
Making a straight jacket for my Renfield costume
Published by Manning on June 22nd, 2015
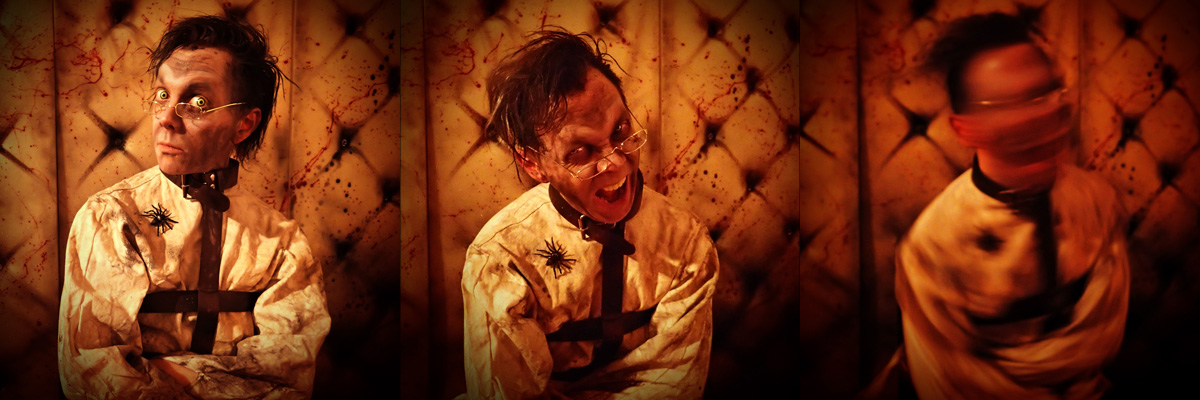
When I was working on my asylum-themed Halloween party in 2014, I decided I wanted to go as Renfield from Dracula! I really wanted to get the straight jacket perfect. I’m not used to working with fabric and clothing, so this was an interesting challenge.
Sometimes the cheapest and best materials you can find for making custom Halloween costumes are… store-bought Halloween costumes! As much as I love do-it-yourself projects, I actually started this straight jacket with a store-bought Halloween store straight jacket, and then I totally overhauled the thing. For something clothing related, it’s way easier to start with a cheap piece of clothing and modify that. I knew I wouldn’t be able to do a great job if I tried to just buy fabric and sew a straight jacket shape, so I shopped around online for the cheapest straight jacket costume I could find, and bought that. It was around $20, and it was awful. The material was fine, but very plain and clean and solid-colored. The straps were flimsy brown pleather, way too thin and fastened with steel loops, not even buckles! And the jacket opening had no way of actually being fastened; it was just meant to be closed by having the straps wrapped around tightly.
Deconstructing the store-bought straight jacket
I apologize for not taking pictures of all these steps! I was in too much of a hurry! Anyway…
The first thing I did was remove the crappy plastic straps, and I cut off the fabric loops for the straps. This left me with just the plain very long sleeved shirt shape of the straight jacket; a perfect starting place for what I wanted to do. The straight jacket costume with all the features removed was basically just an open shirt shape with no collar, no buttons, no cuffs, etc. If you’re able to sew you could easily make something like this yourself; they shape was very square and loose; nothing fitted or tapered at all. The material of the straight jacket was thick and synthetic and looked like burlap; you could totally turn a burlap sack into a costume like this.
Another thing that would work is buying a heavy duty work shirt, like from Dickies, and cutting off the collar and buttons; the only real problem here is you’re left with normal-length sleeves, when a real straight jacket should have much longer sleeves so they can wrap around (or hang down, if you’ve escaped!). Maybe buy two shirts and combine the sleeves?
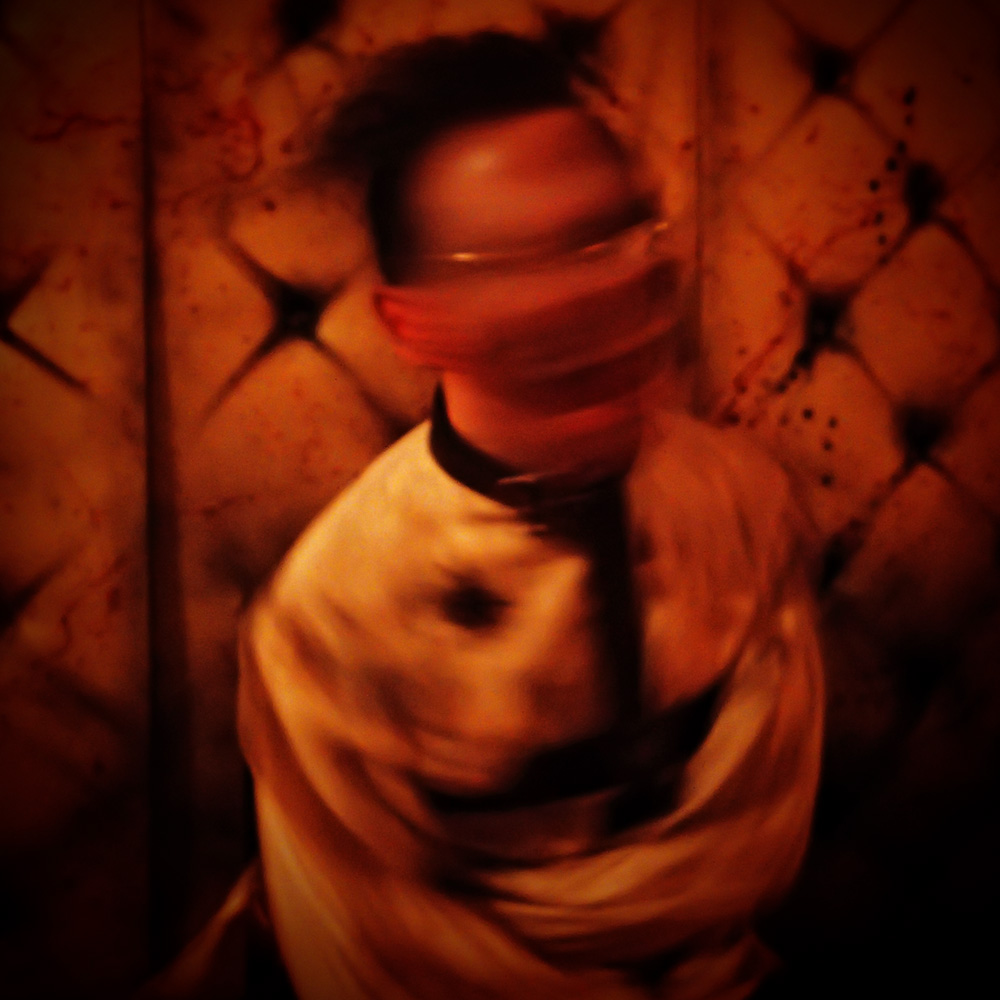
I should mention, when wearing this costume, I never had the sleeves attached behind my back; I just let the long sleeves hang down, and the sleeves had a hole at the wrist where you can stick your hands through if you want. When posing for pictures I just folded my arms to pretend the sleeves were attached in the back.
Making leather straps
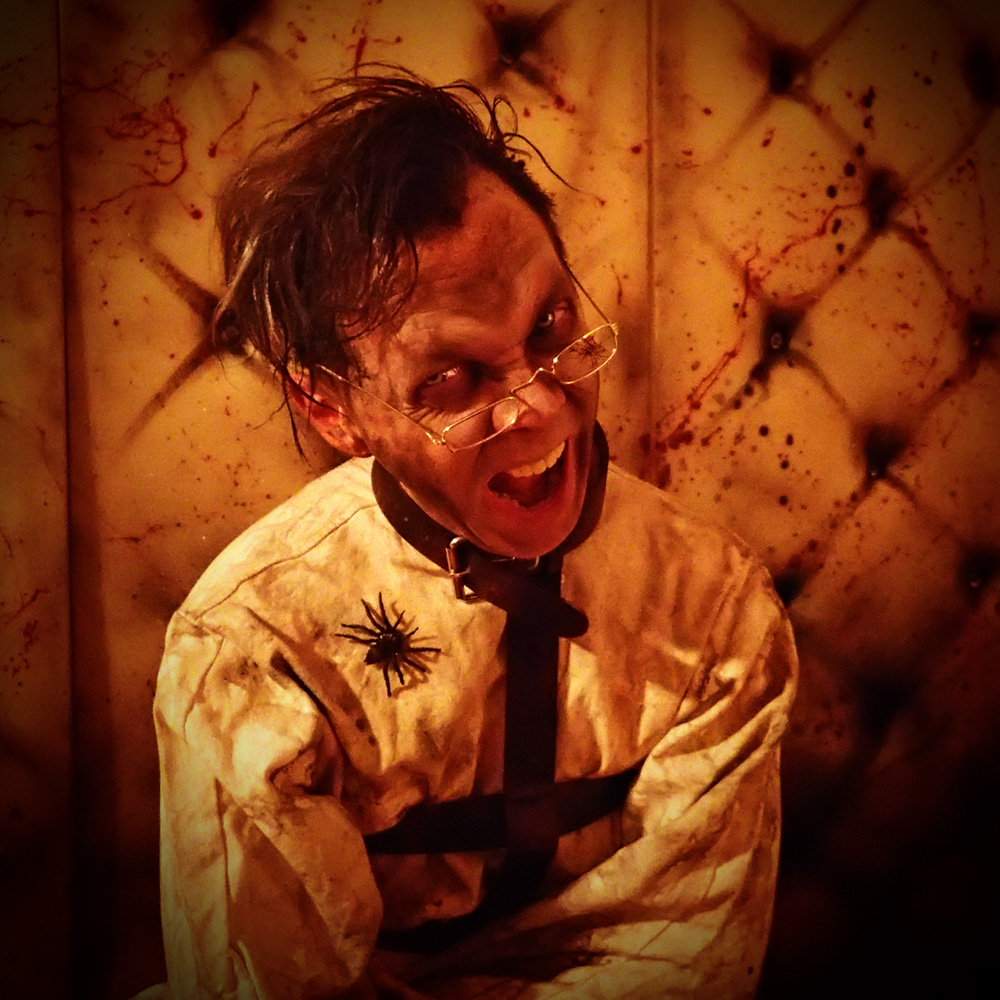
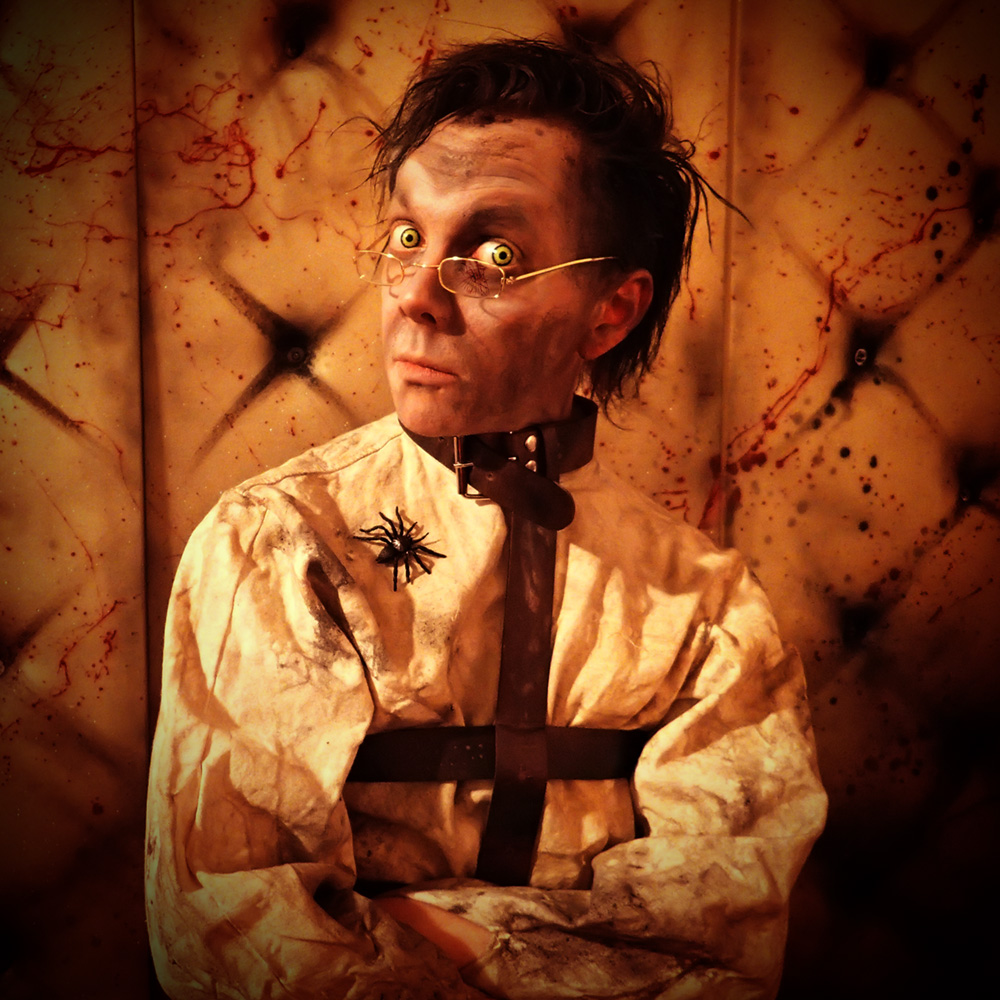
Next, I shopped around online and bought the cheapest real leather belts I could find; they ended up being around $1.99 a piece on Amazon. I bought six of them: three to go around my torso, one to go down the middle, and the other two to cut up and turn into a collar and wrist bands.
I measured and cut the belts and attached them to the fabric with lots of Gorilla glue. This was a complicated and time consuming process because the glue tends to expand and it also takes a long time to dry. I protected my work area with newspaper and wax paper, glued the belts one at a time, covered them each with wax paper, weighed them down with huge stacks of books, and let them dry for 24 hours. In the end the belts were very firmly attached to the fabric.
I left three open spaces behind the middle vertical belt so I could feed the horizontal belts through and buckle them behind me. It turned out I needed someone’s help getting the whole thing on and buckled, but I was able to unbuckle and remove everything on my own.
I ended up not attaching the leather collar and wrist straps to the straight jacket at all; I just slipped them on at the end and they stayed put just fine.
Adding velcro
Like I mentioned, the straight jacket initially had no way of closing; it was meant to just be held in place by the tightened straps. I decided to glue long strips of velcro inside the front opening, so I could close it properly even if the straps weren’t buckled tight. I used Gorilla Glue for this, with pretty much the same process I used to glue the leather straps in place. I laid the straight jacket out on some newspaper, using books to weigh down the areas around the opening edge where the velcro would go. I dripped some Gorilla Glue along this edge, laid the velcro in place, put some wax paper over it, and laid a few more lightweight books on top. (The wax paper is there to protect my books!) I attached the velcro to one edge of the straight jacket, let it dry completely, and then flipped over the jacket and rearranged the books do the other edge.
Making the straight jacket look old and dirty
Once all of this was assembled, I brought the straight jacket outside to paint it and dirty it up. I protected my work area with a shower curtain from the dollar store, weighed down with bricks and stuff.
I used black spray paint as a sort of giant airbrush, holding it about twelve inches above the straight jacket and spraying a fine mist of black paint over it in order to make it look worn out and filthy.
I then used lots of watered-down black acrylic paint to create lots of stains and splatters. I did a little bit of red paint too for some blood splatters. The cheap synthetic material of the straight jacket was pretty water resistant so some of the paint rolled off at first, but little by little I was able to dirty up the surface really nicely.
And that’s about it!
Acessorizing
Since I was specifically going for Renfield from Dracula, I added a plastic spider on the front of the straight jacket (since Renfield ate bugs and spiders) with a piece of wire twisted through the fabric. I bought cheap Santa Claus(!) glasses from the Halloween store and made them look cracked by etching a spider-web crack shape into one lens with an X-acto knife, and then rubbing black acrylic paint into the cracks. Easy!
I added some crazy colored contact lenses and lots of dirty-looking makeup — I also rubbed lots of black makeup into my blond hair to make it look dark and filthy — and voilà!
Related: Check out the padded walls I made for my asylum-themed Halloween party!
 About Manning Krull
 How to make a 4-foot paper maché alligator
 My violin skull mask, Mardi Gras 2015
 Three-headed paper maché dragon sculpture
Leave a comment