
My nightmare-themed Halloween party
Published by Manning on July 13th, 2015
The theme for my Halloween party in 2013 was: nightmares! The name of the event was Night Terrors, and I chose purple and green as my main color scheme for the party. Here’s some info about the decorations we made, our costumes, the animated invitation, etc.
Invitation — I create a short animated invitation for my Halloween party ever year; it really helps set the mood and establish the color scheme and give people some inspiration for their costumes. Here’s the invitation I sent out for Night Terrors. Note: there is audio. Also, it’s made in Flash, so it won’t work on an iPhone/iPad.
Floating eyeballs — As I’ve mentioned before, we have a private front hallway that guests walk through before entering our apartment; it’s about five feet wide by eight feet long, and we usually cover the walls of this space with plastic table cloths from the dollar store, in whatever color goes with the party theme. For this one we did black walls, and put a bright green fluorescent party bulb in the overhead lamp.
To make our floating eyeballs, I bought a few dozen ping pong balls at the dollar store, and I made an iris/pupil graphic in Photoshop, printed that out, and cut and taped the iris/pupil images to the ping pong balls. We then used fishing line to hang the eyeballs at irregular heights all over the hallway. With the green light illuminating them this was a great effect!
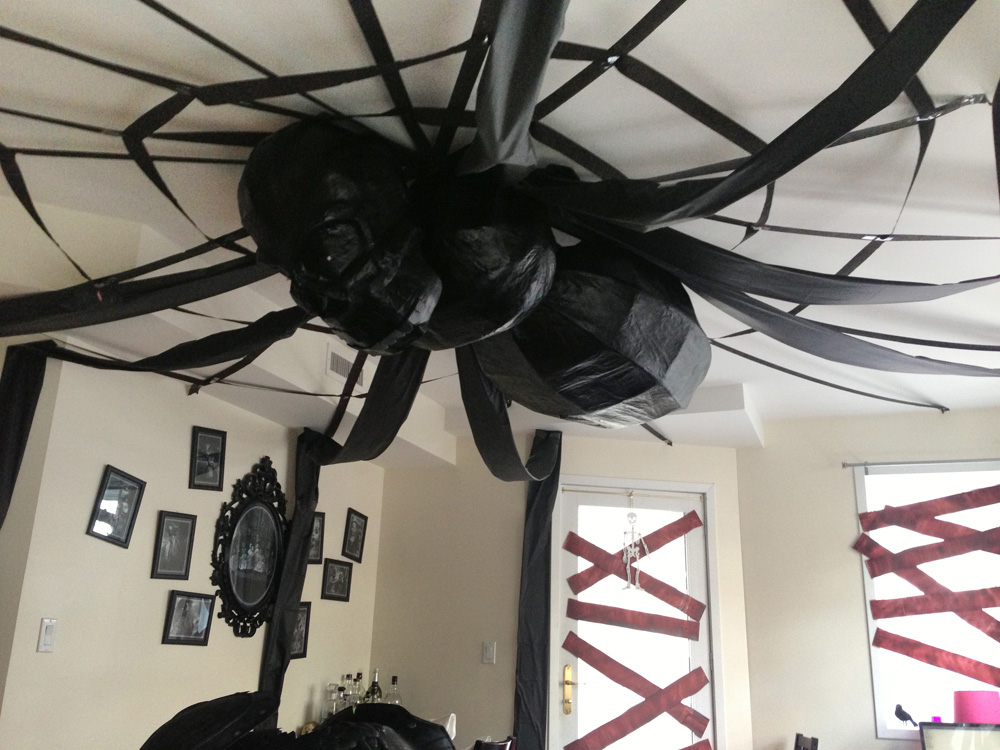
Giant spider and web — this was the centerpiece for the party; I have a whole article about how I made the giant spider here.
Bloody Mary bathroom mirror — I wrote “BLOODY MARY” backwards on the bathroom mirror and added some extra drips and splatters. I originally tried tempera paint for this, because it’s the easiest to clean up, but it turned out to not work; it dried very thin and lots of holes opened up in the painted areas. So I cleaned it all up (very easily!) and started over. I hesitate to tell you what I used, because it was risky and I’m lucky it cleaned up okay! But I’ll tell ya: it was acrylic paint mixed with water-based paste. This created a nice thick mixture that would go on opaque and drip nicely. However, it was tough to clean up! It took a ton of water and Windex and scrubbing. I’m sure stage blood would be much easier to clean up, although it might be less opaque and therefore less realistic. Whatever you do, try a small test area first, and see how hard it is to clean. I take no responsibility for ruined mirrors, countertops, etc! Ha.
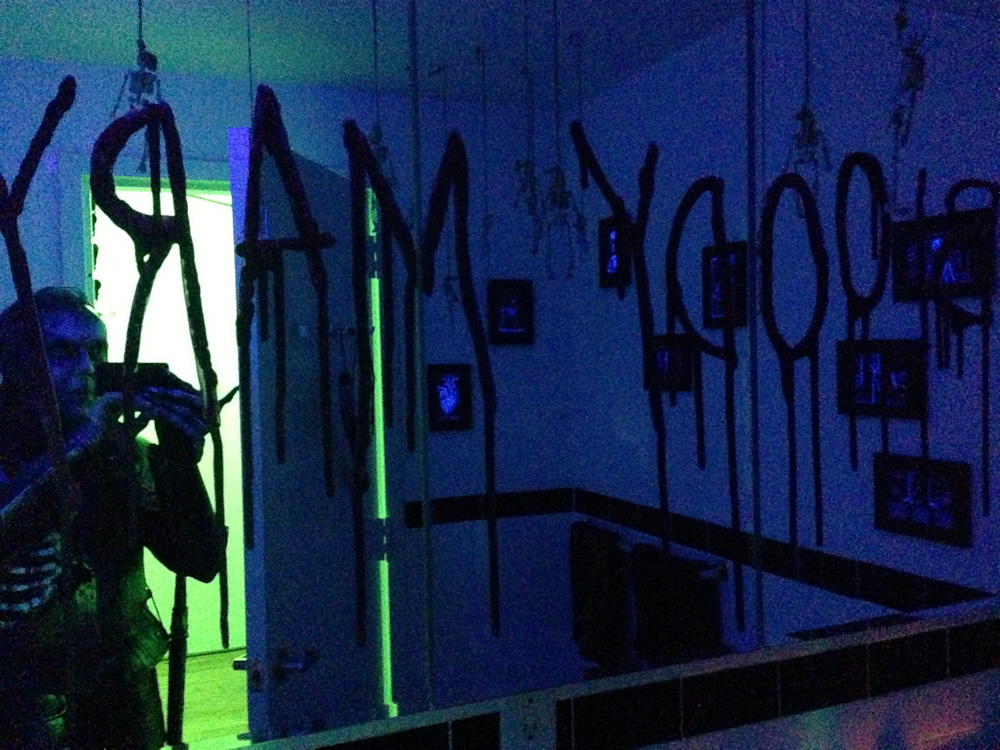
You can see in this pic I also hung up a bunch of tiny skeletons; they were just cheap decorations from the dollar store, and I made little nooses out of twine!
Skeleton in the bathtub — this is a great and easy effect that we do most years. I mix some tempera paint into the water to make it dark and bloody, and tempera is super easy to clean up. I have a whole article about this effect here.
I also made a bloody shower curtain; this is easy and fun! I just buy a cheap shower curtain from the dollar store, lay it down outside, and splatter and drip acrylic paint on it. You can also (carefully!) lift it up and let the blood run down. Once it’s dry, it’s ready to hang in the shower.
Creepy doll pictures in frames — We have a bunch of black picture frames on the walls all year round, and for Halloween I usually design some graphics in Photoshop that go with our theme, print them out, and stick ’em in the frames. For the nightmare-themed party I got the idea to find lots of creepy doll pictures online, and modify them in Photoshop to make them look aged/dirty/cracked/etc. I just do these in black and white, which looks great in the colored lighting of the party. Once they spooky doll pictures were in their frames, we also tilted all the frames at odd angles to create a little bit of a haunted house vibe.
Boarded up windows — I made fake wooden boards for the windows with foam board and brown and black spray paint, and we taped them all over the windows and balcony doors. This helped created the feeling of being trapped in a haunted house!
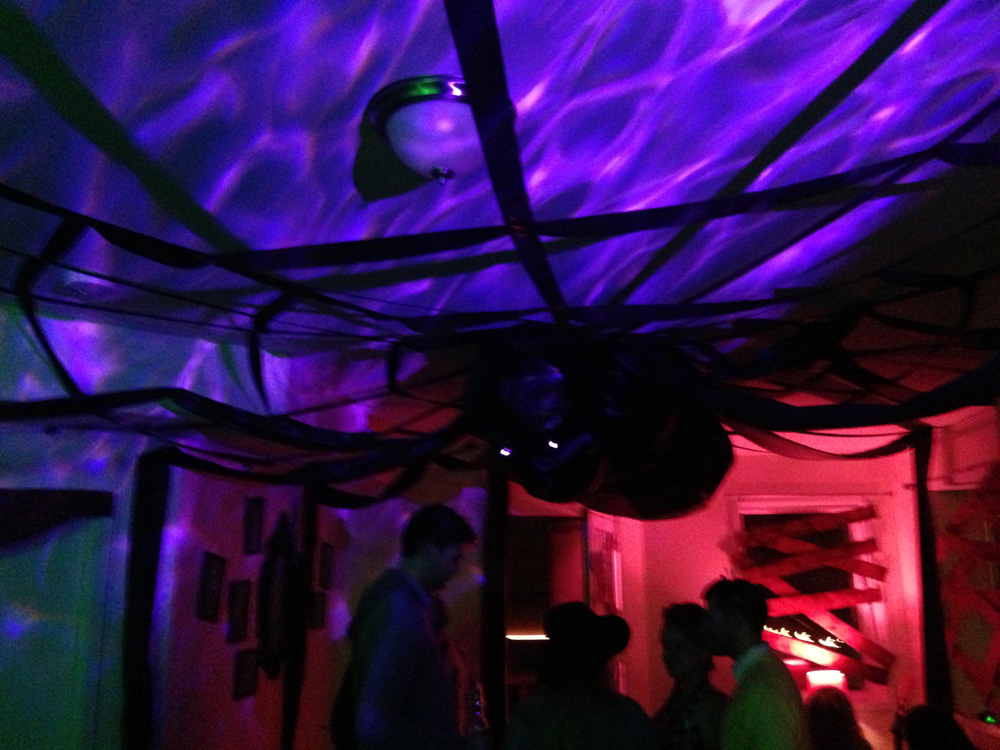
Lighting — Every Halloween we replace all the light bulbs in the apartment with fluorescent party bulbs in the color scheme of the party, so this year that was purple and green. We also have this great lighting effect: the American Dj H2O Led Water Effect Light. This thing projects an animated image of rippling water on your walls and/or ceiling, and you can set the color to whatever you want (or set it to rotate through all colors in a sequence). I originally bought it for my sunken ship Halloween party in 2011, but I’ve used it for a bunch of other themes as well. This time I set it to purple and had it projecting on the ceiling. The water effect didn’t specifically go with our nightmare theme, but with the weird purple color and churning motion it helped create a dreamy, surreal vibe.
You can see a bit of the water effect light in the pic above on the right side; one challenge with this thing is that you have to find an angle to place it so that it’s projecting light across the longest/widest area possible; I first tried pointing it straight up at the ceiling but it just made a small circle or light about four feet wide! I had much better luck when I projected it at an angle way across the far wall and up onto the ceiling; I got a huge amount of coverage that way. The base of the lamp is adjustable but the thing is so heavy I had to place a lot of books around it to stabilize it.
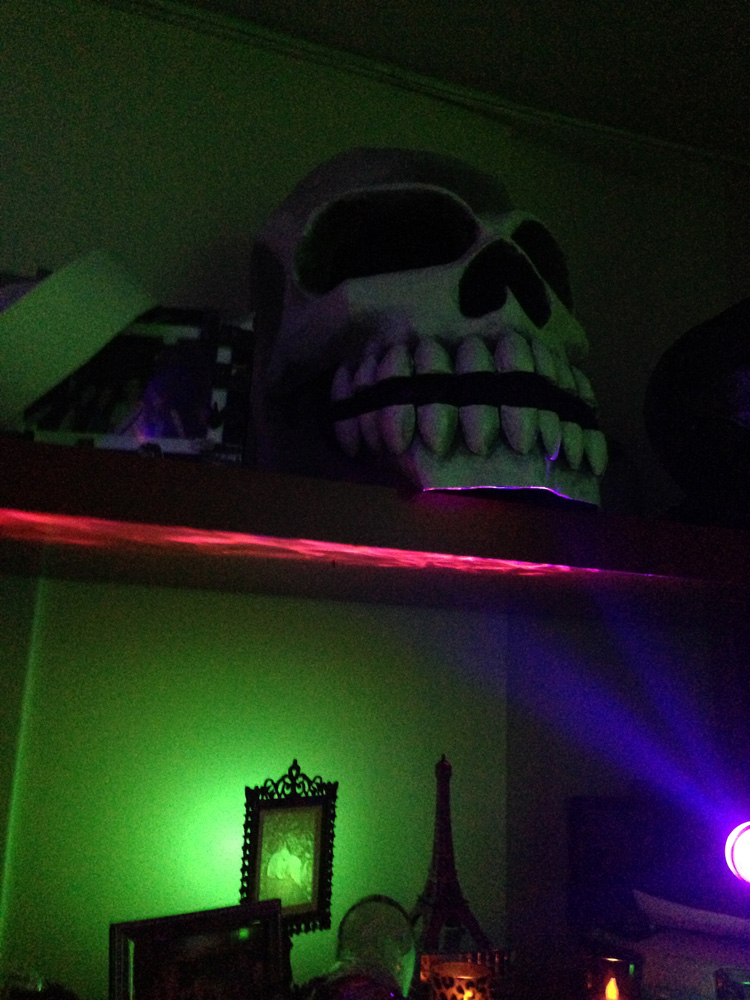
Incidentally, that’s a tiny Victorian-era-style rabbit lamp on the left! It takes little Christmas-bulb-sized bulbs, so I bought them in every color so I can switch them out to go with our Halloween theme every year. The thing is made of some kind of translucent porcelain with a 3d photo of bunnies in it, and the light sits behind it. I love this thing. I got it many years ago at Armed & Dangerous in Philly.
And of course that’s my first big Mardi Gras skull mask on the shelf above!
Miscellaneous odds and ends — We always have lots of fake rats and spiders and bugs everywhere; those go with just about any Halloween theme! I bought a couple dozen battery-powered tealight candles in purple and green and scattered them around, and they looked amazing. I also bought a few tiny battery-powered strobe lights at the dollar store, and I hid them in various places; one behind a mask on the wall so the flicking came through the eyes, and another behind a bottle of Crystal Head vodka in our liquor cabinet; this lit up the whole skull-shaped bottle with the flickering strobe effect! These little strobes are great to hide in nooks and crannies so the light isn’t going directly into anyone’s eyes, but rather you see the effect of the strobing light coming out onto the walls or furniture around ’em.
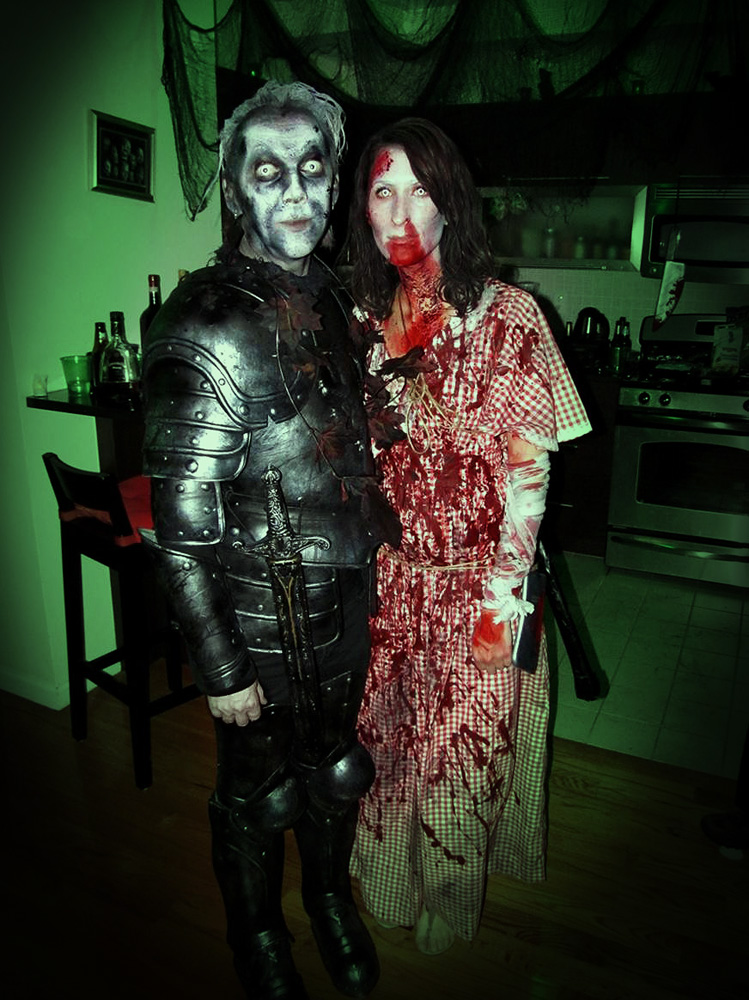
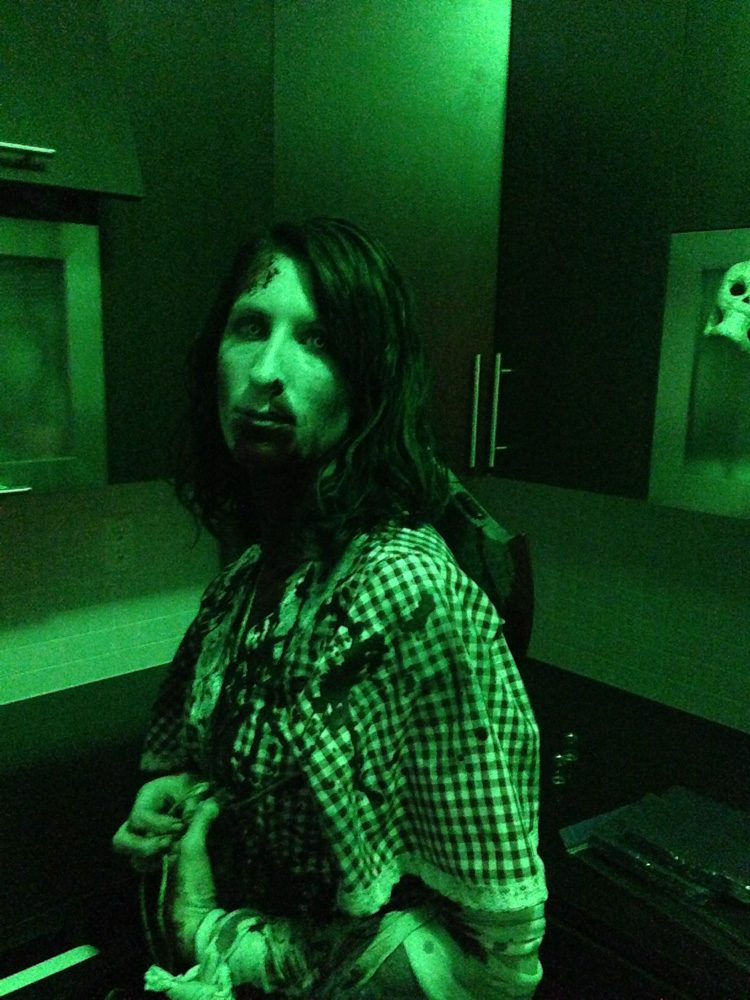
Our costumes — I was a ghostly knight (nightmare/knightmare, get it?) and my fiancée was an extremely scary redneck zombie with an axe strapped to her back and various bloody knives on a rope belt. I’ll mention this any chance I get: acrylic paint is the best way to make bloody clothes! Not fake blood or stage blood. You can see she did an amazing job with acrylic; we set out a plastic shower curtain outside, lay the clothes down, splatter with paint and a big brush, and let it dry. It’s a lot of fun and works great.
This whole nightmare theme was fun to explore, and it’s one of the most flexible themes we’ve had so far; just about anything scary can count as nightmare material! I’d love to hear other nightmare-related Halloween decoration ideas you might have. Happy haunting!
 About Manning Krull
 How to make a 4-foot paper maché alligator
 My violin skull mask, Mardi Gras 2015
 Three-headed paper maché dragon sculpture
Leave a comment