
Ghostly knight in not-so-shining armor Halloween costume
Published by Manning on June 26th, 2015
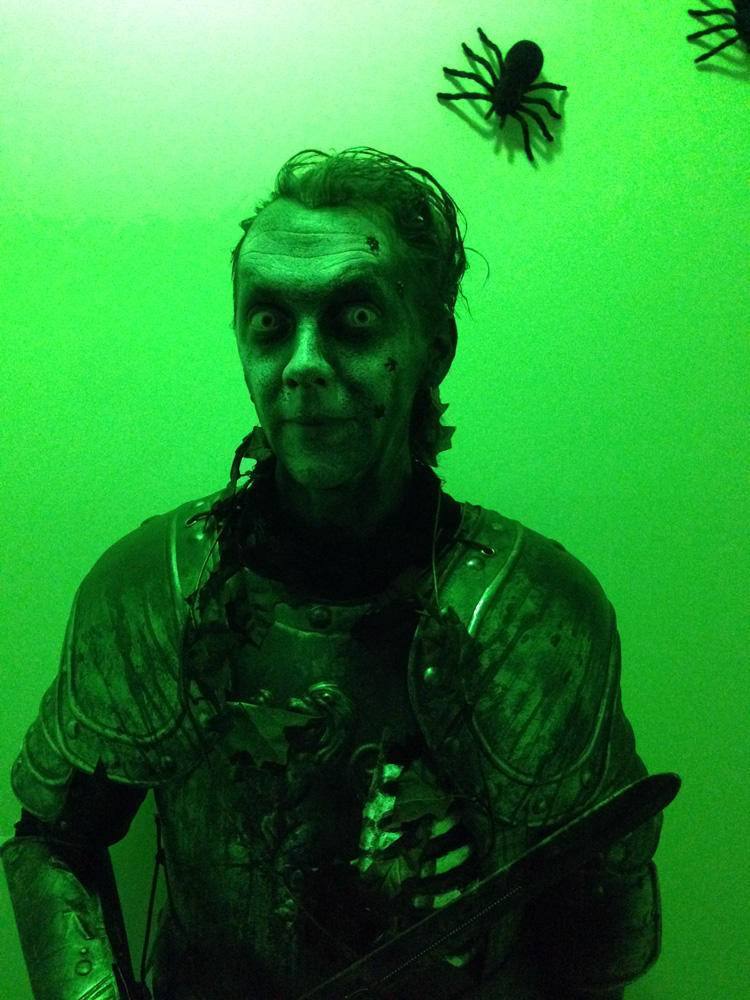
This was a costume I’d wanted to try for years, and it was a lot of fun! I decided to be a ghostly knight for my nighmare-themed Halloween party. My goal was to look like a knight that had been resting in a tomb for five hundred years; dirty and rusty and dessicated. After lots of research on how to make knight armor from scratch (which sounded really difficult and time-consuming), I opted to instead start with an ugly plastic store-bought suit of armor. As I often say, sometimes the best jumping off point for a beautiful custom Halloween costume is a crappy store-bought Halloween costume!
The suit of armor I bought was a nice shape, but a terrible color and texture; flimsy smooth silver-gray plastic; nowhere near as shiny or metallic-looking as you see in the photo there. That was fine, as I knew I wanted to change the look of the thing completely; I wanted to transform this plain silver-gray plastic texture into solid heavy old corroded metal. Here’s how I got it there:
First I removed all the little pieces of velcro that were crappily glued onto the armor to connect all the plates. These stick-on velcro things were so crappy that, if you connected two pieces of armor with the velcro and then pulled them apart, half the time the velcro would get unglued from the armor instead of detaching from the other piece of velcro. Unbelievable. What a garbage product.
With all the velcro gone, how would I put the suit of armor together? I decided on a solution using a grommet kit (paid link) and black string. Grommets are little metal rings that snap onto a surface from either side, locking the thing in place and creating a very strong hole that can support a good amount of tension; you can hang stuff with these, or, in my case, attach two pieces of flimsy plastic with string, and be reasonably assured the plastic won’t split.
The simple grommet kit I bought is low-tech and you need a hammer to pound the grommets together by hand. You can also get a way fancier machine that’s somewhat like a gigantic hole-punch that uses leverage to pop the hole and crunch the grommets together. I had fun doing it the hard way with a hammer out on my patio, although it was definitely hard work!
So, I popped holes and installed grommets in all the many connecting spots on the armor. I then used scissors and a box cutter to put little nicks in the edges of the armor. I also cut out a big jagged hole in the side of the chest; this was for the fake exposed ribcage I would make and add later on.
Then it was time to paint!
Oh wait, before painting, I cleaned all the pieces of armor with Windex and paper towels. With smooth plastic surfaces, this helps the paint stick a little bit. Sometimes plastic can be a little bit dirty or oily, from the factory, shipping, etc. So it’s a good idea to clean everything before you paint.
Then I spray painted all of the armor black. I protected my work area outside with a shower curtain from the dollar store, weighed down with bricks and various objects. See my post about my whole painting process here.
When the black spray paint was done, I did some very rough dry-brushing with silver acrylic paint all over the armor. The end result was a little more shiny and contrast-y than I wanted, so I dulled the whole thing quite a bit by using a can of black spray paint as an airbrush; holding it about twelve inches away from the armor and lightly spraying all over to dirty up the whole thing.
Next, I used some very watered down paint to make the armor look good and filthy. I set up all the pieces outside and dripped lots and lots of watered down black acrylic paint on them, letting the paint run down and form a dripping pattern over everything. I’d let this dry for a couple hours and then repeat; I probably did this three or four times.
In between all these steps of painting, I was in the house working on some paper maché! I wanted to make a ribcage that would be visible through the big hole in the chest armor. I used a big plastic skeleton as a mold — the same kind of skeleton that’s in my post about the skeleton in a bloody bathtub decoration I’ve done a few times. I put a layer of aluminum foil over the ribcage, and then did two or three layers of paper maché over that. See my article about my paper maché process here. When it was dry, I removed the whole thing, cut it to size, and painted it. I did a layer of black acrylic and then dry-brushed the ribs with white acrylic. Easy!
When the armor and ribs were all done, I attached the ribs inside of the chest plate with heavy duty Scotch packing tape.
Then I attached all the pieces of armor together. My goal here was to permanently attach as many pieces as possible, so that I could take the whole thing on and off pretty quickly. The original store-bought armor was designed to be completely assembled and disassembled with each use. I wanted to turn the whole thing into a few big pieces that could be slipped on and fastened. I used strong black string from the hardware store, and tied a few permanent knots in the places where I could. Then I added more un-tied string in the places that would need to be left open in order to slip the pieces on, so that I could tie simple temporary knots in those places while wearing the armor.
I forgot to talk about the helmet and sword! The suit of armor came with a complicated helmet with a faceplate that could open and close. The helmet was poorly made and even with grommets and other modifications I made it wasn’t very wearable, so I opted to not wear it for Halloween. However, I did the same painting process on the helmet as I did with the armor, so in the end the helmet was a nice-looking prop that I sat on a shelf for the party.
I also bought a very cheap hollow plastic sword and scabbard at the Halloween store, and applied the same painting process to them as well. I attached the scabbard to my armor with more black string entered through a couple more grommets I added in the armor.
I glued a couple bugs and spiders onto the armor, and added some fake plastic vines and autumn leaves I bought at the dollar store, to enhance that fresh-from-the-tomb look. The vines and leaves were brown, and I lightly spray painted them black (using my trick of holding the spray paint can about twelve inches away and just lightly spraying the surface) to make them look old and rotten.
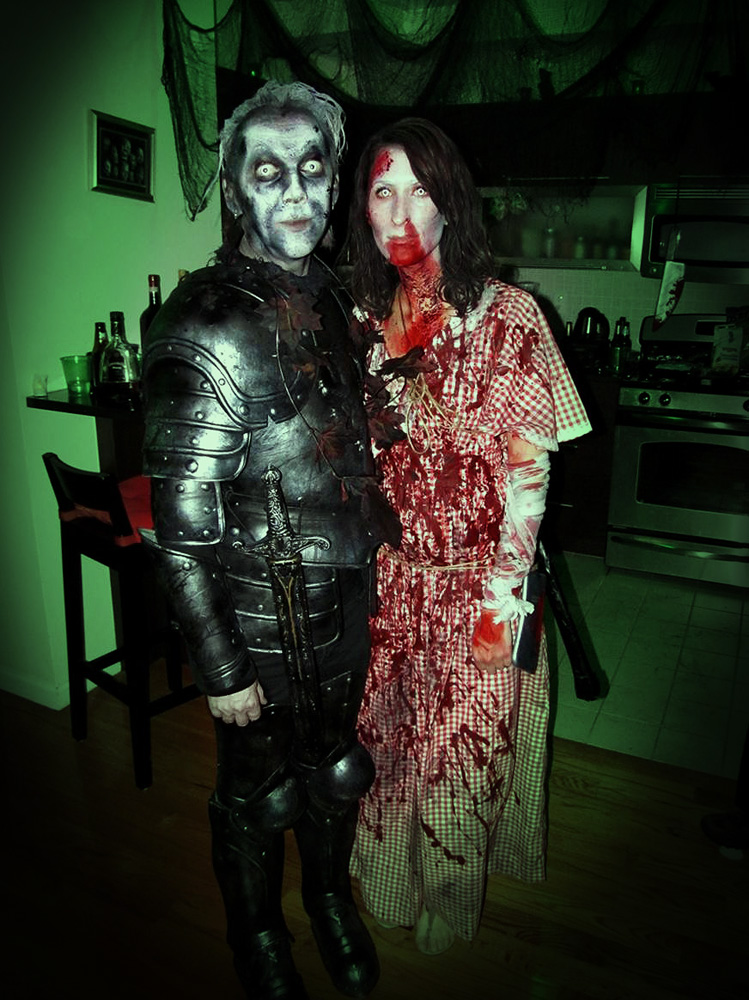
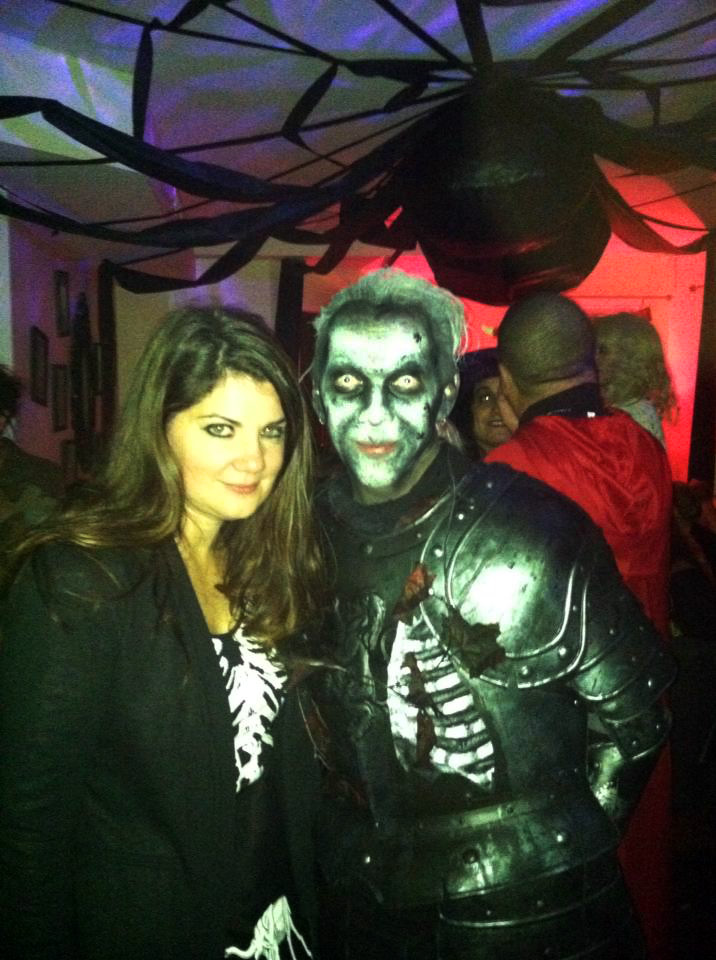
Here’s another pic, of me and friend Collie; it’s not the best photo but you can get a good look at the ribs!
For my makeup, I used black and white creme makeup and a stipple sponge for my face, and cheap black and white creme makeup for my hair. I also glued a few plastic ants to my face with liquid latex. See my article about my Halloween hair and makeup techniques here.
Happy haunting!
 About Manning Krull
 How to make a 4-foot paper maché alligator
 My violin skull mask, Mardi Gras 2015
 Three-headed paper maché dragon sculpture
Leave a comment