
Paper maché wolf skull mask — part 1
Published by Manning on March 2nd, 2017
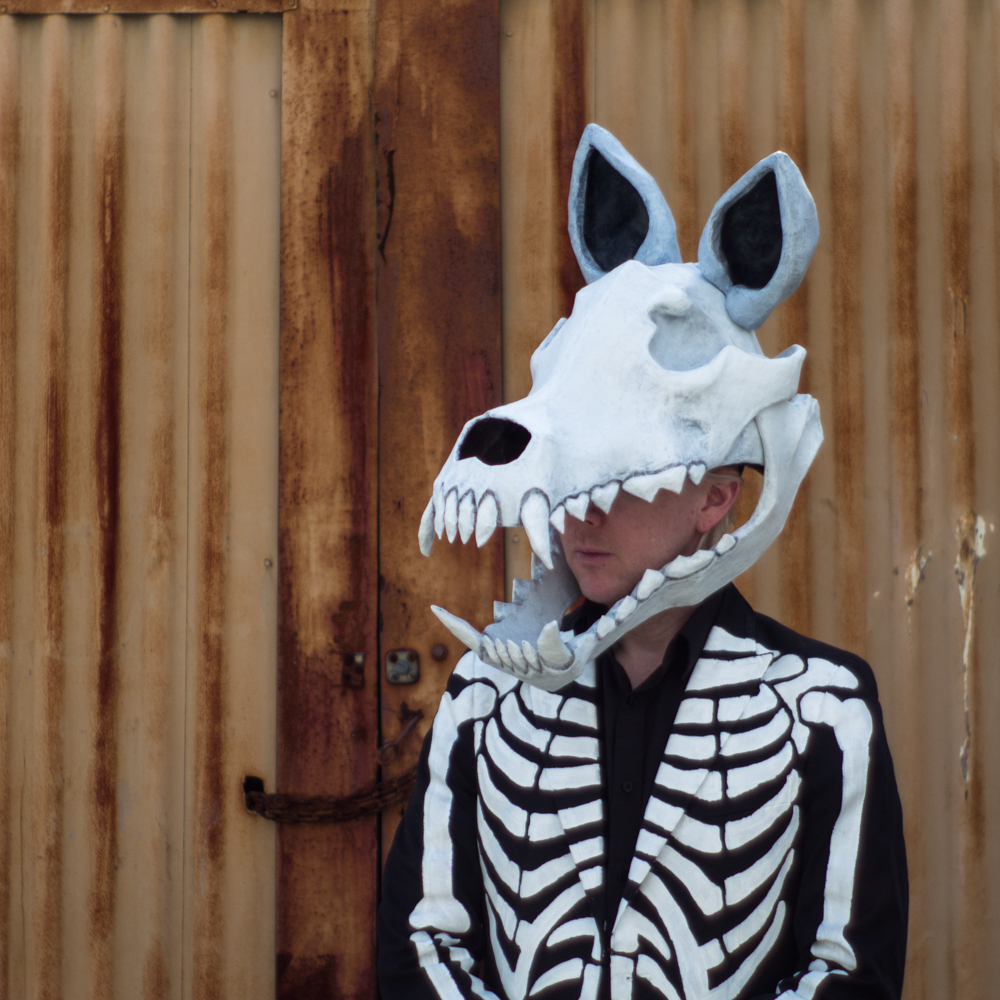
I made this here paper maché wolf skull mask for Mardi Gras 2017! It’s got detachable ears, a movable jaw, and it’s one of my most lightweight and comfortable skull masks yet. It was a lot of fun to make; here’s how I did it!
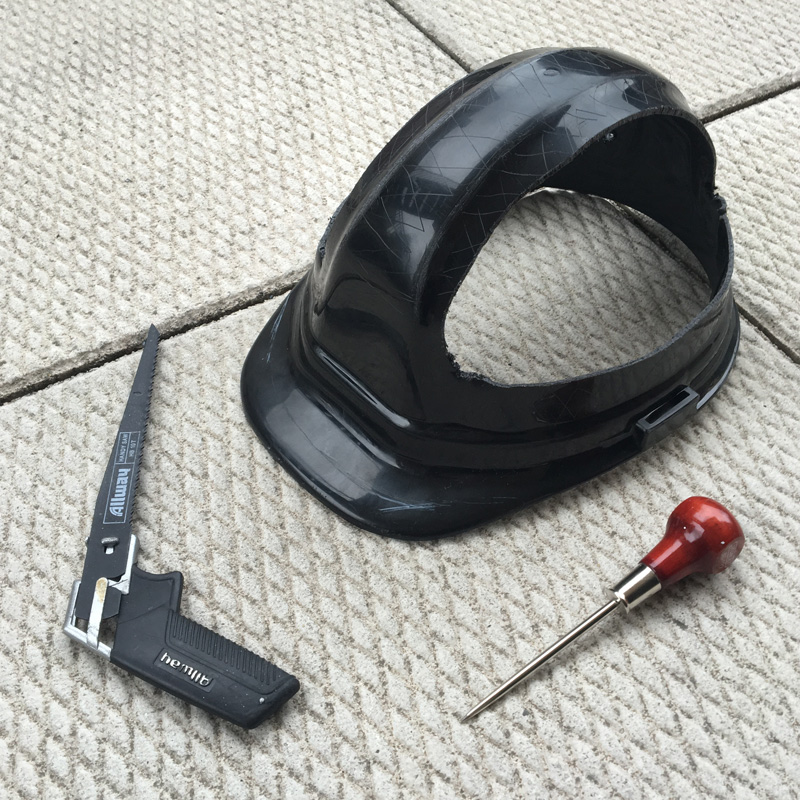
As usual, I started by buying a hard hat — I usually buy one at Home Depot in yellow or white, but this time a friend tipped me off that they have black ones on Amazon! Only a tiny bit of the hard hat will ever be visible in the mask (and only when the jaw is open, or if the mask is set down upside-down), but for some reason it feels a lot cooler to have a black hard hat inside!
I did my typical process for preparing the hard hat — I sawed off two big wedge-shaped panels in order to reduce weight, increase air circulation, and make the hard hat overall a little more narrow, to better fit the wolf skull shape — I knew I’d want the eye sockets to be dented inward as far as possible, so cutting out those wedge shapes from the sides gave me a lot more empty space to place the eye sockets in. I also scratched up the outer surface of the plastic in order to help the glue and paper maché stick to it a lot better; this will come in handy much later when I’m installing the hard hat into my finished wolf skull shape. I then installed the interior rigging and padding that come with the hard hat. The rigging was able to be pulled out fairly easily so I added a drop of Gorilla Glue at each connection point of the rigging to glue it in there permanently.
Next, it was time to design the basic shape of the wolf skull. I measured the length of the hard hat (11.5″), and then I laid out the basic shape of the mask in Photoshop. I brought in a photo of a wolf skull and a photo of me wearing the hard hat, and scaled the wolf skull to fit over my head and the hard hat. I then traced black lines onto the photos (I did this quickly by hand with the paintbrush tool; no need for it to be perfect) and sliced up the resulting big outline into four 8’5″ x 11″ pages. I printed those out, and voilà!
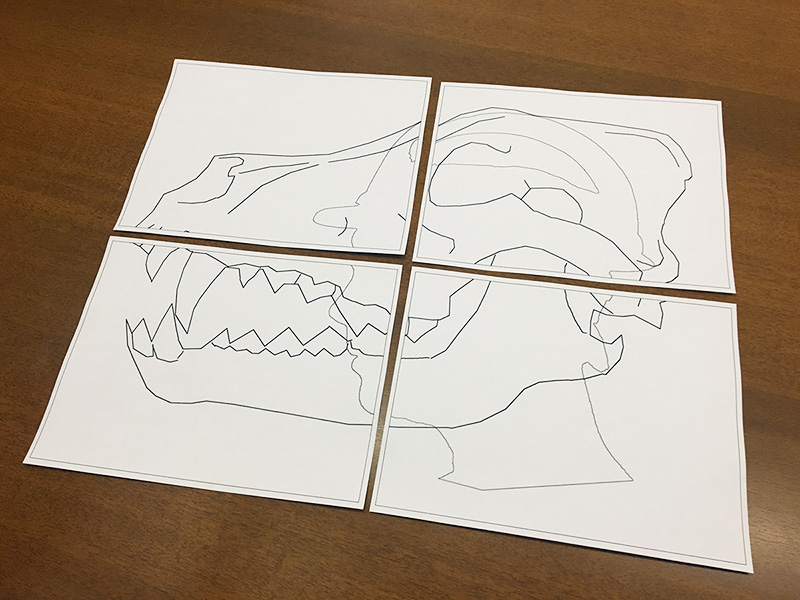
This gave me a life-size image to use as a guide in making the skull. I cut the edges off the pages with scissors, taped them together, and cut out the wolf skull shape.
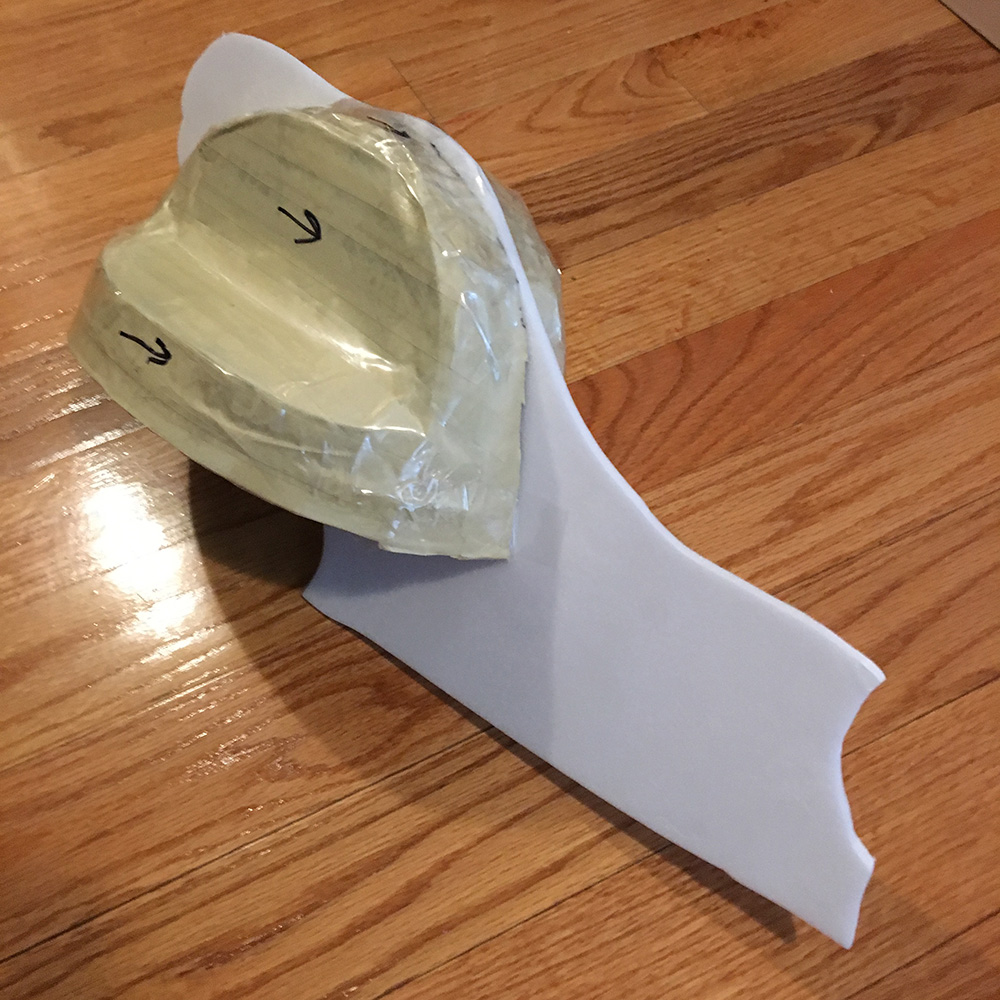
I knew I’d be making the wolf skull sculpture in two separate pieces — the skull/snout/upper jaw, and the lower jaw — so I started with just the main skull part with the upper jaw. I traced just that shape onto a piece of foam board and cut it out with an X-acto knife. I then set aside the paper guide to use later for the jaw.
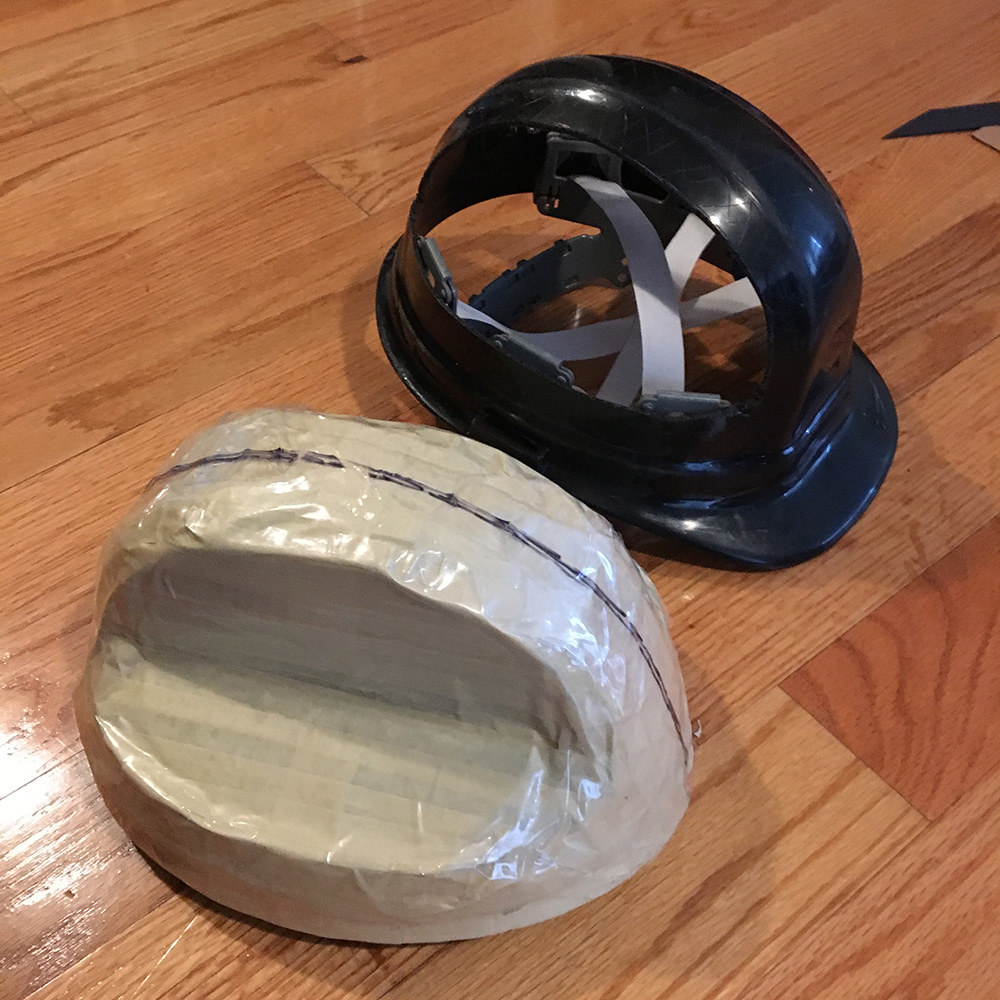
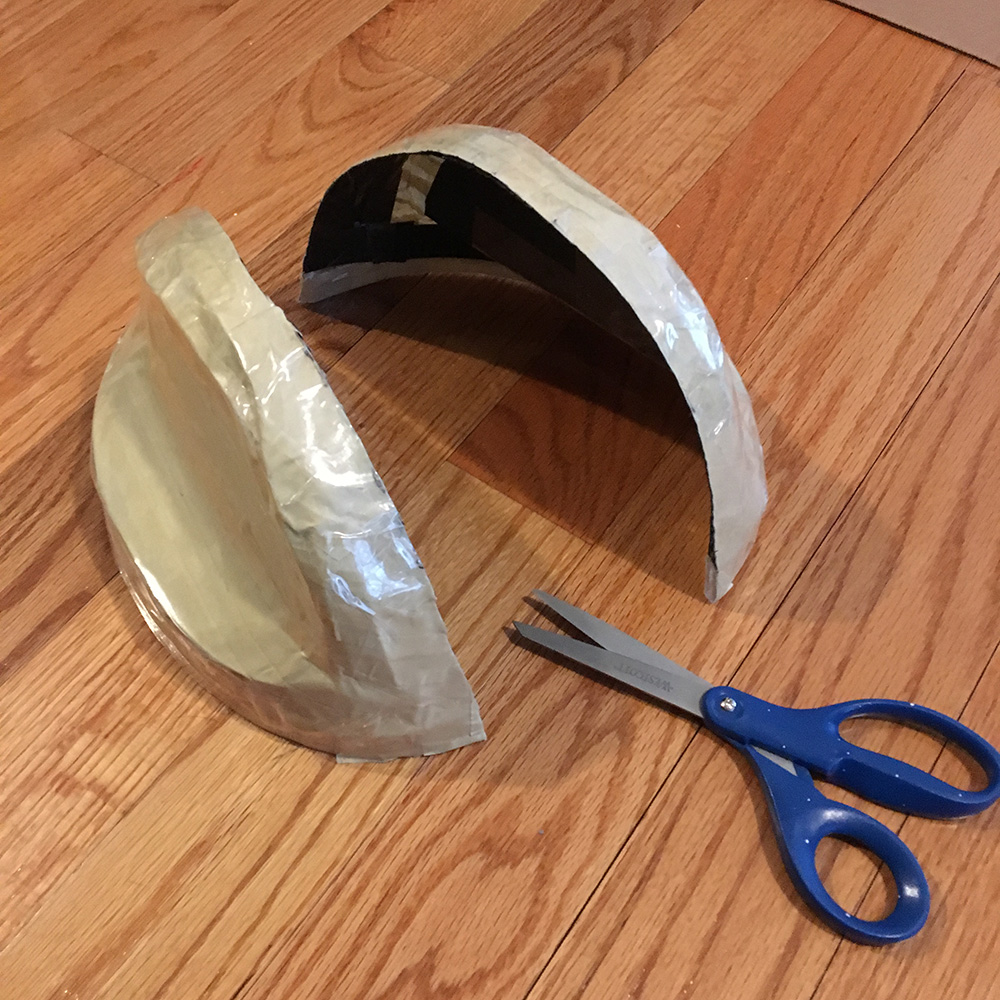
Next it was time to build out the 3d base of the skull shape onto my 2d foam board cutout. I started this one in a way I’ve never done before — with a copy of my hard hat made from strips of poster board and lots of masking tape and packing tape. The reason I did this is because I want the the wolf’s skull to fit really snug on the hard hat so I can keep the overall shape as small as possible, and also because I want the wolf’s eye sockets to be as indented as possible, hopefully fitting right into the holes I’ve cut out of the hard hat. So in the interest of being precise I thought I’d work right on the exact shape of the hard hat. For most of my skulls I just build them huge and insert the hard hat later, so I’ve never had to worry about this before. Anyway, to make this copy of the hard hat I simply cut lots of long strips of poster board and wrapped them onto the hard hat with lots of masking tape and packing tape. When it was totally covered I just lifted the copy off of the real hard hat and the copy was nice and sturdy and ready to go.
I could’ve built the mask right onto the real hard hat, but that would pose a lot of other problems; it would be impossible to remove a lot of the base materials if the hard hat were already glued in there, and I’d also be running the risk of messing up the padding and straps of the hard hat with all that paste and paint and stuff. Better to attach it at the very end. Hence the nice disposable copy.
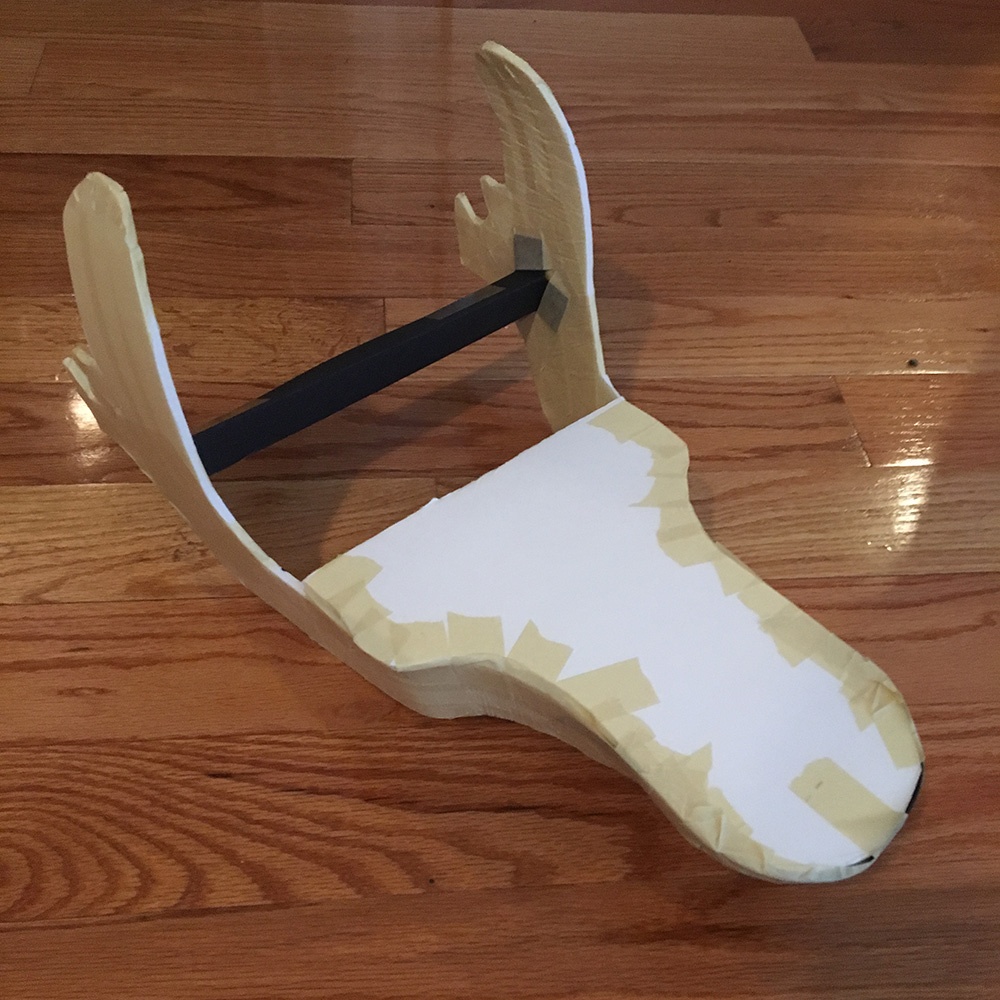
So, I split my fake hard hat down the middle with an X-acto knife and taped the two big pieces to either side of the foam board wolf skull profile I’d cut out. Then it was time to start fleshing out this base and turning it into a nice 3d wolf skull shape.
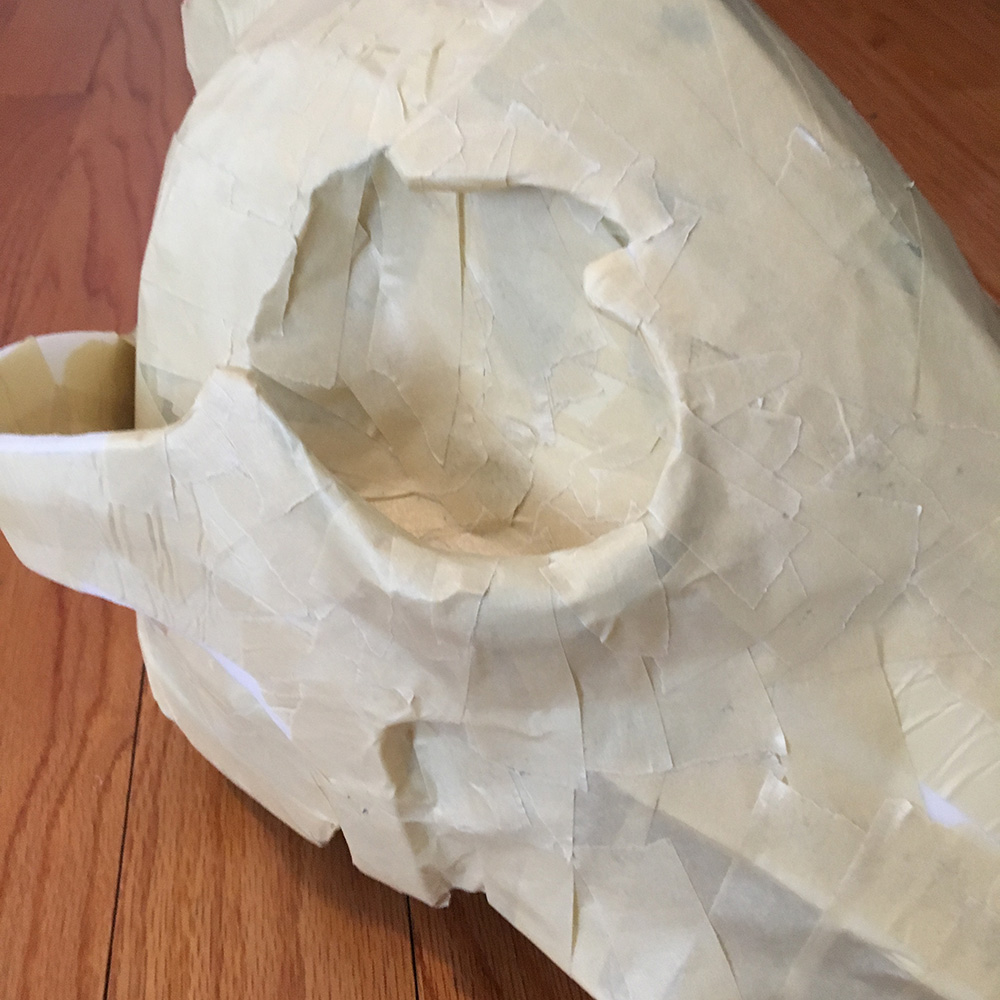
I started with two big pieces that make up the eye sockets and cheekbones. I sketched these shapes based on the guide I’d printed out, and then I traced it onto foam board twice and cut out the pieces. I used this trick I made up to make the foam board pieces flexible — I peeled off the paper on either side of the foam board, and then covered both sides of the foam with masking tape. This protects the foam from cracking so you can bend and curve and roll it up. I pre-rolled up all the shapes to get them nice and flexible, and then I positioned them on the skull. I used some T-shaped pin things to temporarily hold them in place, and then I taped them on with a ton of masking tape, and removed the pins.
I don’t have pictures of the next several steps, because this is where everything got a lot less precise. I simply experimented with lots of pieces of foam board — peeled and taped and rolled to make them flexible, like above — and went through an unbelievable amount of masking tape to get everything in place. I kept referring to the guide image that I’d printed out and just figured out what pieces needed to go where. Little by little it started to finally look like what I had in mind.
The main pieces that helped build out the rest of the mask where two long panels of foam board on either side of the snout, and some curved smaller strips of poster board to round out the front of the snout.
I used four whole rolls of masking tape on this mask. A lot of that was for connecting parts, and a lot of that was for covering the whole shape when it was done. The reason I end up covering my whole shape with masking tape is because the tape works as a good release agent for the type of wallpaper paste I use in my paper maché (more on my paper maché process and materials here). Using a release agent means that when the paper maché is all done and dry, you can carefully remove all the interior materials and they’ll peel away from the paper maché without damaging it. My goal is always to remove as much of the base materials as possible when all the paper maché is done, to get the mask as lightweight as possible.
With the skull and upper jaw mostly done, I decided to add the two big upper fangs so I could start to get a feel for how the teeth will fit on this thing. I made the fangs from foam pipe insulation; I just cut them out with scissors and wrapped them in masking tape, and then taped them in place. I looked at a ton of photo reference of real wolf skulls throughout this whole process to make sure I was putting the teeth on in the right way so they’d fit together properly.
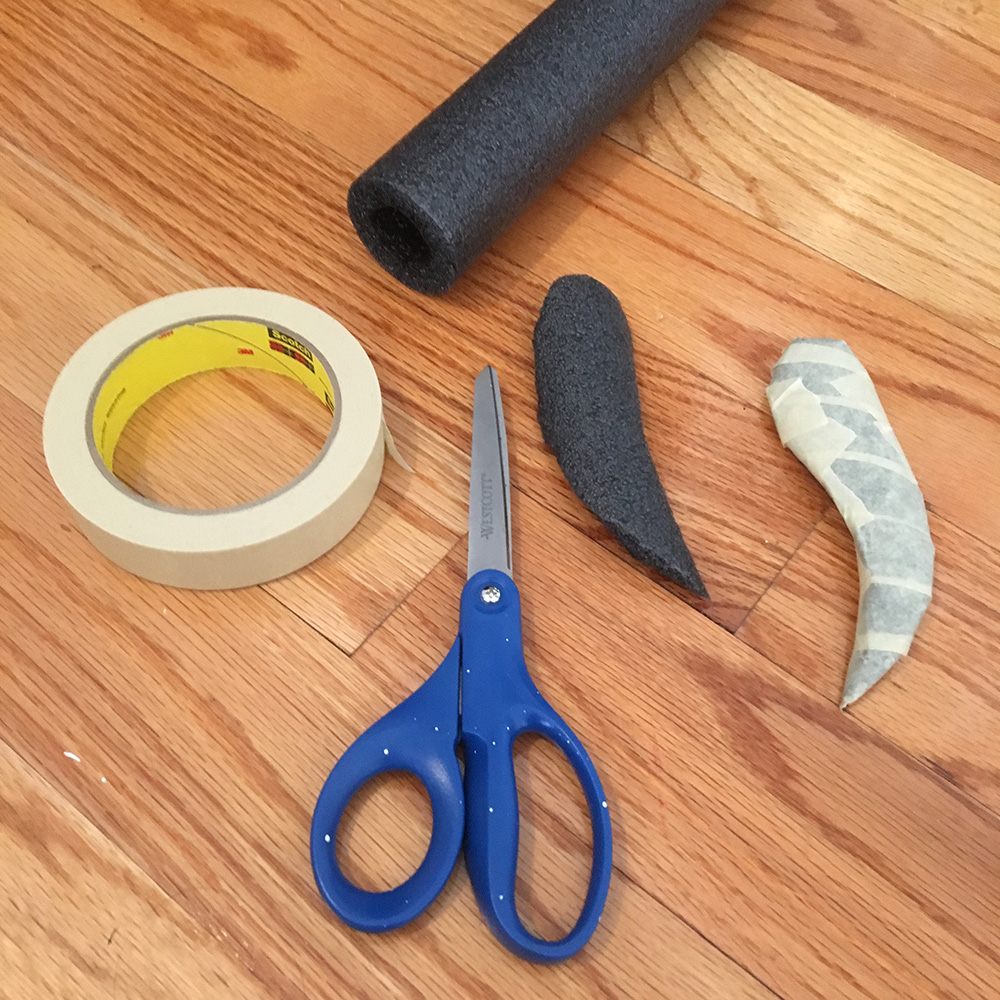
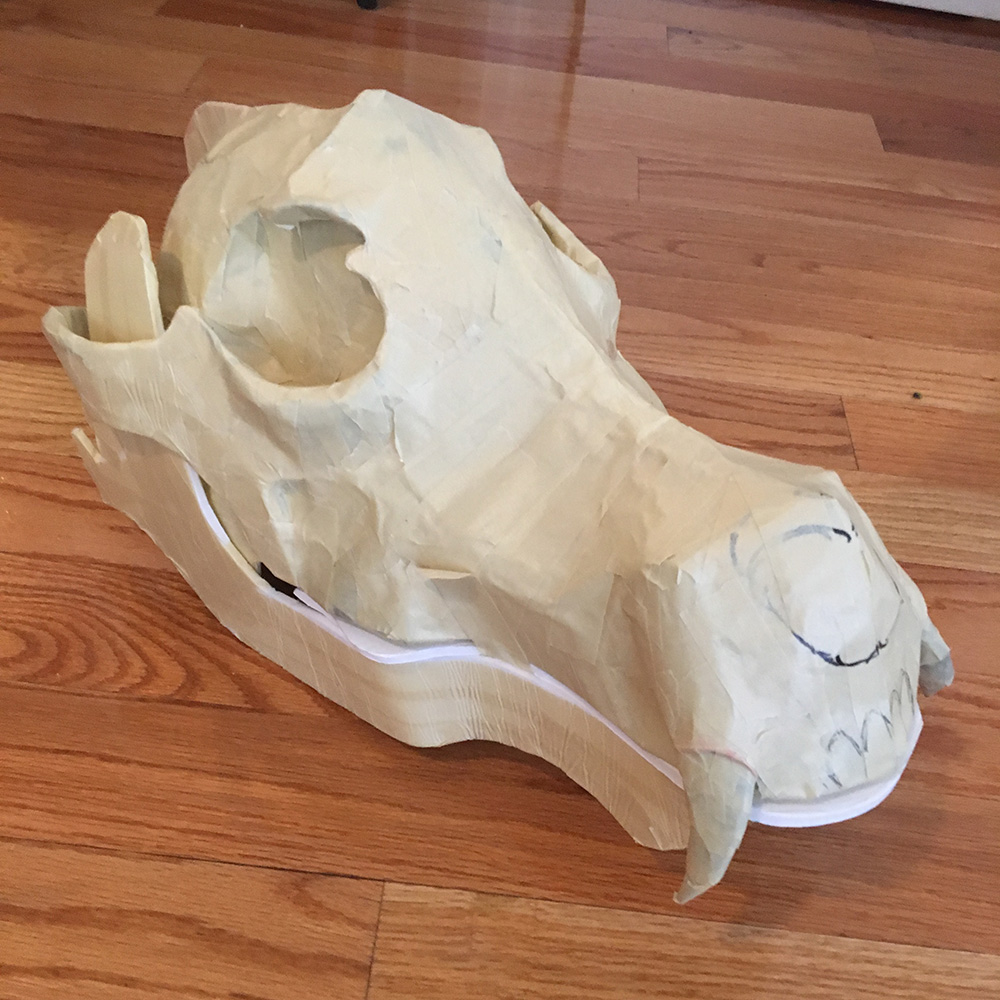
I used the same pipe insulation to pad out some areas of the skull; I cut a few long tapered strips and taped them in place in front of and above the eye ridges, along the cheekbones, etc. These little bumps and edges help to break up the plain smooth lines of the skull; you’ll see a couple ridges like this at the back of the jaw as well (coming up). These little ridges and curves help break up the relatively plain flat shapes of the foam board base and help the whole shape become more organic and realistic looking.
Close up of the large ridge I added at the bottom of the eye socket. It’s just a small wedge of foam that I cut and taped in place; easy!
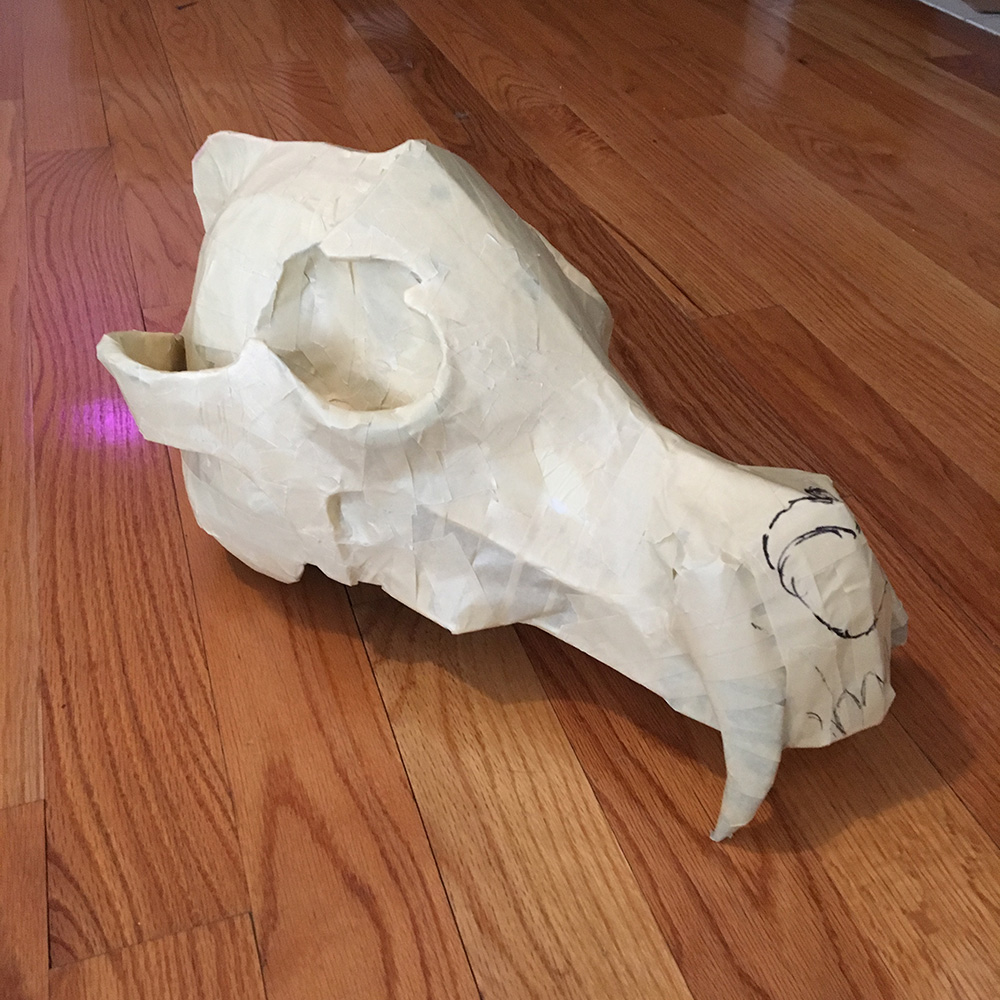
And you can see I added a small ridge near the back of the cheek bones as well, so they flare out a bit more. I also added a tiny ridge above the eye sockets but it’s not easy to see here. The jaw (coming up) has two separate small ridges near the back of each side. All of these ridges are made with that same black foam pipe insulation, cut and taped into place.
I periodically sketch other details onto my base with a Sharpie marker, just to get an idea of how things will look a few steps ahead, to make sure I’m on the right track. That’s why the nose and teeth are drawn onto the base in this pic.
Making the jaw
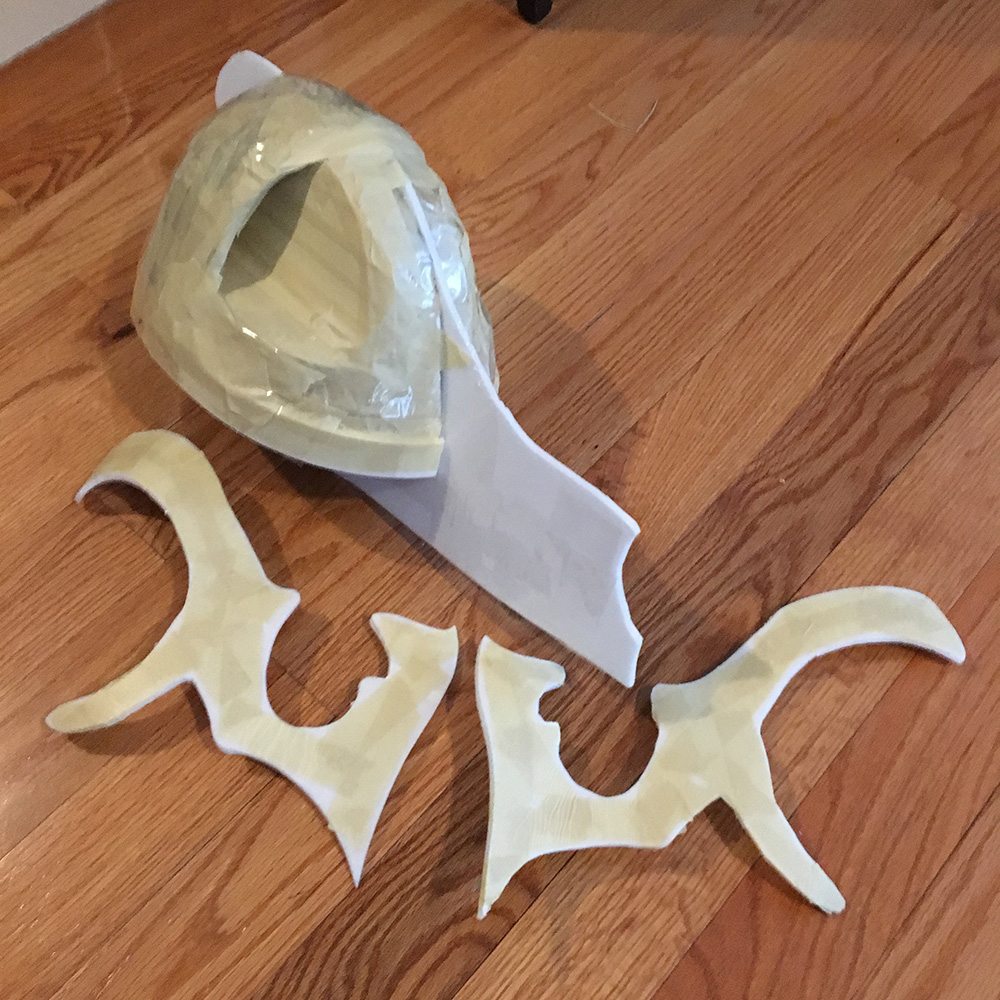
The jaw is mostly just two long pieces of foam board. I went back to my guide image that I’d printed out and traced the jaw part onto foam board, twice.
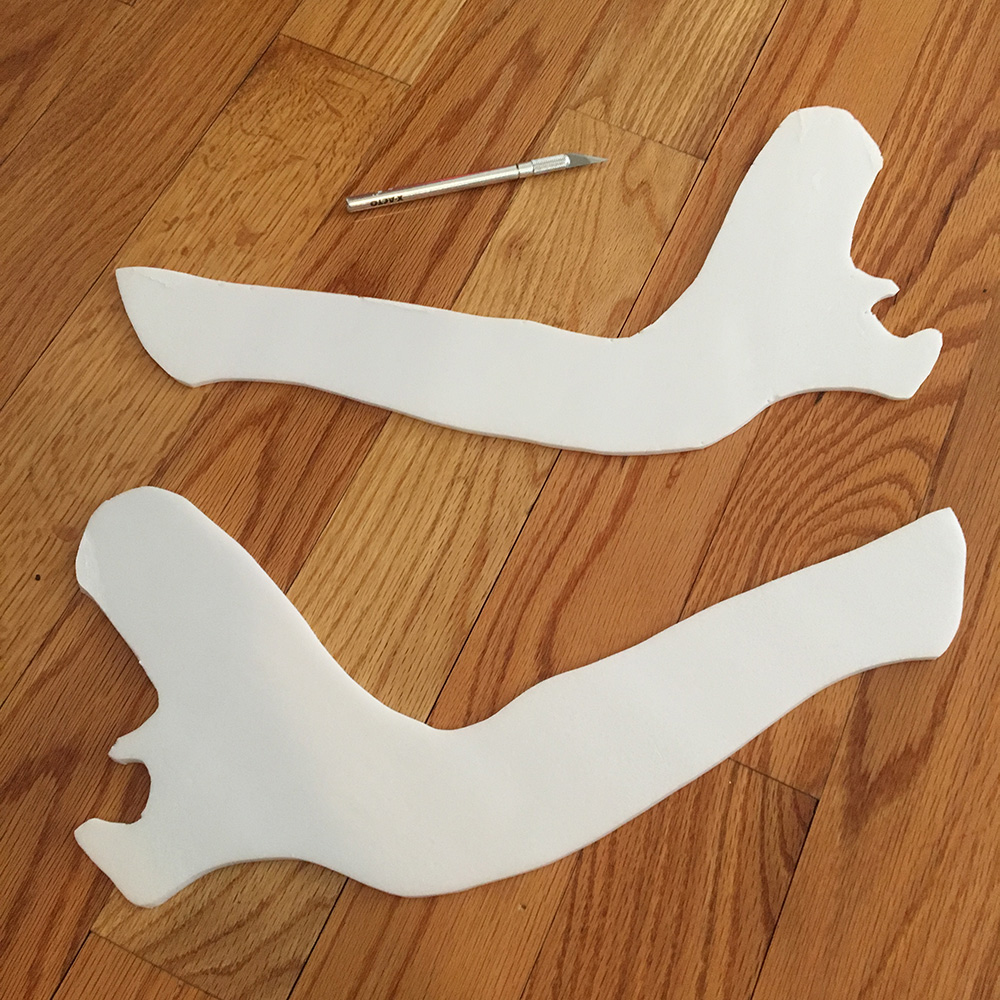
I cut these out and covered them in masking tape to make them flexible, so they can be rolled and bent without breaking. Then I rolled them up to give them a nice curve.
I drew and cut out a big flat foam board shape to hold the jaw bones in the right position while I worked on them; you can see that in the pic below. This is basically the shape of the upper surface of the mouth; it’ll get removed and thrown out later. Without this piece it would be pretty much impossible to get the long jaw bones to stay in that irregular curvy shape and to both be symmetrical. So, I taped the sides of the jaw along the sides of this support, and then I pinched them together a bit on the underside, and put a piece of tape across to hold them in place; so if you look at the jaw from the very front, the sides aren’t completely parallel; they taper inward toward the bottom. So, that big flat piece is used as a temporary support to hold my foam board pieces in a position that they would normally want to bounce back out of, and then once I add a few layers of paper maché (coming up soon) and let them dry, I can then remove the supports and my project stays in the shape I want it. It worked like a charm!
(The long black support piece in the back is another trick I do all the time. I needed something to hold the back parts of the jaw apart at the exact right distance when I started the paper maché — The back pieces of the jaw need to fit perfectly into the cheek bones of the skull, so I couldn’t just wing it with how far apart they are. I measured the distance and then made this support from some poster board, carefully measured and cut and folded into a triangular beam shape with little tabs to tape down. Extremely sturdy and precise. As soon as the first couple layers of paper maché are on there and dry, I cut this support off as well.)
I forgot to mention, I built out the front of this lower jaw piece (i.e. the chin) with some thin strips of poster board that I wrapped around the front, held on with a lot of masking tape to cover and smooth everything out.
While working on all of this, I repeatedly placed the jaw and skull together to make sure the edges of the mouth and all the teeth would line up and overlap okay. I added the two lower fangs right after taking this pic. You can see my flat support piece is still in the mouth; that’ll come out soon.
Paper maché
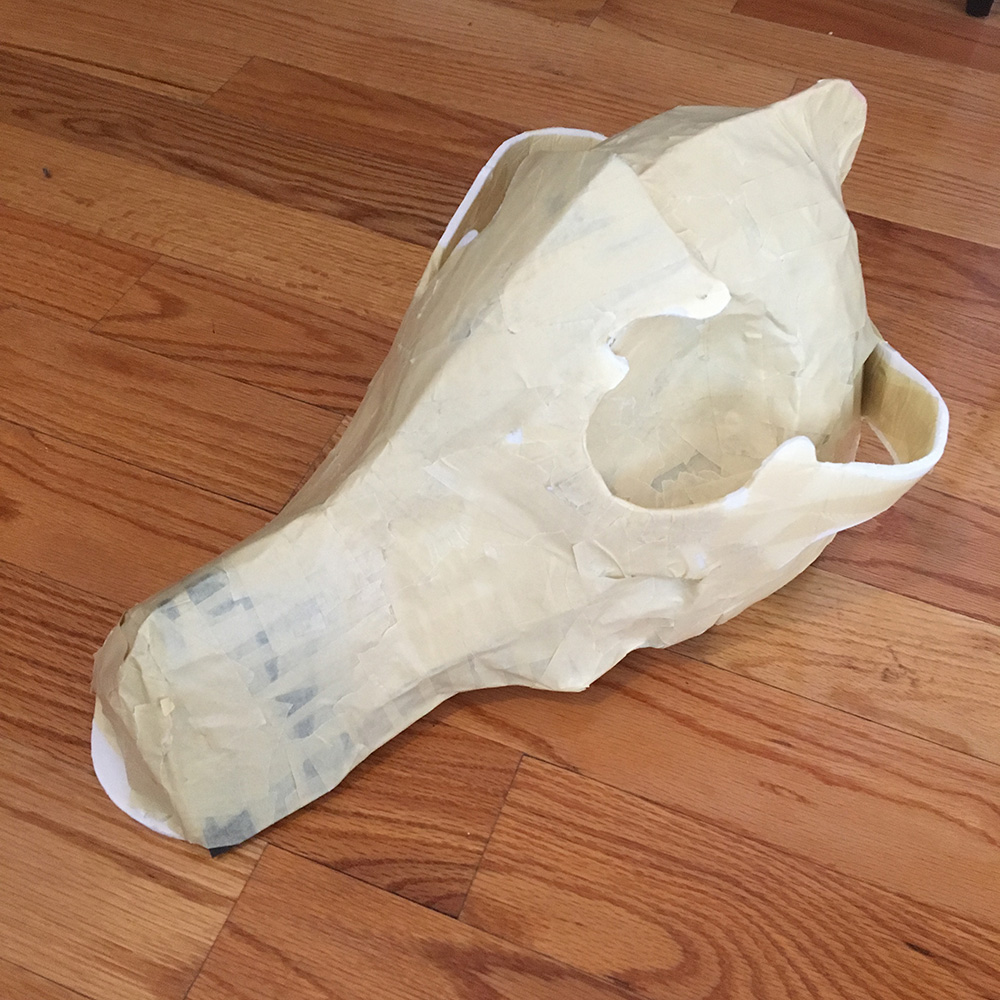
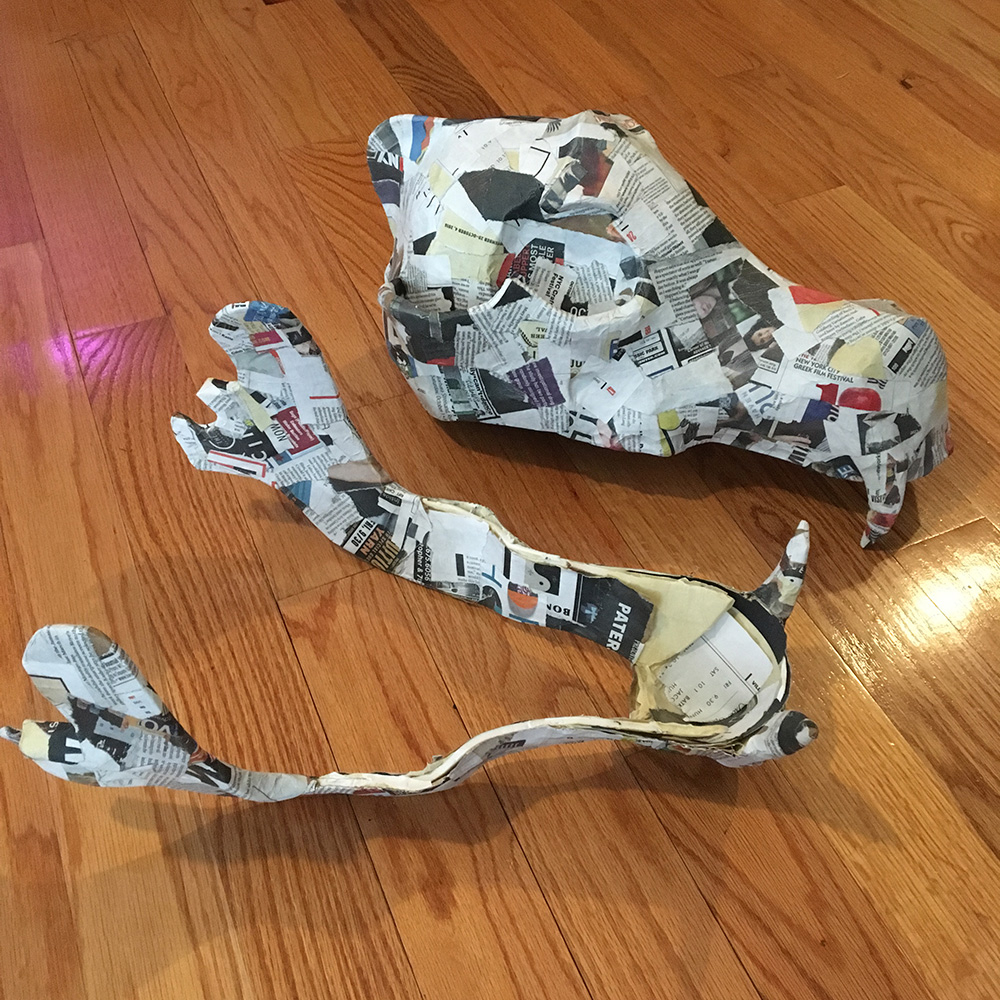
With the base of the skull and jaw finished, it was time to apply the paper maché. I used seven layers for this mask; you can read more about my paper maché method here. The short version is: I use Roman PRO-543 universal wallpaper adhesive (paid link) and alternating layers of newspaper and brown wrapping paper.

You’re looking at the second layer in the pic below. As soon as that was dry, I removed the big flat support piece from the jaw, as well as the long black support piece, and added a tiny bit of paper maché where those connections were, since I couldn’t get at them before. It’s amazing how even with just two layers of paper maché, the shape feels very sturdy with the supports removed; the curved foam board shapes don’t feel like they want to un-bend themselves at all.
While working on the paper maché, I ended up deciding to modify certain parts of the base a little bit here and there; things like extending the snout forward a bit with some foam board and tape and then more paper maché. All the planning I do ahead of time helps me be as precise as I can be, but I also adjust things along the way as I discover any little unforeseen problems. This mask was especially challenging because the two pieces had to fit together really well — the back of the jaw has to fit into the cheek bones, and the fangs need to fit together nicely without scraping together too much. So, at this stage I realized the snout needed to be a little longer in order to make that work, so I just packed some more foam board and poster board onto front of the nose. At this point my overall shape was pretty much 100% done, but with many small details to go.
That’s all for part 1 of my paper maché wolf skull mask! Continue to part 2; adding teeth, setting up the jaw mechanism, painting, etc…
 About Manning Krull
 How to make a 4-foot paper maché alligator
 My violin skull mask, Mardi Gras 2015
 Three-headed paper maché dragon sculpture
July 31st, 2022 at 1:03 am
Me encantan sus trabajos. Me atrevo a pedirle ayuda si se puede.Si pudiera guiarme o darme una idea para hacer un armadillo con estas técnicas.Gracias y exitos