
Paper maché wolf skull mask — part 2
Published by Manning on March 2nd, 2017
What big teeth you have!
Hooboy, the teeth were one of the hardest and most time consuming parts of this whole mask project! Like I mentioned in part 1, the four big fangs were made out of foam insulation tubing and masking tape; those were pretty easy. I tried a few different methods for the other teeth; I’ll spare you my failures and just show you where I ended up…
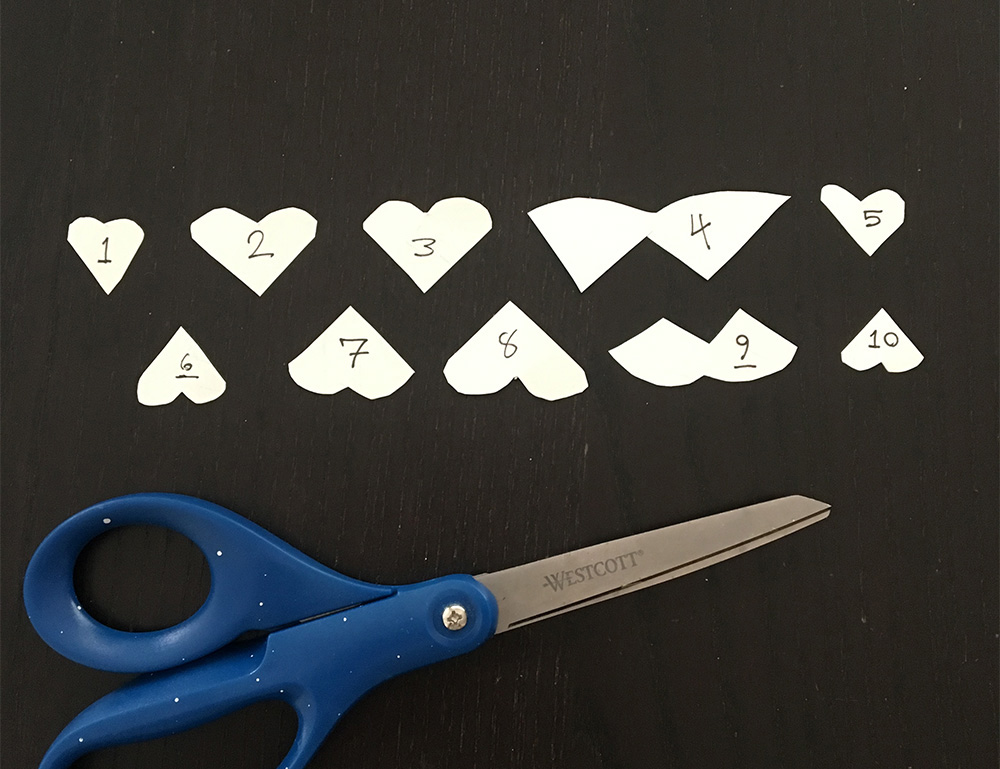
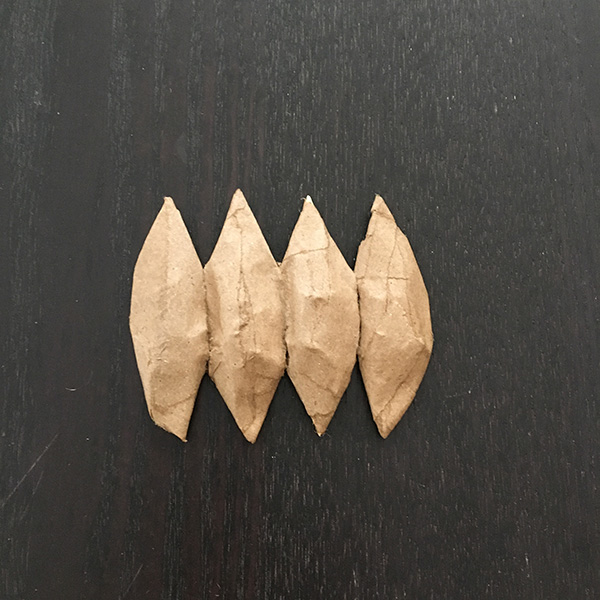
For the side teeth, I carefully measured and sketched these onto poster board, and then cut them out. Of course you’re just seeing the teeth for one side of the skull here; I traced these and made mirror copies for the other side. I’m glad I thought to write numbers on all of these to keep them organized! During the steps where these get covered over with various materials, I was careful to always set them down in the right order.
Then I cut smaller individual teeth shapes out of craft foam, and set them onto the cut-out poster board. Two layers of craft foam for the larger teeth, and just one for the tiny ones.
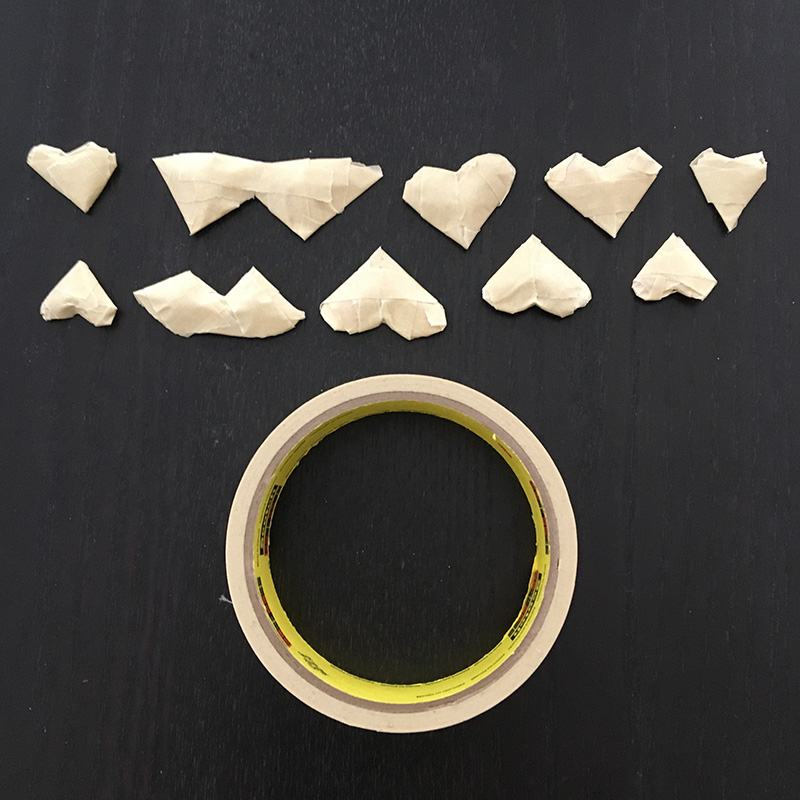
Then I carefully wrapped the teeth with super thin strips of masking tape; I’d tear off a piece of tape and then tear it down the middle into thirds. Wrapping these neatly onto the teeth was a real manual dexterity challenge!

Then I wrapped the teeth again in a couple layers of paper maché with super thin strips of paper. The layers of soft craft foam helped pad out the teeth shapes with a nice beveled effect, and the masking tape and paper maché rounded out the edges to make everything nice and smooth. I set these aside to dry. Once they were dry I wrote the numbers on them again, just in case I knocked them off my table or something!
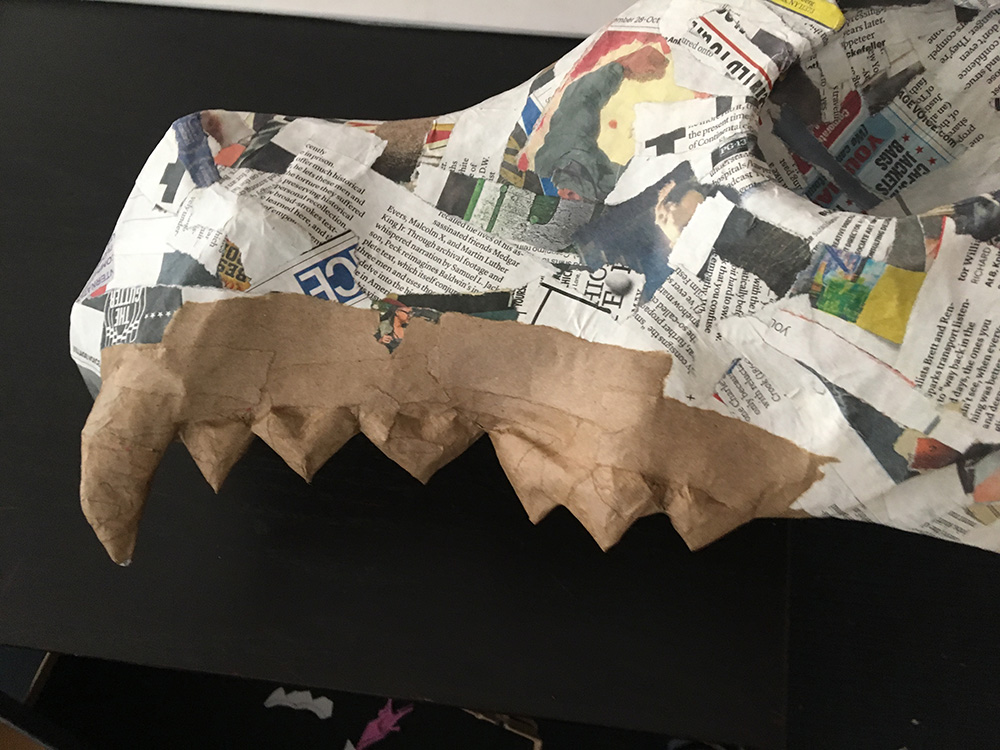
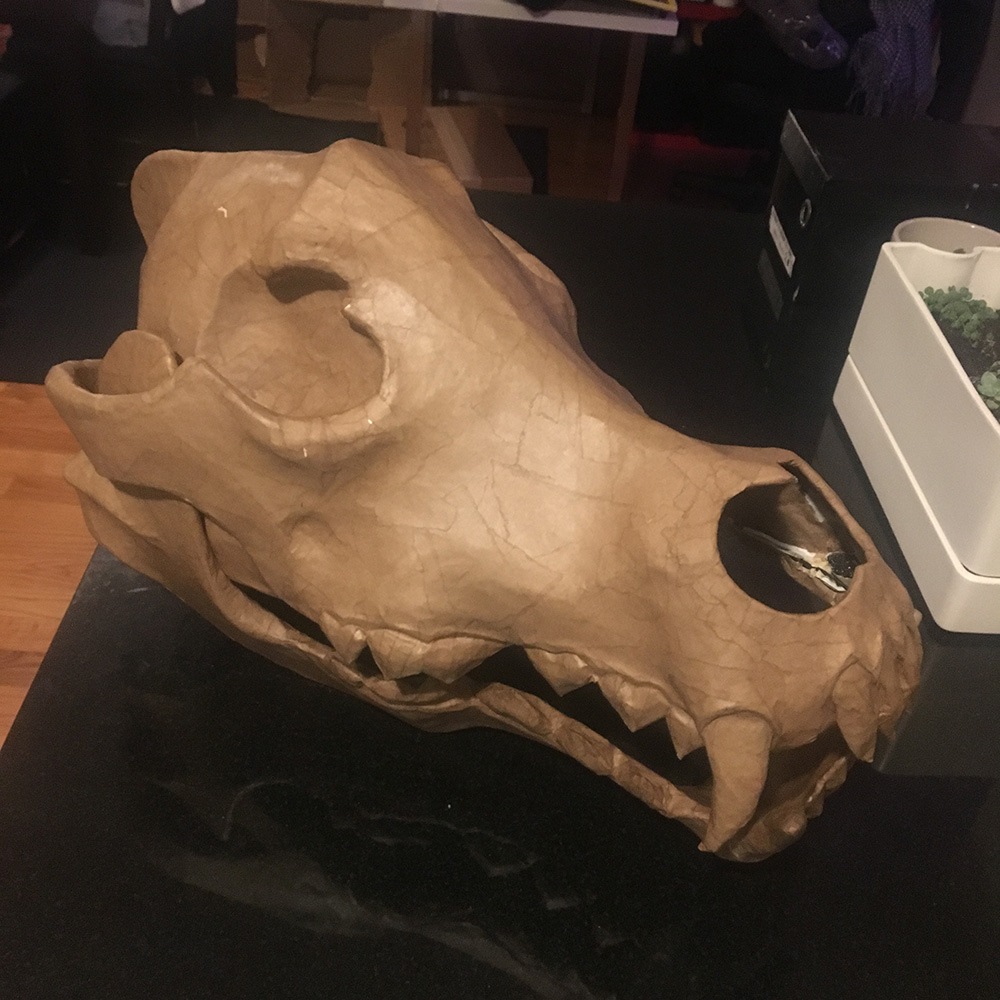
Then I cut spaces for the side teeth into the jaw with my X-acto knife, and then I attached the teeth with tiny strips of paper maché over the gum areas and on the backs of the teeth to connect everything.
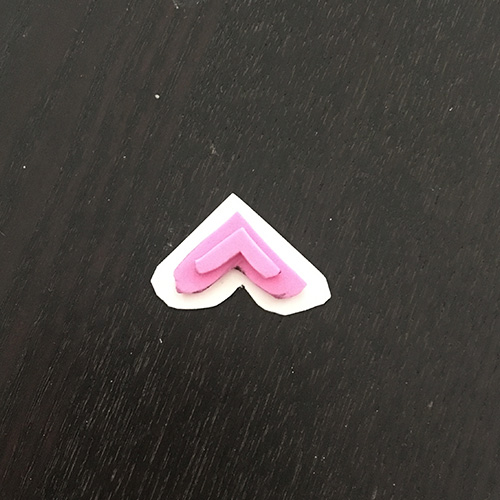
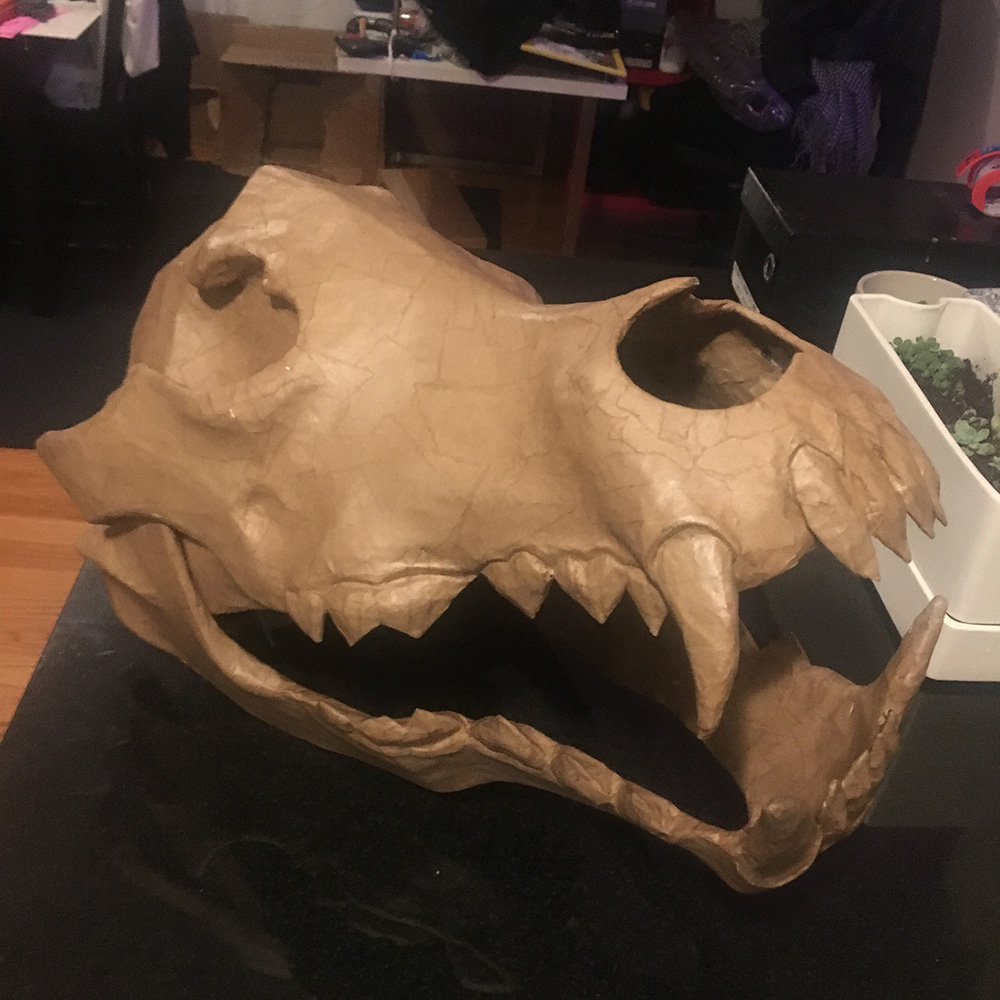
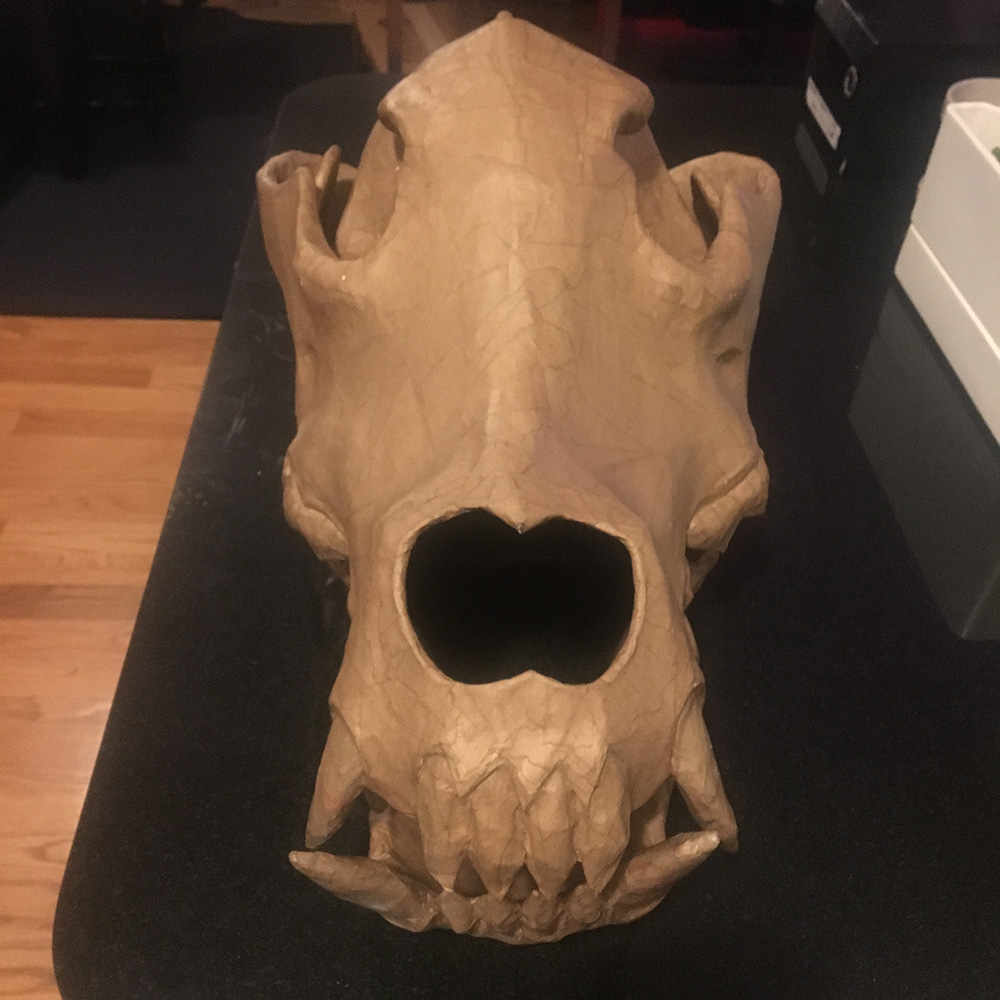
I decided I wanted to accentuate the gum line, as it got pretty smoothed out by just one layer of paper maché. I used craft foam to cut out a raised gum shape; I held up the craft foam to the jaw and drew a wavy line to match the rounded shapes of base of the teeth; basically like cartoon ocean waves but upside down. Then I cut that shape out, and cut it into the thinnest piece I could get it. I paper maché’d this piece in place, and it added a nice raised edge fitted to right where the teeth meet the gums. The pic above is before I added the raised gum line, but you can see the added gum line in the pics below of the finished paper maché.
I tackled the front teeth in a similar way, but I built them as connected rows of teeth. Four upper and four lower.
All of these teeth were a ton of work; 32 in all! I’d considered using modeling clay for the teeth, but I know that would add a ton of weight. In hindsight I kind of wish I’d gone with the clay! All these teeth took up one very long very frustrating day of work over Christmas break. The teeth required such delicate work and such small shapes of tape and paper, it was impossible to get everything 100% perfect and smooth-looking. Luckily some gesso and paint will help smooth all of that out later.
(I should mention, making teeth has been the hardest and most frustrating part of every mask I’ve ever made, and several of the other skeletons in my group have said the same thing. So much work for such a small part of the overall look of the mask! I’ve used different methods for all my masks, and none of them have been pleasant. I’ll keep trying new things and maybe one of these days I’ll find the perfect method.)
Removing the interior
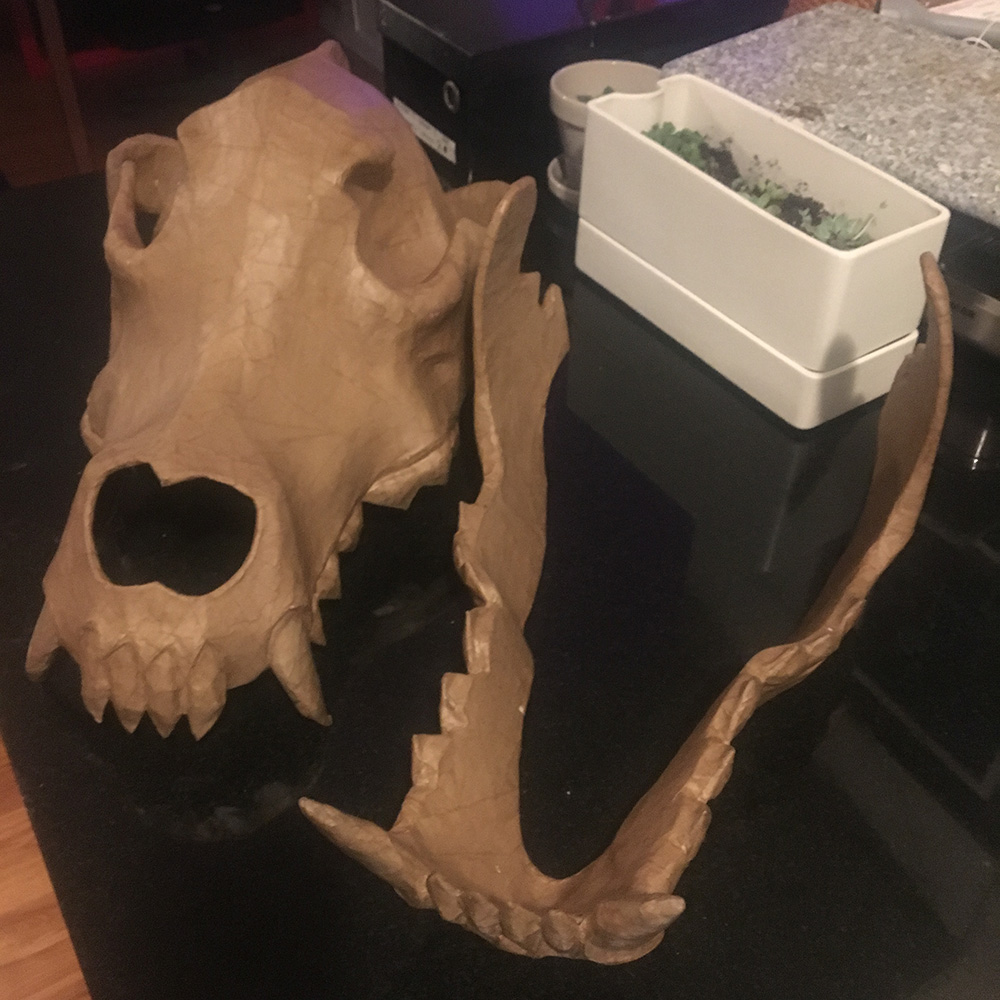
When all of the paper maché was done and dry, I carefully removed as much of the base materials from the mask as possible, using an X-acto knife and scissors. This is really satisfying work, and it’s always fun to see how much junk comes out; it always looks like a lot more than should fit in there! I filled an entire small trash can with scraps of foam board, poster board, and a mountain of tape. And then once the base materials are removed you’re left with a surprisingly lightweight and sturdy shape that’s all just paper.
I should note, for this particular mask I was able to remove all of the base materials from the upper skull piece (except the teeth), but I didn’t remove anything from the jaw at all; that would’ve been more or less impossible.
I cut out the nose from the hollowed out paper skull, and reinforced the outer edges of the nose and the bottom edges of the mask with some more paper maché.


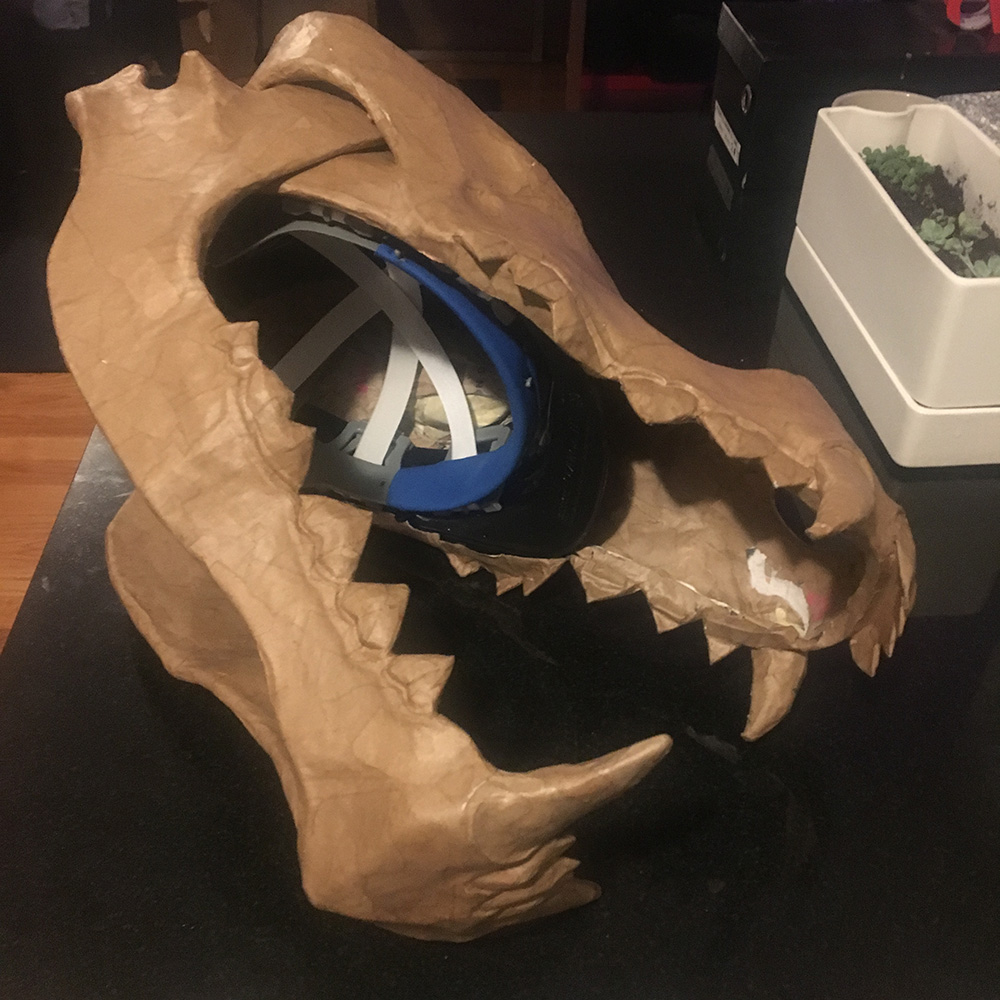
This is the hard hat just sitting in there to try out the fit; it’ll get glued in place much later, after painting.
Installing the magnets for the jaw
I got kind of ambitious with how I wanted the jaw to function! I wanted to use magnets in different positions in the jaw, to allow the jaw to be propped open in multiple different positions. It worked, but not perfectly. I made this simple animation to illustration how I set up the magnets in the jaw…
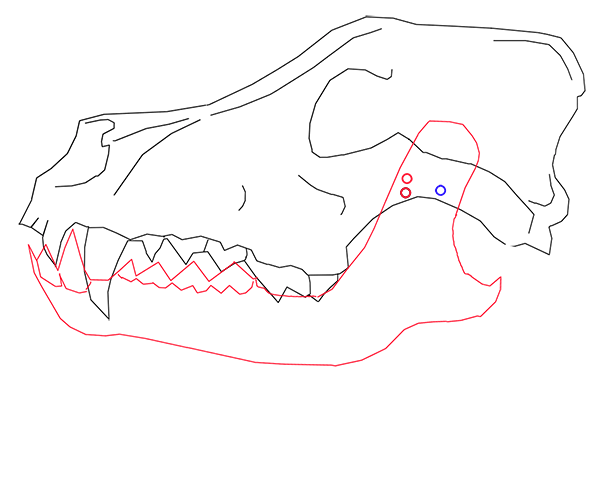
The blue magnet is the hinge; there’s a magnet in the jaw there and another in the skull.
The red magnets are embedded in the jawbone.
The black magnet is embedded in the skull.
As the jaw opens and closes, the red magnets in the jaw slide to connect to the black magnet. As you move the jaw with your hands, you can feel the magnets pop into place. It’s important that each of the red magnets is exactly the same distance from the blue magnet, in order to create a perfect arc of movement.
Note: I actually used multiple magnets, stacked up, in all of these areas. The magnets I use are tiny washer-shaped disks, and they’re very strong on their own, but they become even stronger if you double or triple them up. So, in the location of the (blue) hinge, I actually used three magnets stacked up for each side. That means three magnets together in the skull, and three magnets together in the jaw. For the red and blue magnets, I used two magnets stacked up in each of these places.
Then of course there’s the same stuff in the other side of the head. That ends up being a grand total of 24 magnets. (And a few more in the ears, coming up.)
Something I learned about working with magnets on my last mask is that it’s extremely important to get them to line up just about perfectly when you embed them in your surfaces. If they’re misaligned by just a few millimeters, the connection becomes much less strong. So if you want to try something like this, be very careful with where you’re placing them!
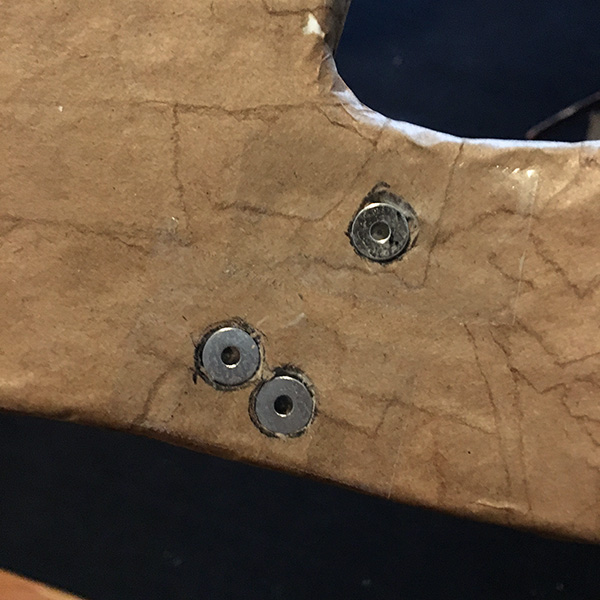
The way I attempted to line up the magnets perfectly was by using a long t-shaped pin to poke a hole through the areas where I wanted the magnets; I stabbed the pin all the way through both the jaw and skull at the same time, and then pulled it back out. This allowed me to use the pinhole as the center of where I’d place the magnets. Since the magnets I use are washer-shaped (small disks with a hole in the middle) it was easy to line up the hole from the pin in the center of the hole in the magnets.
Here’s how I embedded the magnets into the paper maché of the skull and the jaw. I first placed a magnet where I wanted it and traced it with a pen. Then I used an X-acto knife to carefully cut out that circle and dig a few layers of paper mache out of there; enough to place the magnet in there and have it be flush with the surface of the mask. Then, in order to keep the magnet from ripping out due to the force of the other magnet pulling on it, I covered the magnet with a large piece of heavy duty packing tape. The tiny magnet might be able to tear through paper maché, but it definitely can’t tear through the packing tape. So, after the packing tape, one quick layer of paper maché hides the magnet perfectly. More layers than that and you risk weakening the connection of the magnets. Here’s a pic of three of my magnet placements, and they’re covered with packing tape but you can barely see it:
One last concern is that, after the mask is painted, these contact points for the magnets have the risk of having the paint rubbed off. I don’t know any way around this other than using a lot of matte spray to protect the paint, which only helps so much. So in order to improve the situation a bit, I did the paper maché on the contact points using white paper rather than my usual brown paper. I just got some free newspapers and found lots of little areas where the paper was white on both sides (mostly along the edges), and tore them out and used those. So at least if some of the paint rubs off in these places, the white paper will show through and hopefully not be too noticeable, instead of having brown paper show through.
(Update: I ended up not completely trusting the connection in the hinge, so I added a short nail on each side to make this connection permanent; right through the hole in the magnets, stuck in from inside the mask so they’re not visible. I trimmed the nails with wire cutters so they just-barely-but-not-quite reach the outer surface of the jaw. The magnets seemed to work but I got paranoid about the jaw falling off during a parade!)
(One more note: the connection of the jaw started out very loose, like the whole jaw would fall right out if it weren’t secured, but it got tighter and tighter as I added paper maché and paint; by the end it was very tight and there was a lot of friction holding it in place. So the magnets I installed to be able to lock the jaw in a few different positions ended up being only a little bit helpful; in the finished mask the jaw is tight enough that it can basically stick in whatever position you put it. The magnets give it a nice way of popping into place at those specific positions, but they probably don’t need to be in there at all! Nothing ever goes exactly according to plan! But I’m still very happy with how it ended up.)
That’s it for part 2! Continue to part 3; painting, etc…
 About Manning Krull
 How to make a 4-foot paper maché alligator
 My violin skull mask, Mardi Gras 2015
 Three-headed paper maché dragon sculpture
October 23rd, 2019 at 5:12 pm
I’m making this for my daughter for halloween and wanted to know do you have link where I can order the magnets? Amazon? I didn’t see mention of the exact dimension or strength.
October 23rd, 2019 at 5:52 pm
Hi Kenni! If you search Amazon for rare earth magnets you’ll find a bunch of choices that are all appropriate — just take a look for the size you want. I generally use magnets that are 3/8″ in diameter, or 1/2″, but really the size isn’t very important; if the connection is too weak I just stack additional magnets together. The more you combine the stronger they get. Good luck!