
Repainting a dollar store bird skeleton
Published by Manning on August 26th, 2017
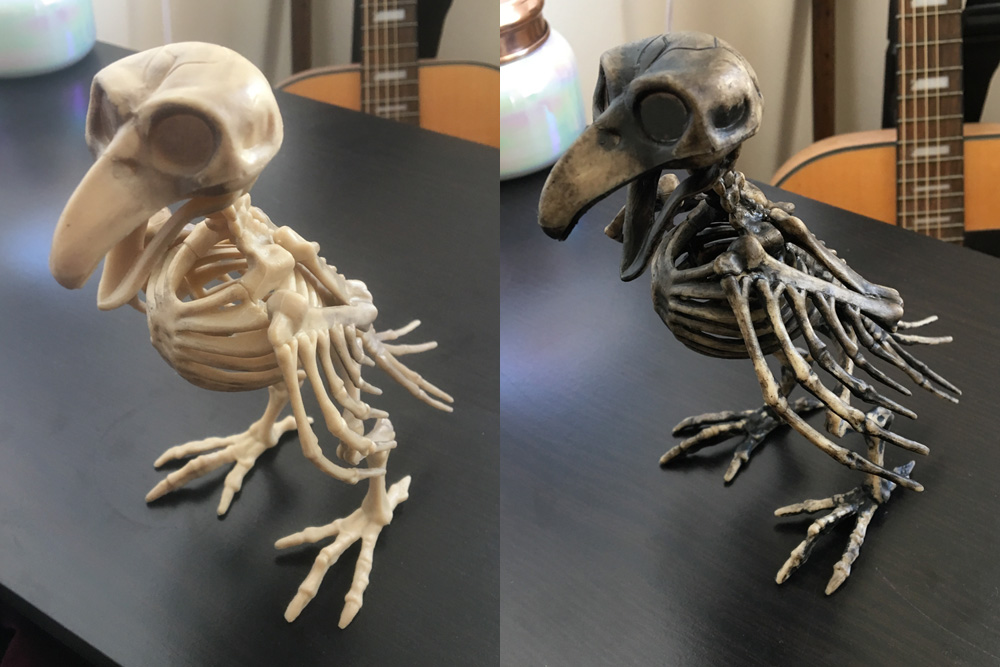
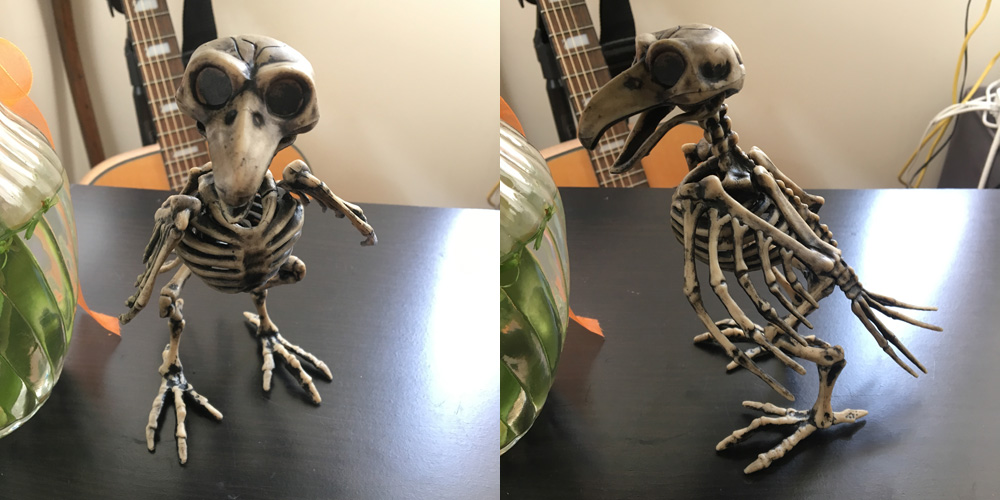
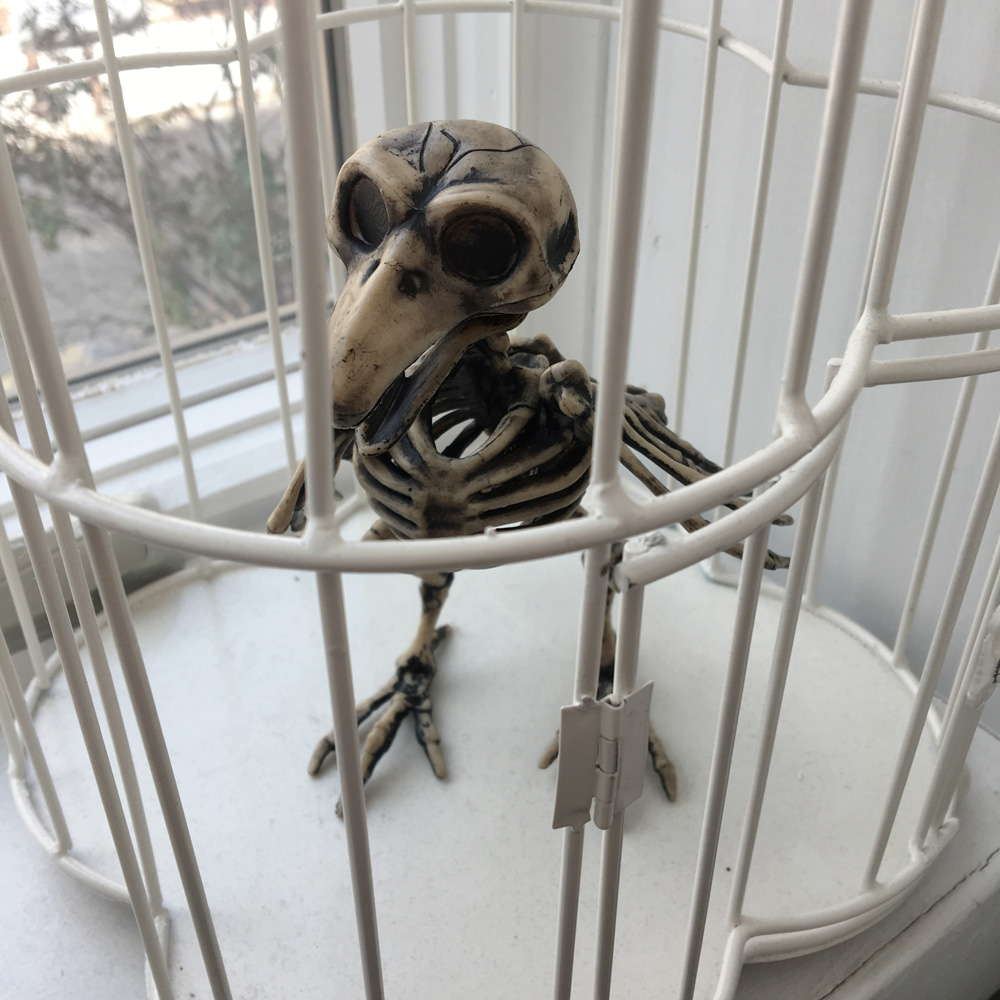
I’m sure it goes without saying that I vastly prefer hand-made Halloween decorations to store-bought ones, but when I saw this really cool spooky bird skeleton for just a buck I couldn’t resist! A few years ago I actually made a tiny bird skeleton for my cuckoo clock skull mask, and it was an insane amount of work for such a simple little skeleton! I’d never use a store-bought piece for one of my Mardi Gras skull masks, for I’m okay with it when I’m decorating for a big Halloween party; the more shortcuts I can take the better! Anyway, I knew this little plastic bird skeleton would look great in this old birdcage we have lying around, so I snatched him up.
These factory-made plastic decorations always have a cheap sprayed-on paintjob that I hate. I’ve tried different thins for repainting various plastic decoration and it’s always a big challenge, because paint really doesn’t want to stick to the cheap plastic. I made up this easy method for repainting plastic skulls and skeletons and stuff, and it works okay! The main thing to keep in mind is that any contact with the piece is likely to scrape off some of the paint, no matter what you do. But this method is my attempt to work around that.
Anyway! I started off by cleaning the bird skeleton with Windex; this is to remove any oils that might be on the plastic. I put the bird skeleton in the sink and sprayed tons of Windex all over it, making sure to get it in all the nooks and crannies. I then rubbed the skeleton with paper towels as best I could, although you’ve never going to be able to reach in the deepest crevices; that’s fine. Then I rinsed the whole thing off with water, shook it off, and let it dry completely.
My first step of painting was to use black acrylic paint, applied mostly a sponge brush which I cut down to be a little more narrow, and I ended up simply applying a lot of the paint with my hands as well. The most important thing here is to get the paint all the way into all the cracks and crevices, and you don’t want the paint to be very thick anywhere; just a thin, even transparent coat on everything. As you do this you’ll see that the paint doesn’t want to stick to the most external surfaces, like the very outer edges of the bones, and that’s fine! The only important thing here is getting the black into all the nooks and crannies.
Immediately after getting the whole skeleton covered with black paint, I then took a regular kitchen sponge, slightly damp, and used the rough side to rub all over the skeleton and wipe off as much paint as possible from the outer surfaces. The rough side of the sponge isn’t able to get into all the crevices, so the black paint stays in there. Some of the outer surfaces end up nearly paint-free, and others end up pretty stained with the black paint, and that’s all fine. I let the black paint dry and set for half an hour.
I’d originally planned on doing two more steps here — a round of heavy drybrushing with brown acrylic paint, and then another round of light drybrushing with a lighter beige acrylic — but in the end I decided I didn’t need to! This guy came out really cool with just the black paint rubbed on and rubbed off; he’s nice and old and filthy-looking now, like he’s fresh out of the grave or somethin’. I’ve done the three-step process of black/brown/beige for other plastic bone decorations and props but in this case I didn’t need to, probably because this bird skeleton has so many tiny details that the black painted could get into and create lots of natural contrast. Anyway, not bad for a buck and ten minutes of work!
 About Manning Krull
 How to make a 4-foot paper maché alligator
 My violin skull mask, Mardi Gras 2015
 Three-headed paper maché dragon sculpture
September 27th, 2021 at 4:22 pm
Thank you for this….I have a rat I’m going to try this on….as I as well hate that tanish plastic look….
Was great you shared this…….thanks again,
Jann
October 22nd, 2022 at 1:58 am
I have a couple on these skeletons and am going to do this tomorrow. Thanks!!
September 18th, 2023 at 8:32 pm
love this gonna try look amazing