
Wolf skull mask — part 4; making the ears
Published by Manning on March 2nd, 2017
This is part 4 of my paper maché wolf skull mask; see part 1 here.
I wanted to give my wolf skull some ears; I had this idea because in researching wolf skulls I realized that basically all carnivorous mammals’ skulls look almost indistinguishable, and the main different from one mammal head to another is the ears. So my hope is that adding ears will help people recognize my skull as a wolf (or at least a dog! I’ll settle for a dog!). In working on the skull without ears, I felt like from different angles it looked more like a dinosaur, or a dragon, or a lion, or a bear, etc. From day to day as I added stuff I felt like it looked like a different animal. But even just by cutting out paper ears and holding them up above the skull, I suddenly clearly saw: wolf(/dog)!
I also decided I wanted to make the ears detachable. This was for a few reasons: I always have to travel with each new skull mask from New York to New Orleans for Mardi Gras, and having removable ears will make the skull much easier to pack and fit in a smaller container. Also, any pieces that stick out from these big masks are bound to get knocked around in all the movement and activity (not to mention drunkenness) of the parades we march in, so it’ll be way better to have a detachable ear get knocked off than a non-detachable ear get broken.
I’ve mentioned before for this project and others that I love working with magnets to make strong, invisible connections between pieces. I attached the ears to the mask with the same tiny washer-shaped magnets I’ve used in other projects; they’re like $4 for a dozen at Home Depot. Each ear has two magnets in the base that connect to two magnets in the skull. I used two magnets side by side in each ear rather than just one, so the ears can’t spin around. They lock right into place and are even easy to put on while wearing the mask and not being able to see what you’re doing up top.
(Note: this article is a little bit out of order with the others. I had to start work on the ears before painting the mask, because I had to install the magnets in the skull before painting it. I worked out where the ears would go, embedded the magnets in the top of the head, then set the ears aside for later and proceeded to finish the skull before returning to work on the ears. More on all of this below.)
So, how to make the ears? I considered a couple options. Initially I thought about sculpting the ears out of clay and then covering them with paper maché. The main pro of using clay for this would be how easy and quick it is to work with. But there are a lot of cons: it’s very heavy, so I’d have to carefully remove it after finishing the paper maché, and that adds a lot of work — I’d have to finish the paper maché, let it dry, then slice the ears in half around the edge, remove the clay (which means I’d have to wrap the clay in plastic wrap beforehand so it’s easier to get out), and then I’d have to tape the ears back together and cover them in more paper maché; tons of extra steps. This kind of process always ends up warping the paper maché shape somewhat; pulling the clay out always does a little bit of damage to the overall shape. On top of all that, sculpting the ears out of clay would make it very difficult or even impossible to get the ears perfectly symmetrical.
I wanted something more precise that would allow me to get the ears as symmetrical and identical as possible. So I ended up using this weird process I made up that I’ve used any time I want to create a shape that’s very precise but also has a lot of irregular curves and is overall pretty organic-looking.
I started from a drawing of the basic ear shape, which I then traced onto foam board twice and cut out.
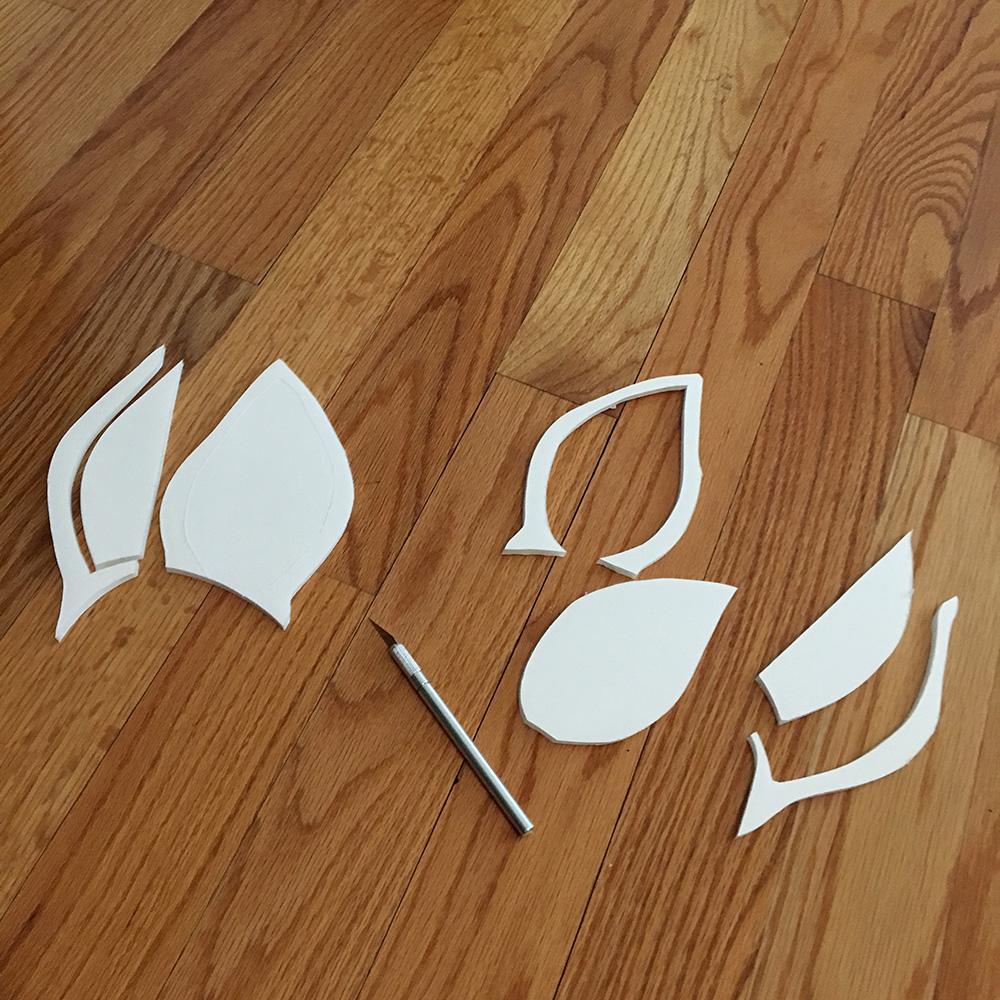
I then drew and cut out a perpendicular piece of foam board that will make up the back edge of the ear (and made a second one for the other ear, of course). Now, here’s a weird idea I’ve never tried before. Rather than leave these four pieces of foam board as-is, I sliced them up a bit before assembling them. The idea is that when the ear shapes are mostly done I’ll be able to cut them open with an X-acto knife and easily remove the already sliced-apart pieces of foam board, rather than have to painstakingly cut them apart with an X-acto knife while they’re still inside the ears in order to get them out; I’ve done this for other projects and it’s a real pain. Anyway, you’ll see what I mean in a few steps…
I wanted to slightly curve the back ridge of the ears, so I used a trick I’ve mentioned a few times here before: I covered each side in masking tape, which allowed me to roll the shapes up without breaking them, and then when they unroll they have a nice curve to them. I taped them into place on the back of the front ear panels. The curved backs of the ears give them a somewhat more organic looking shape.
I then taped the ears into place on the mask. I’ll be removing them a few steps later; this was just so I could work on them and see how they were coming along step by step on the skull.
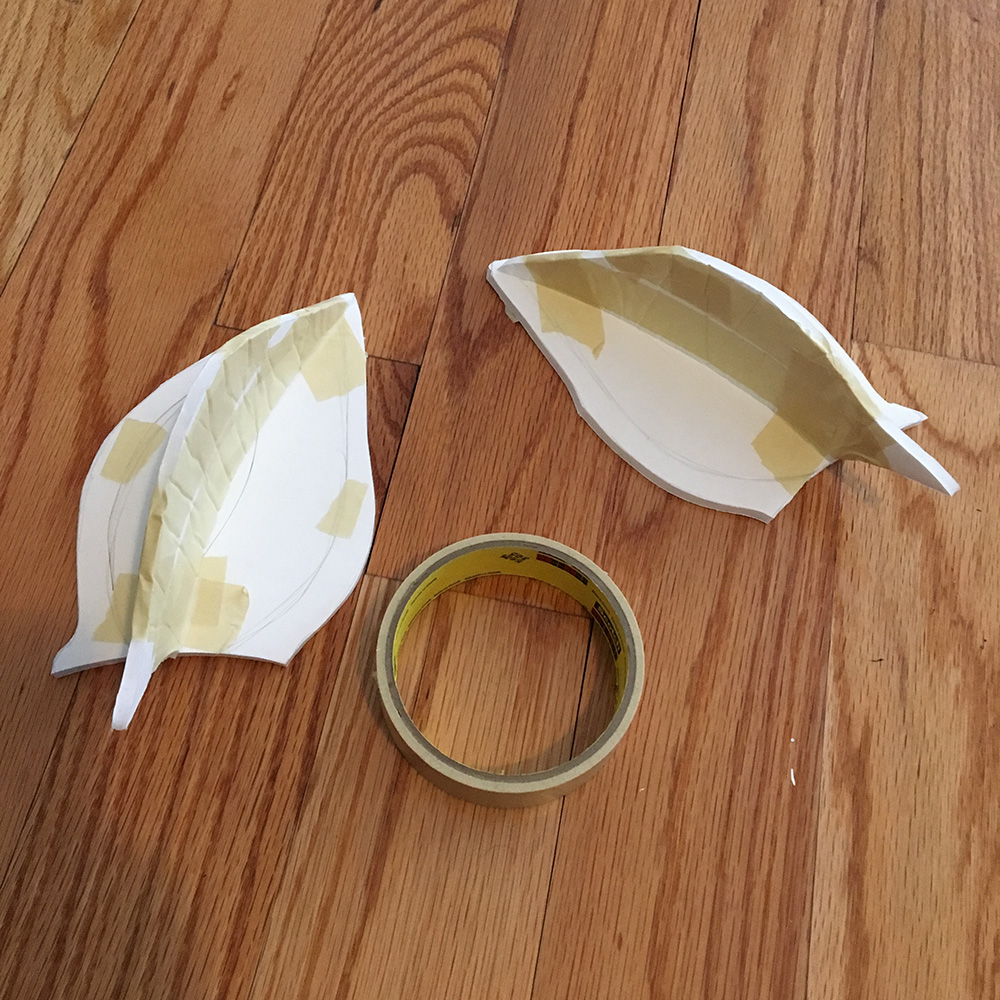
I rounded out the backs of the ears using narrow strips of craft foam, taped into place with lots of masking tape. The more tape you use, the rounder and smoother the surface becomes.

When all this tape was in place, I carefully cut the ears off the of the skull with an X-acto knife.
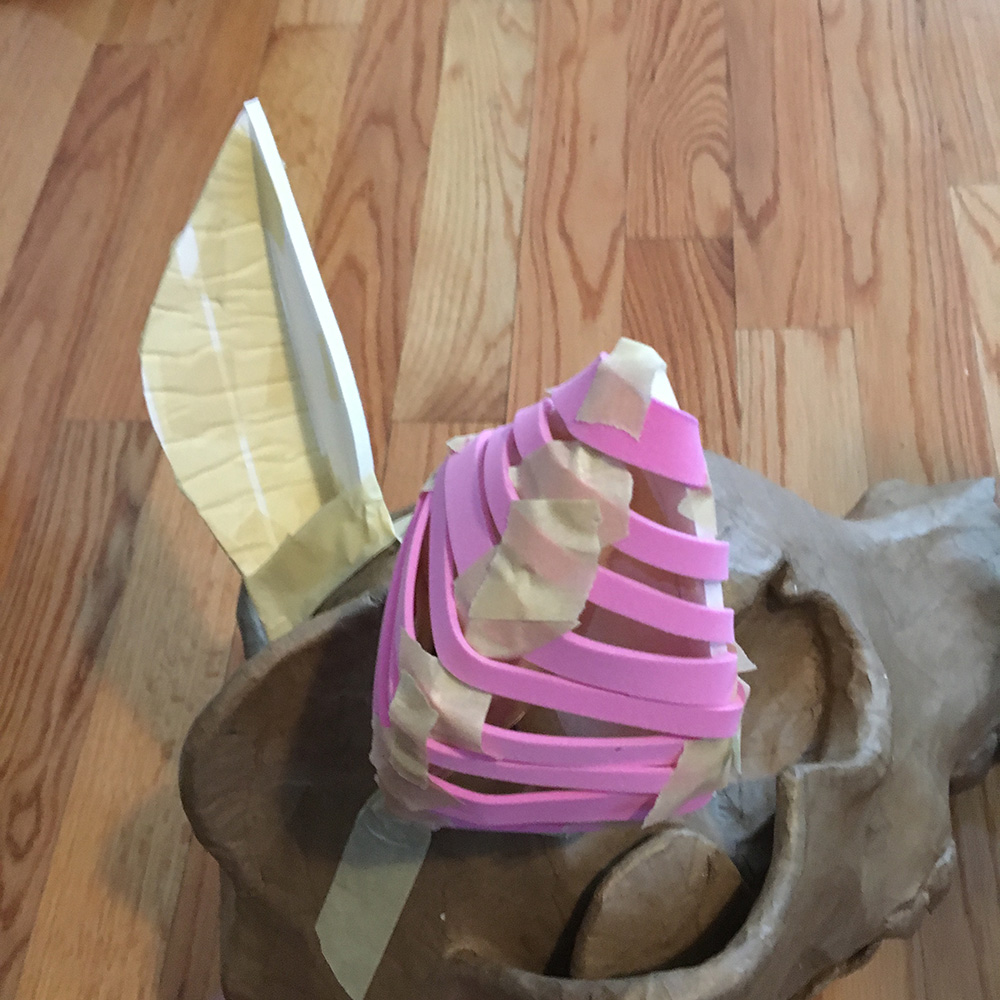
I decided I wasn’t satisfied with how the ears were fitting onto the skull; I needed the fit to be very precise in order for the magnets to work well. So I used aluminum foil to add a more perfectly-fitted base. I took two pieces of aluminum foil and crushed them right onto the skull in the places where I want the ears to be mounted. The aluminum foil blobs took on the exact shape of the curve of the skull. I then taped them in place on the skull with masking tape. I then attached the ears onto these aluminum foil blobs using lots of masking tape, wrapped around the foil and the base of the ears. I did all of this right on the skull, to make sure the ears stood up at the correct angle.
Now that I had a better base on the ears, I cut the ears off the off the skull again, and then I applied five layers of paper maché onto the entire surface of the ears.
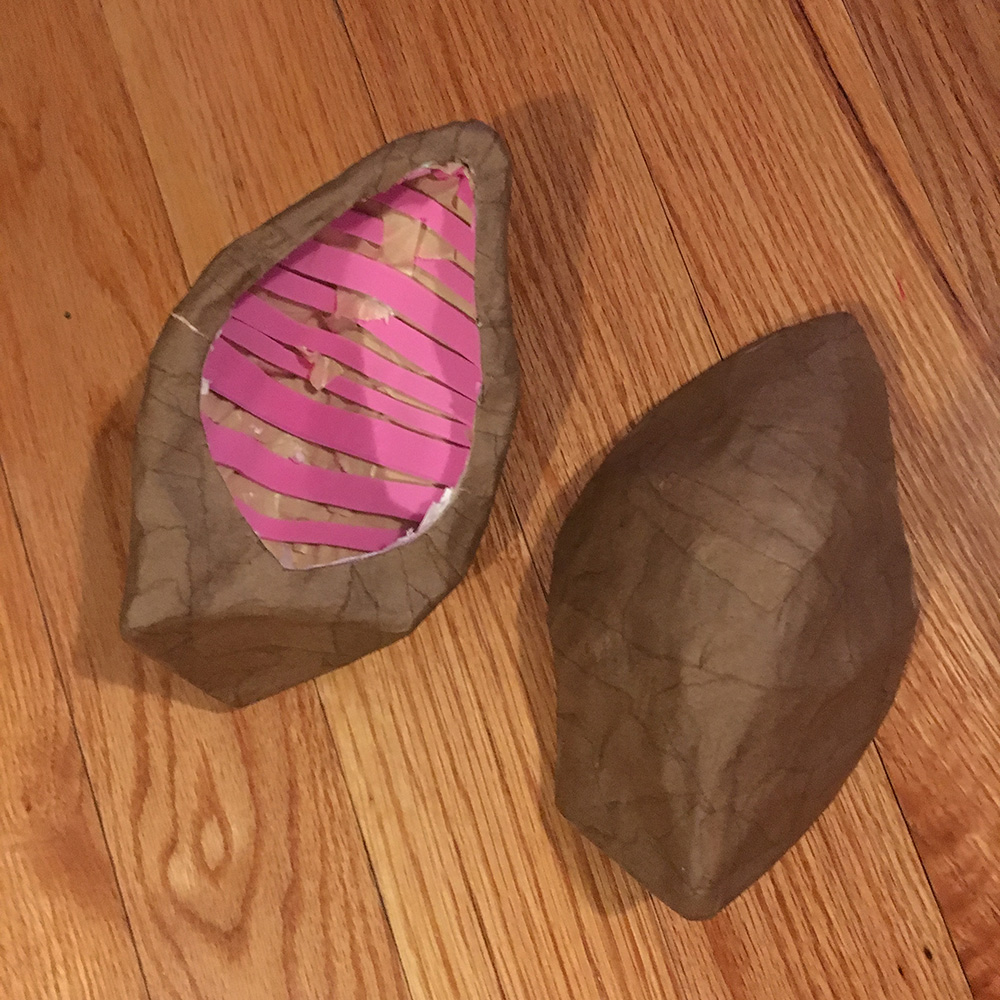
When that was dry, I cut open the front of the ears with an X-acto knife and removed all the interior materials. My trick of slicing up the foam board ahead of time totally helped! Success! It was easily to get everything out, leaving just the sturdy lightweight paper maché.
I then installed the magnets in the bottom surface of the ears. I did this by tracing the shape of the magnets with a pen, then slicing out those little disks of paper with an X-acto knife, then dropping the magnets in. I always put a piece of thick packing tape over the magnets to help lock them in place, so they can’t tear out of the paper maché. Then I cover the tape with one layer of paper maché. While I was working with the paper maché again, I also reinforced the inner edges of the ears a bit.
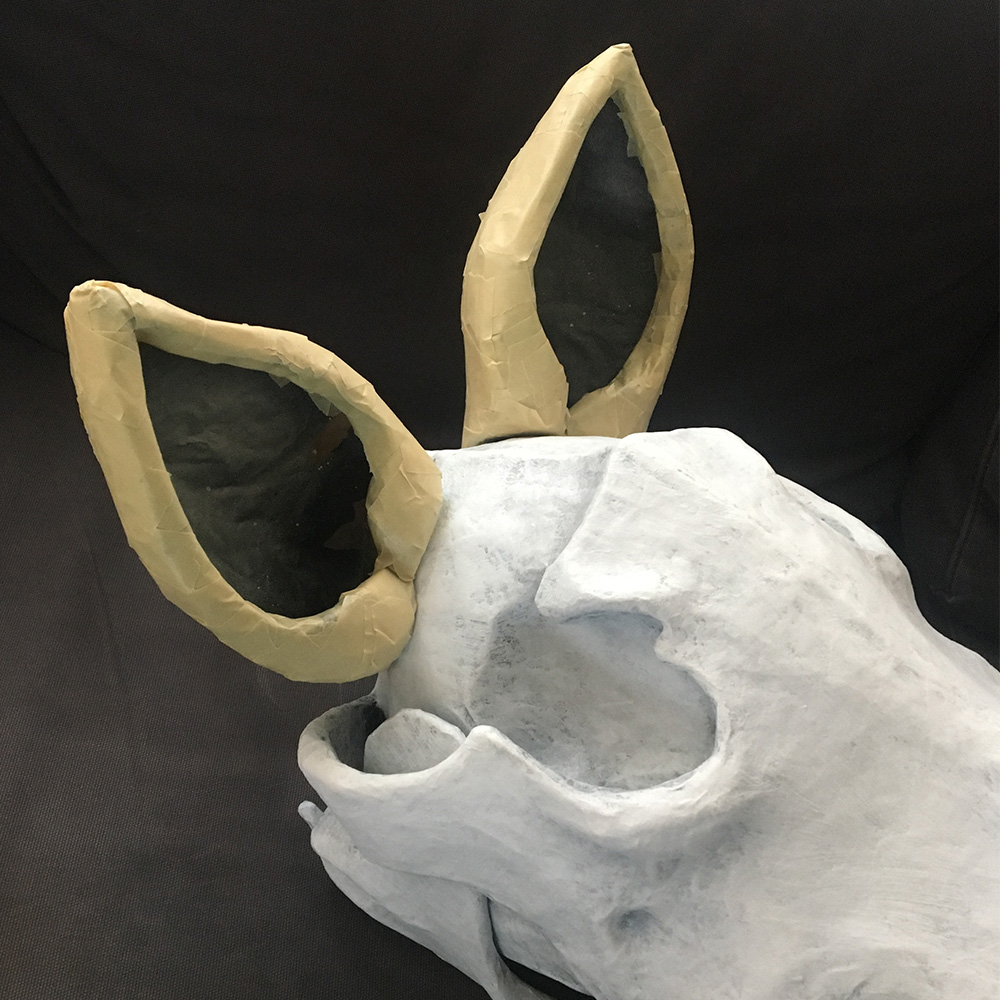
Of course I also had to install magnets in the top of the skull. It’s very important that these get lined up perfectly with the magnets that are already permanently embedded in the ears. Here’s an easy way to get the placement perfect: First, hold the ear onto the skull and trace the outline of the base onto the skull with a pen. Now pick up the ear and just stick the loose magnets to the bottom; they’ll snap perfectly into place to connect to the magnets that are embedded within the paper maché of the ears. Then, grab a marker and cover the exposed magnets with ink. Quickly, before the ink dries, you can “stamp” the ink onto the skull; use the outline you traced to make sure you’re stamping the ink in exactly the right place. Now you’ve got a perfect stamp on the surface of the skull to show you exactly where to put the magnets. I installed the magnets in the skull just like I did for the ears; slice out a hole, insert magnet, cover with packing tape and then paper maché. Boom, easy.
With a little trial and error I decided I’d better use two magnets in each connection point, rather than one, to make the connection twice as strong. So that’s two connection points in each ear, and two on either side of the skull, with two magnets in each spot; that’s 16 magnets total. When everything was dry I put the ears on the skull and they snapped right into place; perfect.
One note: with magnets and paper maché and paint, there’s always a risk that some of the paint might scrape off where the magnets connect. The best way I know to mitigate this is to use a lot of matte spray on the surfaces, but even that isn’t a guarantee. So, in accepting the risk that the paint might come off a bit in those areas, I decided to use white paper for the paper maché on this part of the skull. That way if the paint does rub off at least it’ll be white paper showing through rather than brown paper. Hopefully won’t be noticeable at all. I got the white paper by going through a local free newspaper and finding all the little areas that were white on both sides, and carefully tore them out.
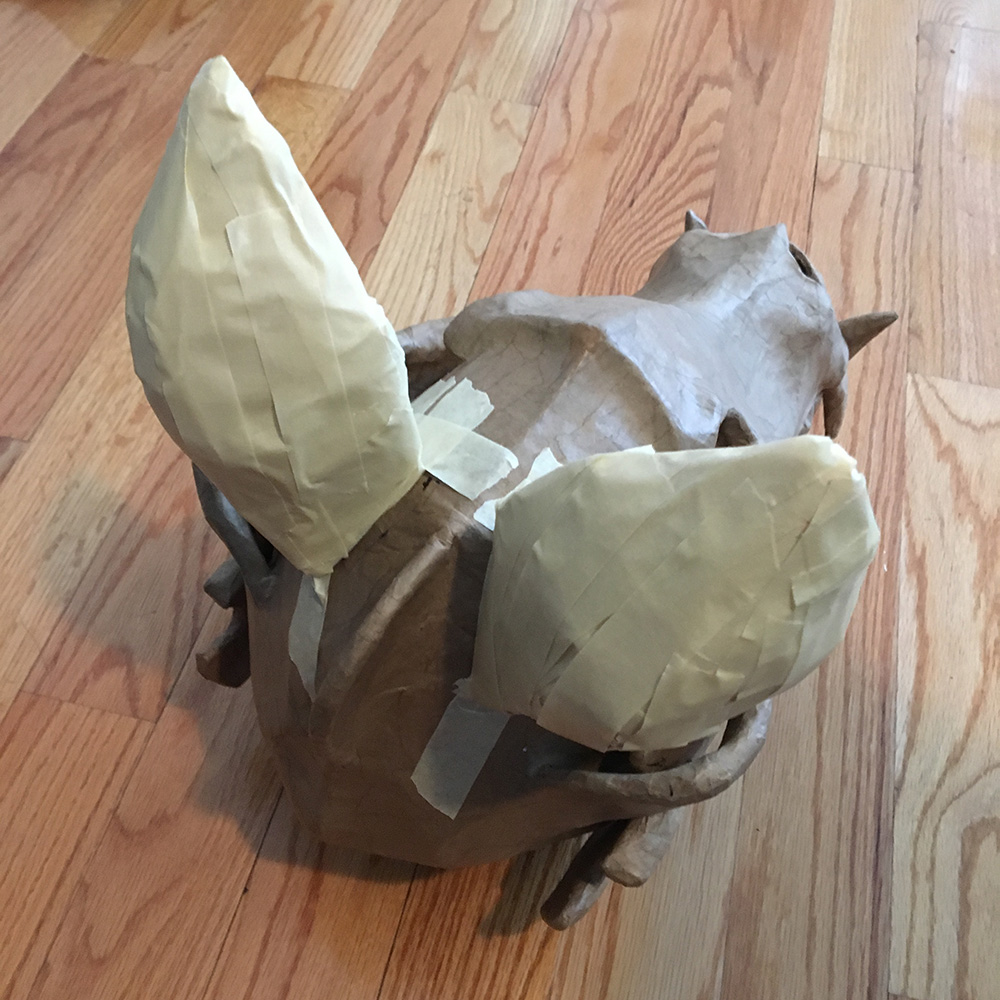
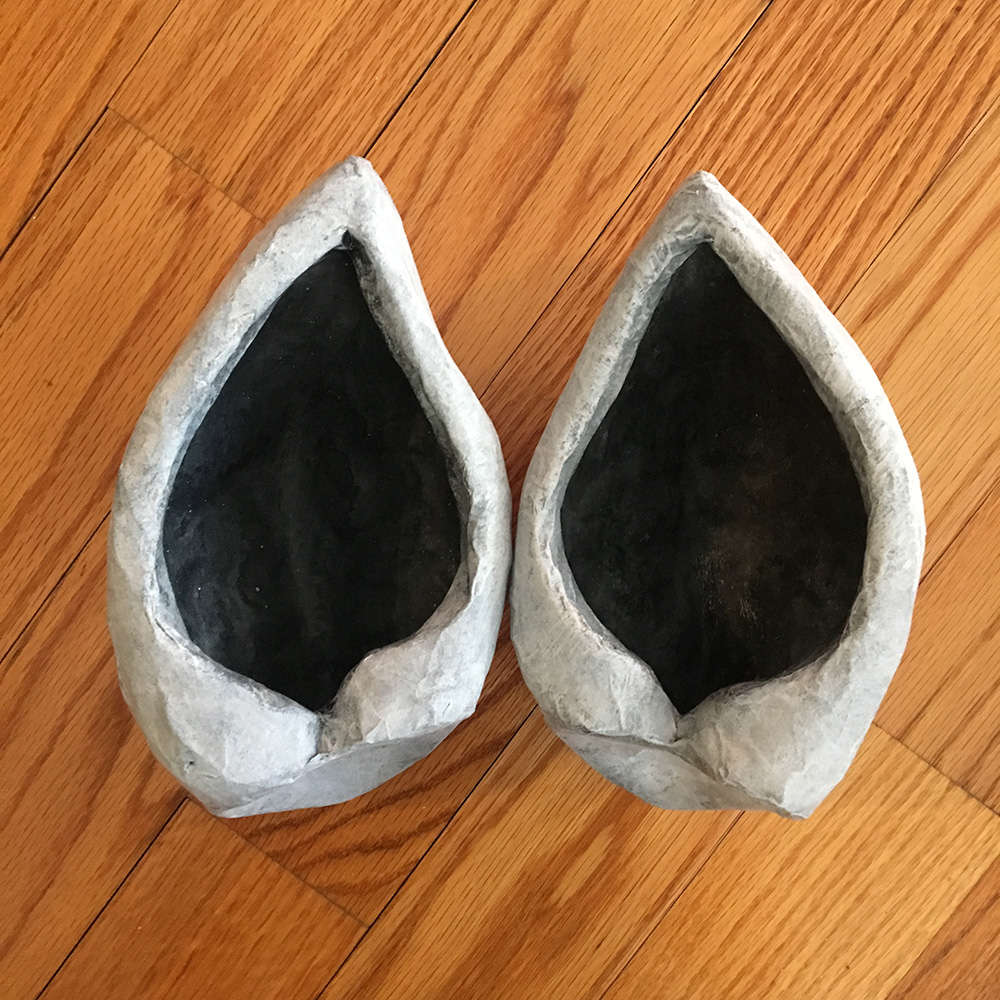
Now, on to painting. I started with one coat of gesso on the ears, and when that was dry I painted the ears with black and white acrylic paint. I wanted to give them a slightly different-looking texture than the skull itself, so I also gave them a light dusting of white spray paint at the end. The pics below are of just the gesso on the ears and skull, before painting.

As with many of my projects where I’m trying something I’ve never done before, when I saw the finished ears I wasn’t thrilled with them; the front surface was kind of flat and lifeless, and the back surface was a lot more bumpy and imperfect than I’d hoped for.
(Did I mention I’d wanted to add fake fur to the ears? That’s why I was so lazy with the original shape; I thought those imperfect surfaces would all get covered with fake fur. However, I bought some fake gray fur material and found it impossible to work with, and eventually abandoned it. Maybe some other year!)
So I decided to partially re-do the ears. I’ve found over the years that the first time I try something new, I learn what all the inherent problems are along the way as I screw things up, and then on the second try I can usually solve those problems and get things almost perfect! There’s no shortcut to that second try; I wish there were!
The base of the ears were perfectly fitted to the skull, and the magnets were placed perfectly inside, so I decided to keep the base and just create a new outer surface for the ears that looked more like what I was picturing.
I began by adding a new surface of craft foam onto the back of the ears. My earlier method with thin horizontal strips didn’t create a perfectly smooth curved surface like I hoped it would, but it did help me build up the nice rounded base, even though it was imperfect. By taping wider vertical strips of craft foam over the ears, I managed to get a much smoother surface this time.
The first version of the ears were just flat in the front with a large hole cut out. This time I decided to give the front of the ears a more sculpted, organic-looking shape by cutting out pieces of foam pipe insulation tubing and taping them into place. I basically just cut out a few long tapered foam shapes, and taped the wide, rounded end near the bottom-middle part of the ears, and curved the thinner end up to the top, and covered everything in masking tape. Here’s what they looked like with the tape, pre-paper maché:
I wouldn’t be able to remove the base materials from these “new” ear shapes after adding paper maché, so unfortunately they’re quite a bit heavier than they were before. I added a couple additional magnets in each ear to help hold them onto the skull.
I then applied just one layer of paper maché onto the new ears. Since I wouldn’t be able to remove the base materials this time, there was no need to build up several layers of paper maché; the base materials themselves would give the ears enough sturdiness.
I then painted the ears again with acrylic paint, let the paint set for a few days, and they were finally done! I’m much, much happier with these new ears! They took way longer to make than I would’ve liked, but in the end it was worth it.
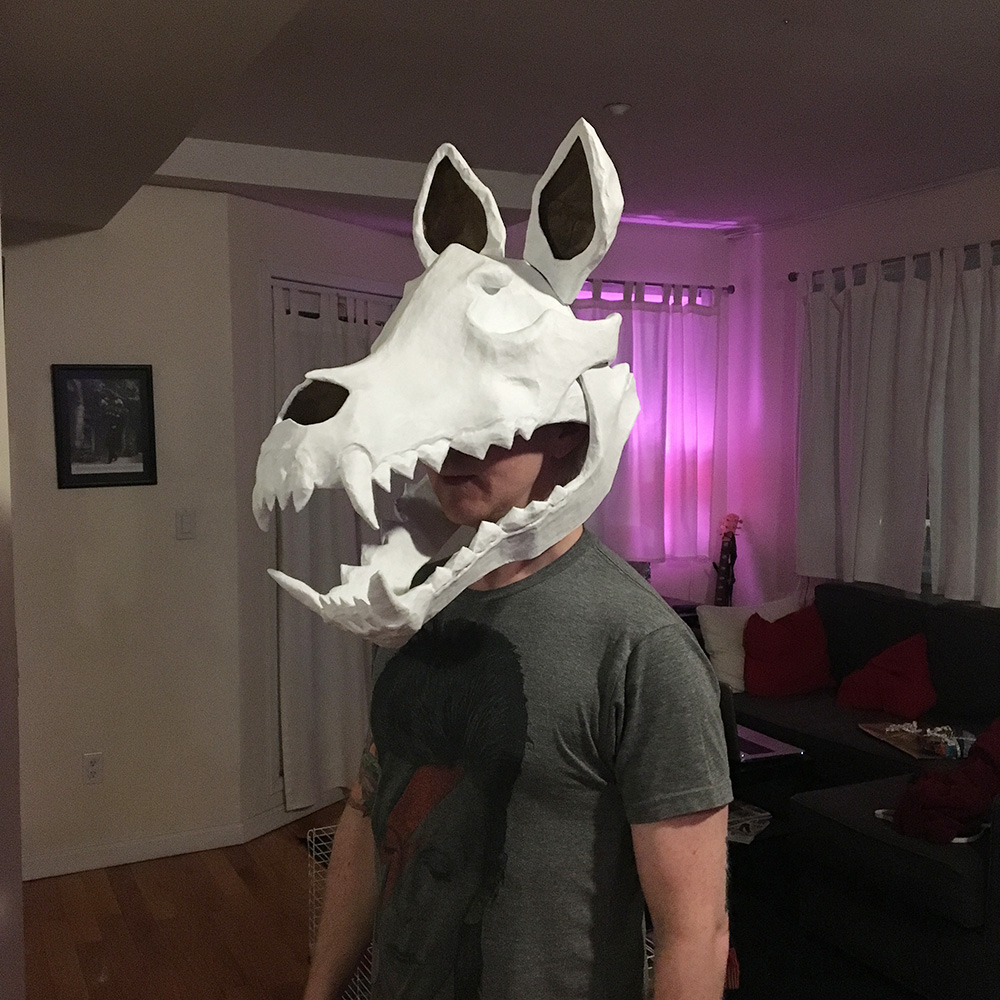
And here’s the finished mask all put together!
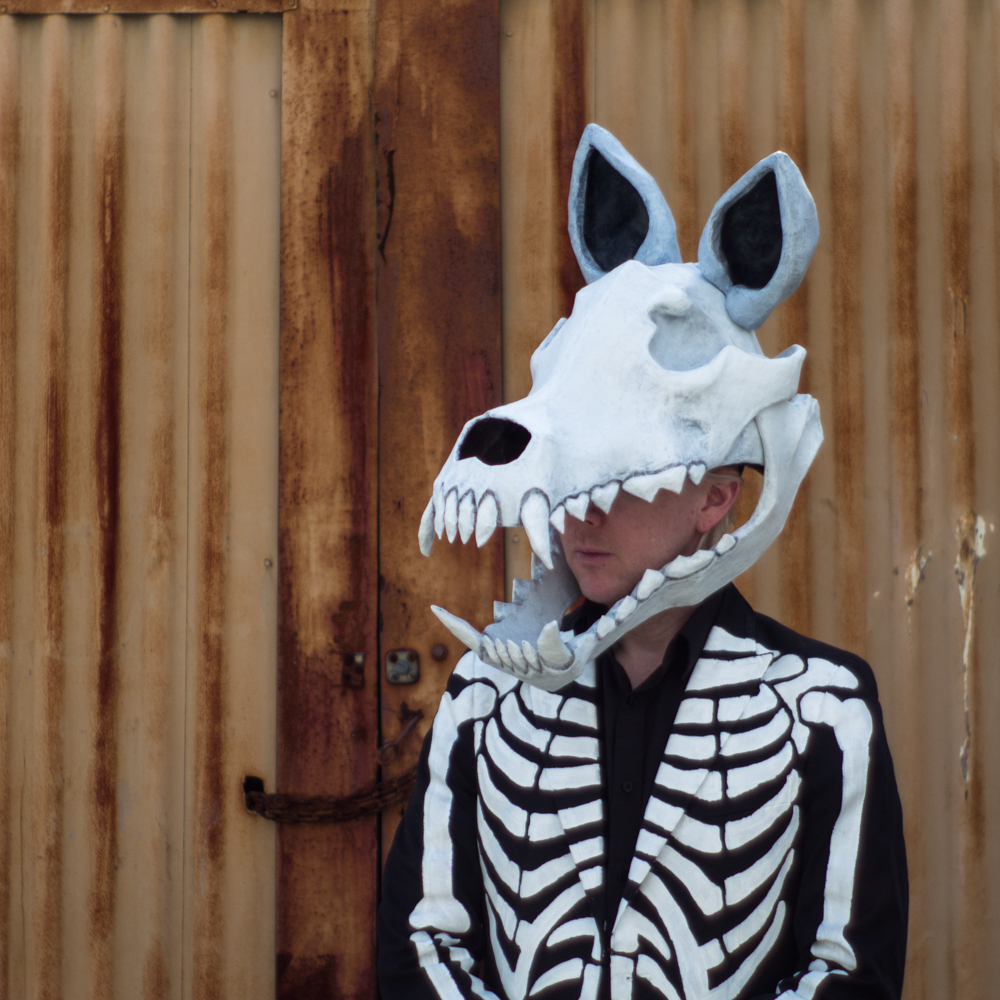

Work in progress pics by me, pretty outdoor pics by Kevin O’mara.
I also made this short 360° video to show the mask from all sides and also to show how the ears attach with the magnets.
So that’s it for this mask! Whew! See you next Mardi Gras!
Back to part 1 of my paper maché wolf skull project.
 About Manning Krull
 How to make a 4-foot paper maché alligator
 My violin skull mask, Mardi Gras 2015
 Three-headed paper maché dragon sculpture
March 2nd, 2017 at 8:41 pm
http://ci.memecdn.com/2640821.gif
March 2nd, 2017 at 9:12 pm
@Bridey Haaaaaaa!