
10-foot grim reaper Halloween decoration!
Published by Manning on June 23rd, 2015
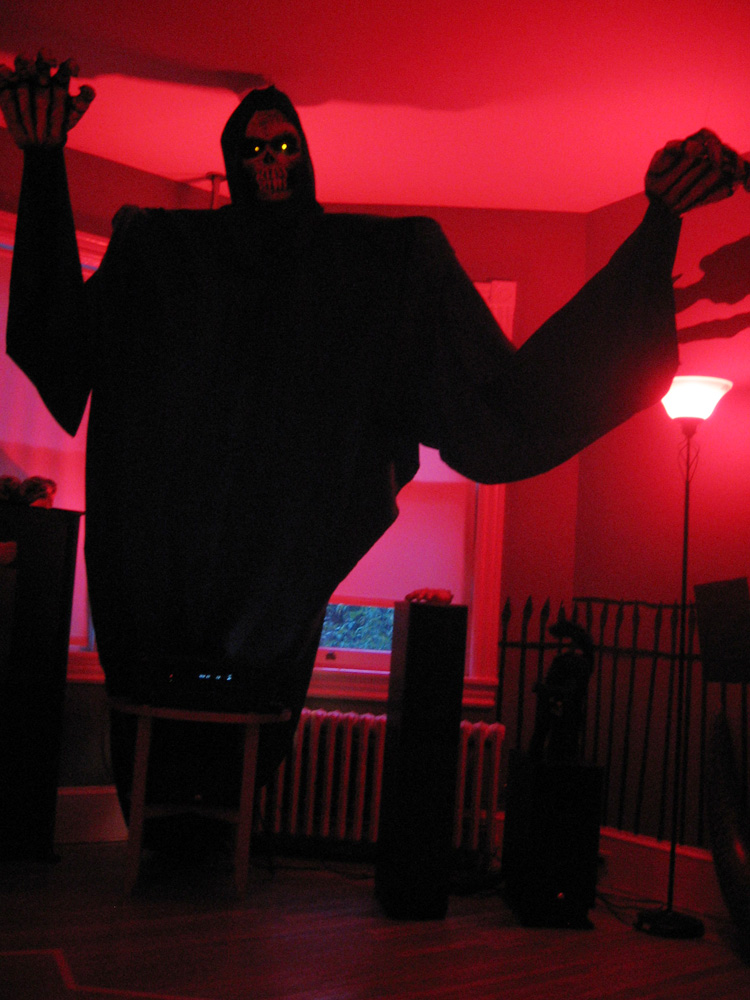
This giant grim reaper prop I made for a Halloween party in 2010 was the first paper maché project I ever tackled! (Well, not counting art class back in grade school.) I seriously had no idea what I was doing but it turned out okay, and my success with this project really inspired me to keep trying to make bigger and more complicated Halloween decorations every year.
I started with the skull face and skeleton hands. I had not yet figured out my preferred paper maché method at this time so I made this stuff a little differently.
I bought a big disposable aluminum foil pan — like you’d use for a turkey or whatever — at the dollar store. I then molded this into a rough skull shape with my hands; basically bending and twisting it into a big skull-shaped aluminum mask. I was able to create decent shapes for the eye sockets and cheekbones and not much else, but this was a good enough starting place.
I then used wadded and rolled paper towels to build up the eyebrow ridges and outer nose shape. I attached all this stuff with masking tape.
Then I started paper machéing; I used watered-down Elmer’s glue (which works, but I really don’t prefer it), and paper towels rather than my usual newspaper and craft paper. I’m really glad I discovered Roman PRO-543 universal wallpaper adhesive (paid link) a couple projects later; it’s way easier to work with and dries stronger than Elmer’s glue.
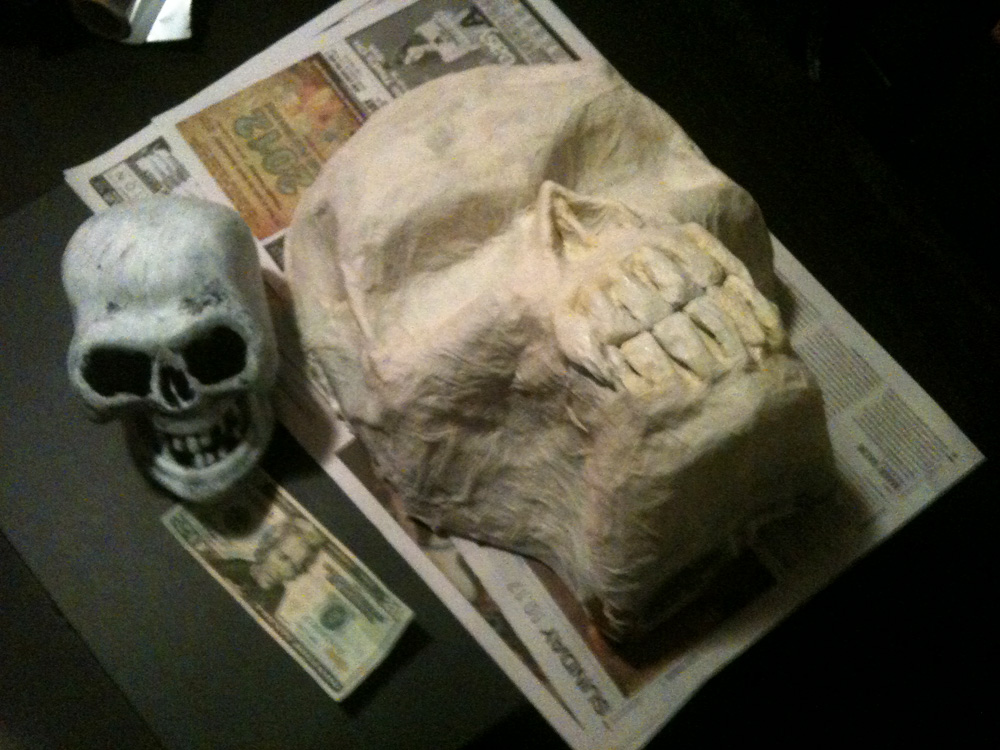
Small dollar store skull decoration and twenty-dollar bill shown for scale, and to prove that I have twenty bucks.
Anyway, I did two layers of paper maché for the face. I then made the teeth of wadded up aluminum foil and paper maché’d over them, and the glue in the paper maché held them in place.
For the hands, I first cut out big poster board hand shapes, and then taped pieces of bendable wire onto them from the wrist to fingertips, and bent them into gnarled skeletal hand shapes. I rolled up newspaper and paper towels for each of the finger bones and hand bones and taped them all in place. Then I paper maché’d over the whole thing with Elmer’s and paper towels; just two layers.
When all of this was dry, I used scissors to cut away the excess aluminum and paper maché from the skull face. I was able to peel the paper maché completely away from the aluminum pan and masking tape, which was great; I was left with an extremely lightweight paper maché skull face.
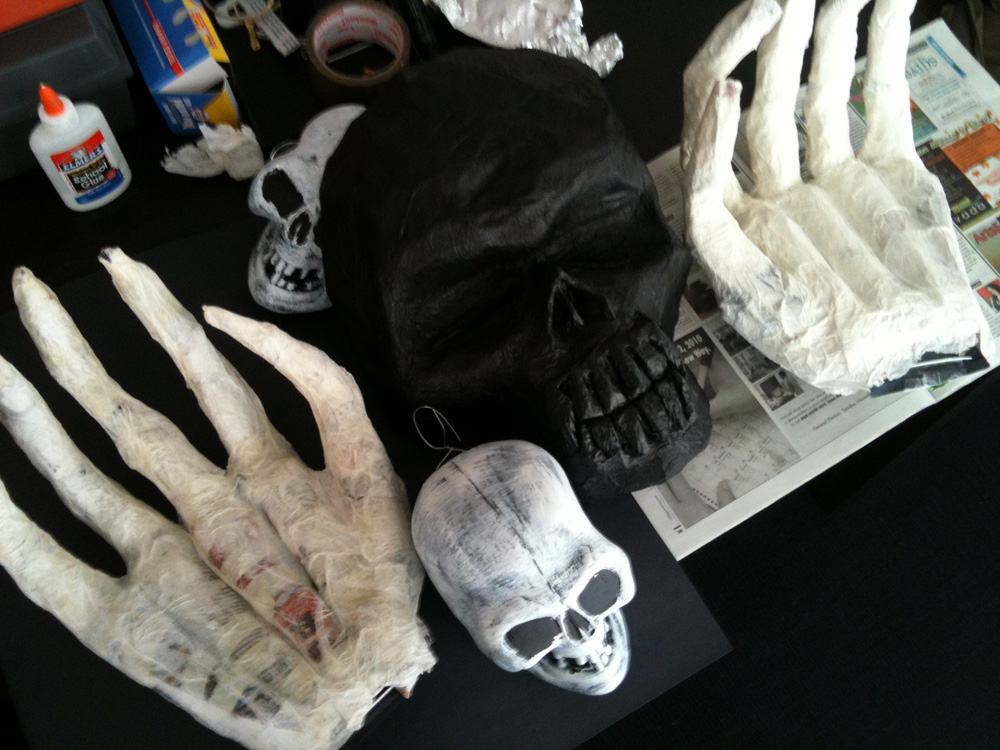
I took the skull face and skeleton hands outside and spray painted them black. When that was dry, I dry-brushed them white. This was a more primitive version of my usual painting process for my big paper maché skull masks and whatnot.
With the face and hands done, it was time to work on the body. I bought the cheapest and lightest-weight black fabric I could find at the fabric store. Nowadays I mostly use cheap plastic table cloths from the dollar store for this kind of thing; that’s definitely the cheapest (but flimsiest!) material you can get for covering big areas. Anyway, I cut and stapled the fabric to make a simple cloak and hood shape.
I used strong, flexible wire to make a long, wide shape that would serve as the arms, shoulders, and head. Since my paper maché skull was just the face, and not a whole head, I used the wire to make a sort of round 3d head shape that could wear the skull as a mask and have the hood fit over it nicely. I twisted a tiny loop into the top of the wire head, and pushed it through the fabric so it stuck out the top. I used this loop to hang the skeleton on the ceiling.
I installed three small hooks in the ceiling; one for the head and one for each hand. I hung the head on a hook by the little loop. For the hands, I attached fishing line to the hands and ran that up to the hooks in the ceiling, and adjusted the length to have the hands hang at the height I wanted.
We got the idea to set up an oscillating fan behind the grim reaper in order to have the lightweight fabric blow and billow a bit; this worked great!
One last thing, I poked small holes in the skull’s eye sockets and inserted two battery powered tealight candles behind them, with the fake flames sticking out. This gave the eyes a nice spooky flickering effect. This was the first time I used this trick, and I’ve done it for a million more projects afterward. It’s a great cheap and easy effect.
I was really happy with the overall look of this grim reaper; he was huge!! And people were definitely impressed when they walked into the room. He was definitely a highlight of that year’s Halloween party.


Happy Halloween!
 About Manning Krull
 How to make a 4-foot paper maché alligator
 My violin skull mask, Mardi Gras 2015
 Three-headed paper maché dragon sculpture
Leave a comment