
9-foot paper maché snake prop!
Published by Manning on October 26th, 2015
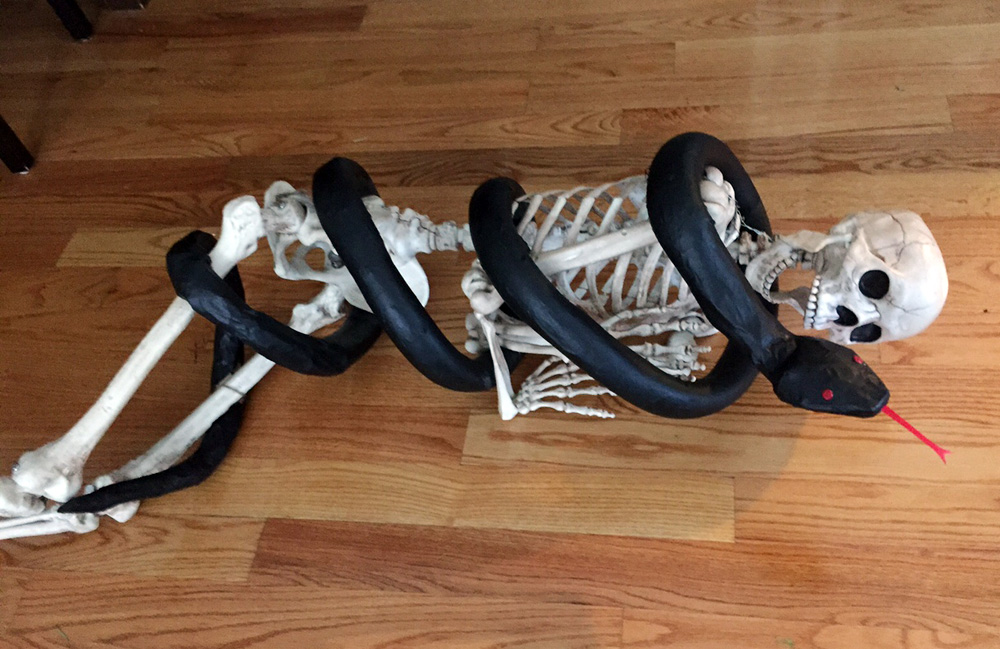
My latest project for my Voodoo Bayou Halloween party: I made this big ol’ snake! He’s made of foam tubing, wire hangers, tape, paper maché, paint, and a few other odds and ends.
I started with a package of black pipe insulation from Home Depot; four one-meter foam tubes for just $3! This stuff is fantastic to work with; extremely lightweight, sturdy, flexible, easy to cut, etc. It’s so great for creating organic-looking shapes that I ended up using a bunch of it on two projects before I tackled the snake: my six-foot bat decoration and a pair of horns for a devil mask I’m working on (pics coming soon). When it was time to start on the snake, I only had two and a half of the one-meter tubes left, so that’s about seven and a half feet for the snake. (I later added a tail made of bubble wrap for a total of about nine feet; more on that below.)
I wanted to make this snake to wrap around one of our lifesize plastic skeletons and cram the whole thing up on top of our kitchen cabinets. While I’m a bit of a perfectionist with most of my projects, I wanted to keep this one extremely simple and quick. Since the snake and skeleton would be up on top of the cabinets, guests won’t be looking very closely at the details, and a good deal of the whole prop would be hidden; no one will see the back side of the prop, nor will they see the top surface since it’ll be up by the ceiling. So I decided to skimp on a lot of the details and just focus on the parts that would be the most visible. I saved a ton of time this way.
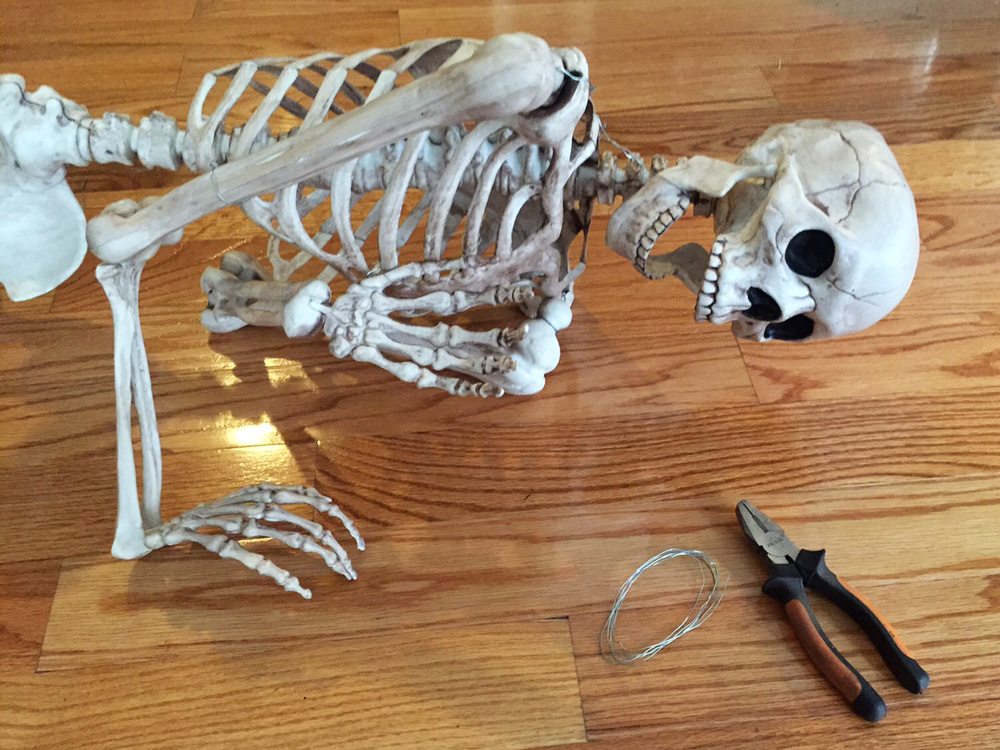
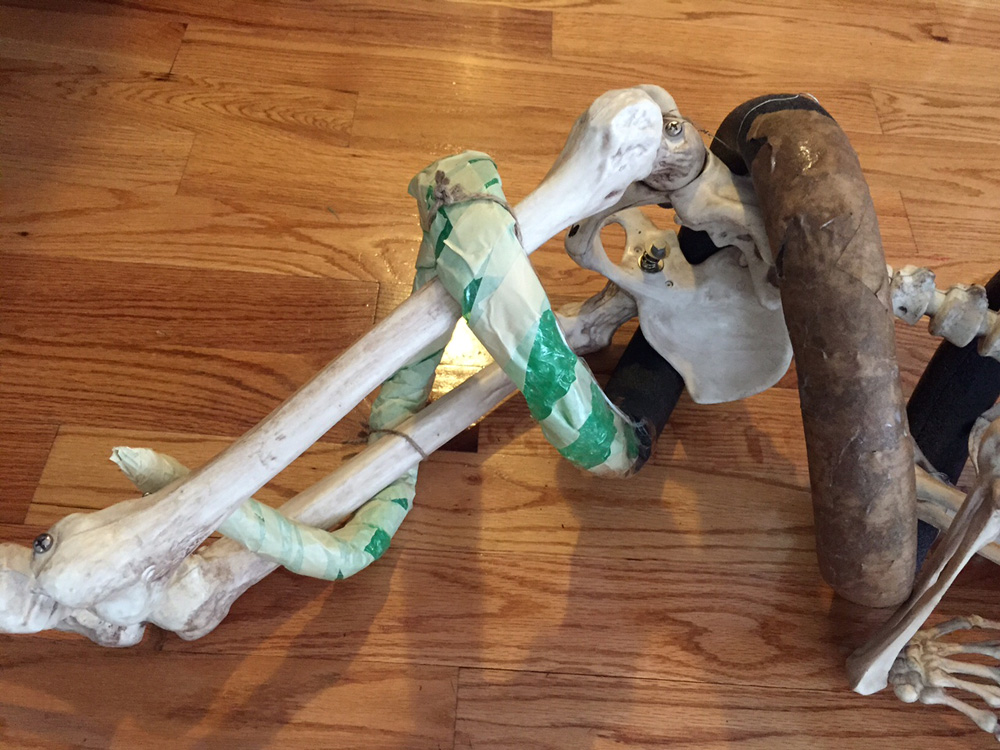
Okay, before I even started on the snake, I had to modify the skeleton first. I have four of these big plastic skeletons, and while they’re posable, they can only be posed in very stiff, unnatural positions. So every year I end up taking them apart and wiring them back together myself so I can give them more lifelike poses. In this case I took off the arms (easy to do with a screwdriver) and wired them back on with some leftover scrap wire; I wanted to position the arms like the skeleton was being squeezed by the snake. I also wired the jaw open and attached it to the collarbone in order to keep the head turned toward the viewer, and I wired the ankles together.
(For contrast, here’s a pic of what these plastic skeletons look like in their unmodified state, below.)

Boring! Mine looks a lot better with everything taken apart and reassembled.
Okay, now for the snake! I didn’t take a ton of pictures of the early steps, because they’re so easy! You won’t need to see every step in order to do this.
First I simply taped my foam tubes together with heavy duty Scotch packing tape.
Then I used wire cutters to take apart four wire hangers. Be careful when doing this! Protect your eyes, and make sure not to cut/stab/pinch yourself. If you’re a kid make a grownup do this part!
I unbent the wire hangers with pliers and got them as straight as possible. Then I bent the ends of each one to make little hooks; basically I just bent about one inch of wire in on itself. Then I connected all the wires into one long piece by hooking all the hooks together, and wrapping the hooked areas in tons of packing tape.
I carefully ran the whole long wire through the foam tubing. Do this slowly so it doesn’t snag and tear holes in the tubing! Once I got the wire all the way out the other end of the tubing, I bent back about two inches of the wire in order to make a big hook to anchor onto the end of the tubing. I taped this in place with lots of packing tape.
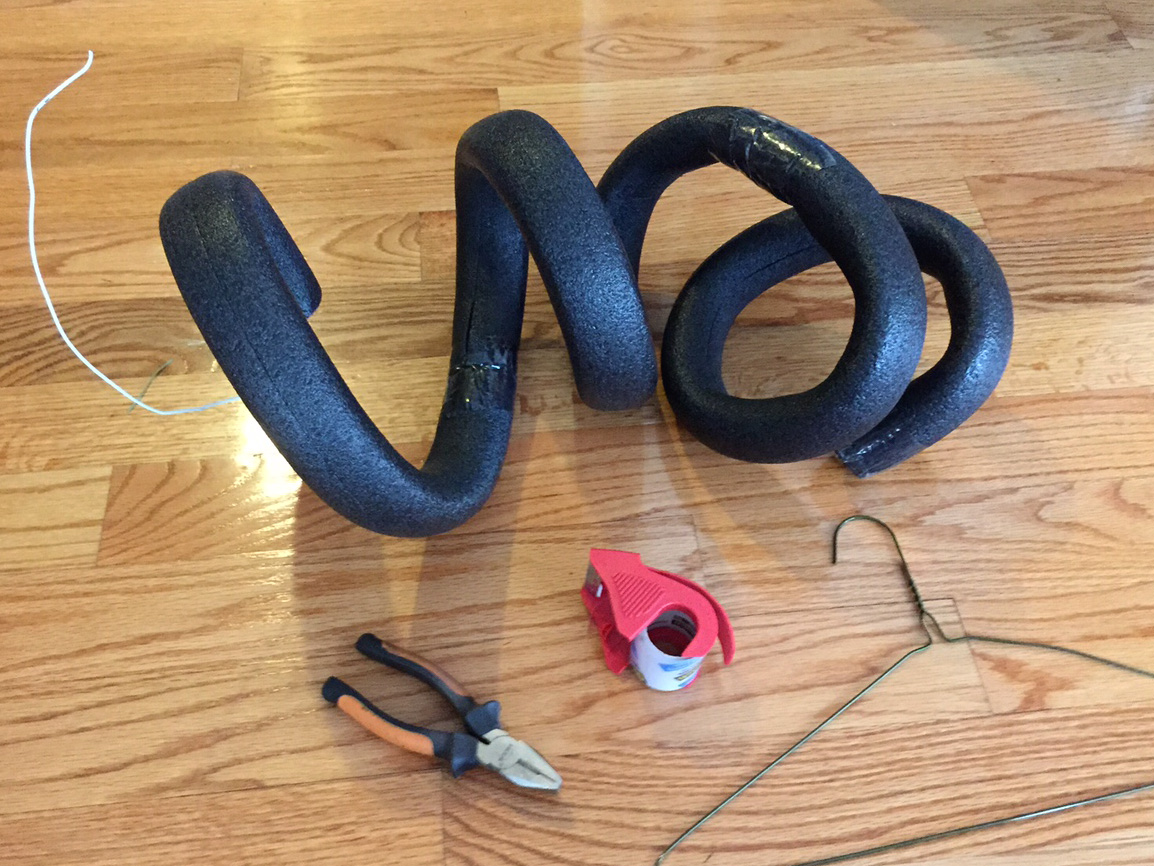
Now it’s time to start winding up the snake! I picked up the tubing and started curving it with my hands. This was easy and only took a few minutes. I basically ran the whole long tube through my hands, bending it little by little in the same direction. When I was done, it was one huge curve. Then I started over and did the same thing again. This time it was more circular and beginning to look like a spiral. By the third time it was really tightening up into a nice spiral snake shape. You want the spiral to be as tight as you can get it, so it will hold onto the skeleton pretty snugly.
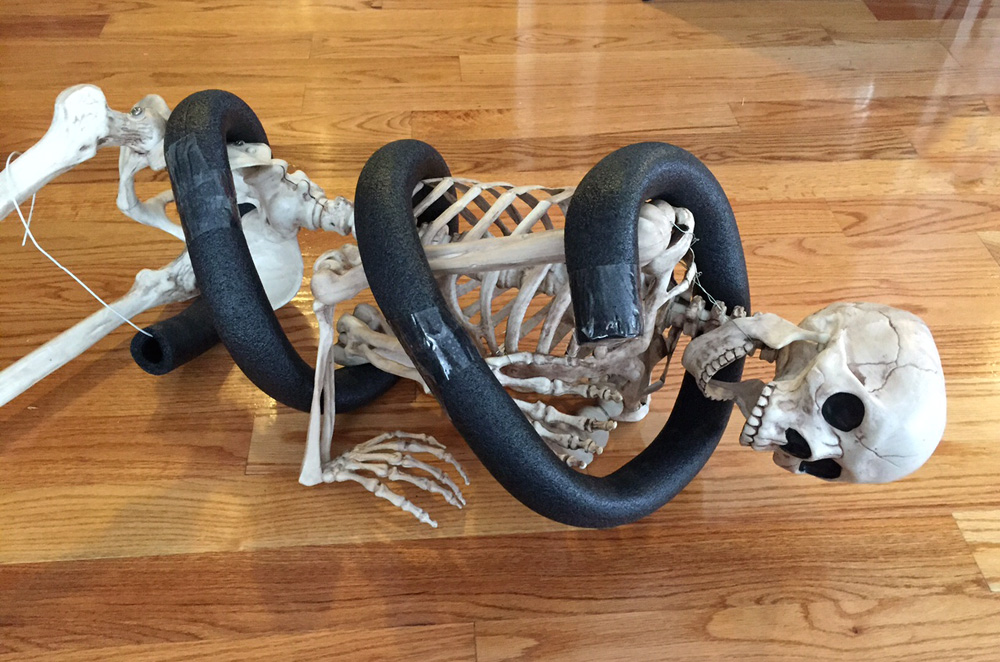
When the spiral was done, I wound it onto my skeleton and positioned one end where I wanted the snake’s head to be.
I attached the spiral tube to the skeleton in a few places with more of that scrap wire. I actually ran out of wire and attached the last few bits with twine. This didn’t look great, but again, no one’s going to be staring at the details of this thing! It’ll be fine.
The snake body wasn’t quite as long as I wanted it, and a bit of wire hanger was still sticking out of the end, so I decided to extend the body with some bubble wrap and make a tail. If I hadn’t used up part of my foam tubing on other projects this wouldn’t have been an issue! However, even if I had enough tubing to get the length I wanted, I’d still need to find a way to taper the tail and bring it to a point, so I probably would’ve ended up making something like this bubble wrap tail anyway.
With the whole body shape done (minus the head), I then did a partial layer of paper maché over the snake body in order to cover up the shiny taped areas and to give me a nice surface to paint. (See my article about my paper maché method and materials here.) I let myself be very lazy and sloppy with this part! I really only covered up the parts of the snake that would be facing toward the viewer. I figured I could paint the paper maché black and blend the black paint onto the black foam, and this turned out fine!
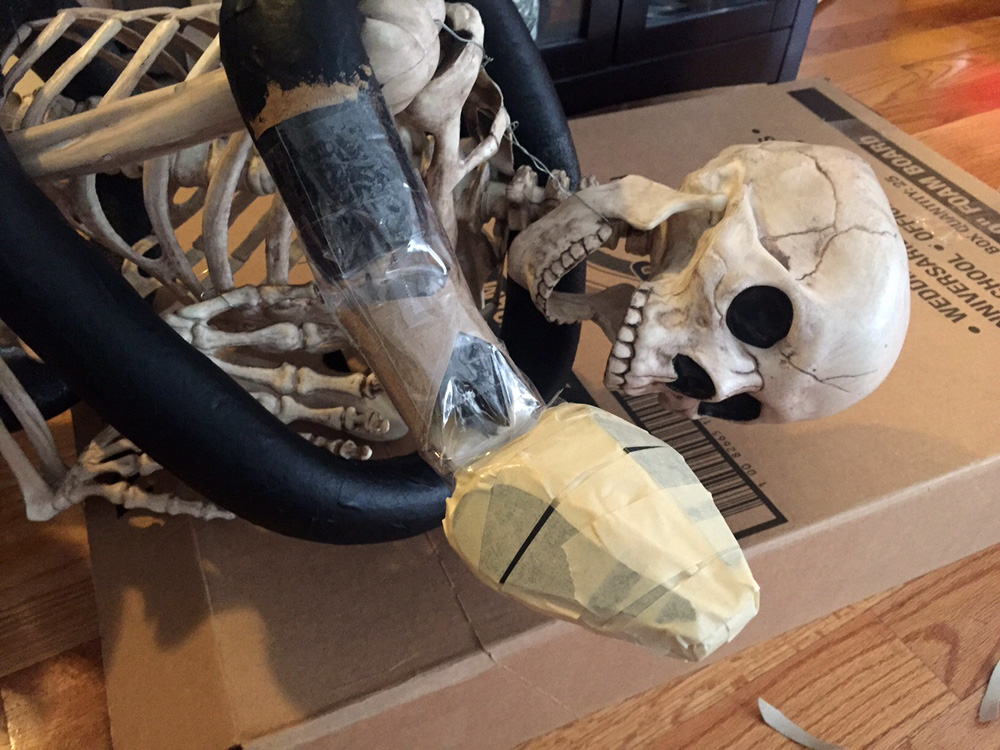
While the paper maché was drying I made the head. Again, I was in a big hurry and did this as simply as possible! I just cut out a head shape from foam board, then cut out two more of the same shape with poster board. I taped some small bits of foam tubing onto each side of the foam board head, then taped the poster board heads onto the top and bottom and curved them over the shape. I then wrapped the whole shape in tons of masking tape to smooth out the shape a bit.
When the head shape was done, I took a toilet paper roll and cut the ends a bit to fit one end onto the snake’s body and the other onto the snake’s head. Added some packing tape to put the whole thing together. And boom, done! Then I did a layer of paper maché over the head and neck.
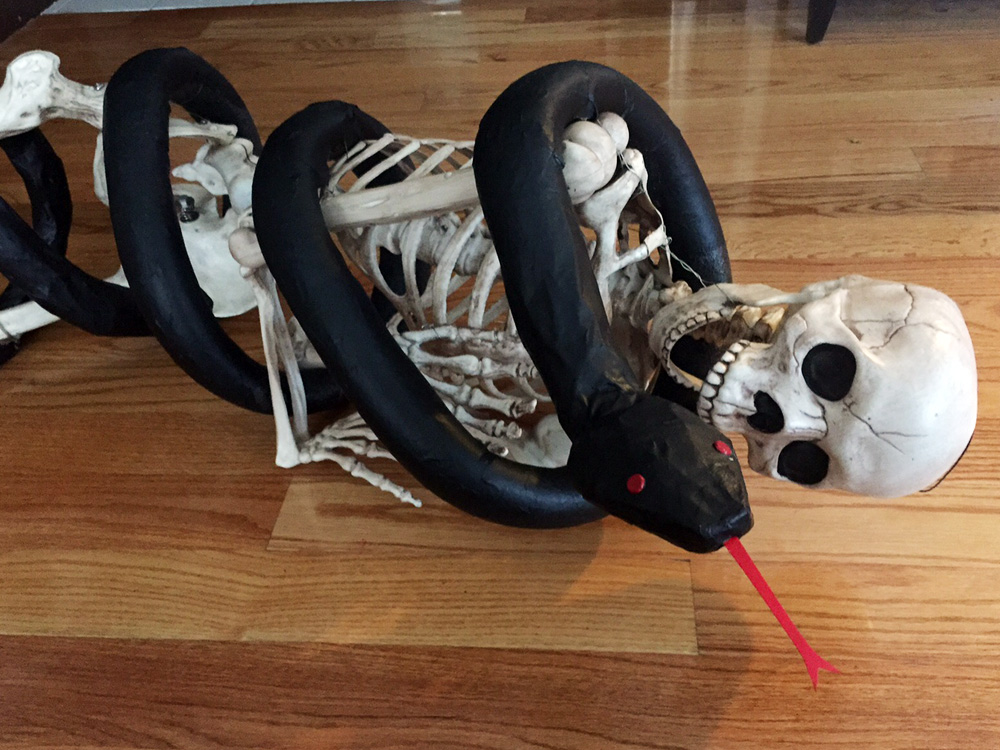
I painted all the paper maché bits with black acrylic paint and a medium-sized brush. I did this in phases so my progress is a bit all over the place in these pics. I’d do paper maché on one part, do some paint elsewhere while the paper maché was drying, etc etc. In the end the black-painted paper maché parts blended into the exposed black tubing parts really well; better than I expected. In the low lighting of the party no one will notice that the textures are slightly different.

Next was the eyes and tongue. These were a cinch. For the eyes I took two small brass fasteners and snipped off the long parts with wire cutters, then I painted them red. When they were dry I glued them on with Elmer’s wood glue; I scored the area a little bit with an X-acto knife first in order to give the glue a better surface to hold onto. I cut the tongue shape out of poster board and painted it red. When it was dry, I stabbed a hole into the front of the snake’s head with an X-acto knife, put some wood glue on the tongue, and inserted it into the slit. Easy!
And that’s it! If I had more time, I’d paint a snake scale texture on the snake with an old fishnet stocking and some spray paint (wrapping the skeleton in a trash bag first to protect him). I simply don’t have time this year before Halloween! But this project was so easy I’d love to do more snakes like this someday, and I’ll be sure to give myself enough time to paint some scales.
Another fun thing you could do with this kind of project is make a wearable snake as part of your Halloween costume; you could have the snake wrapped around your body and have the mouth biting onto your neck! I’d love to do that one of these days, if we ever do a jungle theme party, or an Egyptian tomb party, etc.
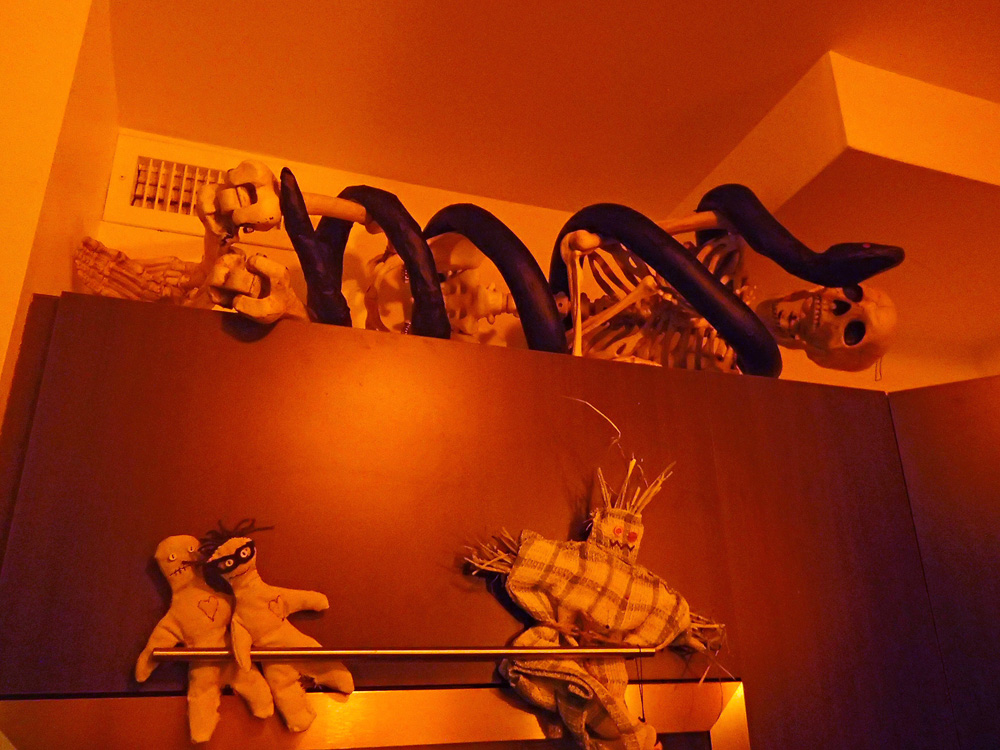
Update: Here’s the snake up on the cabinets during the Halloween party!
 About Manning Krull
 How to make a 4-foot paper maché alligator
 My violin skull mask, Mardi Gras 2015
 Three-headed paper maché dragon sculpture
October 12th, 2023 at 1:32 pm
I’m here for the snake mache as I’m working on my medusa costume for this year!thanks again!!!