Cuckoo clock skull mask, Mardi Gras 2016
Published by Manning on February 9th, 2016
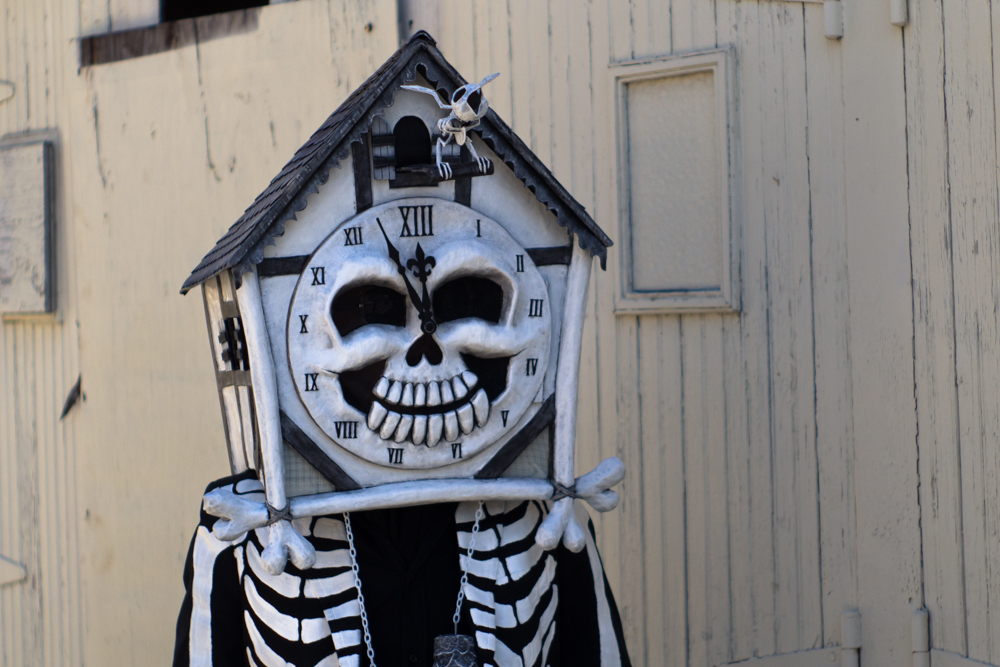
Behold my cuckoo clock skull mask for Mardi Gras 2016! Wow, this one was complicated and fun! Here’s the short version…
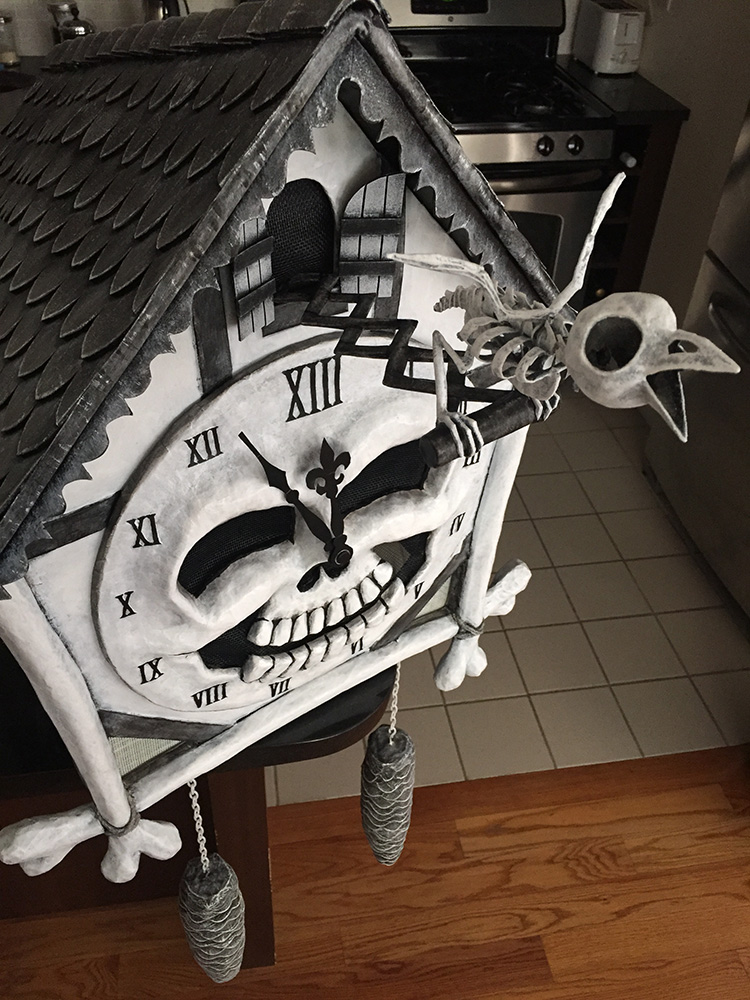
This mask was made up of a lot of individual paper maché parts that I built separately and assembled. Here’s a very quick rundown of the parts and what they’re made of:
- skull face: foam board and clay for the base, paper maché
- house-shaped clock body: foam board, paper maché, craft foam for the beams
- roof: foam board, craft foam shingles
- bones: foam board, foam tubing, masking tape, paper maché
- clock hands: poster board, masking tape, magnets
- Roman numerals: poster board
- pine cone weights: foam tubing, craft foam, paper maché, plastic chain
- doors/window shutters: craft foam
- bird skeleton: a million things; details here
- pantograph (extending platform) for the bird: wire hangers, paper maché
- hinge mechanism: plastic folder, magnets
- mask interior: hard hat, styrofoam blocks
- interior counterweight: poster board, pennies
- plus lots of spray paint and acrylic paint everywhere, and matte spray to finish
Here’s the (very) long version! This is part one; see part two, part three, and the article I wrote about the little bird skeleton.
Making the skull face
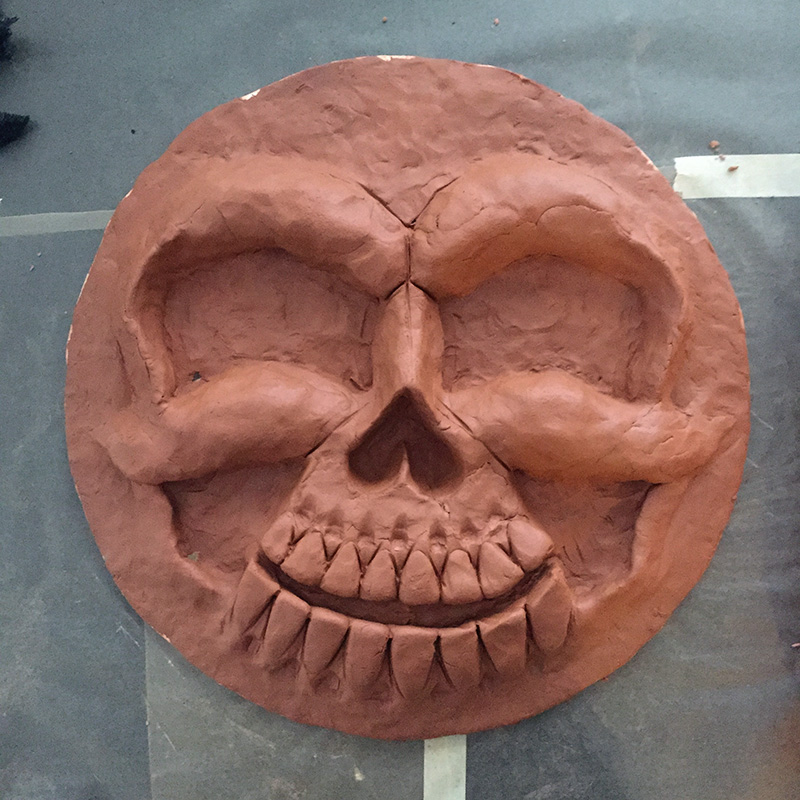
I started with the skull face; I made this in a very similar manner to what I did the previous year for my violin skull mask.
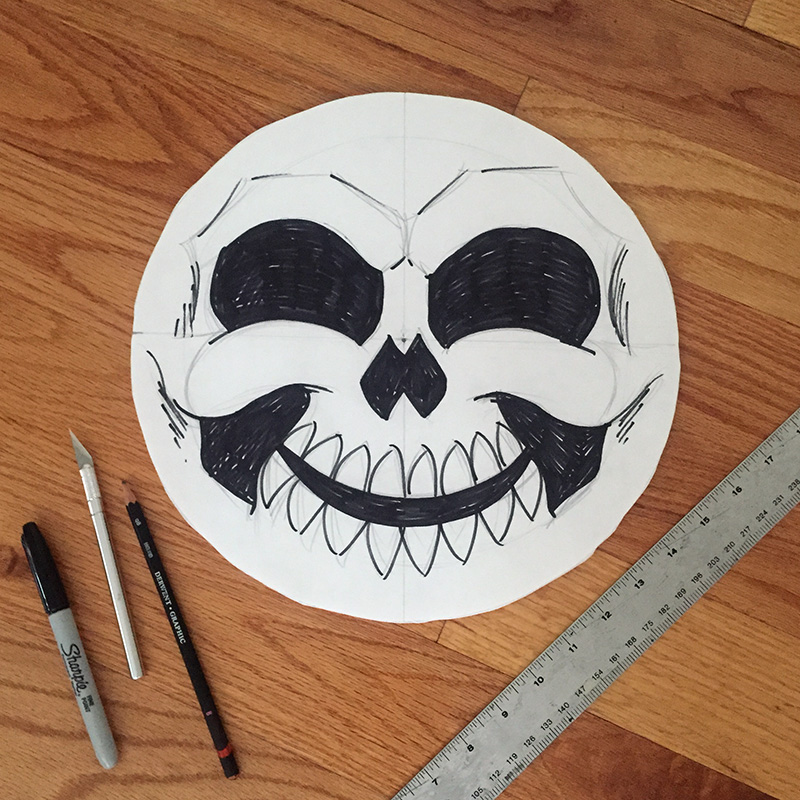
I began with a circular foam board base, and sketched my skull face on that.
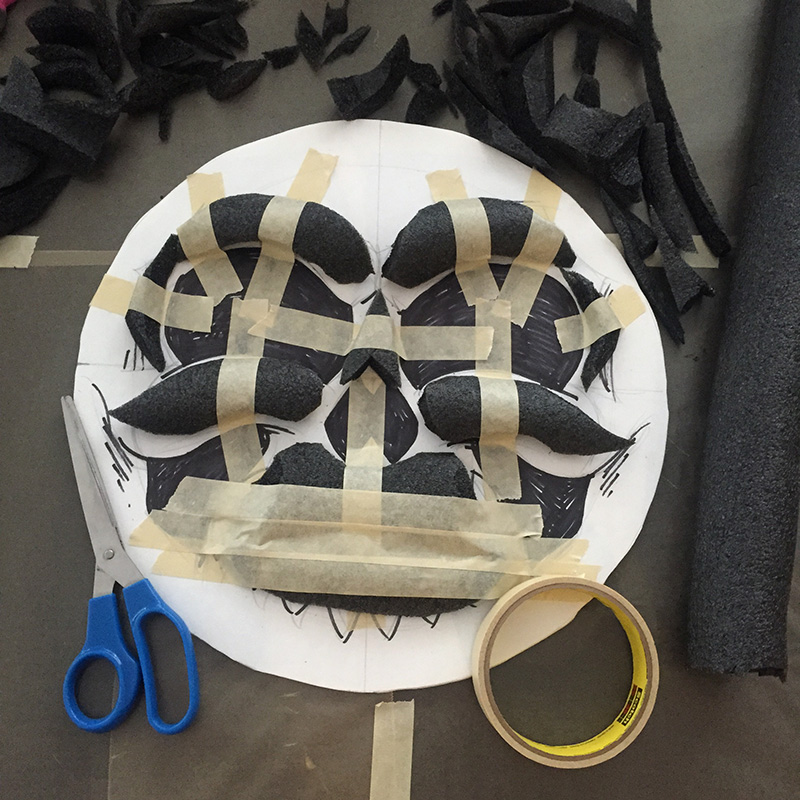
I then cut some pieces of foam pipe insulation tubing for the biggest shapes — cheek bones, brow ridges, front of the jaw — and taped them in place.
I sculpted the face with one pack of Activa Plus clay (reddish-brown this time) and gave it several days to dry completely. A strange thing happened this year that didn’t happen last year — the clay shrank as it dried! The foam board disk curled slightly inward, and the outer edges of the clay actually receded away from the outer edges of the foam board by about a quarter inch. The facial features didn’t noticeably shrink or change, so really it was no big deal. The thinnest outer edges of the clay cracked and broke a bit, which was scary but turned out not to matter. I always cover the whole clay skull face with thin strips of masking tape before starting the paper maché; this serves as a release agent for the paper maché, meaning it makes the clay easier to remove from the interior of the finished paper maché face. In applying the masking tape I was able to tape all the little broken pieces back in place nicely and cover them with an additional layer of tape to smooth out where the cracks were. By the time I was doing the first layer of paper maché you couldn’t tell that the base was somewhat cracked and broken.
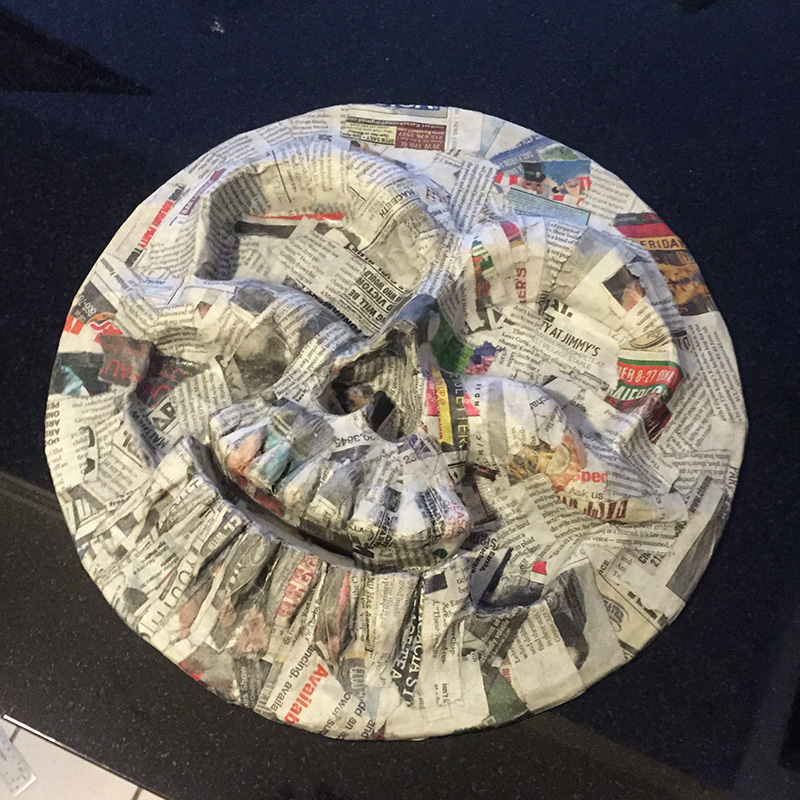
So, I applied six layers of paper maché to the skull face over the course of a few days, alternating newspaper and craft paper; see my article about my paper maché method and materials here. The short version is: I use Roman PRO-543 universal wallpaper adhesive (paid link) and alternating layers of newspaper and brown wrapping paper.
I always end on a layer of brown craft paper rather than newspaper, to make painting a bit easier, and I always do a final coat of just paste, smoothed all over the mask with my hands. This helps the finished face look nice and smooth and even.
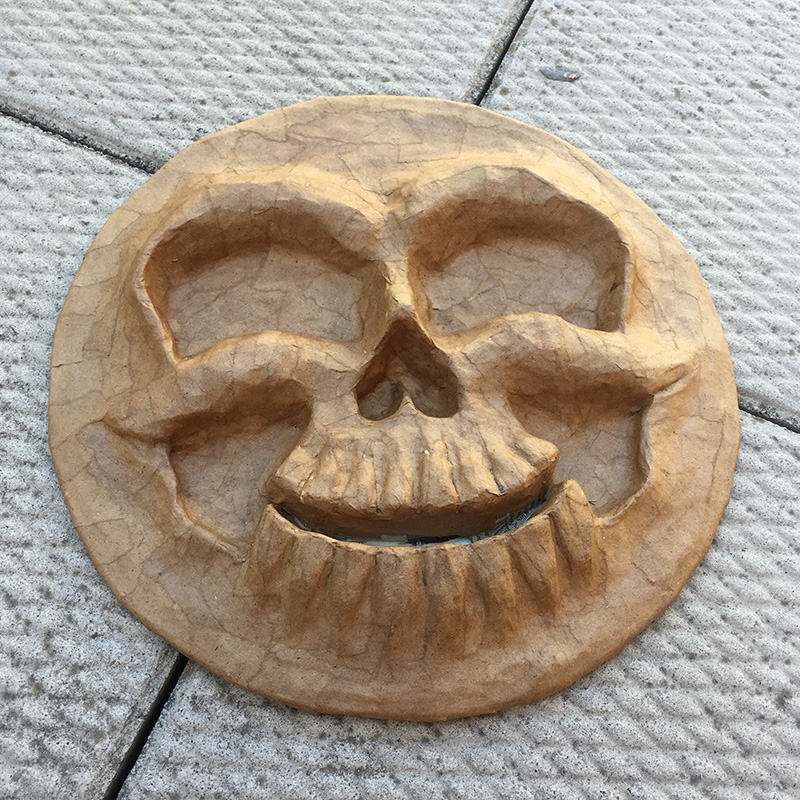
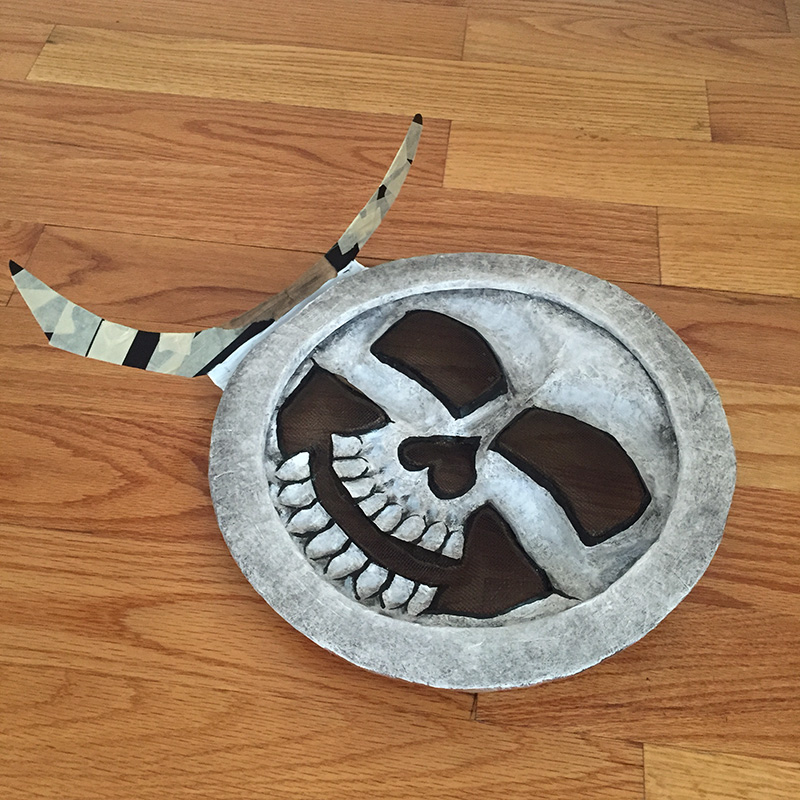
When the face was all done and dry, I flipped it over and sliced open the foam board on the back with an X-acto knife. I then removed all the clay and foam — the bigger pieces of clay were surprisingly hard to break up and remove! — and then I carefully peeled away all the masking tape, leaving me with a very lightweight and sturdy skull face that’s just paper and glue.
I cut out the eyes, nose, and mouth holes with an X-acto knife, and then reinforced all the edges with tiny pieces of paper maché.
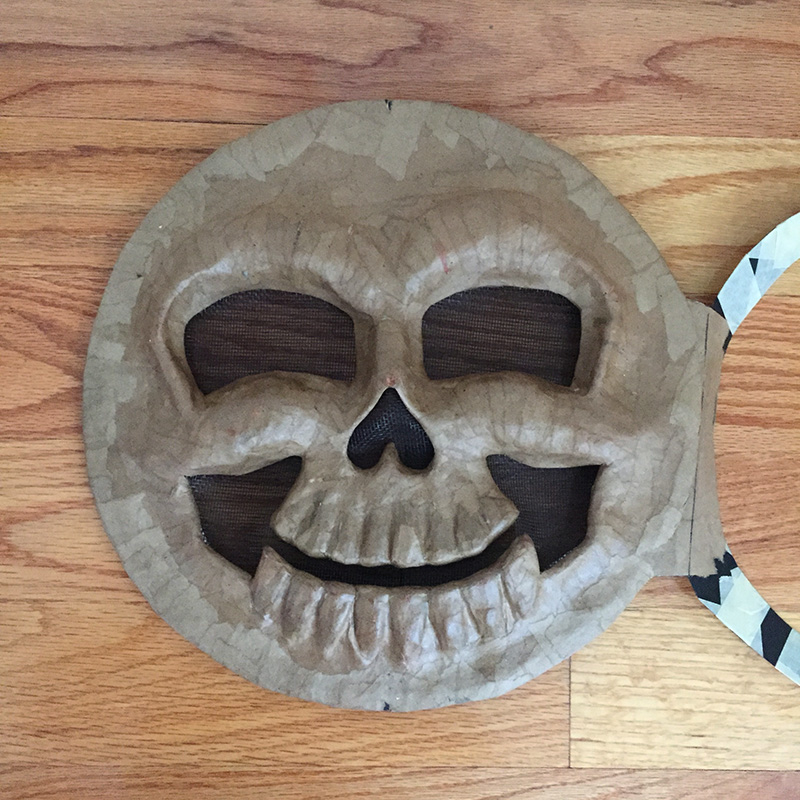
A friend of mine gave me the great idea of turning the skull face into a door that can open (video here!) — much more convenient for drinking! I considered using a metal hinge for this, but ended up doing something even easier; I bought a sturdy plastic folder, cut it to shape, and used that as the hinge. The skull face is mounted on a ring of foam board (you’ll see that on the interior face pic coming up), and I attached the plastic folder in between the skull face and the foam ring. I used masking tape to get all these pieces in place and then covered everything with a couple layers of paper maché. The end result was nice and sturdy. Much later I attached the face and hinge to the house-shaped clock body. More on that coming up.
I also installed some magnets to keep the door closed. I bought these at Home Depot; they’re tiny ring-shaped magnets that are super strong. I used an X-acto knife to dig out two small holes near the edge of the skull face, stuck the magnets in, and put some heavy duty packing tape over them so they can’t tear their way out. I then applied some paper maché over them. I later did this on the front walls of the clock as well. More on that in a bit. (Note: before putting the magnets in the mask, I did some tests with varying numbers of layers of tape and paper maché to work out the right strength for the door — for me the right combination was two magnets in the face connecting to two magnets in the body, each magnet with one layer of tape and two layers of paper maché, plus paint, of course.)
Since the face will open like a door, this is the first time I’ve ever had to worry about what the inside of the mask looks like! The interior of the paper maché was a little ragged from where I’d torn out all that clay and foam and tape, so I covered it with another layer of paper maché inside to smooth it out.
I cut out pieces of black plastic screen to go in the face holes; you can buy this stuff in a big roll, like for a screen door. I taped them in place from the back, and then applied some paper maché around the edges inside the mask to make the mask interior look a little neater.
I decided to paint the interior of the skull before attaching it to the body, since it would be so much harder to get at once it’s attached. I protected the black screen areas with blue masking tape (the kind that’s really easy to remove), and then painted the inside of the skull with black and white acrylic paint, using brushes and a sponge See my article about my painting process. No spray paint for this part.
Making the house-shaped clock body
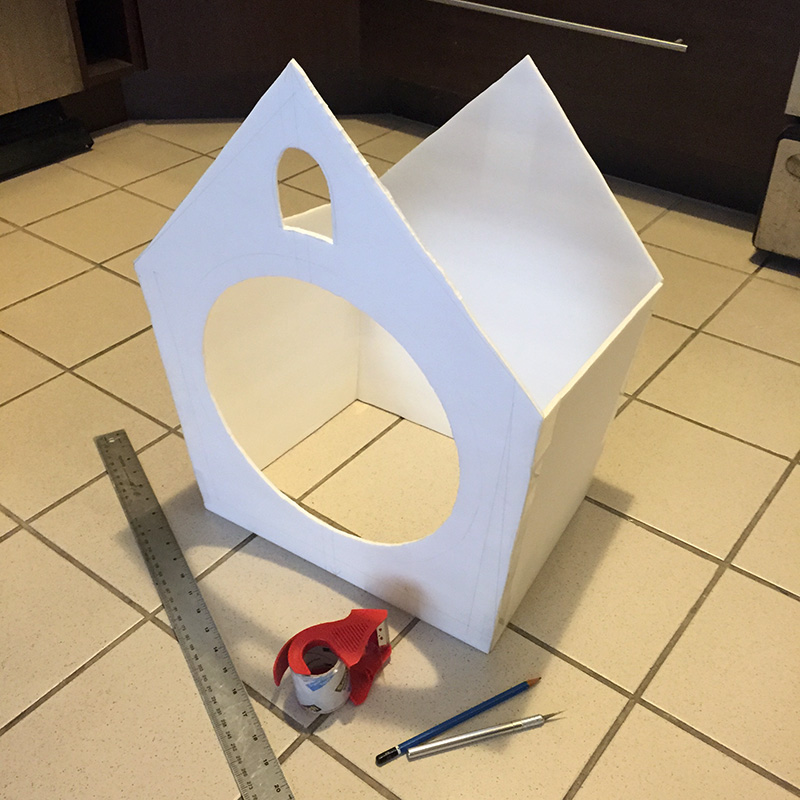
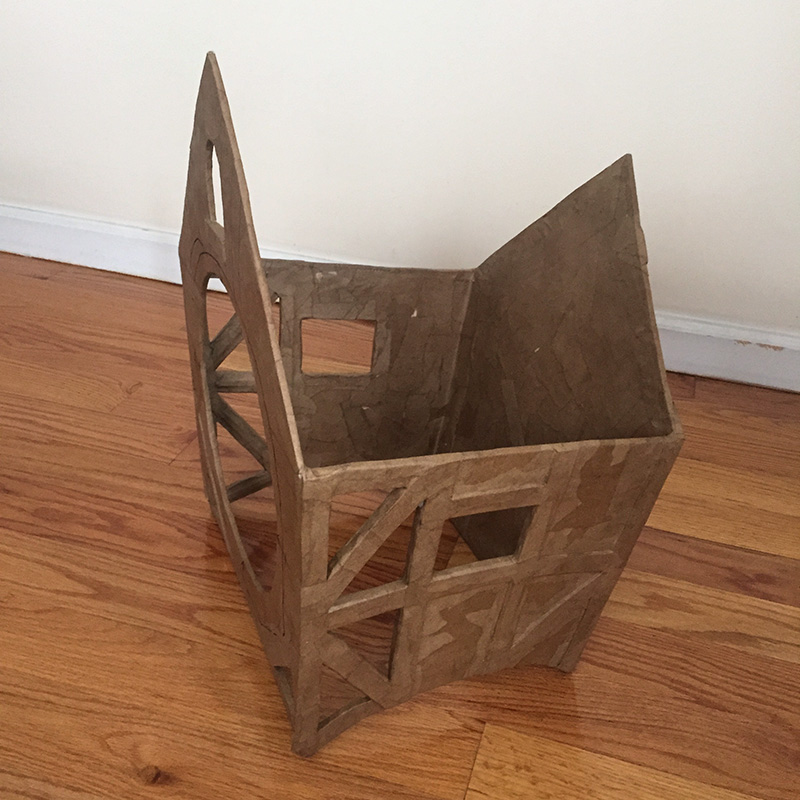
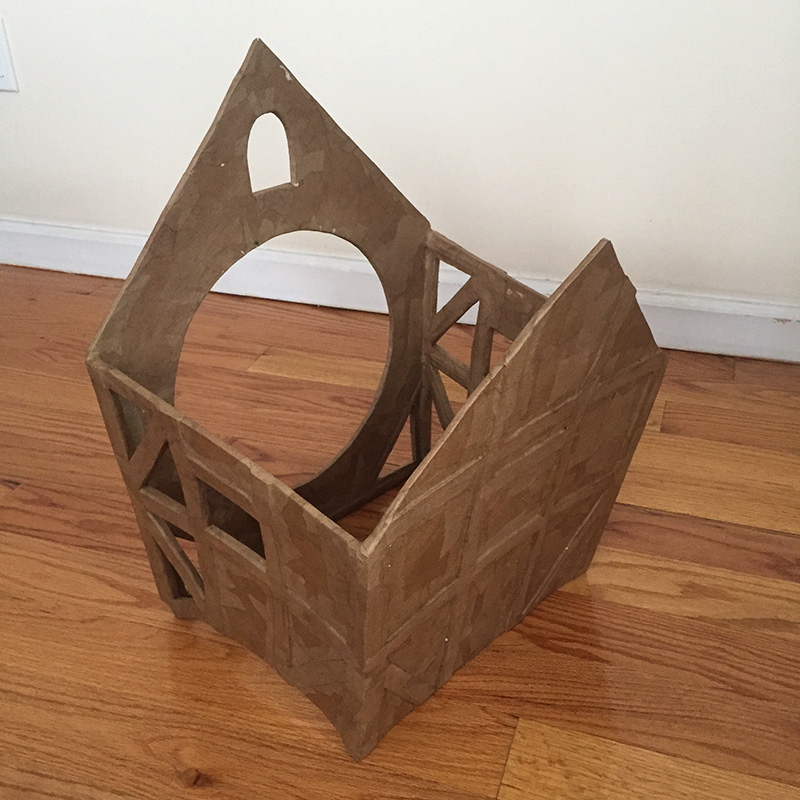
I sketched the clock shape on paper to figure out the dimensions, and then cut out the walls and roof panels from a few sheets of foam board. I cut out the large circular hole for the face and the smaller door where the bird comes out, and then I assembled the four walls with Scotch heavy duty packing tape. I put the roof panels aside to work on later.
The angles of the clock shape are a bit unusual. As you can see, the front of the clock is narrow at the bottom and gets wider toward the top. On top of that, I made the back panel smaller than the front panel, so the whole clock has the illusion of getting larger from back to front. This means the side walls have to do the same thing: they’re less tall at the back edge and taller at the front. Same for the roof panels (coming up). I like making irregular shapes like this because they have a little more life and movement to them. If the whole clock were a perfect box shape with right angles, it would be relatively lifeless-looking. The downside of working with these weird dimensions is that it’s much more challenging to get all the pieces to line up correctly! Lots and lots of measuring and sketching involved, and sometimes some math.
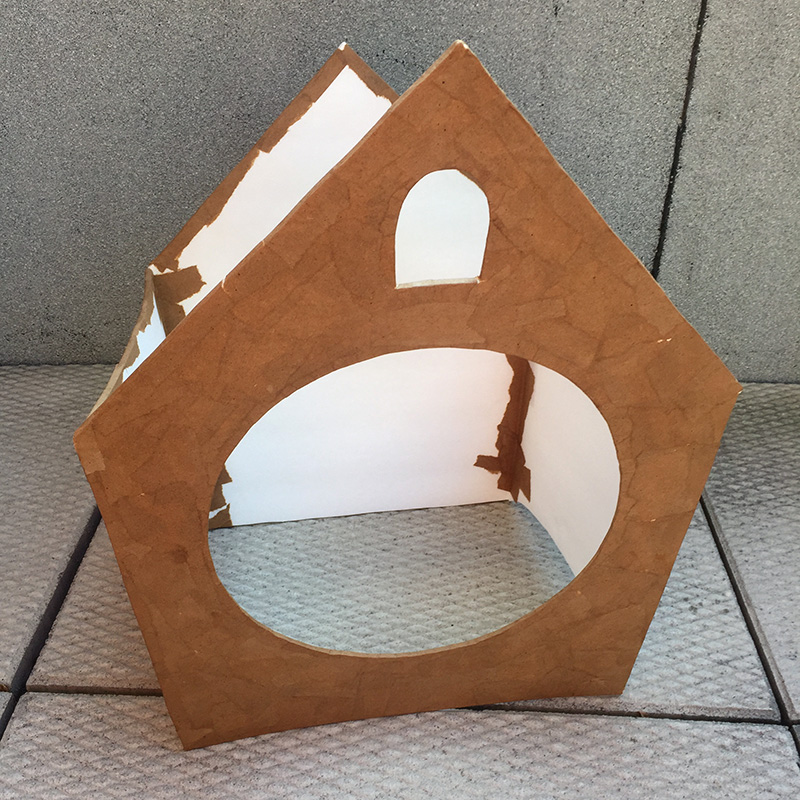
I applied a layer of paper maché to the exterior of the assembled walls, and a couple strange things happened! First, when the paper maché dried, the walls all curved inward. This probably had something to do with the fact that I only put paper maché on the exterior, and it shrank as it dried. I actually really liked how this looked! But then the next day I noticed the paper maché had actually lifted away from the foam board, creating a tight, drum-like surface on all four walls. I figured out why this happened: the cheap foam board I use has a thin sheet of paper on each side, and I’ve noticed it’s fairly easy to peel off. As the paper maché dried and shrank, it pulled this paper surface right off of the foam board! So the end result was a curved foam board wall, with a layer of paper maché raised up off of it, pulled tight. I was a little concerned this shape would be prone to breaking, due to the tension of the paper maché surface, so I decided to fix it. I sliced open the paper maché with an X-acto knife in a big asterisk-pattern, and then glued the pieces back down on the foam. This did the trick. The paper dried nice and strong and remained stuck to the foam. The walls remained slightly curved but less so than before, and they feel nice and strong now. I did three layers of paper maché on the exterior of the walls and one layer on the interior, with an extra couple layers inside all the corners to reinforce them a bit.
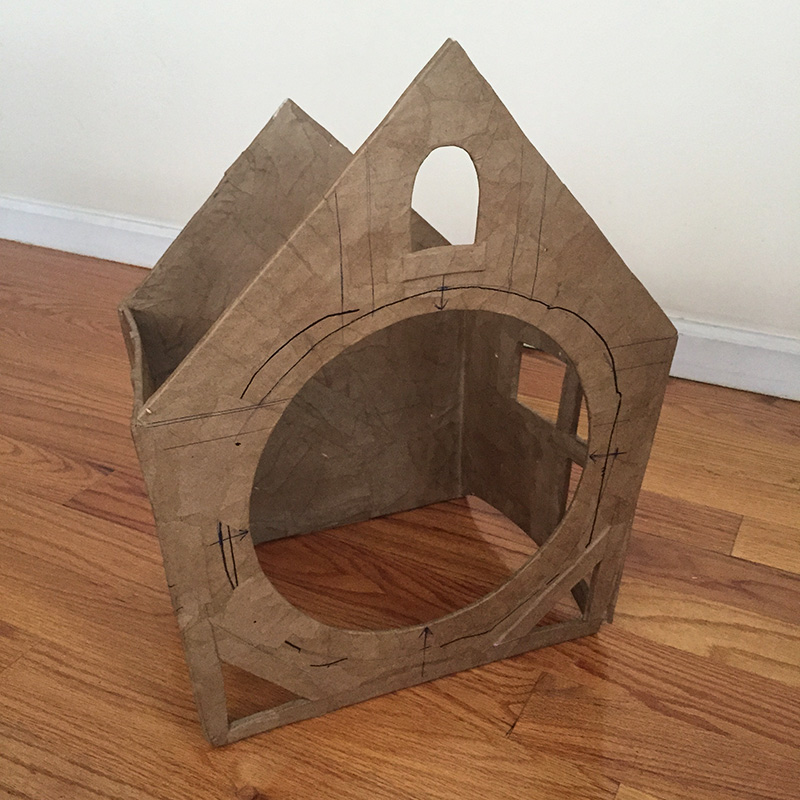
I made the exposed beams out of craft foam, glued them on, and applied a layer of paper maché over them. Easy.
I later decided to cut out a bunch of holes to give me more places to see out of and better air circulation. I reinforced the narrow beams and walls with flat wooden coffee stirrers; I taped them in place inside the mask and then covered them over with masking tape and then paper maché.
That’s it for part one! Next up: building the roof, window shutters, etc, in part two (or skip ahead to part three or the bird skeleton!).


 About Manning Krull
 How to make a 4-foot paper maché alligator
 My violin skull mask, Mardi Gras 2015
 Three-headed paper maché dragon sculpture
December 29th, 2020 at 6:39 pm
Your work is incredible,I want to learn to make a giant mask…I will have to study your work.Wish you lived near Madison, Wi
I have been trying to figure out how to make a copy of a mask I have for years!!! Your idea may help me achieve it.
Thank you
Lori
December 30th, 2020 at 3:00 pm
Thanks Lori, I hope you’ll go for it! Feel free to shoot me an email if you want any tips! If you send me a photo I’d be happy to take a look and let you know how I’d approach it. manning@manningkrull.com
January 6th, 2023 at 9:33 pm
This is awesome I wanna make this for next Halloween but can u put more pictures of each steps of how to make these instead of reading everything English is not my first language. Im still confused on how the paper mache would sit on the helmet? Thanks