
Experiment time: paper maché and wood filler
Published by Manning on January 14th, 2019
One thing about working with paper maché is that it’s very time consuming, because you’ve gotta do lots of layers and they all take a long time to dry; most of my big masks and sculptures need at least seven layers of paper to be thick and sturdy enough. I’m always looking for any kind of shortcuts that might speed up the process of building up a surface that’s nice and strong, while also keeping the cost of materials in mind.
Recently I did an experiment with paper maché versus plaster of paris cloth, and the result was that substituting plaster cloth for some of my layers of paper maché did help speed up the time, but there were a lot of cons that made not really want to use it again — it’s much heavier, more expensive, etc.
My friend Kevin suggested I try Elmer’s wood filler — partially with the same goal of replacing layers of paper and speeding up my process, but the wood filler has other great uses in masks and sculptures as well. I’ll talk about this at the end of this article…
Wood filler as a replacment for paper maché layers
I’m currently in the process of making a dozen paper or so maché severed heads for Halloween, and I’m using this project as an experiment in trying different combinations of types of paper, types of paste, etc. I’m using styrofoam heads as a mold, and then creating rough paper maché copies of these to use as a base, and then sculpting faces on them, painting, adding hair, etc. When Kevin suggested the wood filler, I decided to do use it in a couple of these basic head shapes and see how the results compare.
For most of my heads I used my normal paper maché process of alternating types of paper — newspaper, brown paper, and in some of the heads, cheap C-fold paper towels — and my usual Roman brand wallpaper adhesive. You can read about my paper maché process and materials here.; the short version is: I use Roman PRO-543 universal wallpaper adhesive (paid link) and alternating layers of newspaper and brown wrapping paper.

After some experimenting I settled on five layers as being the sweet spot for these heads — five layers of paper ends up being just the right amount where the head shapes are sturdy enough for me to sculpt faces on them with clay and not have them get crushed while I’m working on them.
So, with the wood filler, rather than do five layers of paper, I decided to do one layer of paper, then one layer of wood filler, and then a final layer of paper — so the wood filler is effectly replacing three layers of paper maché.
I started with my normal process for these heads: I wrapped the head with a plastic bag and masking tape, then applied one layer of paper maché, and let that dry completely. Now it was time for the wood filler.
I had no idea what it would be like to work with wood filler, and I read that it’s normally applied with a putty knife, so I got mine ready. However, after I put on nitrile gloves and opened up the tub of wood filler and scooped up a tiny bit of it with my hands, I realized it would be easy to just apply it all over my head shape with my hands. I expected the wood filler to be somewhat hard and dense like clay, but it’s much softer than that; more like Play-Doh. In the end I didn’t use the putty knife at all.
Here’s one of my regular paper maché heads (left) next to the other head as I covered it with wood filler (right). You can see the open tub of wood filler, and the putty knife that I ended up not using:
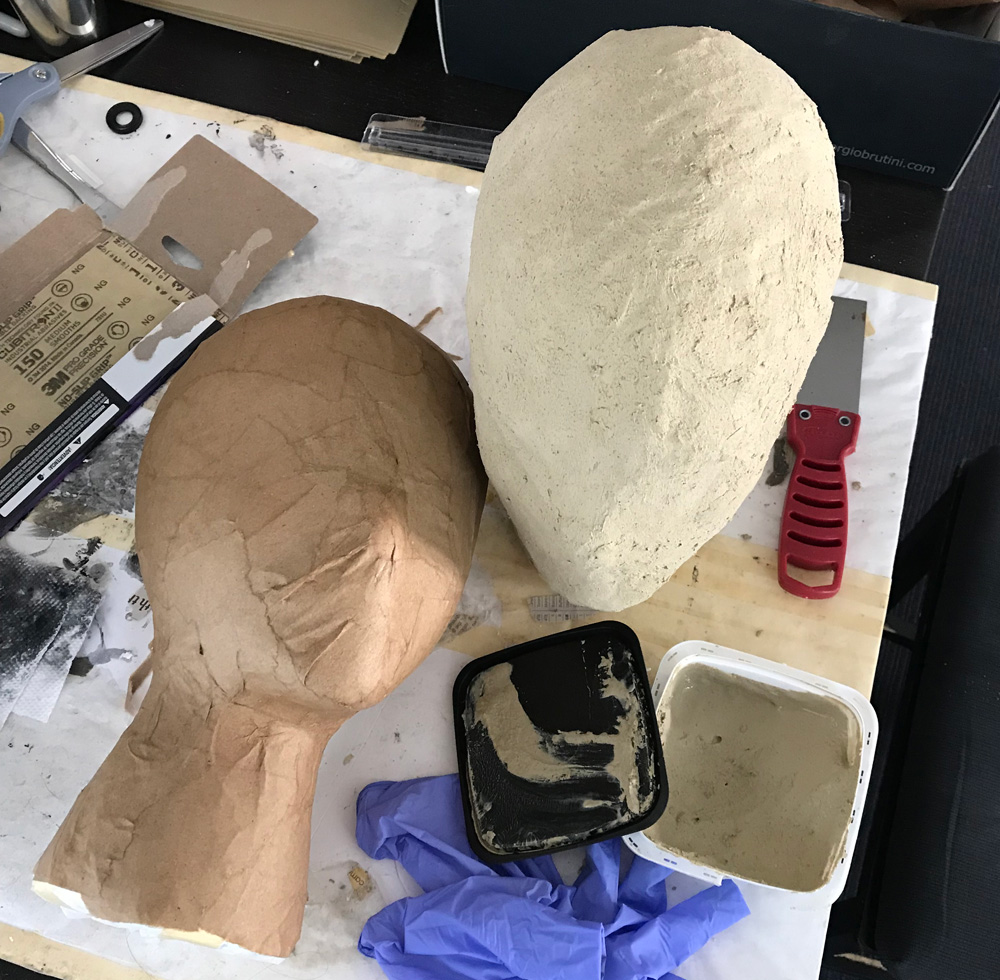
It turned out to be really easy to smooth the wood filler over the paper maché head and get thin, even coverage. This whole process ended up being easier and faster than I expected. The wood filler stuck to the paper maché really well; no pieces big fell off, and only a tiny amount of small crumbly bits fell onto my work area. When I’d finished this coating, the head still felt pretty light-weight, and it would only get lighter when it dried. I put the head out in the sun and turned it every hour or so, and it was dry that same afternoon. The wood filler coating didn’t shrink or crack at all; I’d read that it wouldn’t, but it seemed almost too good to be true.
Here’s a regular paper maché head (left) drying next to the head covered with wood filler (right):
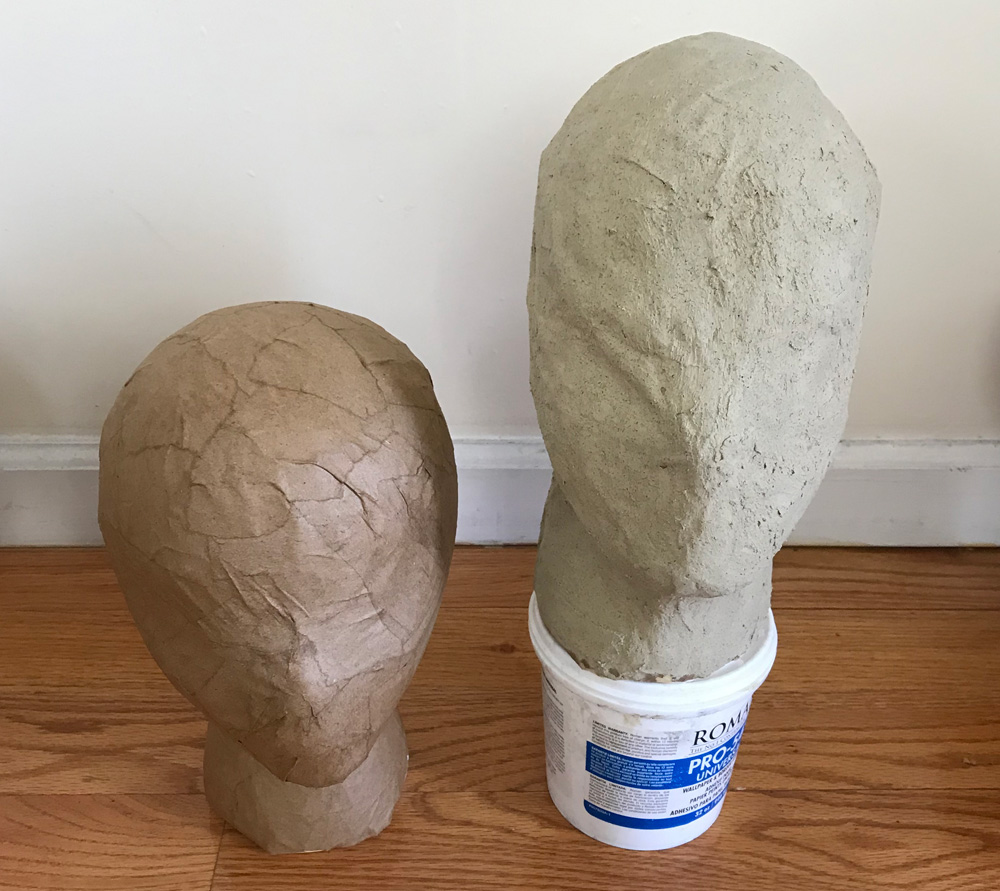
I brought the head back inside to add the final layer of paper maché. You can see the surface of the wood filler looks a bit sandy/crumbly, although it didn’t feel crumbly when I handled it. However, in working with the next layer of paper maché, I ended up with bits of sandy grit all over my hands and in the paste as I worked with it. I finished this last layer of paper and let it dry, and the end result is that the last layer of paper maché has a few tiny areas where you can see there’s like a large grain of sand under the paper, and several places on the exterior where it looks like little grains of sand are glued on. I was able to rub most of these off with a dry sponge, but the ones under the paper are stuck in there, obviously. (Fyi, I had the exact same problem during my experiment with paper maché versus plaster of paris cloth.)
The feeling of working with paper maché with gritty-feeling material in it was somewhat unpleasant, and I worried about some of it remaining in the tub of paste, where it could mess up future projects. Anyway, this was a pretty minor problem, but I’d throw it in the “cons” list. For this particular project I’m not going for a smooth texture so it’s really no problem, but for some of my projects this would be a disappointment.
When the last layer of paper was dry I did the same steps I’ve done for the other heads: I cut the head shape in half, removed the styrofoam base, and taped the sculpture shut again. I then covered the taped-up areas with one layer of paper maché and let that dry.
Finally it was time to compare the results of this paper-and-wood-filler head to the all-paper versions! Here are my findings…
Weight — The all-paper heads (with five layers of paper) weigh about 3.5 ounces. This paper-and-wood-filler head weighs 4.5 ounces, so that’s about 23% heavier.
Strength — The heads feel about equally sturdy, so the wood filler did a good job of replacing three layers of paper. The wood filler head might be a tiny bit weaker than the other ones, so let’s say the wood filler layer takes the place of 2 or 3 layers of paper.
Speed — Even though the layer of wood filler went on quickly, this method actually took more time overall than the all-paper versions. The reason is that for this method I had to do the first layer of paper, let it dry, then the wood filler, let that dry, and then the last layer of paper and let that dry. With the other heads I just did all five layers of paper in one session, which took maybe 30-40 minutes. The drying time was much more significant for those (24-48 hours) but at least I could move on to other projects during that time.
Now, all of that was an experiment in using wood filler to replace layers of paper maché. But there are other great uses for it in paper maché masks and sculptures as well…
Using wood filler as an outer later on a mask/sculpture
One of the main benefits of wood filler, which I didn’t need to take advantage of in the above experiment, is that you can sand it. So one great use of wood filler is that you can apply a thick outer coating on your mask or sculpture, and when it’s dry you can sand it and create a beautifully smooth surface. With paper maché, no matter how careful you are to avoid wrinkles, I find it to be impossible to get a truly smooth surface; you’ll always be able to see the overlapping torn edges of the paper, at least a little bit.
I’ve read a lot of articles that say you can sand paper maché, but I haven’t had great luck with that; when I’ve tried, I always end up with some parts of the paper maché surface looking scraped and shredded. So I normally don’t bother with sanding; I’m fine with a slightly rough texture on most of my paper maché projects. However, if I needed to make a mask that’s really smooth, wood filler is the perfect material for that.
You can also use a blob of wood filler to build up a bigger shape — like let’s say I lost the tip of a nose and built it back up with this stuff. It’ll dry nice and solid, and of course you can then sand it to get it smooth.
I’m being somewhat remiss in talking about these uses without having examples to show; that’s on my list! Pics forthcoming. I really want to try to use this stuff for more projects…
 About Manning Krull
 How to make a 4-foot paper maché alligator
 My violin skull mask, Mardi Gras 2015
 Three-headed paper maché dragon sculpture
September 23rd, 2019 at 11:50 pm
In college, I used paper grocery bags (yeah, that long ago; your brown wrapping paper is probably the same) and wood glue. It dried super hard and light.
September 24th, 2019 at 3:54 pm
Ha! I’m old enough to remember those bags too! I can confirm the paper I use is basically the same stuff; very porous with a nice rough texture.
December 6th, 2020 at 5:58 am
I read so much of your advice and information. All extremely helpful and inspiring.
However, I wanted to see about making masks. So I wanted to make some reusable head casts. I saw on Pinterest you had made a few of them and sort of talked about them in a couple of your blogs. Not sure if I missed the step by step of those or if I haven’t gotten to them yet. Could you point me in the right direction?
December 6th, 2020 at 2:10 pm
Hello Will! Happy to help: here are a few pages on my site where I talk about working with a reusable base: general info – severed head props – giant gummi bears – baby chick sculptures