
Paper maché giant gummi bears!
Published by Manning on September 1st, 2018
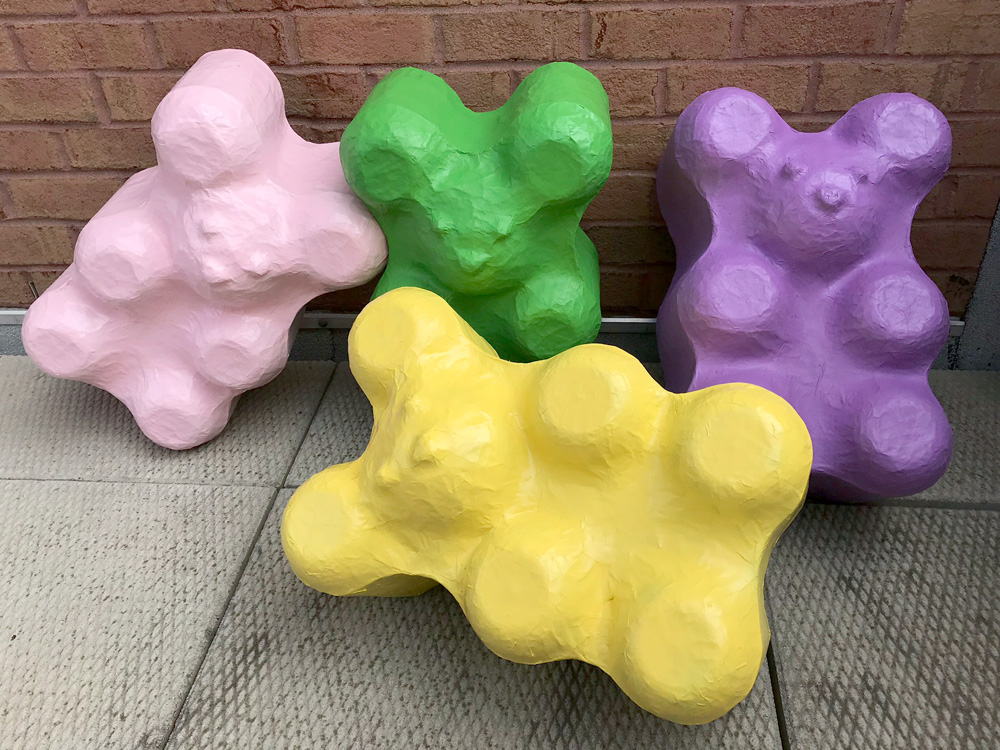
These were so fun! I made these paper maché gummi bears as part of a set of giant candy decorations for my haunted gingerbread house Halloween party!
I created a reusable base for the giant gummi bears; I built one nice solid gummi bear shape and then used it to make multiple paper maché copies. (Other projects where I used a reusable base: paper maché baby chicks, twin skull masks)
I wanted to mostly go for an old-school 1980s gummi bear design, which is not really very bear-shaped. If you look at more recent gummi bear candies, they’re molded into much better cartoony bear shapes now! I personally like the crappy old primitive ones, so I ended up going with something kind of in-between the crappy shape and the more detailed shape.
Here’s how I made the base…
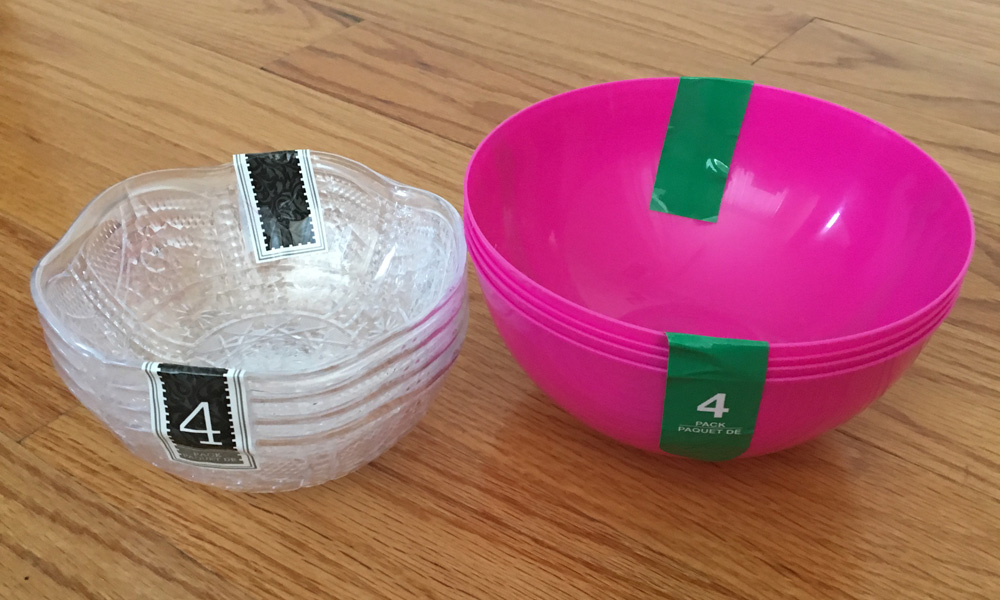
The base is mostly foam board and some plastic bowls, and lots and lots of tape. I started by buying two different sizes of plastic bowls at the dollar store, and by tracing those onto foam board I was able to figure out how big the gummi bears would be.
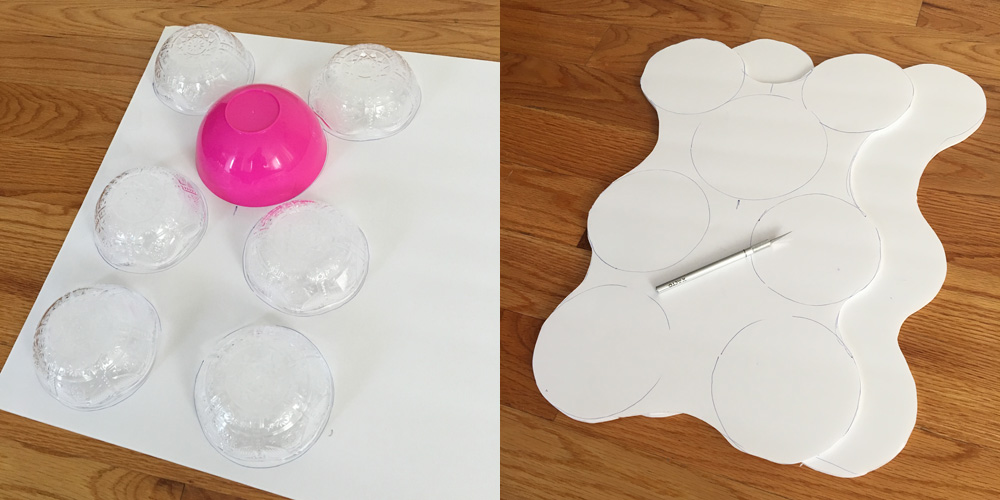
I drew the whole gummi bear shape on one sheet of foam board, cut it out with an X-acto knife, and then traced that onto a second sheet of foam board and cut that one out too.
(Right when I started taking these pictures a crazy storm started up, hence the very dramatic lighting!)
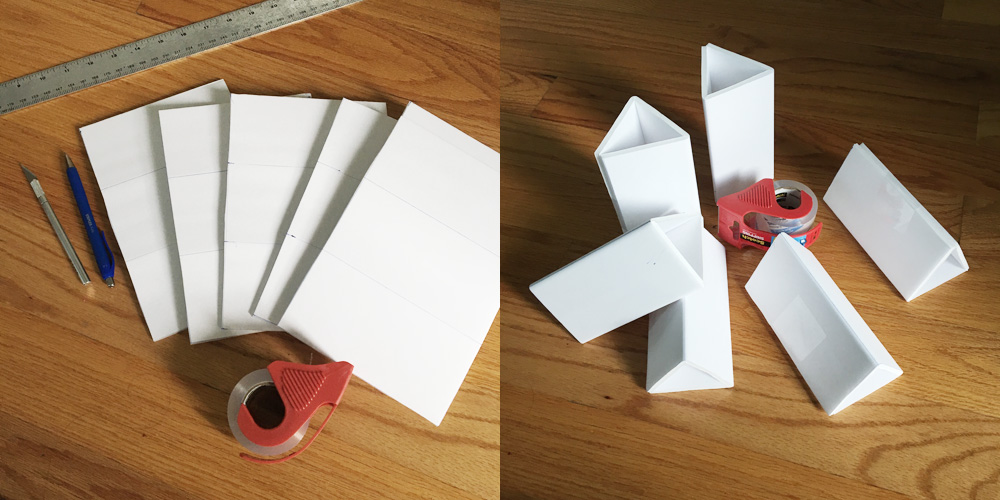
I cut out some foam board strips, assembled them into triangular supports, and taped them in between the two foam board gummi bear shapes. I then cut out long strips of poster board and taped them around the edges of the body shape (not shown) to create a curved wall all the way around the base.
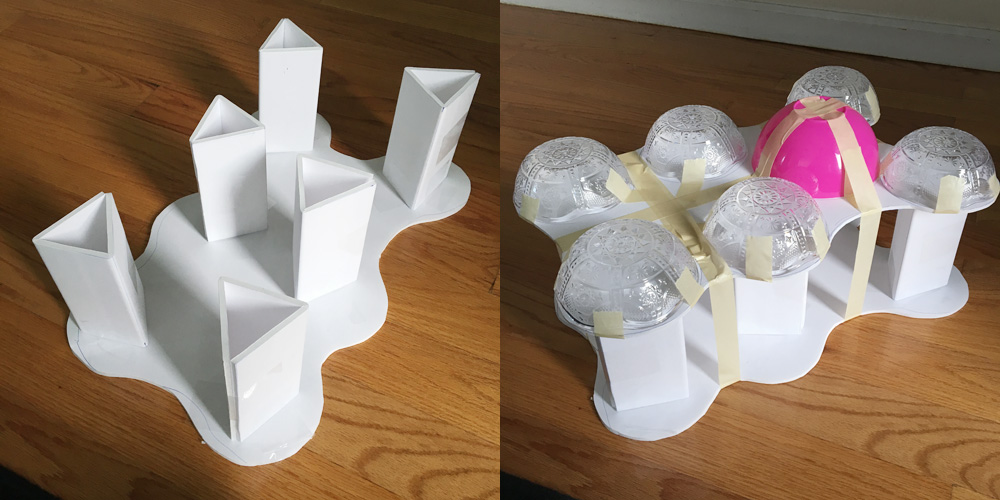

I taped the various bowls in place onto the flat body shape to start rounding it out. I then covered the whole thing in a layer of masking tape, to smooth and unify all these shapes. The top part of the face ended up kind of hollow looking, so I stuffed some aluminum foil in there to round it out a bit. I also added eyes and a nose with little balls of aluminum foil and covered them in tape.
The finished shape wasn’t quite as sturdy as I wanted it to be, so I covered the whole thing in two layers of paper maché. You can read about my paper maché process and materials here. The short version is: I use Roman PRO-543 universal wallpaper adhesive (paid link) and alternating layers of newspaper and brown wrapping paper.

These layers of paper maché will stay on the base shape permanently, but from this point forward I’d be using this base to make paper maché copies that can be removed from the base.
Before starting the first copy of my gummi bear base, I covered the base shape in aluminum foil. The aluminum foil is there to act as a release agent; when my layers of paper maché are done, I can remove them and the aluminum foil will lift right off the base.
I applied four layers of paper maché over the aluminum foil, everywhere but the flat surface in the back.
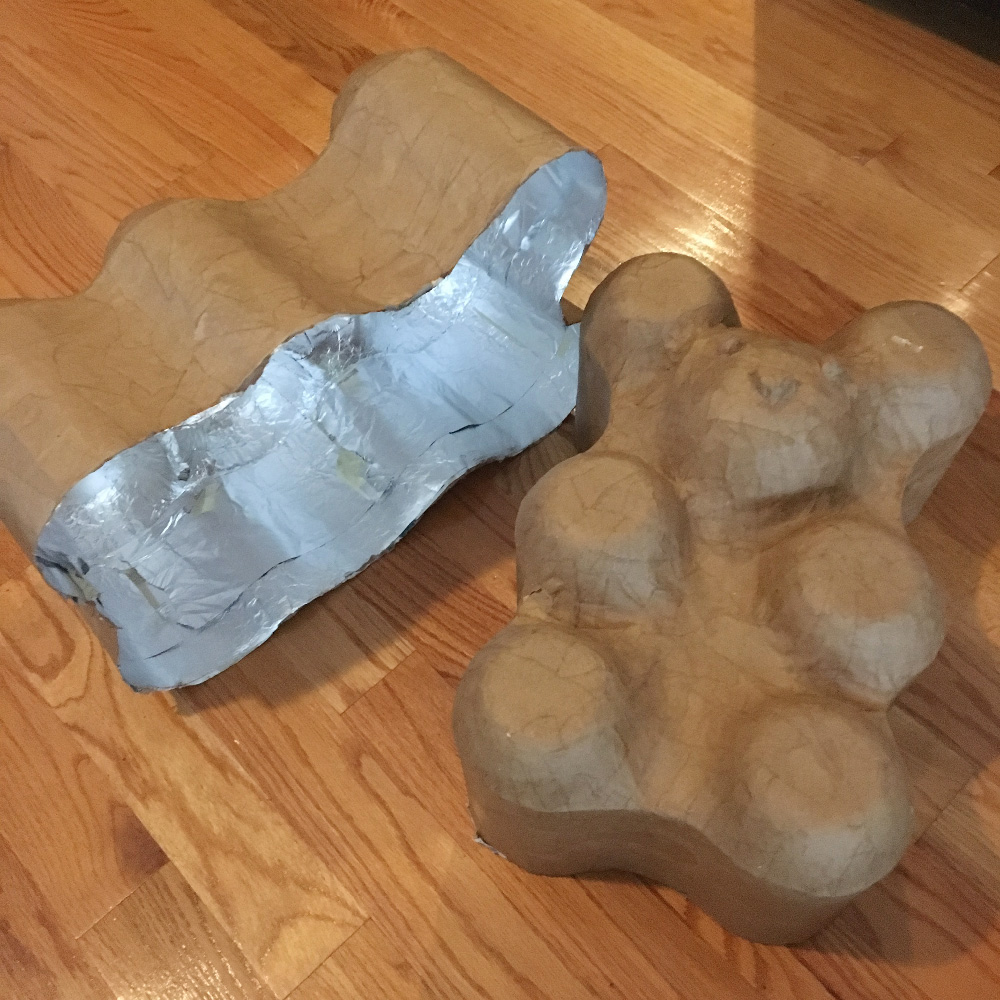
I let the paper maché dry completely, and then I sliced around the back edge with an X-acto knife, releasing the paper maché from the base. The paper maché copy slid right off of the base with a little bit of effort. Above you can see the first copy at the left and the base at the right. I always leave the aluminum foil inside because it adds a tiny (tiny!) bit more stability to the overall shape, kind of like an extra layer of paper.
This gummi was pretty much done, except he was missing a back. I traced and cut out a new foam board back panel, taped it in place, and covered the edges with paper maché. Now the first copy was really done! Well, except for paint. And now I was ready to make the second copy, again by starting with a layer of aluminum foil.
(Note: My paper maché gummi bears are hollow and kind of flimsy; totally fine for short-lived party decorations. If I wanted them to be a little more sturdy I would have stuffed them with newspaper before closing them up, and I probably would’ve gone with six layers of paper maché rather than four.)
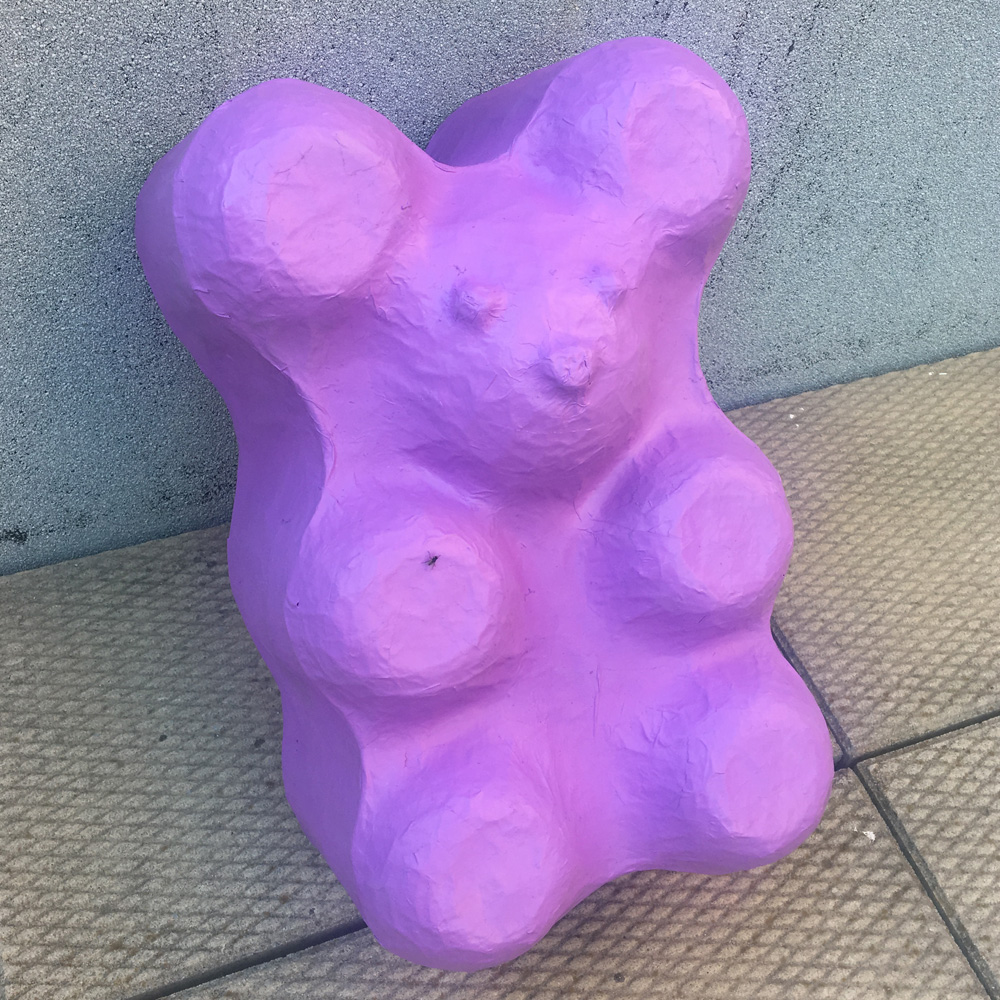
When the gummi bears were all done, I took them outside and spray painted them various colors, and then let them dry for a few hours, and then added a coating of gloss spray on ’em. I let them air out outside for a couple days before bringing them in.
So much more to do! On to the next one!
 About Manning Krull
 How to make a 4-foot paper maché alligator
 My violin skull mask, Mardi Gras 2015
 Three-headed paper maché dragon sculpture
June 17th, 2023 at 2:25 am
Hey love ,first want to say I love you and your work but I do have a question how do you feel about about someone using some kind of concrete to make a weighted gummy bear out of your mold? Thank you hopefully I’m able to hear from you soon.
June 19th, 2023 at 4:59 am
Hi there! Sorry but I don’t have the mold anymore; I got rid of all that stuff years ago. But the idea would totally work if you want to make a new mold!
June 23rd, 2023 at 4:19 pm
Thx so much I’ll let u know how it goes but for now I’m going to try the design somewhere I can use it ❤️🧡💛💚💙💜🖤🤎🤍