
Making a crown for my festive Creature costume
Published by Manning on March 8th, 2023
The short version: the crown is foam board with just one layer of paper maché, and it’s held on with magnets! The jewels are craft foam covered with Mod Podge and then painted.
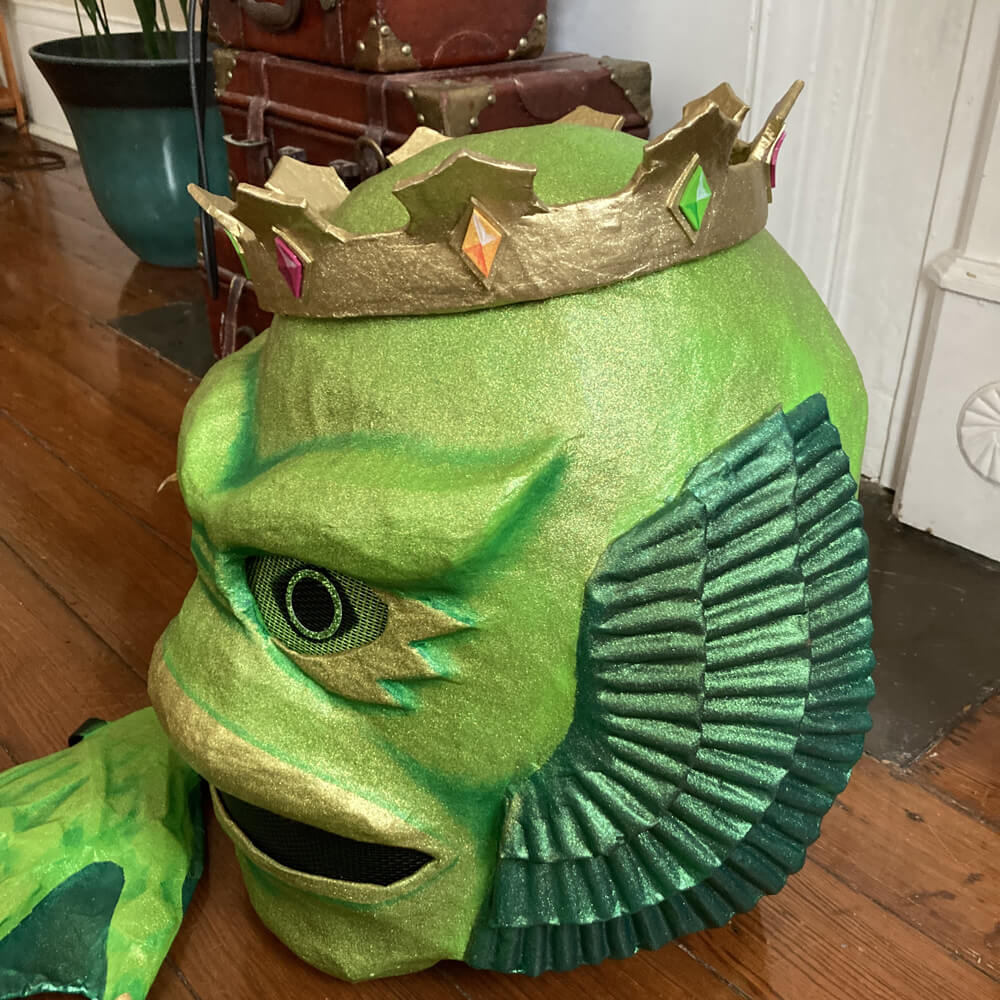
(This is the last part of my Creature costume project: check out my articles on making the Creature mask and hands, and the scaly suit.)
The longer version: Hooboy, this crown! Readers of this blog know I love to overcomplicate things. I knew I wanted to make a simple crown for my Creature costume, but I didn’t love the idea of gluing it directly onto the mask; I might want to wear the thing in the future without the crown. So I made up a plan using one of my favorite things: magnets.
A really important thing to note if you’re working with magnets is that it’s critical you get them to line up with each other perfectly. If you attach magnets to solid shapes in a way that they can’t line up perfectly, their connection gets much, much weaker. Like, let’s say I embed three magnets in three places in the Creature head, and the crown has three magnets, but when I put the crown on the head, one or two of the magnets aren’t perfectly aligned with their counterparts in the head. Even if they’re shifted over by just a few millimeters, let’s say 10% of the width of the magnet, the connection becomes very weak, and the whole crown can fall off or get knocked off very easily.
So of course I wanted to create a structure that would allow the magnets to be perfectly aligned. The challenge is, paper maché is very inexact, and shapes covered in paper maché tend to warp as they dry — especially something relatively flimsy like this thin crown. Not to worry! I came up with a cool plan, and it actually worked…

Okay, backing up a bit. First I had to figure out how big the crown should be, and where it would sit on the head. I did this through trial and error by drawing and cutting out bigger and bigger circles from a piece of foam board and trying it on the head. (Read my article about drawing precise circles at unusual sizes!)
I landed on a diameter of exactly ten inches, meaning the strip I needed to cut out for the crown would be about 31.4 inches long (math!!). I decided to make a strip that was a bit longer than that with the plan of trimming it down to the exact size it needed to be. The foam board sheets I use are just 30″ wide, so I cut two strips and combined them with heavy duty shipping tape, to make one long strip that was about 33″ long.
I curved and rolled up the foam board by crushing it between my fingers little by little and rolling it up on itself; this is easy to do with the cheap foam board I buy at Dollar Tree.
I took the piece of foam board with the 10″ circle cut out of it, set it down on my work space, and set the curved strip of foam board into that. I pressed it against the outer edges of the circle and figured out where I’d need to cut the extra couple inches off in order to make it fit perfectly. I cut that segment off, and then un-curled the strip and laid it flat on my work space.
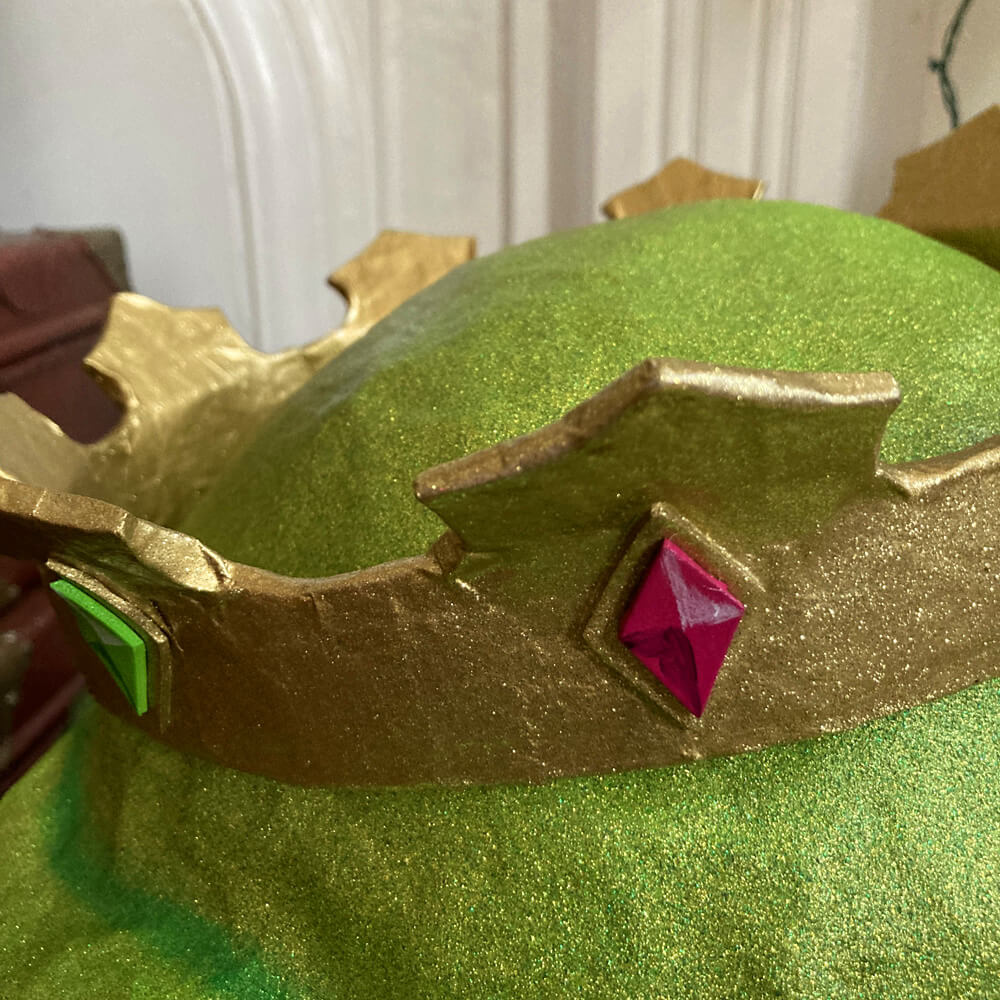
When drawing the design of the crown, I wanted to make sure the pointy bits were a multiple of three, because the jewels I would be gluing on it are in three colors: purple, gold (well, I did sort of orange), and green; the traditional Mardi Gras colors. So I decided on nine points for the crown. I did some measuring and calculating to figure out how to divide the strip into nine equal sections (math!!). I drew nine vertical lines to outline the sections.
I then drew the shape for just one of the pointy bits on a piece of a LaCroix box. My drawings are never symmetrical, so I drew a vertical line down the middle of the pointy shape, then used tracing paper to trace just the left half of it, then cut that out. I traced this shape to draw one half of the point, and then flipped the tracing paper over and traced the other side of the point. This gave me a nice symmetrial pointy shape.
I then cut out this pointy shape and traced it nine times onto the strip of foam board. Whew! That’s a lot of steps.
I cut out all nine pointy shapes with my X-acto knife. I then bent all the points outward, and I added some tape on both sides of the points to make them stay bent.
I then curled up the strip again and taped the ends together.
I applied one layer of paper maché to the crown in order to make it more rigid and stable for the next steps.
Magnets
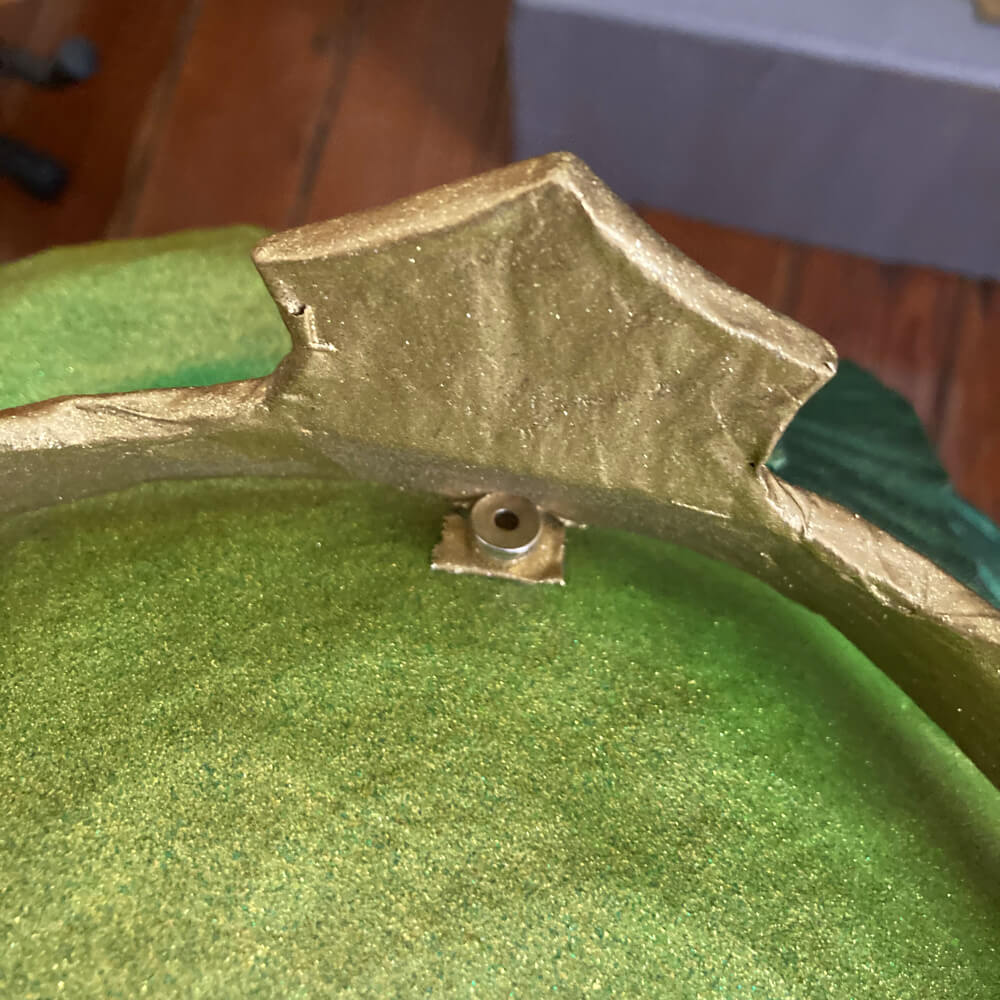
Next, magnets! I placed the crown on the Creature head and looked for the areas where the crown touched the surface of the head. In a lot of places it didn’t quite touch, but I found a few where it did. I marked one of these with a piece of blue painter’s tape. I then put the crown aside and placed a small magnet on that tape, and put another piece of tape over it to hold it in place.
Then I flipped the head over and placed a magnet inside; it snapped right into place to find the first one on the outside. I put two pieces of masking tape over this interior magnet to hold it in place. Then I turned the head right-side up again.
The magnet I placed on top of the head was just a placeholder; I remove it and the tape. Of course I’ve got that other magnet taped inside the mask, so I won’t lose this spot.
Next step was to attach three magnets to the crown itself. I took three small magnets, and I covered each one in a strip of heavy duty shipping tape, to basically make a long thin strip of tape with a magnet locked in it.
I taped one of these strips onto the bottom edge of the crown, with the magnet pointing inward. I placed the crown on the head and let this magnet find the other one inside the head and connect to it.
I then took the other two strips with magnets, slide them under the crown, and taped them in place on the crown. Now that all three magnets were attached to the crown, I could flip the head over and insert the last two magnets; they snapped right into place where the magnets on the crown are. I covered these two interior magnets with masking tape to lock them in place.
I applied a layer of paper over the tape and magnets inside the mask and let that dry.
I removed the crown from the head and applied more paper maché to it, to cover the tape that’s holding all the magnets in place.
That was it for the magnets! Since the magnets in the crown are placed inside those strips of tape, they’re able to move a little bit, and this means they can align themselves perfectly to the magnets that are in the head. If I’d locked the magnets into the solid shape of the crown itself, there would be a risk that they wouldn’t line up perfectly with the magnets in the mask.
Jewels
I wanted to place a jewel on each of the pointy areas of the crown. I made these, and the little base shapes behind them, out of craft foam.
I first cut out the base shapes for the gems. I made a stencil and traced nine large diamond shapes onto craft foam and cut them out.
I made a second stencil of a smaller diamond shape and traced and cut out nine of those. These are the gems.
I hot-glued the base shapes onto the crown. I put the gem shapes aside for later; they’ll go on after everything is painted.
Painting
I first covered the crown with a coating of Mod Podge, and let that dry. I then spray painted the crown a shiny metallic gold, and then gold glitter spray.
For the little gem shapes, I first mounted them on a scrap of foam board and covered them with a coating of Mod Podge. When that was dry, I spray painted them purple, yellow/orange, and green. Once they were dry, the spray paint had caused them to get stuck to the foam board (as I expected), but it was easy to slice through with an X-acto knife and remove them. I then hot-glued the gems onto the base shapes on the crown.
Then I finished with a coating of glitter sealer, and the crown was done!
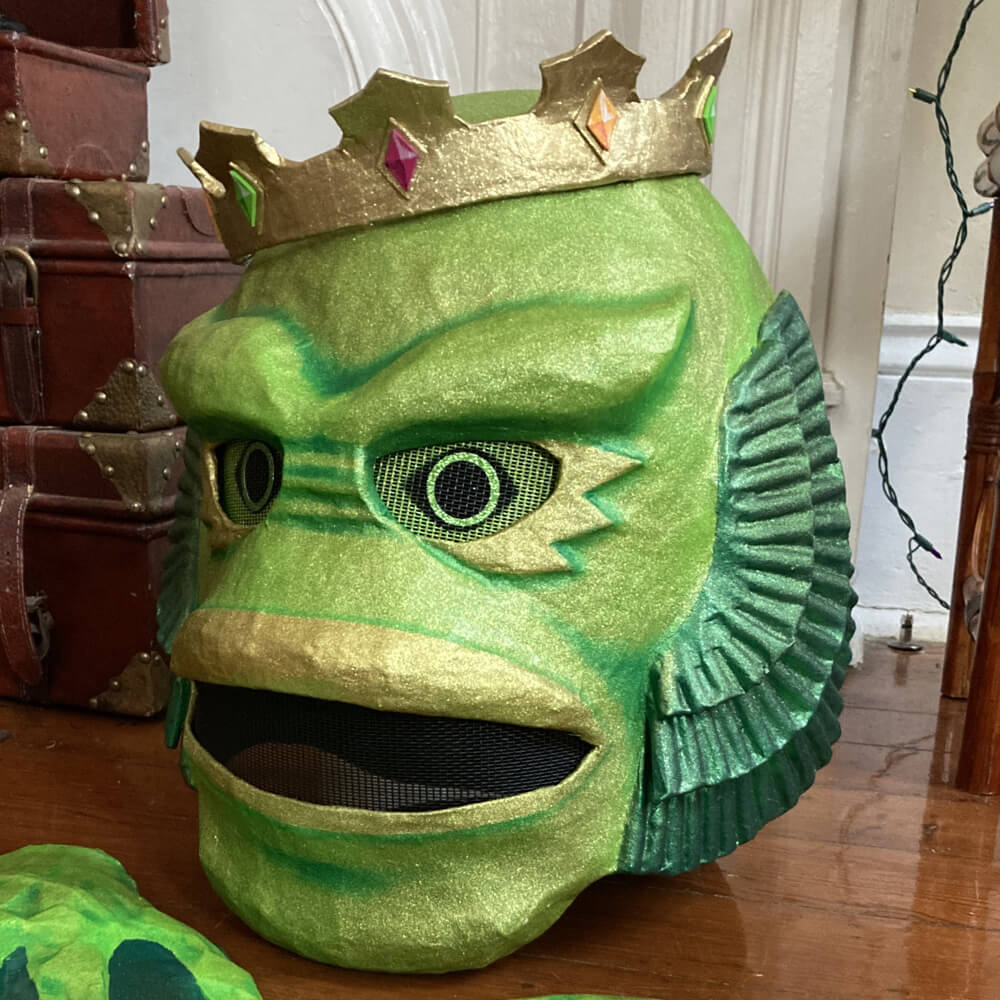
It’s easy to pop the crown off and on the head, and the magnets jump right into place nicely. I decided I’d like for the connection to be a little stronger, so I stacked up a couple additional magnets onto the ones that were already on there. The more magnets you combine, the stronger the connection gets.
I’m really pleased with how this came out!
 About Manning Krull
 How to make a 4-foot paper maché alligator
 My violin skull mask, Mardi Gras 2015
 Three-headed paper maché dragon sculpture
Leave a comment