
Making plastic bones look aged and dirty
Published by Manning on July 27th, 2015
For my bayou/voodoo-themed Halloween party, I ordered a hundred little plastic bones; I wasn’t sure what I wanted to do with ’em, I just knew I wanted ’em! They were pretty cheap; I got ten packs of ten bones for a total of about $22 from some online party supplies store.
When I got the bones, they were pure white and smooth and shiny, and I wanted to make them look old and dirty before incorporating them into my decorations. This is what they looked like right out of the package:

Since the bones are very smooth hard plastic, I knew this would be a challenge. Some kinds of paint would probably bead up on contact with the plastic, while others would stick but be very easy to accidentally scrape off. Even with spray paint and a coat of matte spray, I’m sure the paint would scrape off easily; I’ve had this happen with other projects I’ve done that start with a plastic base. I once spray painted a life-size plastic skeleton black, and applied some matte spray, and it was a disaster; every time the skeleton bumped against anything the black easily scraped right off. So my challenge with these bones was to come up with a better method that would stick much better than that.
I should mention, there are two pre-painting things you can do to help paint stick to plastic: A) clean the plastic with Windex first, and B) sand the plastic with sandpaper. The Windex will remove any oils and the sanding will make the surface rough and porous and help it take the paint. But, with a hundred tiny irregular shapes like these bones, all of that would just take too long, so I didn’t bother.
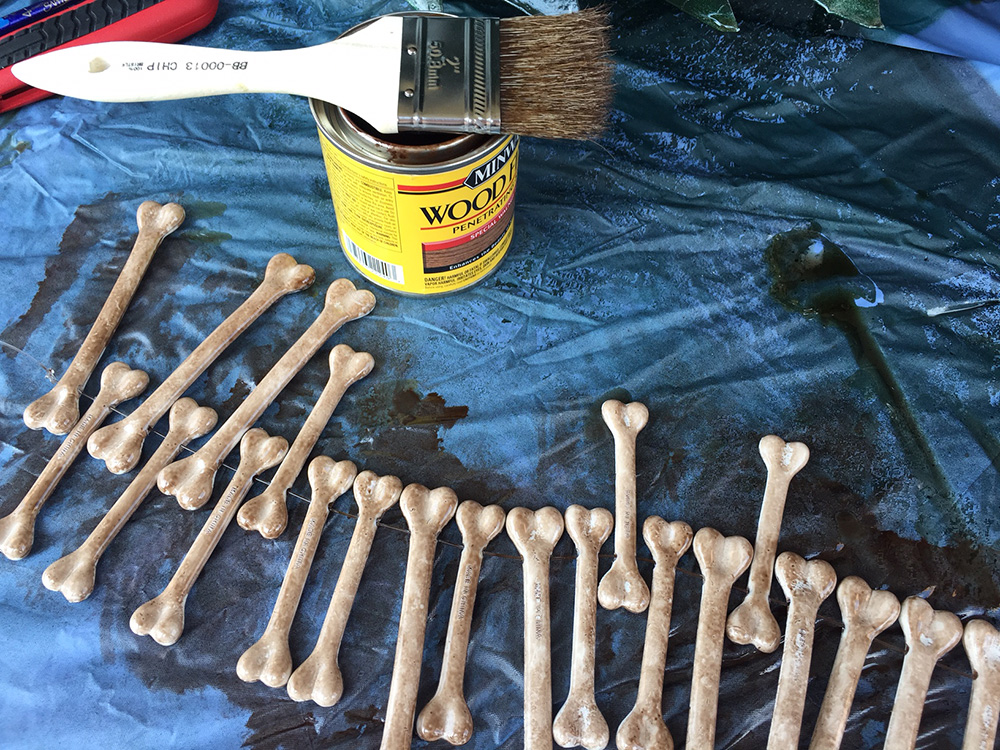
I did a little research for staining hard plastic, and settled on wood finish. I bought a tiny can of Minwax wood finish, “Special Walnut” — what a cute name! There were a million kinds of wood finish and stains at the hardware store, and I really just picked this one ’cause it was a small can and it was on sale.
The plastic bones I bought happened to have little holes through them, presumably so you can make a necklace or whatever. I decided to string them onto pieces of monofilament fishing line, just to make them more manageable and easier to lay flat and move around. This turned out to be a big help; if I hadn’t strung them together the individual bones would’ve flopped around a lot while I was brushing them. So, I laid the connected plastic bones on my typical working surface for painting: a shower curtain from the dollar store.
When I first put my brush in the wood finish, I was shocked at how dark it looked! I hoped I hadn’t made a mistake (but I also had a plan for lightening up the bones later if necessary, just in case). The wood finish painted onto the bones really dark at first, too. However, as I continued to brush the stuff on, it spread out and got a lot lighter.

The wood finish went on nice and streaked and uneven at first, which is what I wanted, but it soon spread itself out and got nice and smooth and even-looking, which I did not want. I want the surface to look irregular, organic; aged and dirty. These were looking kind of solid milk-chocolate brown; no good. Fortunately, I found out that just a minute or two after I applied the wood finish to the bones, I could go back with the same brush and just dab at the finish to mess up the surface; the finish had already started to get gummy so by dabbing a rough brush at it I could make a nice grainy pattern. When I first did this effect it looked great, but I looked again a minute later and the finish had completely smoothed itself out again! The pattern was gone and the finish was perfectly even once again. So I did the exact same technique again, dabbing the brush at the bones and creating the grainy pattern, and this time the finish had become a little more gummy and the pattern stayed. Cool.
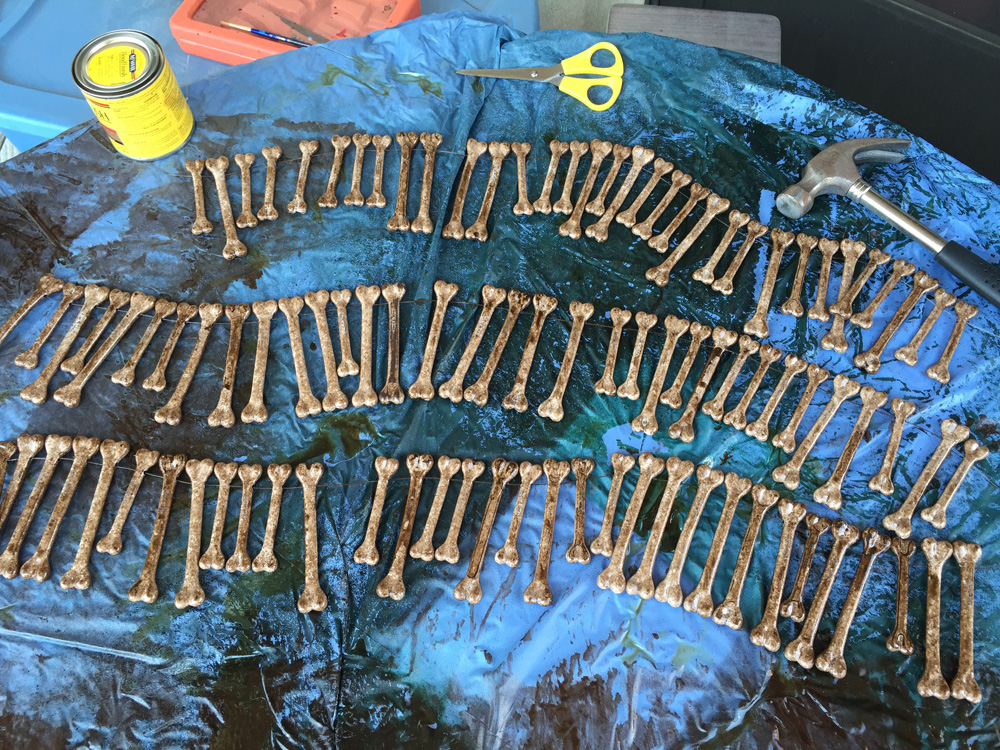
The result was a group of brown, dirty, streaked, grainy-looking bones. They were a little darker than I wanted, and very shiny, so I sprayed them with a little bit of white spray paint. I do a sort of air-brushing technique with the spray paint can, holding it about eight or twelve inches away and doing quick, light bursts. Be careful or you’ll put too much on! You want to err on the side of too little; you can always do more. I’ve used this technique for a million projects, with black whenever I want to make something look a bit dirty, and with white when I want to make something look faded or weathered. Works like a charm. One caution: if you do a light dusting of spray paint like this, the result on your surface will feel powdery and dusty and will pretty easily brush off, so you’ll need to lock it in place with matte spray or something along those lines.
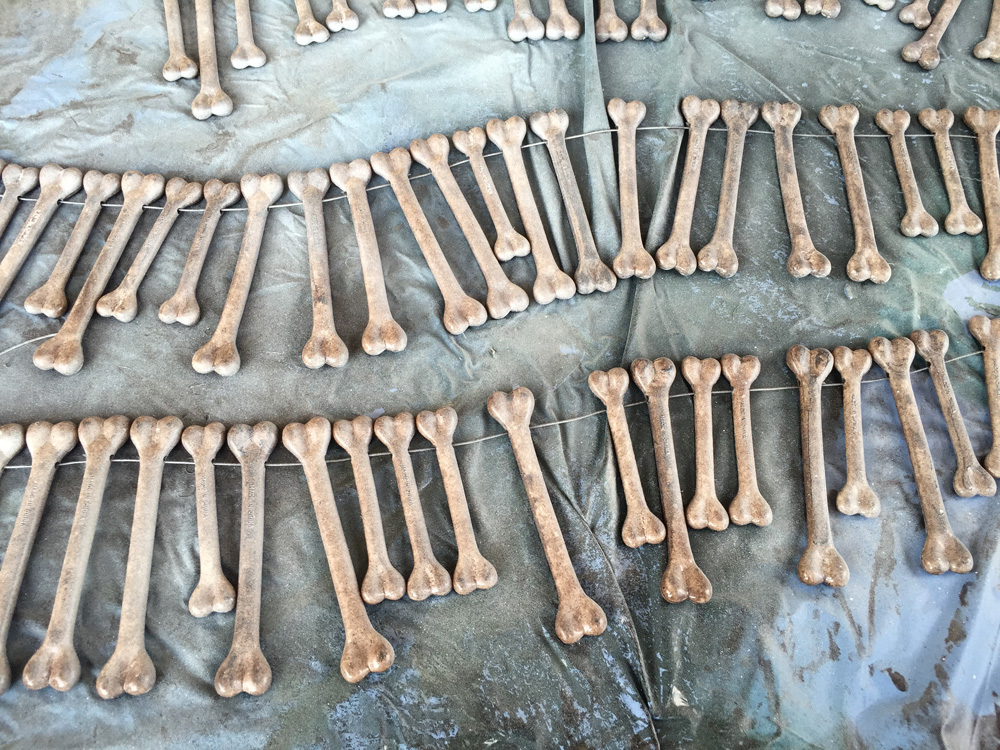
The white spray paint made the bones a little lighter and much less shiny, and added a kind of grainy texture. Once the spray paint dried, I added a coat of matte spray to (hopefully) protect this color job a bit. We’ll see how it works once I’m actually working these bones into some Halloween decorations.
With all these steps and with flipping the bones over and moving them a lot of times, the wood finish and paint on some places on the bones got scraped off a little, but it really looks fine, since the overall effect I’m going for is rough/uneven/dirty. A few little white spots here and there don’t hurt. But these little scratches tell me that this technique isn’t a 100% effective way of staining plastic. It’s way, way more effective than just spray paint, though! For the most part the wood finish and paint are holding really well. If you have other techniques for staining plastic or making plastic look aged and organic, I’d love to hear them!
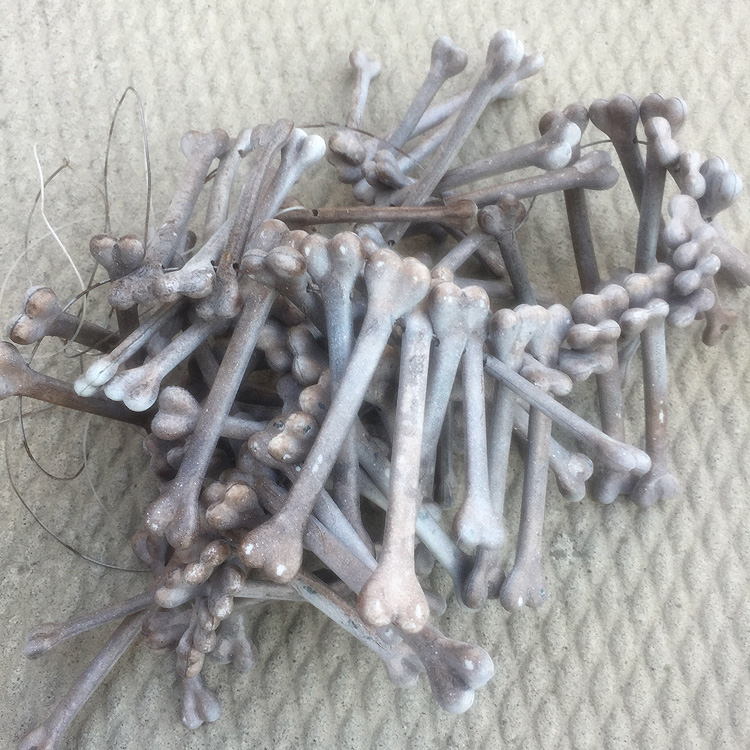
Now that I have all these nice dirty-lookin’ bones, I’m imagining all sorts of projects I can do with them: maybe a chandelier made with bones and wire and battery-powered candles, or a voodoo staff made from an old branch and a fake skull and some bones and feathers and beads tied on with twine. I’ll definitely be making a lot of voodoo dolls for my party, and some of these bones will probably end up on necklaces for them. I might need to order another hundred and do all of this again!
Update: This technique looked great but turned out not to be perfect — the spray paint and wood stain cracked and rubbed off in some little places, letting the original bright white plastic show through. Not a big deal! For the low lighting of my Halloween party, these worked out fine. But wow, it seems like it’s impossible to make anything really truly stick to that hard plastic.
 About Manning Krull
 How to make a 4-foot paper maché alligator
 My violin skull mask, Mardi Gras 2015
 Three-headed paper maché dragon sculpture
September 18th, 2021 at 4:30 am
Thanks for the tips on this “bone dye” technique. I picked up a plastic femur bone at a Spirit Halloween to turn into a hilt for a prop sword. This will go well with the aging of the prop sword I picked up.
August 20th, 2022 at 3:44 am
Rustoleum has a plastic primer spray paint. Works like a charm.
October 11th, 2022 at 8:08 pm
You need to scruff it a little with sandpaper first so the stain has something to grab onto. Also to make it look more real, scratch ‘em up. I use folk art multi purpose paint for details and have it sun bake!