
Paper maché cupcake sculpture!
Published May 3rd, 2017
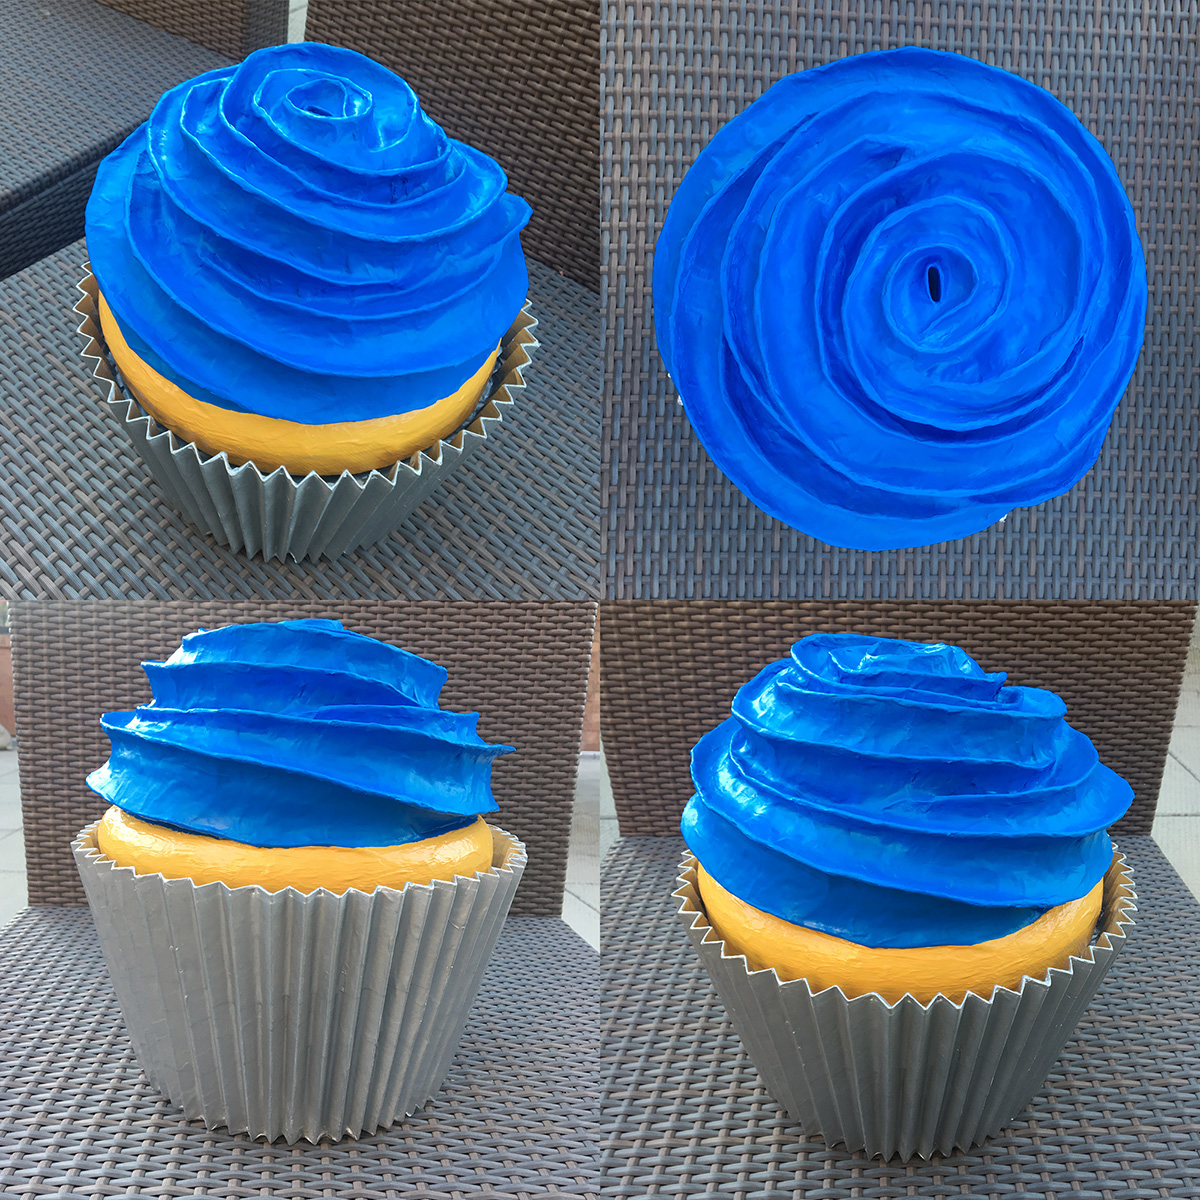
I was commissioned to make this cute paper maché cupcake sculpture, and it was a lot of fun! I'm so used to doing monsters and skeletons and stuff, this was a really neat diversion. The cupcake was to be used as a decoration in a tradeshow booth with a couple signs on it with logos and messaging, and the whole thing is painted in the client's brand colors. Here's how I made it!
I started by sketching the cupcake to work out the basic dimensions; I do a ton of sketching and planning and measuring before I start anything, probably more than I need to! Anyway, I decided to go with an 8" circle for the base, and a 10" circle for the widest part at the top of the wrapper. I actually cut out two circles at 10", for three circles total. I wanted to build the wrapper section and the cake/icing section separately. So one of the 10" inch circles would become the top of the wrapper section, and one would be the bottom of the cake/icing section. You'll see what I'm talkin' about. I drew the three circles onto foam board and cut them out with an X-acto knife. (Check out my dumb article about drawing perfectly-sized circles.)

I had this 10" ring of green floral foam lying around and I decided to use that for the top surface of the cake part. I pick up foam shapes like this whenever I'm at the dollar store, and they always come in handy for one project or another. I taped the foam ring to one of my 10" circles. This created a nice sturdy base for me to build the icing on (coming up).
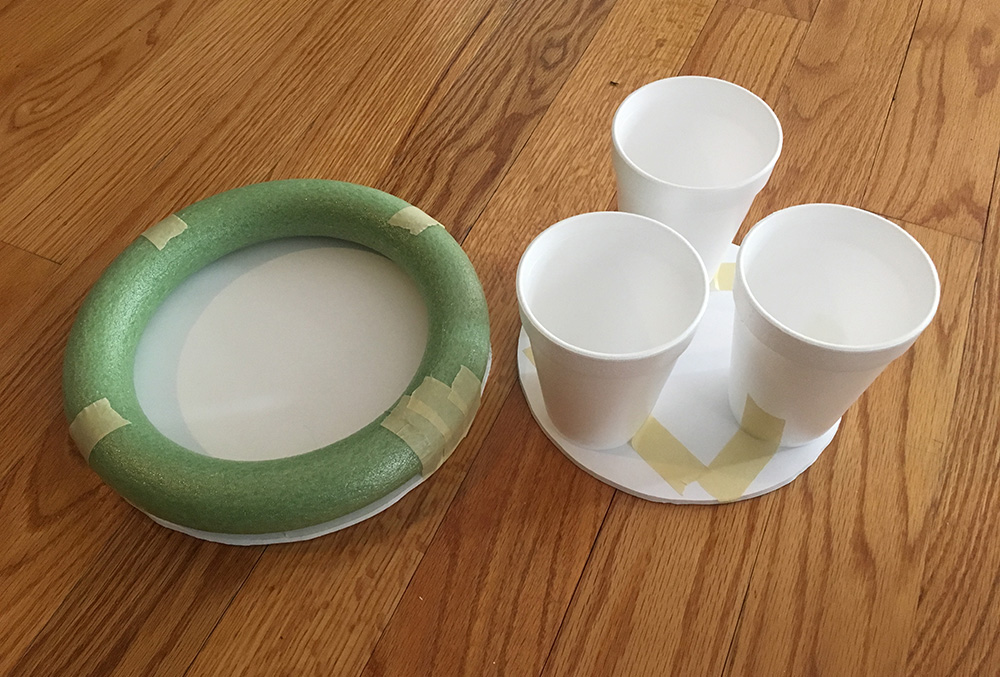
I used three styrofoam cups, taped in place on the 8" circle, to create the height of the cupcake. I then taped the other 10" circle on top (not shown). Also not shown, I taped a bunch pennies into the base to give the cupcake more weight. I used about 120 pennies from my change jar — it's nice to find a use for these, because, as I always say, pennies ain't money.
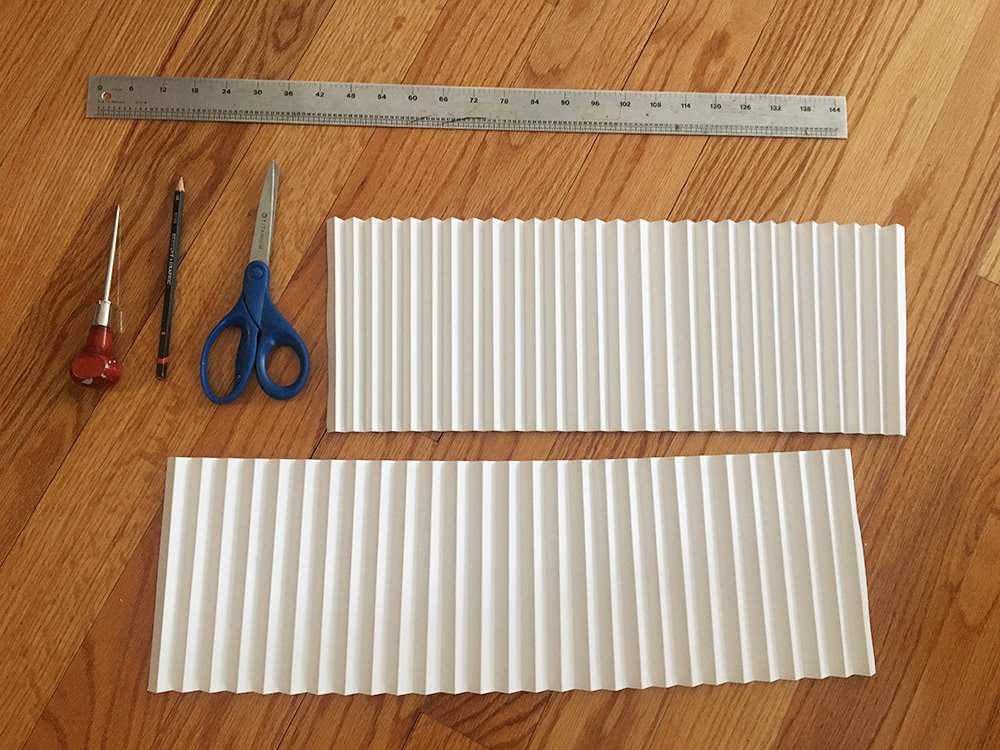
I used a sheet of poster board to make a cupcake wrapper with folded ridges. I measured my cupcake shape and decided I wanted the wrapper to be 6.75" tall; a little taller than the base I just built, so the cake/icing part can sink down into it a bit. The poster board happened to be 28" long, so I drew a line across it with a ruler to make a 28" x 6.75" rectangle. I then marked off 1/2" dots all along the length for where the folds would be. Rather than draw these lines with a pen, I scored them with an awl, making deep scratch marks rather than drawing actual visible lines. These scored lines would make the poster board easy to fold in nice clean angles. I used an awl because it was handy, but you could also do this with a butter knife, or even with a ballpoint pen; you just have to dig deep to really scratch those lines in there, so they become easy to fold.
When my score marks where done, I carefully folded the poster board by hand, like an accordion. I held this up to my cupcake base and saw that it wasn't nearly long enough to go all the way around, so I made a second one the same way.
I taped the two accordion things into one long piece. Before attaching the accordion to the cupcake base, I marked off some measurements with a pen to divide the accordion evenly into eighths. I also drew marks onto the top and bottom circles of my cupcake base, to divide those into eighths. So, each of the marks on my accordion shape would line up with each of the marks on my circles, and that would help get the ridges spaced out nice and evenly around the cupcake base. You can see those lines in the next pic.
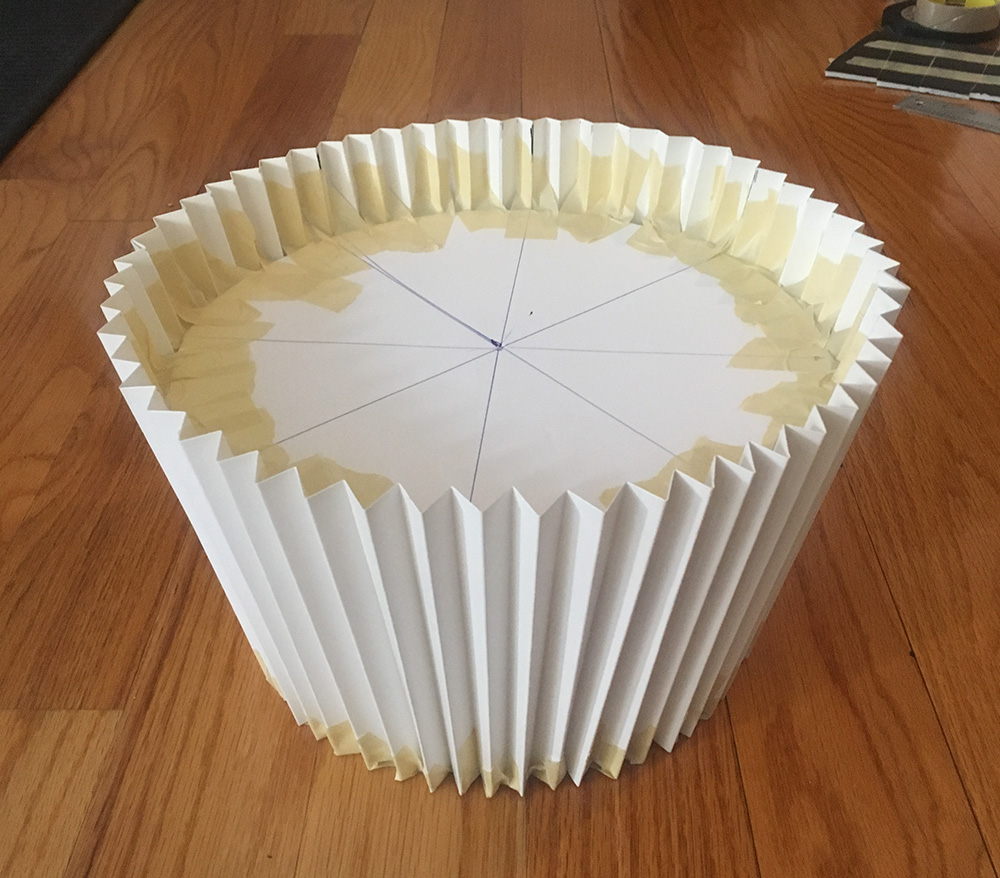
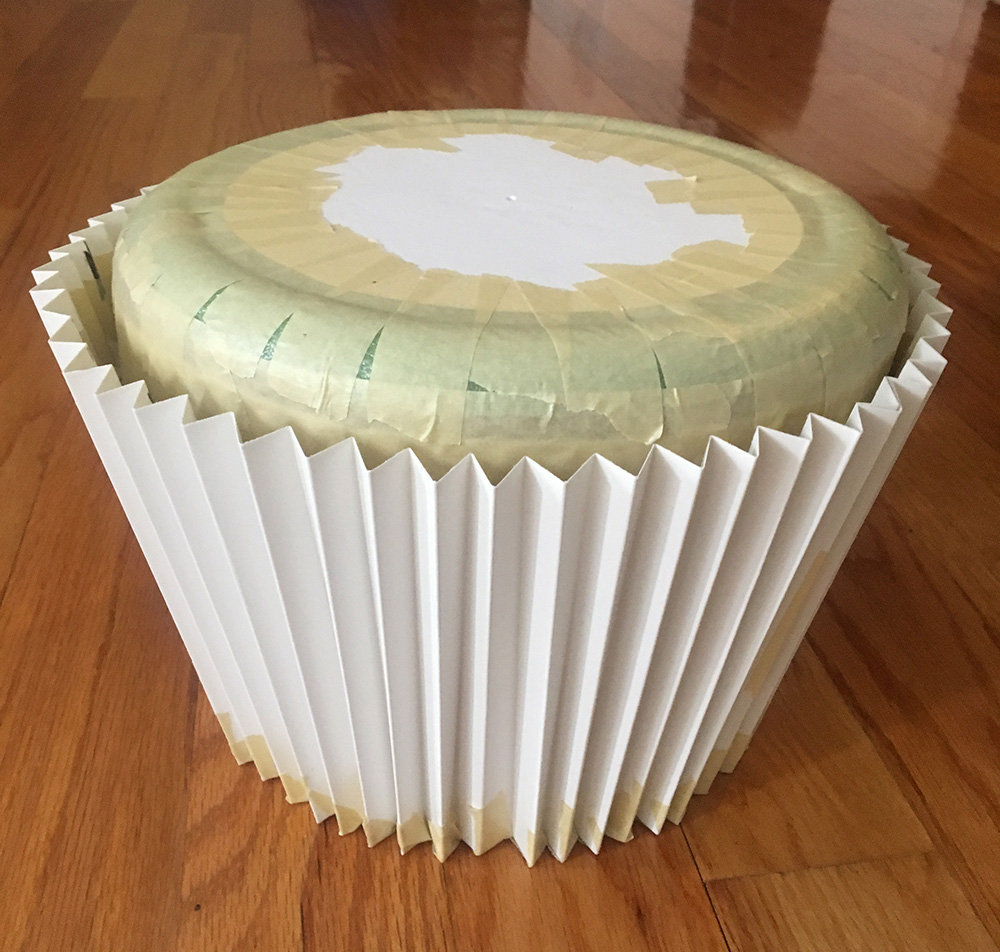
I taped the ends of the long accordion shape together to make a loop, so the whole thing became kind of like a big sleeve that I could put over the cupcake base. I then set the base upside down on some small books so that the bottom edge of the base (now on top) would line up with the bottom edge of the accordion (also now on top), and I carefully taped the accordion to the bottom circle, lining up all those pen marks and attaching them with small pieces of masking tape — I tore short pieces of tape and then tore those in half down the middle to make very thin strips. This part was a lot of work! When everything was attached, I flipped the whole thing over and did the same thing with the top edge. Finally the whole shape felt pretty sturdy! You can see I left about an inch of empty space inside the top edge of the wrapper; this is so the cake/icing piece can sit inside.
I set down the cake part into the wrapper part to make sure it fit nicely and stuck out the top just a bit. Perfect! You can see I added a circle of foam board to the top of the foam ring to create a flat top surface for the cake part.
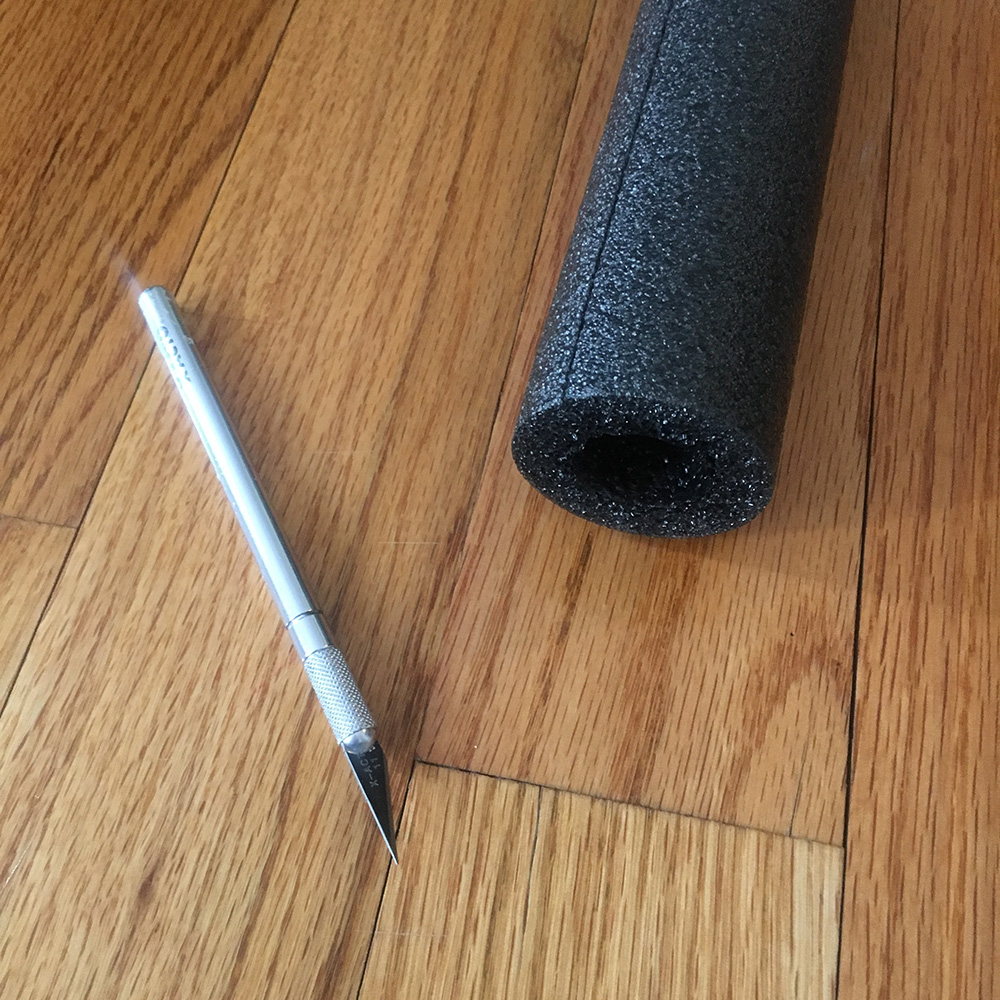
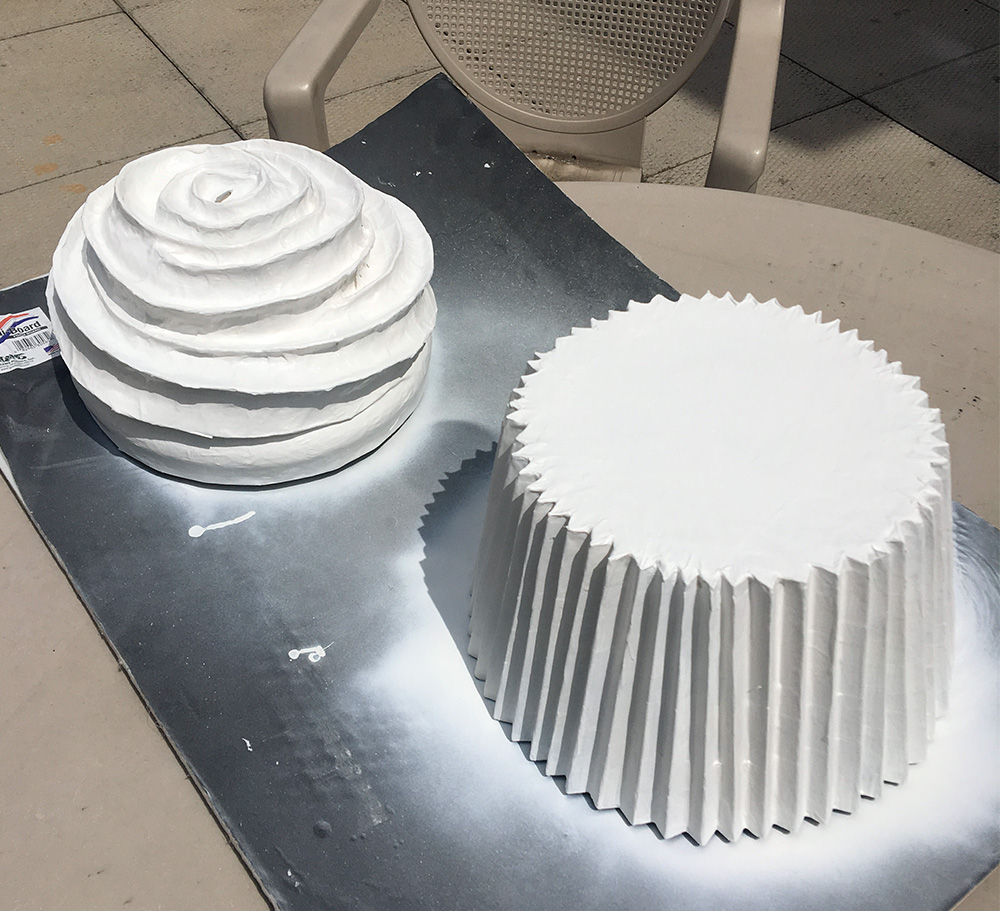
Now for the icing. I made the base for the icing out of foam pipe insulation tubing — I get this stuff for about $3 for a pack of four 1-meter tubes at Home Depot. I love working with this stuff; it's extremely lightweight and sturdy, it's super easy to cut into precise shapes, it doesn't crumble and make a mess, and it takes tape and paper maché very well.
The foam tubing is too dense and rigid to easily curl into a tight spiral, so I cut a bunch of wedge-shaped holes in one side, to allow those areas to fold and compress together. I also cut the end of the tube to be tapered; this would be where the spiral meets up and closes at the bottom.
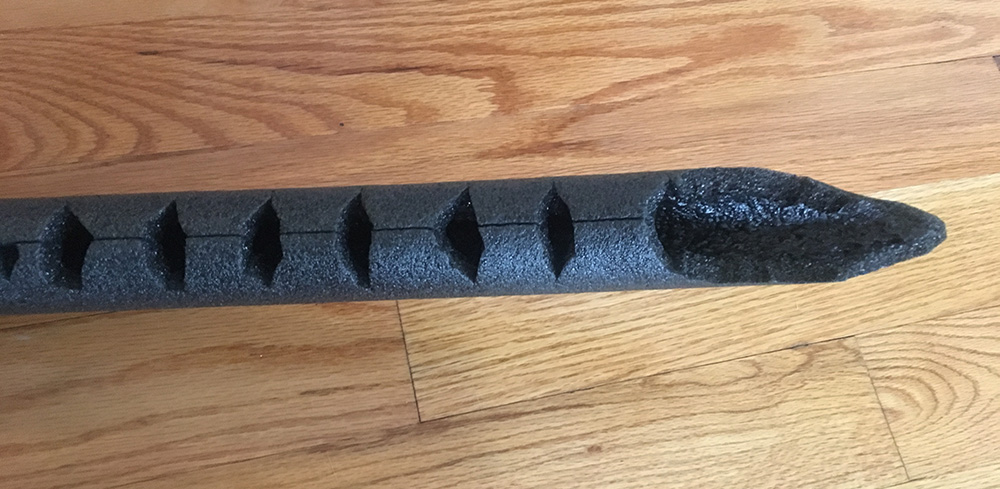
I thought one meter would be enough for my whole spiral, but a quick test of curling it up and holding it in place told me I'd need to tape a second tube to the first. So I added another half a tube — about 18" — to the first. I cut the same wedges into this part and cut that end to be tapered as well.
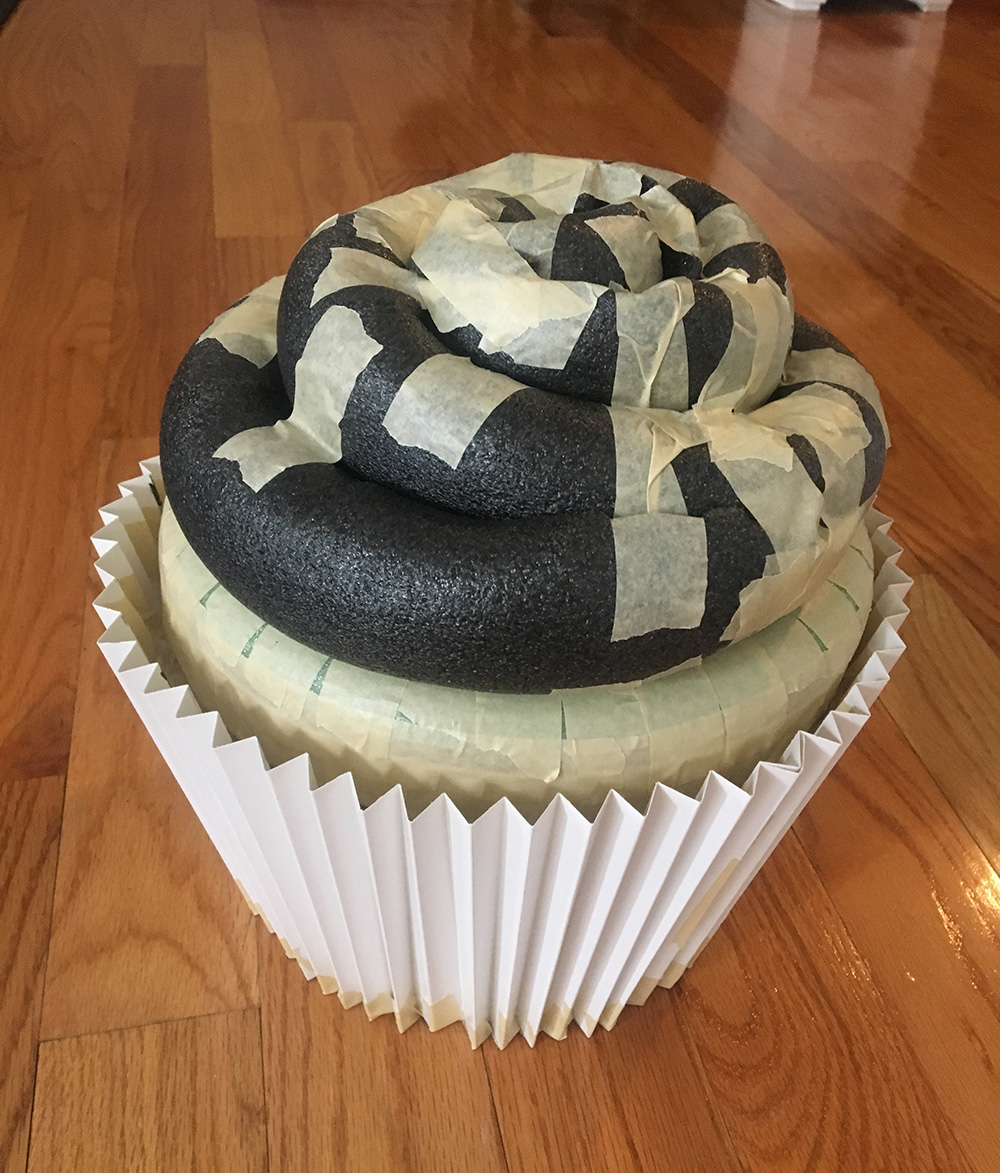
I curled the long tube into place over the top section of the cake, and secured it with lots of masking tape. Let's pretend it doesn't look like a poop emoji at this stage, okay? The next steps will fix that!
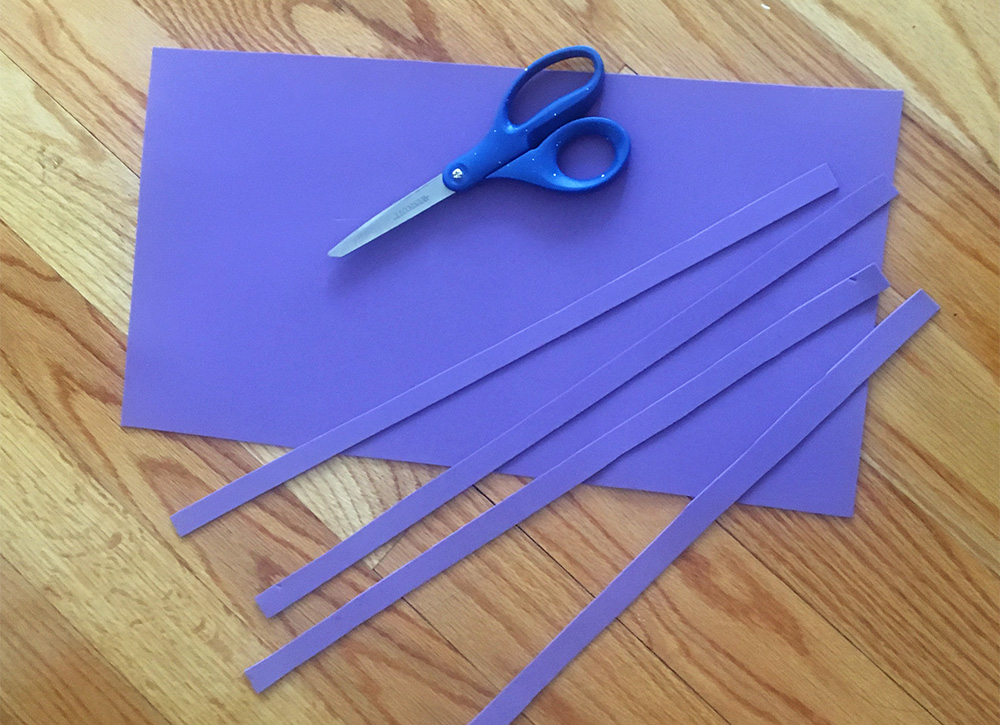
I then built out the narrow ridges along the spiral of icing. I used craft foam for this, cut into long thin strips and taped into place with lots of masking tape; first tons of small pieces of tape to hold the strips in place, and then an entire layer of tape to really smooth everything out.
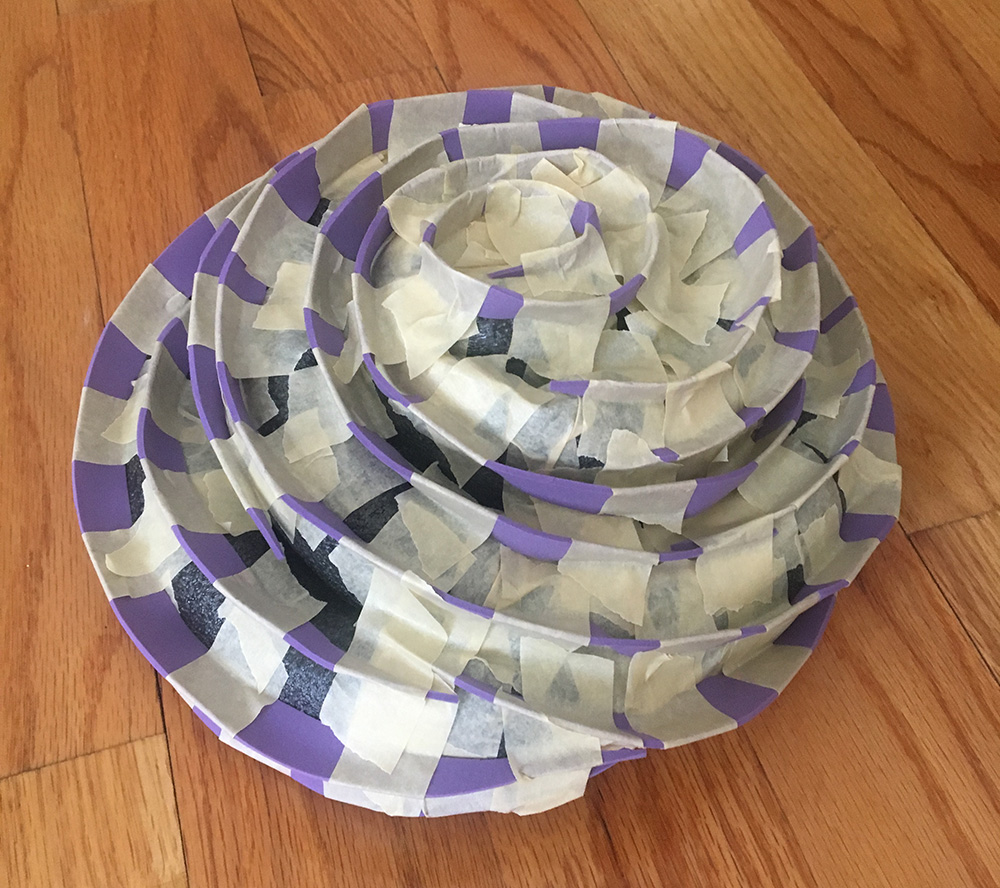
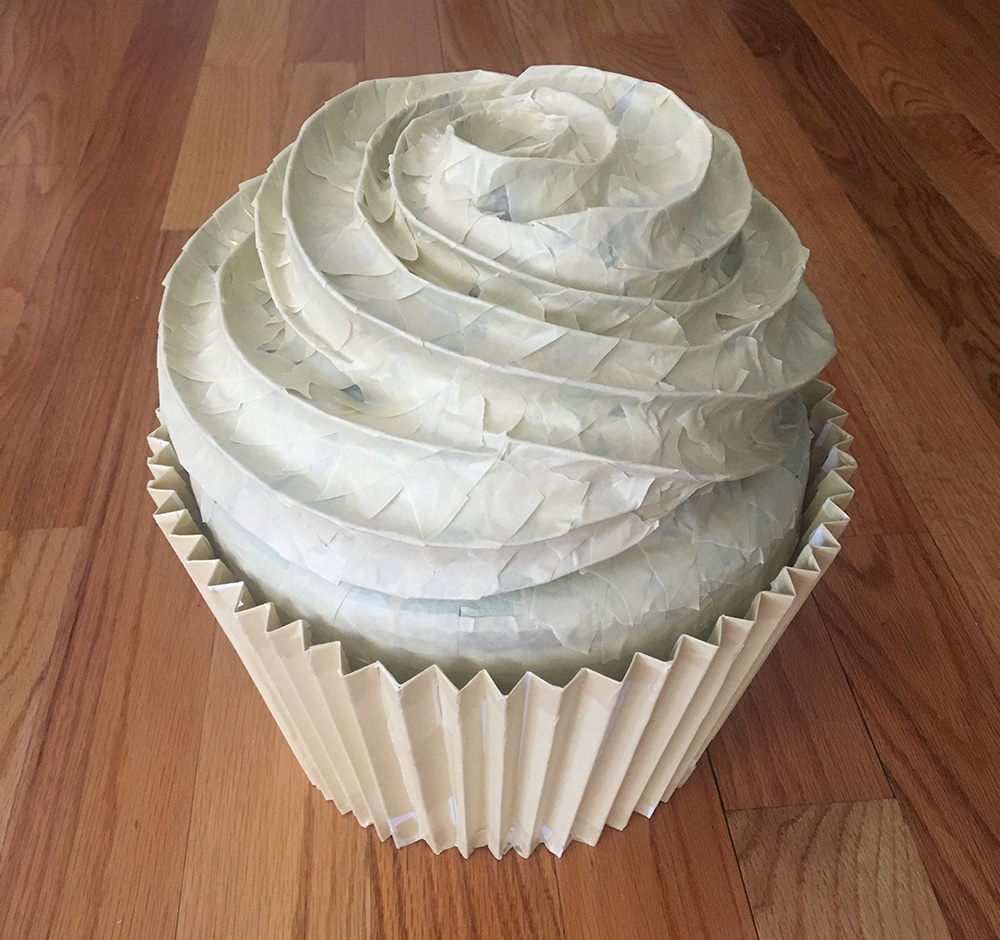
When the ridges were built, I covered them completely with masking tape, to help define the shape and to make the whole thing more sturdy. The cake/icing part and the wrapper aren't attached to each other yet; I just put them together to see how they looked. Not bad!
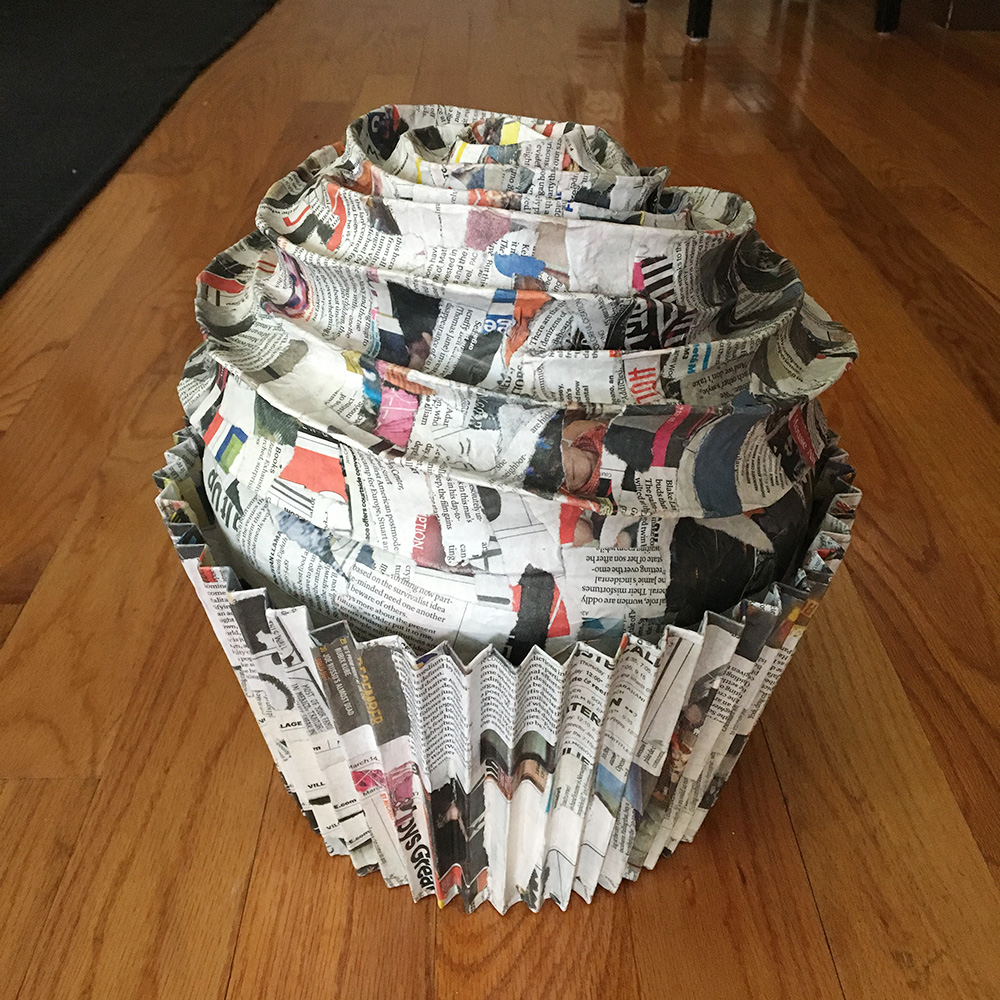
I then added two layers of paper maché to the cake and icing area. You can read about my usual paper maché process and materials here. The short version is: I use Roman PRO-543 universal wallpaper adhesive (paid link) and alternating layers of newspaper and brown wrapping paper.
I would later be adding a small sign sticking out of the top of the icing, so at this stage I cut a hole in the top of the icing for the sign post to stick through, and I also cut a hole in the bottom of the cake part, so the sign post could go through both holes and be perfectly vertical. I built a kind of sleeve to hold the sign post steady, made out of poster board and masking tape; basically a long flattened tube shape. I inserted this sleeve through the holes in the top of the icing and the bottom of the cake, and added some tape and paper maché to hold it in place and smooth over the edges.
Back to the wrapper shape. I covered the base of the cupcake with two layers of paper maché. When this was all dry, the base was nice and sturdy.
I painted the cake/icing shape and the wrapper shape separately. I started off with two coats of gesso on both sections to smooth out the texture of the whole surface. (See my article about working with gesso.)

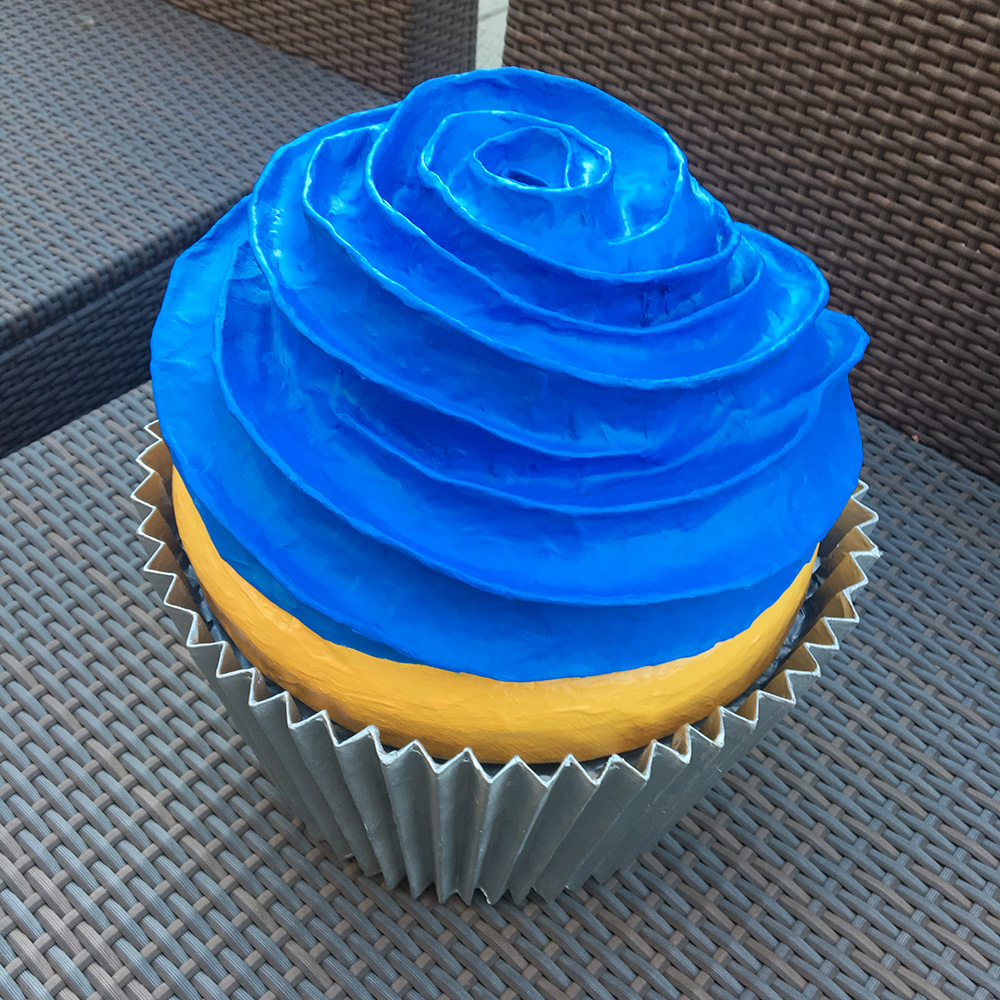
Then I spray painted the wrapper with a matte silver color, and the icing/cake part with blue. (That masking tape you can see on top of the wrapper section is there to close up the incisions I made when I installed magnets for the sign; more on that later...)
After letting the spray paint dry and air out for a couple days, I then hand-painted the cake part with a mixture of yellow and red acrylic paint to get as close to the client's brand color as possible. At this point everything looked pretty finished, but it still wasn't time to glue the top and bottom halves together...
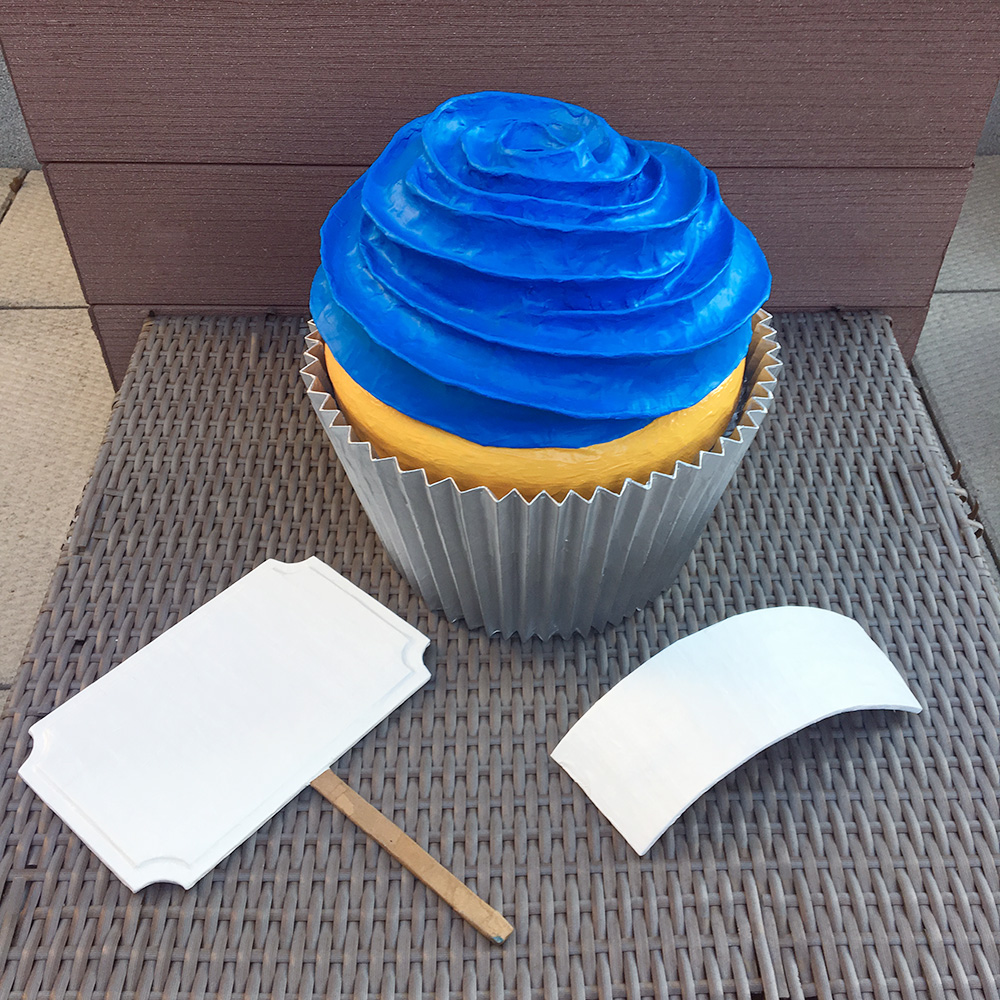
So like I mentioned, my client needed two signs on the cupcake — one on the front of the wrapper and one sticking up from the top. (I'm leaving out the graphics and logos and stuff in this article since those are the client's property.) I started with the sign on the wrapper. To get this sign to match the curvature of the cupcake shape, I taped a long strip of poster board around the wrapper base, and then taped my craft foam banner shape onto this. I then taped a second layer of craft foam onto this shape, to make the sign thicker and also to help stabilize the curve — if you curve one sheet of foam, then curve another onto that and tape it firmly in place, the two won't be able to un-curve. The strip of poster board was just there to let me shape the craft foam around that pointy accordion shape.
I applied a layer of paper maché onto the surface of the craft foam sign and let it dry right there on the poster board. When it was dry, I removed the sign from the poster board, and it retained its nice curve just as I planned; it was good and sturdy now.
I wanted to make this sign attach to the front of the cupcake wrapper with magnets. I cut open the top surface of the wrapper and attached three magnets along the front surface with packing tape. (This is why I had to wait to glue the cake/icing on there!) Now that the magnets were in the wrapper base, how could I place the other magnets on the back of the sign in exactly the right place? Here's what I did. I held the curved sign on the front of the wrapper, and put some magnets on there so they'd pop into place over the ones inside the base. I marked those spots with a pen. Then I removed the sign from the base, and put more magnets on the back of the sign, so they'd line up with the magnets on the front. When those popped into place, I taped them into place with masking tape, and removed the magnets from the front. Easy!
Then I put a layer of paper maché all over the front and back of the sign to lock the magnets in place and make the overall sign shape even stronger. When it was dry, it was easy to pop the sign into place on the wrapper; all the magnets lined up nicely.
For the other sign on top of the cupcake, I cut out the basic shape from a piece of foam board, and then added a smaller shape cut out from craft foam, and covered them in tape and paper maché to make the whole thing sturdy. I made the signpost from four wooden coffee stirrers, taped together and covered in paper maché. (I could've used a popsicle stick if I had one handy!) I attached this to the back of my sign and secured it with tape and then a layer of paper maché.
I gave both signs two coats of gesso and then painted them with white acrylic paint. I designed the text and imagery for the signs in Photoshop, printed them out, and then taped them in place on the signs with masking tape, so they can be removed and replaced as needed.
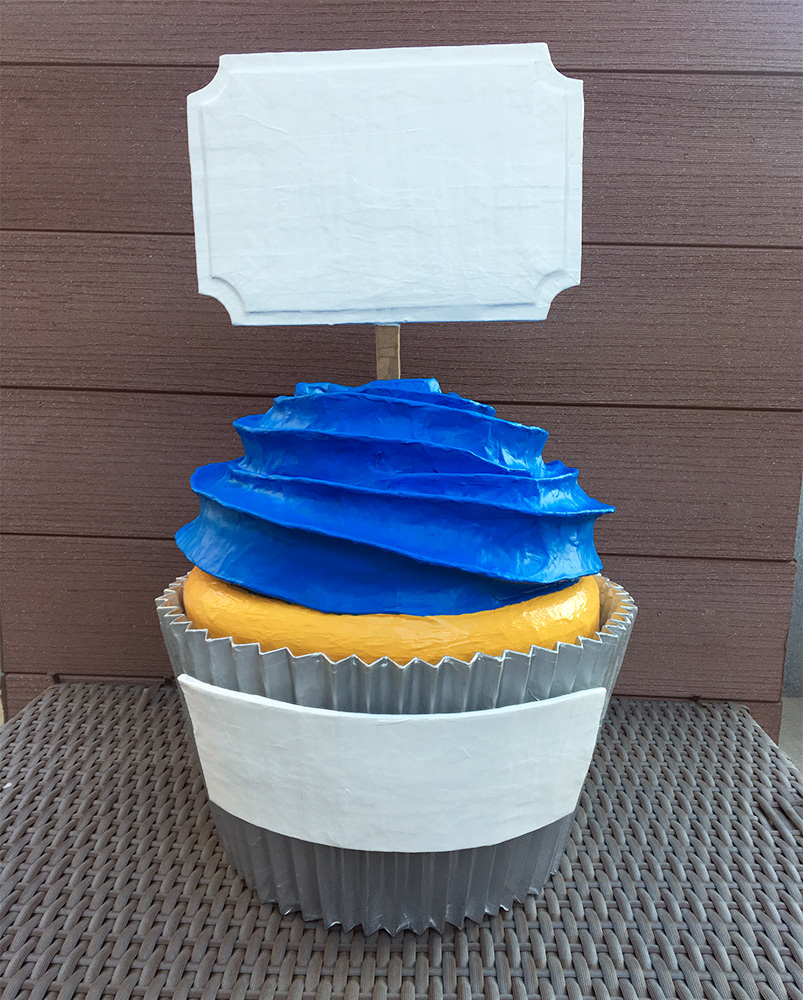
Finally I could attach the two halves of the cupcake! I glued the cake/icing piece and the wrapper piece together with a little bit of Gorilla Glue. I tied a piece of string around the two pieces to hold them together when drying; Gorilla Glue expands a huge amount as it dries and I didn't want it to push the pieces apart. A few hours later the glue was dry and everything looked great.
The sign on top popped into place nicely in the holder I installed in the icing. There was no need to glue it in place; better to leave it removable for easy shipping/storage.
And that's about it for the cupcake! This whole project so fun, and I'm delighted with the results!
Interested in commissioning a custom paper maché sculpture, decoration, or mask? See my page about custom paper maché projects.