
Tips for working with gesso
Published by Manning on July 1st, 2016
If you’ve ever created any paper maché projects and then painted them, you’ll surely have noticed that the edges of your paper are often still visible, sometimes even after several layers of paint. I hate seeing those paper edges in my stuff, and I’ve learned I can reduce this with a few techniques, like being really precise with my last layer of paper, and doing a final layer of just paste smoothed over the whole shape with my hands. Still, even when I do that stuff I end up still seeing those paper edges through the paint sometimes. It drives my crazy.
Enter gesso. Gesso is a thick paint-like substance that’s meant to be used as a primer before regular painting. It’s thicker than acrylic paint, and it shrinks a little less than acrylic paint when it dries — you might notice sometimes that acrylic seems really thick when you’re painting it on, but when it’s dry it becomes very thin and all those little imperfections show through. Gesso does a better job of keeping its shape and thickness as it dries.
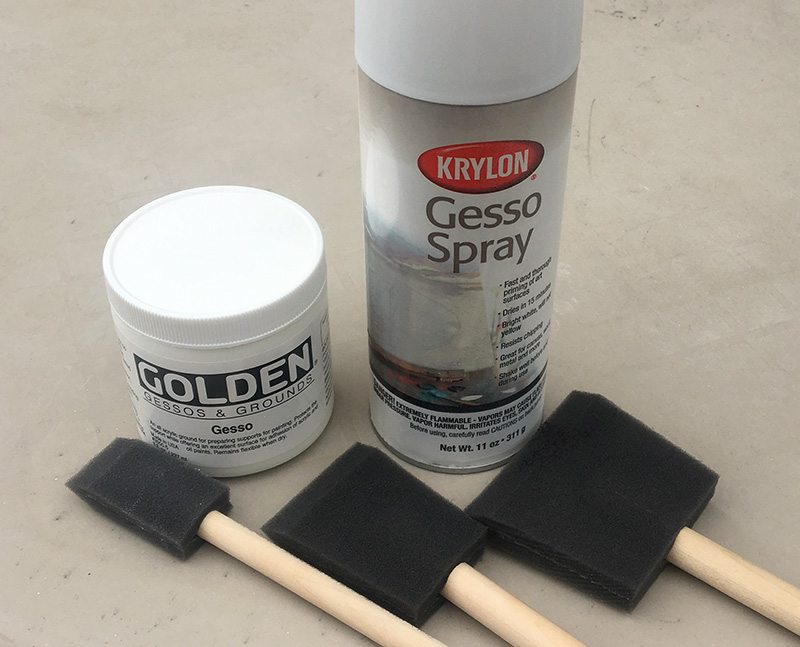
I’ve used two kinds of gesso for my paper maché projects: the regular liquid kind in a jar, and the spray kind.
Working with gesso in a jar
One important tip if you’re working with the kind of gesso that comes in a jar or a bucket is that it’s important to use a foam brush for large surfaces, rather than a large paintbrush. Gesso is so thick that it can create grooves where the individual hairs of your paintbrush are as they drag through it, and when it dries those lines are still very visible. I learned this the hard way the first time I used it, with a wide chip brush. Fortunately a second coat using a foam brush covered up these lines nicely. So, buy a few foam brushes from the art store in different sizes; they’re those dark gray foam squares mounted on a stick. I’ve never loved them for normal painting but they’re perfect for gesso. They’re also cheap!
Even though the point of the gesso is to get it on there thick, it’s important to spread it out nice and thin rather than daub in on in big blobs. If you leave it too thick in places, like with big blobs or drips, they can dry really ugly; the shapes can warp as they dry. So go ahead and throw a big blob onto your shape, but then spread it around nice and evenly with the foam brush. Go for two or three thin coats rather than one really thick one.
Wait at least an hour or two between layers; the thickest part of your coat will take a while to dry completely. When you’re all done with the gesso, wait at least eight hours before moving on to other coats of paint.
Whenever I’ve finished with gesso on a project, I let it dry for an hour or two and then look the whole thing over carefully for any little stay blobs or drips. Depending on where they are, I either slice them off with an X-acto knife or sand them down with sand paper, and then add a little more gesso in those spots with a small paintbrush; usually two or three thin coats to smooth out these areas. Let all that dry for eight hours before moving on to the rest of your painting. The finished dry surface of gesso is smooth and matte and kind of chalky and porous — an absolutely perfect surface for spray paint and/or acrylic paint.
One great thing about the regular kind of gesso that you paint on by hand: it cleans up with just water! Spray gesso does not.
Working with spray gesso
I was hesitant to try spray gesso, but I’m glad I did! This stuff looks like a regular can of spray paint. It’s very important to shake it up for a long time before using it. And when you do use it, you want to go for very thin, quick coats, holding the can about eight inches away and moving it in quick circles, moving quickly over your surface so you’re not going over the same area more than a second.
I always keep a small foam brush handy when I’m working with spray gesso so that when I’m done with an entire coat I can look for any big drips that might be forming and smooth them out, using a corner of the foam brush — I even trim the edge of a foam brush with scissors to make a nice narrow point for hard-to-reach areas. Once you’ve cleaned up these drips, wait at least three or four hours between coats of spray gesso to make sure they’re completely dry. If you do your next coat too soon, tiny holes may form on the outer surface. In humid weather I wait at least six hours between coats.
One great thing about spray gesso is that it doesn’t have the same gross chemical odor that spray paint does. I usually leave my spray paint projects outside for at least three or four days before bringing them inside, and they still have a bit of a chemical odor, but with spray gesso you can bring your projects in after just a few hours and they’re totally fine.
(I assumed at first that since spray gesso has so little odor it might be water based, but I learned the hard way that it is not. I sprayed too much on a project and it formed large drips, so I smoothed them out with a foam brush. I tried to rinse off the brush in the sink and the gesso wouldn’t wash out with just water; it smeared all of my hands and the sink! It was able to clean everything the sink with acetone, but the brush was ruined. Regular liquid gesso rinses out of your brushes easily with just water.)
Because spray gesso is so thick, it’s important to keep the nozzle of the can clear. I didn’t know about this trick for ages, but all you have to do is, when you’re done using the spray gesso, turn the can upside down and give it a few sprays until the spray becomes clear. That’s it! Then the nozzle will be clear next time you want to use it. This works for spray paint too, of course!
One last trick. When I’m working with gesso and I want to do multiple coats and it’s important I get perfect coverage with each coat, I alternate my coats of gesso with a very fine coat of spray paint; any ol’ color. I do one coat of spray gesso, let it dry for an hour, and then do a quick dusting with spray paint all over the piece, just enough so I can see a hint of the color all over. Then I let that dry for a half hour, and then I do the next coat of gesso; when the color is completely covered, that means you’ve done a complete coating.
You now know everything I know about gesso. Good luck!
 About Manning Krull
 How to make a 4-foot paper maché alligator
 My violin skull mask, Mardi Gras 2015
 Three-headed paper maché dragon sculpture
June 8th, 2022 at 11:19 pm
Is there a way to soften rock hard Gesso?
June 10th, 2022 at 1:26 pm
Hi Sandy! None that I know of, unfortunately!
May 9th, 2023 at 4:46 pm
Will clear spray gesso work on silk, card stock and chipboard embellishments?
May 9th, 2023 at 7:04 pm
Hi Diane! I don’t know about silk, sorry! My guess is maybe not; it may cause a lot of little bumps, and it may bleed through. However, on card stock and chipboard, totally. My only concern with anything thin like that is that the gesso may cause it to warp a bit.