
Paper maché skull mask with dancing skeletons, part 2
Published by Manning on March 5th, 2019
This is part two of my skull mask project with rotating gears and marching skeletons. See part one here.
Dancing skeletons
I drew all 29 of the dancing skeletons at a larger size (about 6″ tall) on sketchbook paper, keeping the designs as simple as possible since I’d be re-painting them by hand at a much smaller size. I scanned ’em and cleaned ’em up in Photoshop, reduced them to about 2″ tall, and printed them out. I printed out the skeletons as dark gray, rather than white, on a black background; more on that in a minute. Like I mentioned all the way at the top, I chose my favorite skull masks and costumes of each of my 28 current fellow group members (plus myself — I’m the violin!) as a sort of best-of selection from the last 20 years.
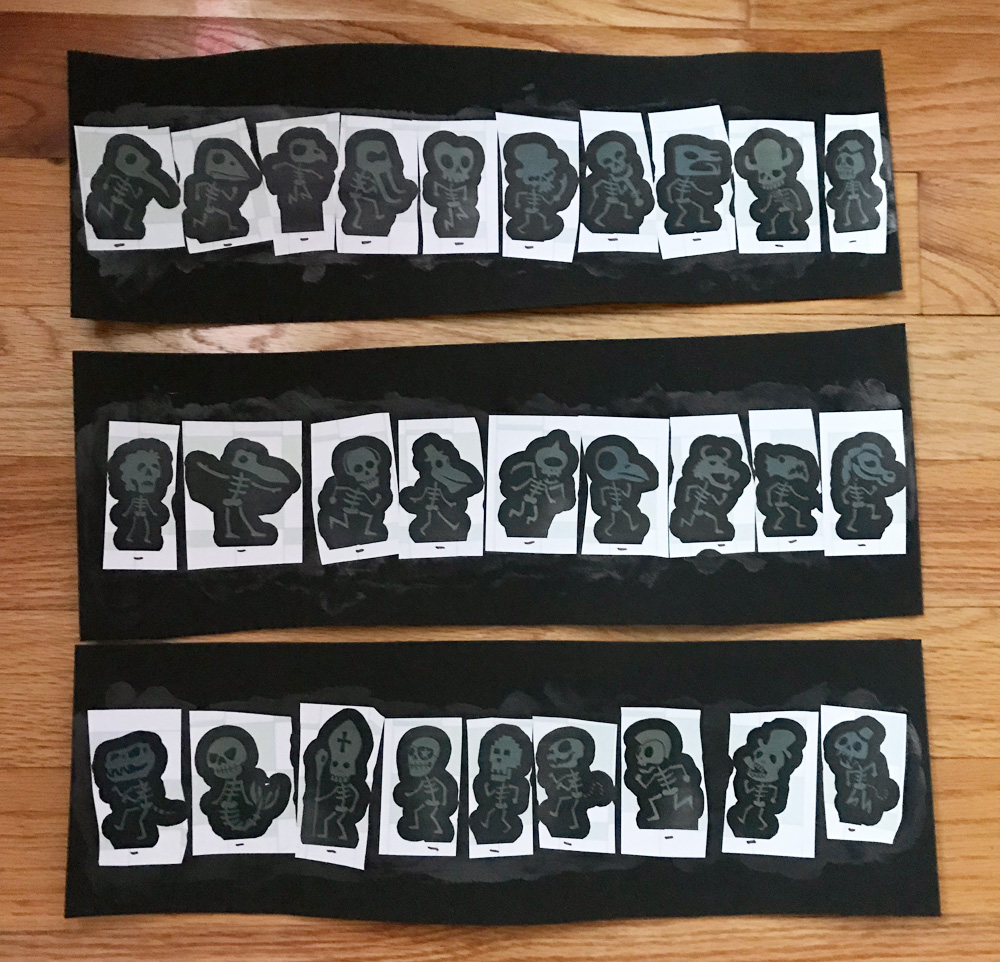
I cut out the paper skeletons very loosely with lots of space around them, and pasted them onto sheets of black craft foam using the same wallpaper adhesive I use for paper maché. I just spread some paste onto the foam with my hands, then laid the pieces of paper in place, and smoothed some more paste over them. I weighed down the edges of the craft foam with heavy books (protected with wax paper) so it wouldn’t curl up when drying. In the pic above you can see the paper skeletons after they’re dry; the craft foam warped a little bit but not too bad thanks to the books.
I cut out the skeletons with scissors and then I used a tiny paintbrush and some black and white acrylic paint to re-do all the skeleton images; the dark gray print-outs are just there as a guide, as I wanted to make the skeletons look totally hand-made rather than printed. Don’t tell anybody I cheated by printing them! I used watered-down black paint to make the black parts of the print-outs even blacker, and I also touched up the white edges of the paper from where I cut them out; you’d be surprised but the edges of the paper can be very visible even though they’re so thin (like, paper-thin, one might even say). I painted the actual skeletons very very carefully with watered-down white paint; two coats each. I hate working at a small size like this! Why do I do this to myself?
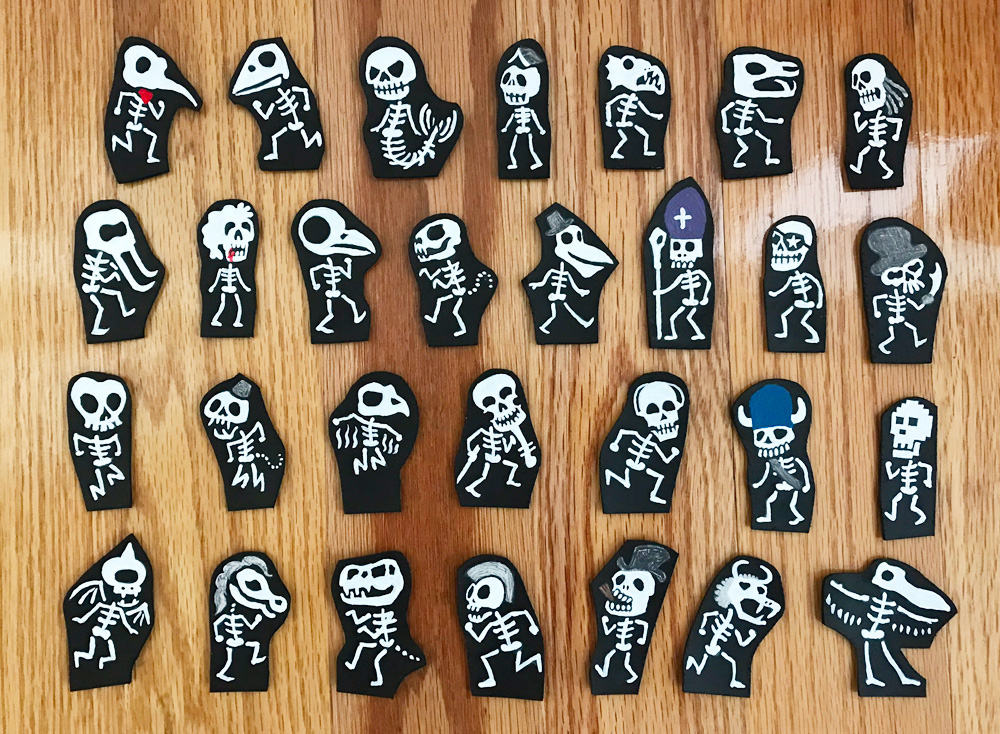
A few of the skeletons have elements of color (like our Grande Poohbah’s blue hat), and I did those with acrylic paint as well.
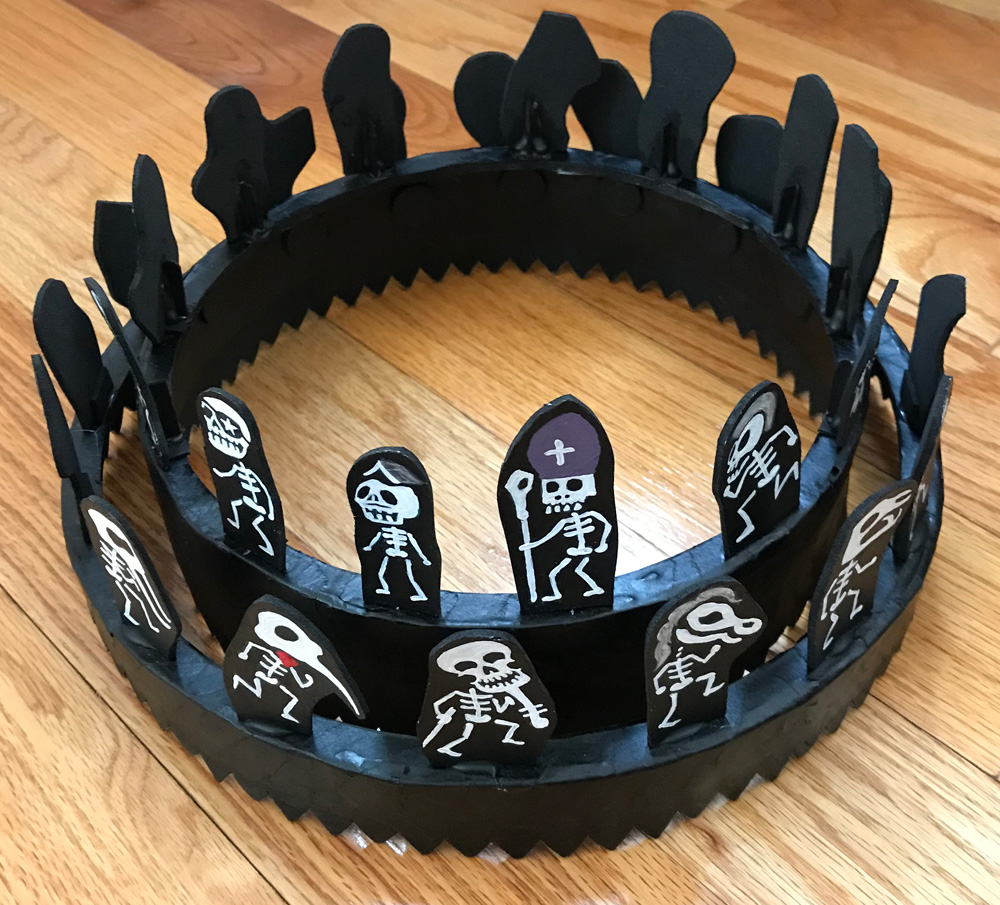
When it was time to mount the skeletons onto the rotating rings, I ended up using two different methods. I started with little pieces of wooden coffee stirrers; I snipped them with pliers and hot-glued them into an upside-down T-shape and then hot glued them and the skeletons in place. This ended up being a little bit labor-intensive, so I finished the whole top tier this way and then switched to a simpler method for the bottom tier: I simply cut little rectangles of the same black craft foam that I made the skeletons out of, hot glued these on the back of the skeletons to give them a little more width at the bottom, and then hot glued the skeletons onto the ring. Much faster and easier, and they hold on nice and firm.
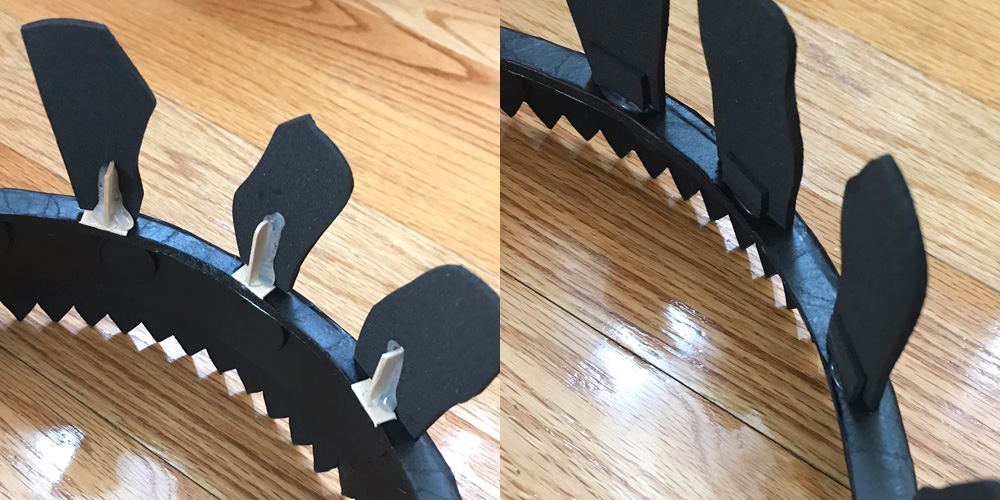
Then I painted the stirrers and all that hot glue black. Did you know they make black hot glue sticks? I need to get me some of those.
The skeletons are all slightly warped in exactly the same direction; they all curve forward a tiny bit, and this is totally fine. This happens whenever you paste paper onto foam like this; the paper expands a bit when it’s damp with the paste, and then you smooth it out flat on the foam, and when it dries it shrinks a bit, pulling itself into a slightly curved shape. So even though the skeletons are mounted at a perfect 90-degree angle at their feet, they all lean forward a little bit. Not a big deal at all for this project, and you can’t even really tell in this pic of the finished rings:
That’s all for part two! Whew! Time to build a freaking skull mask around all of this. On to part 3: making the skull mask!
 About Manning Krull
 How to make a 4-foot paper maché alligator
 My violin skull mask, Mardi Gras 2015
 Three-headed paper maché dragon sculpture
Leave a comment