
Spider skull mask and costume for Mardi Gras 2020! — part 1
Published by Manning on February 25th, 2020
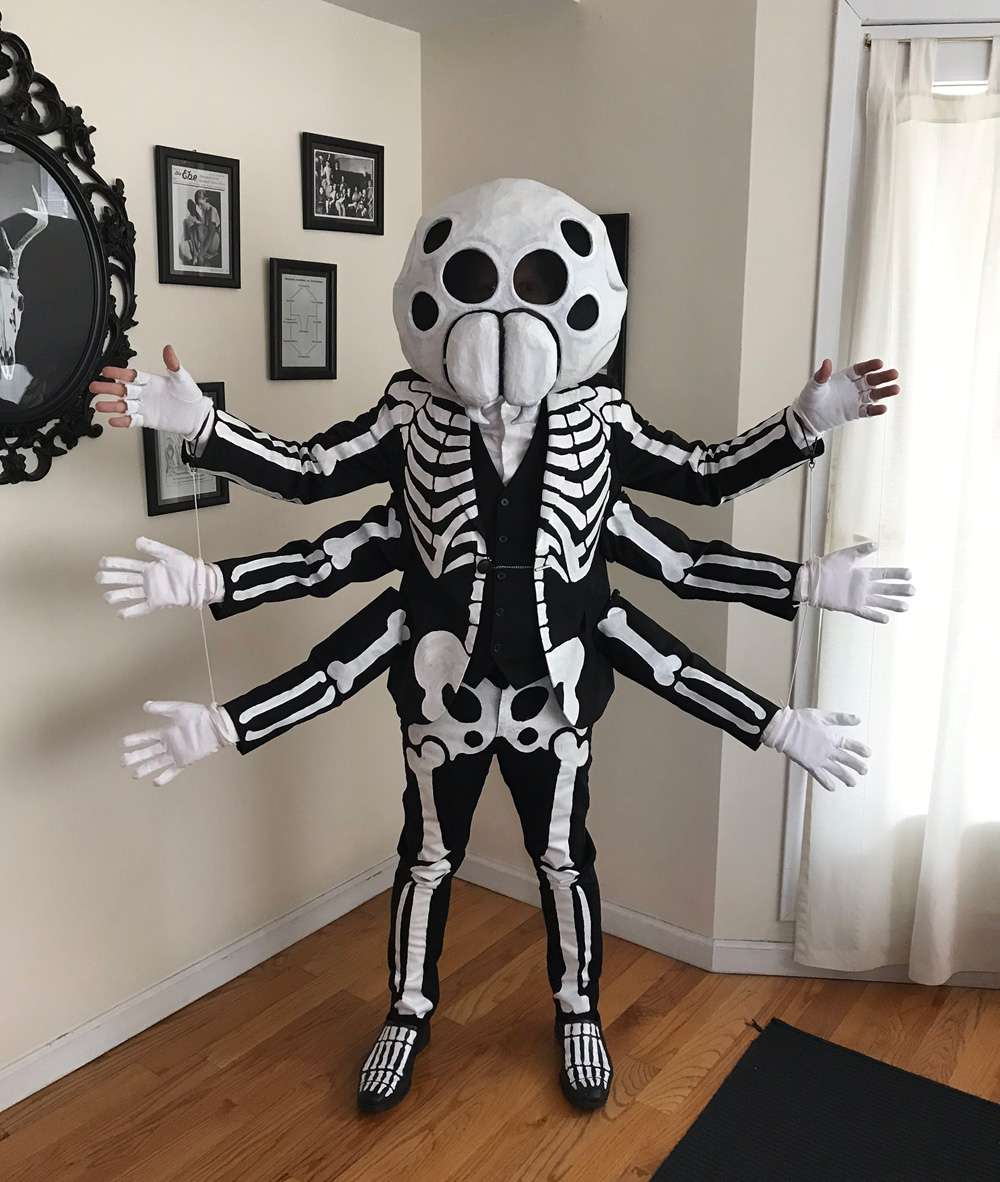
I made this spider skull mask and six-armed spider skeleton costume for Mardi Gras 2020! I know, I know, spiders don’t have bones; they got like an exoskeleton or somethin’. Deal with it, nerds. Anyway I’m really happy with how this whole thing came out, and now I’m going to bore you with every detail of how I made it!
Part one: making the spider skull mask
My basic objectives for this spider skull mask design were:
- Make a skull that’s shaped more or less like a spider head but with a couple exaggerated features to make it look a little bit like a human skull rather than part of an exoskeleton — stuff like cheekbones, and whatever you call those dents at the temples — so, sort of a spider-human hybrid.
- Keep the mask super lightweight, comfortable, and balanced.
- Give it lots of eye holes and other extra holes, for great visibility and so I can hear pretty well.
- Build the fangs so they’re like a door that can swing up so I can drink!
This was also the first big mask project where I decided to try…
A hat instead of a hard hat
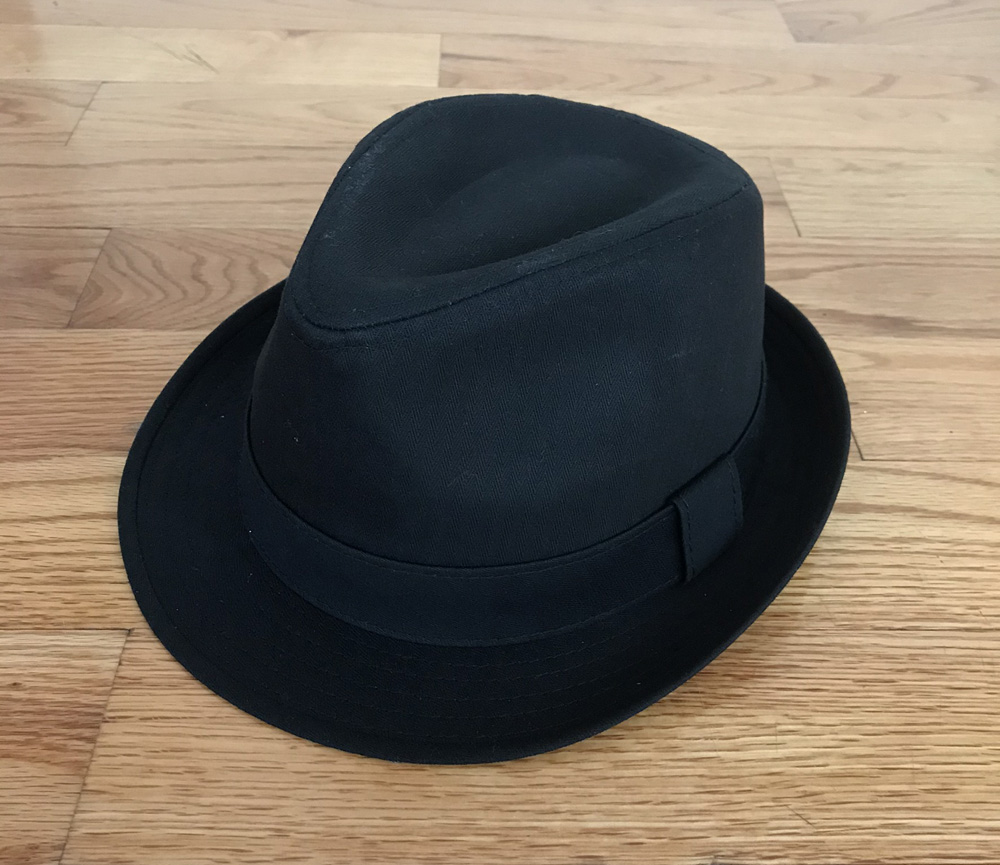
Normally I install a modified hard hat in each of my big masks, but since this spider skull is pretty lightweight and well-balanced I wanted to try building a structure that fits onto a trilby (paid link) — kind of like a fedora with a smaller brim. The reason for this is, in recent years for Mardi Gras I’ve been bringing a cheap trilby with me on the parade route so I can wear it after we’re done marching. We usually abandon our skulls for the rest of the day at some point, and I wear the hat to keep the sun and/or rain off my head while I’m wandering around and hanging out at street parties all day.
I usually carry the hat folded-up inside my jacket, but this year I got the idea to build a foam and paper maché structure into the mask that perfectly sits on the hat, and at the right height and angle and everything. Most of my big masks are too heavy and unbalanced for this kind of thing, so that’s why I usually use a hard hat; the hard hat is nice and solid and makes the mask a lot more stable. So anyway, my first step for all this was ordering a cheap hat off of Amazon (paid link). I’ll explain my process for building the hat into the mask below, under “Installing the hat”…
Building the base for the spider skull
Okay, finally I could start building the basic head shape to use as a base for the mask. I designed the head on paper to work out the basic measurements. I took some rough measurements of my head; to do this I just take selfies in the mirror while holding a ruler up next to my head, and then I can bring that into Photoshop and slice the ruler onto its own layer and then move it around to measure all the dimensions. This helps me figure out how big the mask needs to be, and where the eye holes need to be so they line up correctly with my (real) eyes.
I started by drawing the front view of my spider skull onto foam board. I used a ruler to draw a rectangle at the exact dimensions I wanted to make the head, and I drew a vertical line down the middle of that. I then used this rectangle as a guide to sketch the head shape.
To keep the head symmetrical, I first lightly sketched the whole shape in pencil. When I was happy with this rough sketch, I then went over the lines of just the left half with a marker. I cut out this half with an X-acto knife, flipped it over, and traced the other half. Then I cut this out and taped the two halves together with shipping tape. Easy, perfect symmetry!
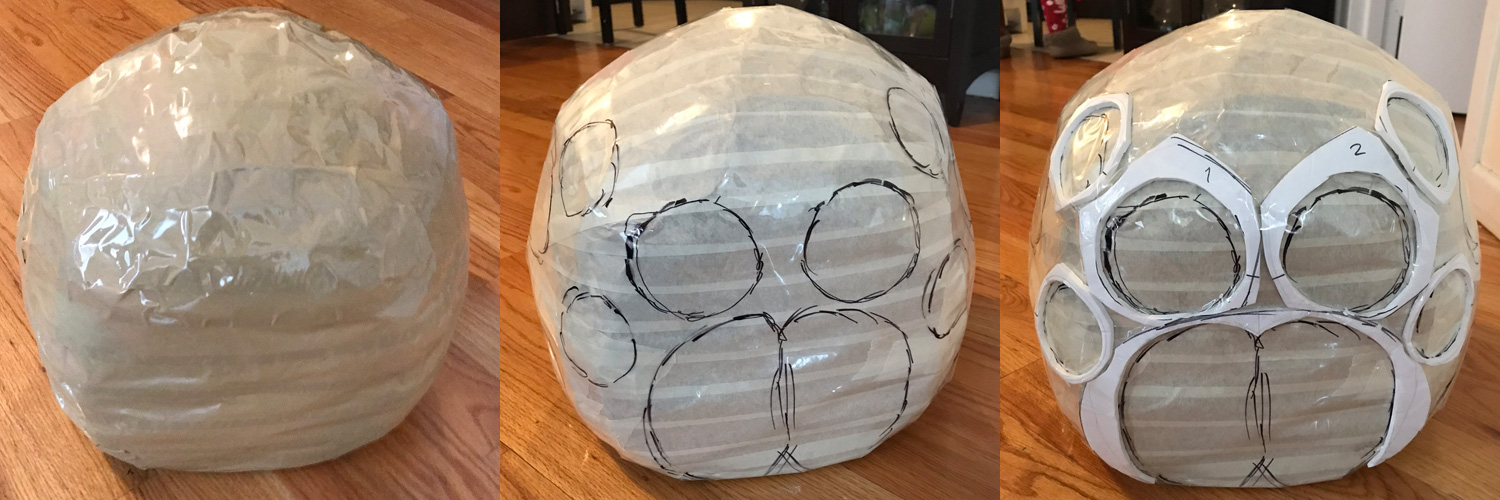
I then worked on creating smaller and smaller versions of this foam board shape; I did these two at a time. All these 2D slices will get assembled to make a symmetrical 3D head shape. Let me fast-forward a bit; this is what I’m making:
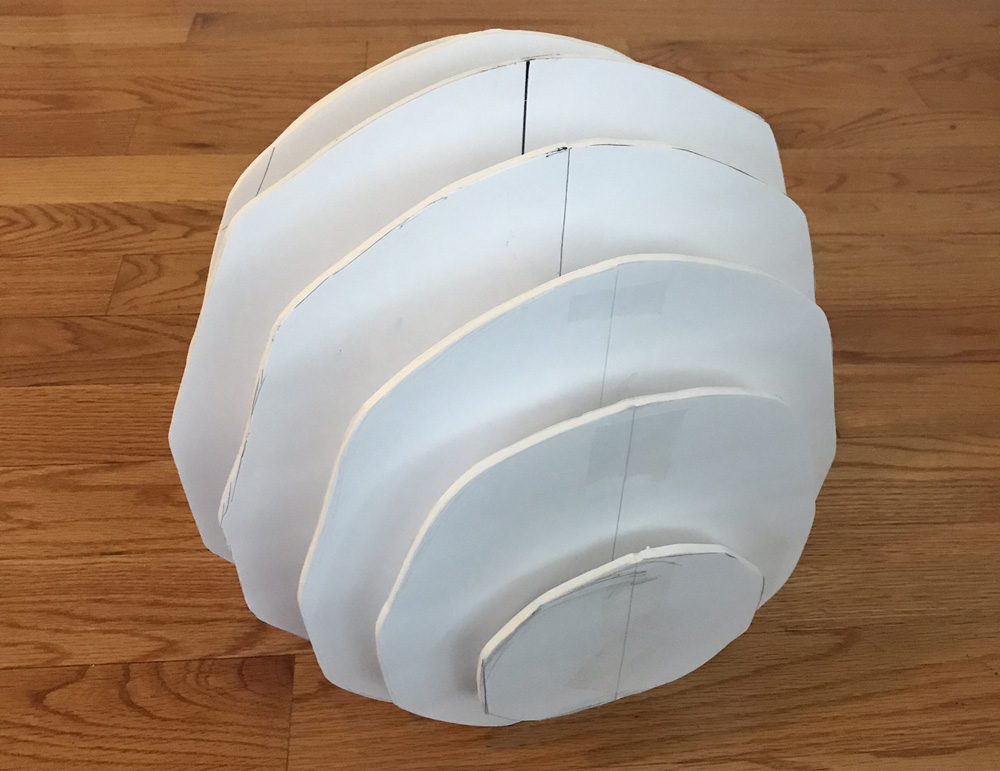
So, in the above pics, the largest panel — the one in the middle — is the first piece I drew and cut out.
The smaller pieces are identical copies on both sides (with one exception; I’ll explain in a bit). So, after making the middle panel, I traced that panel onto foam board, and then I drew a smaller shape inside it and cut that out. I traced that one and cut that out, so I had two copies of it. These are the panels you see on either side of the middle panel. Make sense?
Note: I always mark numbers and/or letters on everything to keep track of what’s what! I know I’m too dumb to just remember what goes where. I marked a “1” on the middle panel, and I marked “2” on each of these new panels.
I then traced one of the “2” panels and drew a smaller shape inside that. I cut that out, traced a copy, and cut that out. I marked these with a “3”; duh!
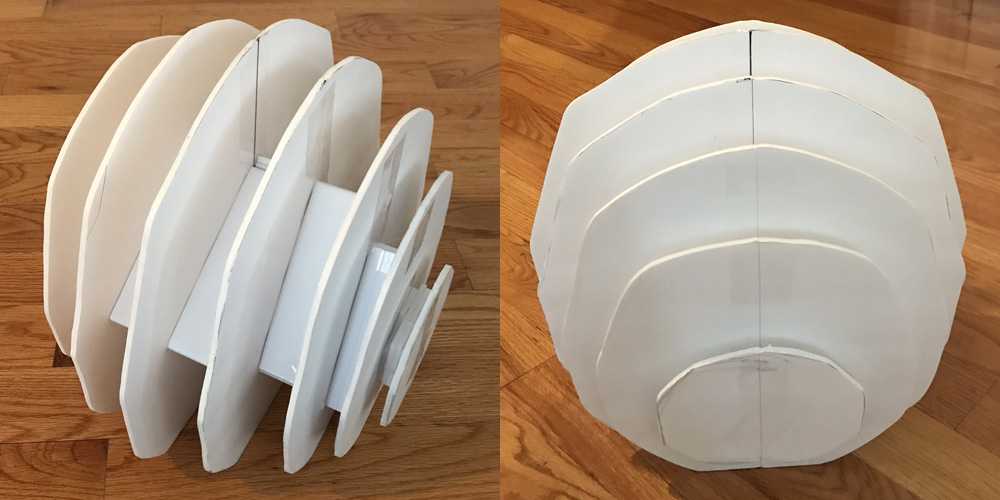
I made a smaller pair and marked them “4”, and just one tiny piece for “5”. I wanted to leave the front of the face somewhat flat, so the “5” piece goes on the back of the head to round that part out a bit. In the above pics you’re looking at the back of the head. The front needs to be flat to give me a place to add the big fangs later on.
When drawing all these shapes, I drew a vertical line down the center of each one to use as a guide for lining up all these parts later.
To assemble these slices and hold them apart at regular intervals, I cut out a bunch of 2″ strips of foam board and folded them into triangles. I carefully hot glued all the slices and triangles together, being careful to keep the vertical lines all lined up. When all this was done, I had this nice, fairly precise armature shape for the head. (This is somewhat similar to my technique for making box shapes out of foam board — the main difference is that I’m stacking up slices here rather than building a box shape with walls.)
If I didn’t care about being so specific with this head shape I could’ve just used a big plastic bucket for this, or even a big blob of chickenwire — but you know me, I love to over-complicate everything for myself!
Time to pad about this armature shape and hide all the hard edges of the foam slices.
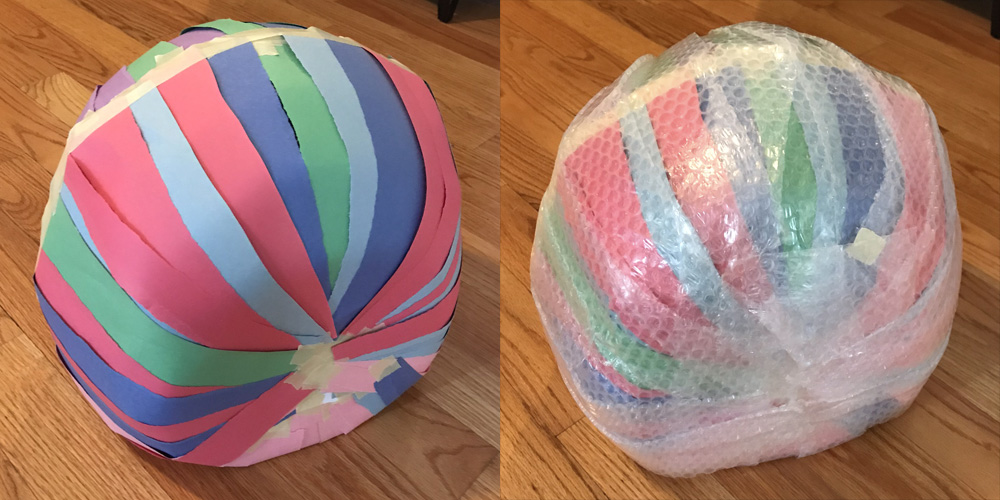
First I covered the spider head shape with torn strips of construction paper; I have a ton of this stuff left over from another project a million years ago. I taped these strips in place somewhat tightly, and already they started to conceal the hard edges of the foam armature. However, the shape felt pretty flimsy and unstable. That will get a lot better over the next few steps.
Next, I covered the whole spider head with 3″ strips of bubble wrap. To make these strips, I take a 12″ roll of bubble wrap, unroll a bunch of it, and cut that into four strips, first by cutting it down the middle, and then cutting those halves down the middle. I attached the strips tightly to the head with clear shipping tape.
The head shape felt more stable, but still a little soft and squishy. Again, the next steps will fix that.
I then covered the spider head with a layer of brown shipping tape. Now the head felt a lot more stable and sturdy, however, shipping tape ends up getting wrinkled when you apply it on a big curved shape. So next I covered the shape again with a layer of masking tape; that helps smooth out the wrinkles. The head shape was becoming more clearly defined step by step and felt a lot more solid; totally stable enough to put paper maché on.
I then did one more layer of clear shipping tape, which you can’t really see here ’cause it’s clear (I would’ve used brown again but I ran out). This last layer of shipping tape is there to act as a release agent; the paper maché won’t stick to it very well, which will make it very easy to remove all the inner materials when the paper maché is done.
I sketched the face onto the head with a marker just to get a sense of the size and positioning of all the parts.
I made some 3D ridges for the face out of foam board — the eye sockets, the outer edges of the mouth, and the the cheekbones (not shown yet) — and taped them in place on the skull. I smoothed out the outer edges of these shapes a little bit with lots of masking tape.

I then carefully covered over all these face parts with small pieces of brown shipping tape (I bought some more!); for the smallest parts, I cut the shipping tape in half or even thirds to make tiny strips. Again, the non-porous surface of all this shipping tape will act as a release agent for when it’s time to remove the finished paper maché (coming up).
I’m skipping the fangs for now; I’ll be building them separately so they can act as a door. So with that, the basic head shape is done, and it’s finally time for paper maché!
Paper maché
I covered the whole mask with seven layers of paper maché over a few days; here’s some info about my paper maché process and materials. The short version is: I use Roman PRO-543 universal wallpaper adhesive (paid link) and alternating layers of newspaper and brown wrapping paper.

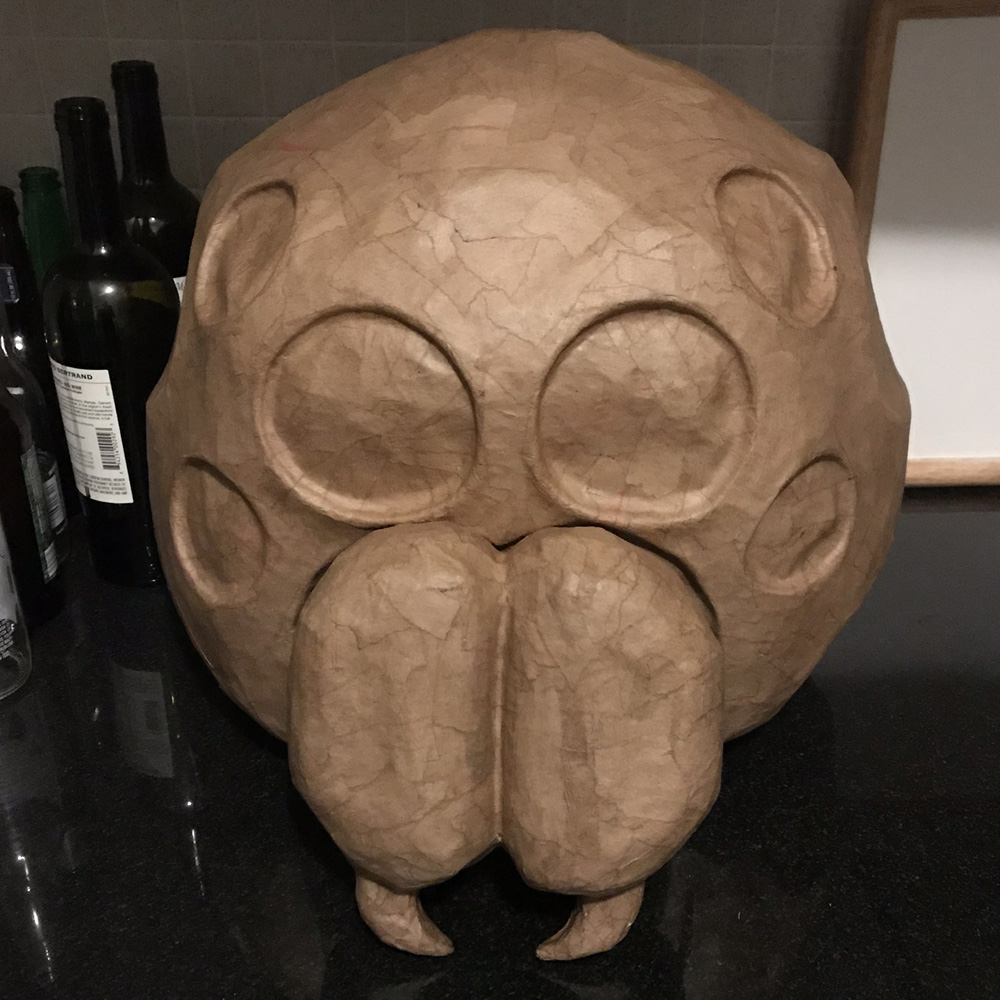
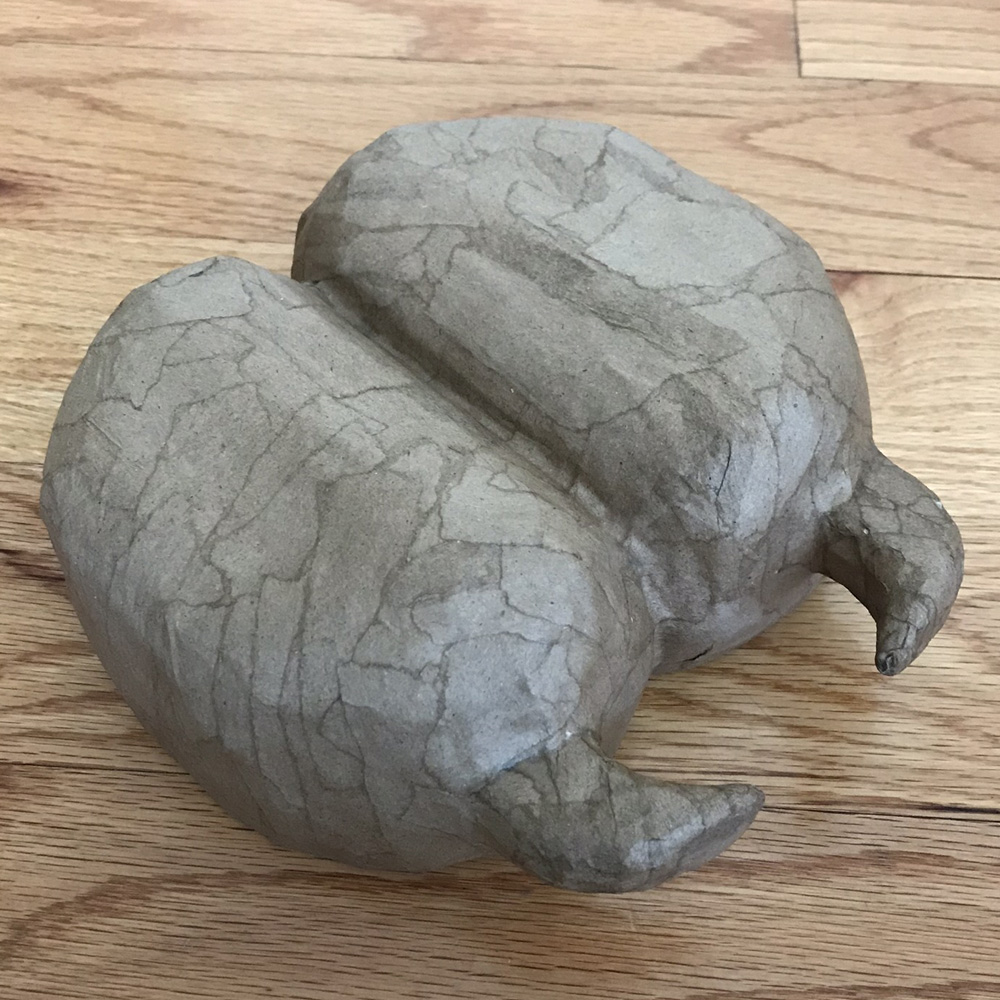
Here’s the spider skull with all seven layers of paper maché done, with the separate fangs piece just sitting in front of it — more on the fangs below…
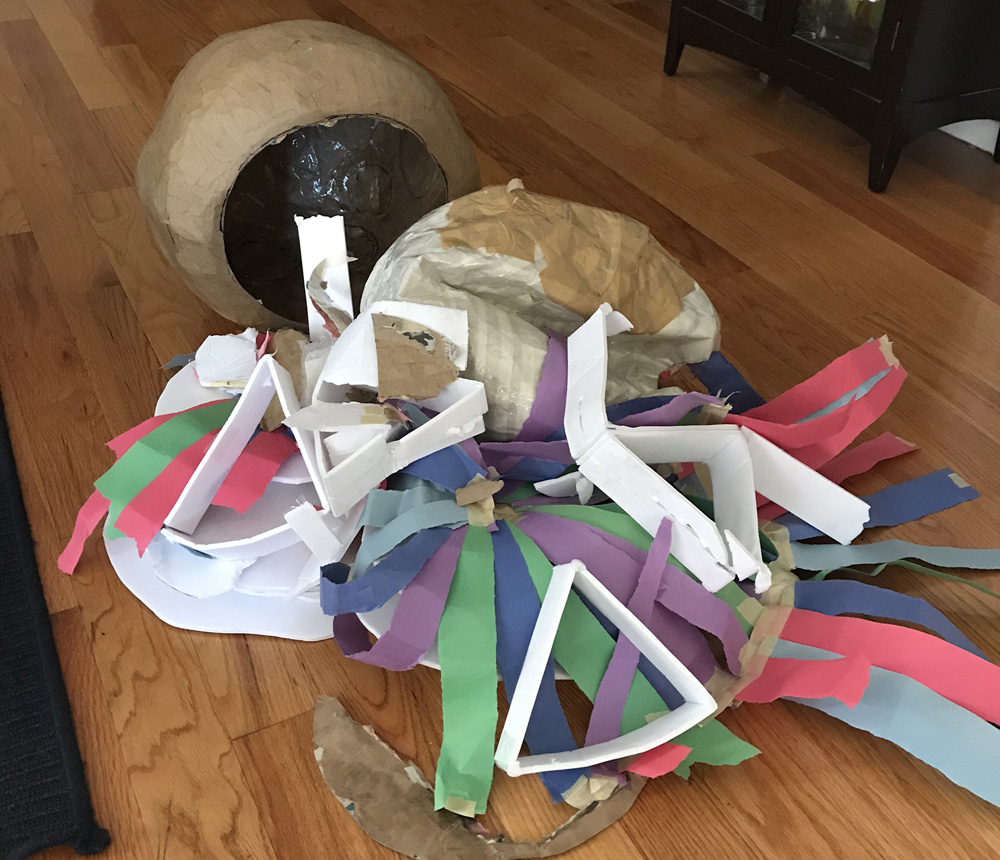
When the paper maché was 100% dry, I cut open the bottom edge of the mask with my X-acto knife and removed all the junk inside; that’s the mask, face-down, in the back of this pic. Thanks to all that shipping tape, the base materials were really easy to pull away from the paper maché and remove.
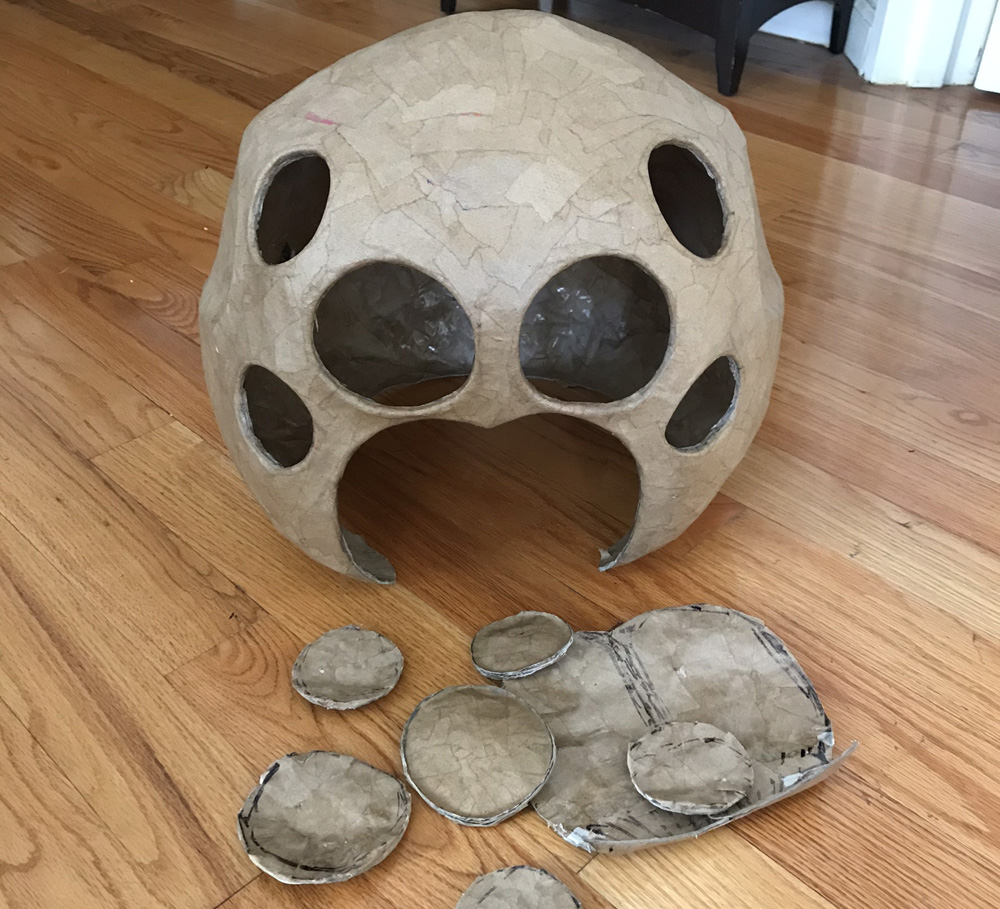
I trimmed the bottom edge of the mask with scissors to make it nice and even. I then cut out all the eye holes with an X-acto knife. I also cut out two holes under the cheek bones; these are there to help me hear better and to help with air circulation.
I reinforced the inner edge of the mask opening with plastic zip ties, which I taped in place. This helps prevent the walls around the big opening from warping.
I covered over all these reinforced areas with two layers of paper maché. I also covered the edges of the eye holes and ventilation holes with a layer of tiny pieces of paper maché.
Building the fangs
I forgot to take any pics of my process for making the fangs! I just started with a foam board shape to use as a base and built up the big curved shapes of the fangs with pieces of foam insulation tubing and lots of tape.
I made the little pointy teeth at the bottom out of aluminum foil and hot-glued ’em onto the main fang shapes.
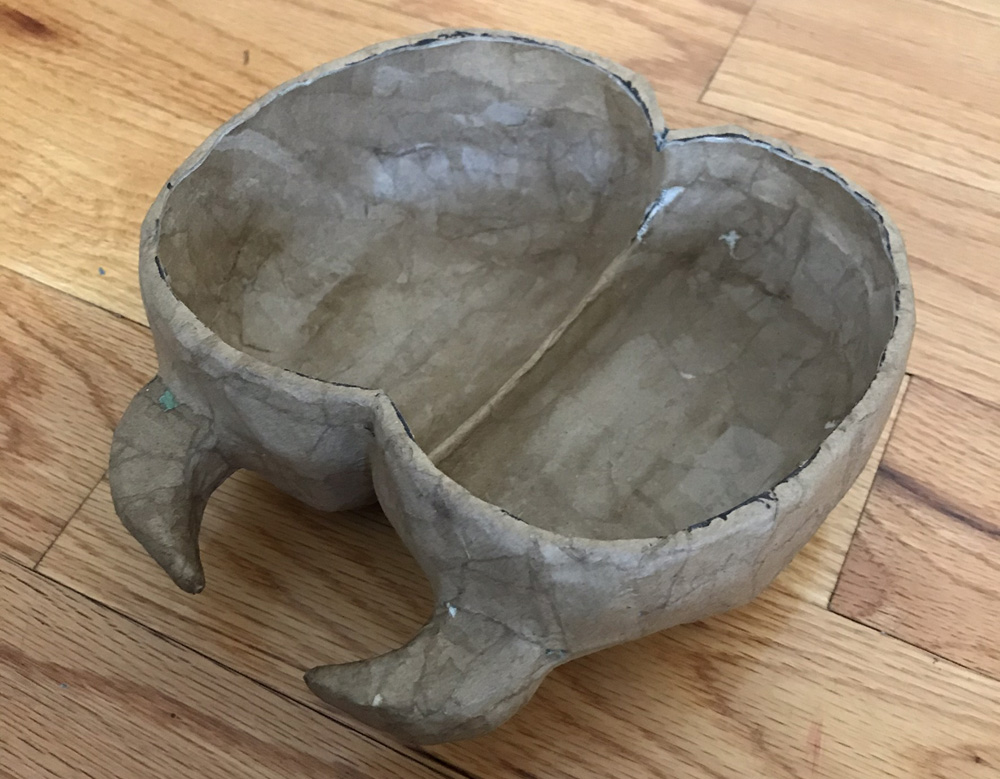
I applied seven layers of paper maché over the whole fangs all in one go. I let them dry for a couple days, and then I cut them open in the back and removed all the inner materials, except for the little pointy teeth. I wanted these teeth to be as strong as possible since they’ll have a bit of weight on them when I set the mask down on a flat surface, so leaving the base materials inside helps them be a little stronger.
Painting
I painted the mask and fangs before assembling them. I followed my usual steps for painting this mask: I started with a coat of spray gesso, let that set for a half a day, and then I did a coating of white spray paint. I also do a weird step in between these: after the gesso and before the white spray paint, I do a light dusting of another light color of spray paint (in this case, green) just so I can see where I’m covering when I do the white spray paint. Otherwise you never know if you’re getting good coverage from one white layer (i.e. the gesso) to the next (i.e. the spray paint).
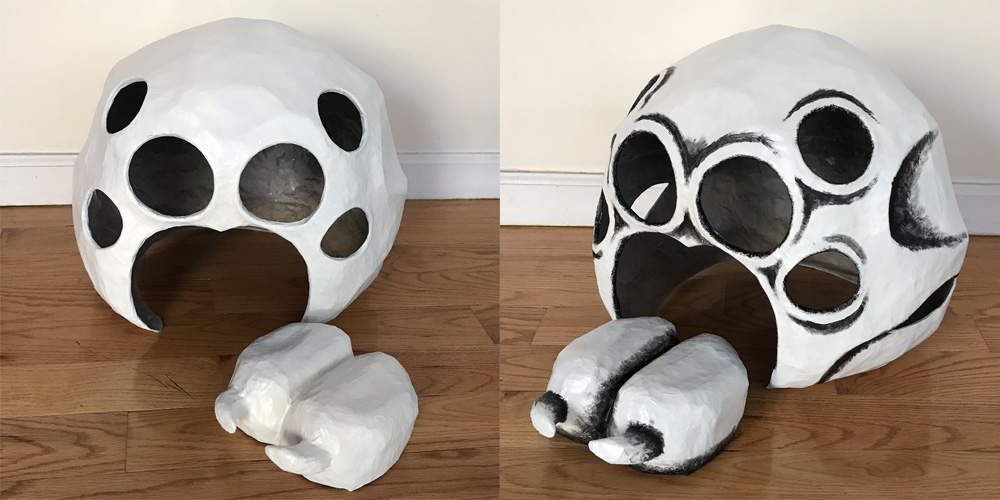
I let the spray paint set for a full day, and then I painted some dark, exaggerated shadows with black acrylic paint and various brushes. This always looks crazy at first, but I’m going to dial back the contrast a lot in the next step.
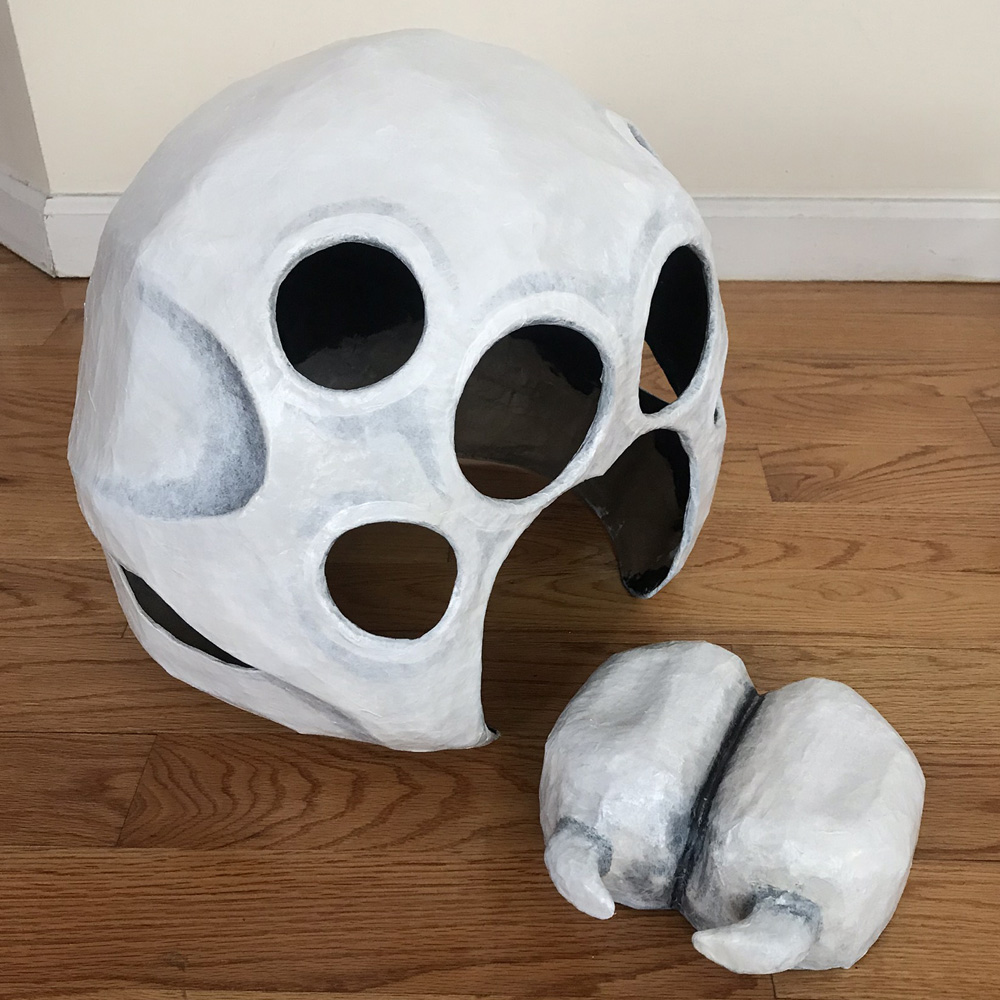
I then painted over the whole mask with white acrylic paint and a big foam brush, mostly to tone down the shadows a bit. I usually don’t care too much about brands of paint that I use, but for this step I really rely on this specific type of acrylic paint: Golden fluid acrylic colors, titanium white (paid link). This stuff:

This type of paint is great in that it’s very thin and liquid-y but it gets good solid coverage that’s slightly transparent. This great combination of traits lets me cover over very dark shadows and lighten them up very evenly, and it leaves the shapes of the shadows very distinct underneath. I was also able to create a bit of an illusion of raised rings around the eyes by doing an extra coat of white in a nice smooth line.
(You might ask: rather than paint black shadows and lighten them up, why not just paint light gray shadows? Uhhh, that makes a lot more sense, really! But I like the layered look that these steps create.)
I painted the interior of the mask with black acrylic paint, but at this stage I skipped a few areas — specifically the inner part of the top of the mask, and also the lower edge inside the back of the mask. This is because I still have a little work to do in these areas; more on that coming up.
Making a hinge for the mouth
Now to make the fangs into a door! I could tell that with the shape of the mouth opening and the weird shape of the fangs, it was going to be a challenge to create the hinge. If I were to simply attach the fangs at the exact position I wanted them, let’s say with short pieces of string at the top, I could tell that when I lifted the fangs up they would bump into the top of the mouth and be blocked from opening more than a very small amount. I needed to design a system where the strings can stretch as the fangs swing up.
I considered using actual stretchy string for this, but then I realized it would be impossible to make the fangs hang exactly where I wanted them. With stretchy string there’d be a good chance they would sag and hang down farther than I wanted, and they might sag more and more over time.
So I designed a system where I could use non-elastic string and pieces of foam to act as a sort of spring. The strings are connected inside the mask at the top of the mouth, and then they go through holes at the top of the fangs, and inside of the fangs the strings go through these pieces of foam, and they’re anchored at the bottom of the foam. So, when the fangs are flipped up, the strings pull at the foam and compress it a bit, which lets more of the string come out of the top of the fangs, which lets the fangs open as much as I want. Whew! Here’s a diagram of what I made, as seen from the side:
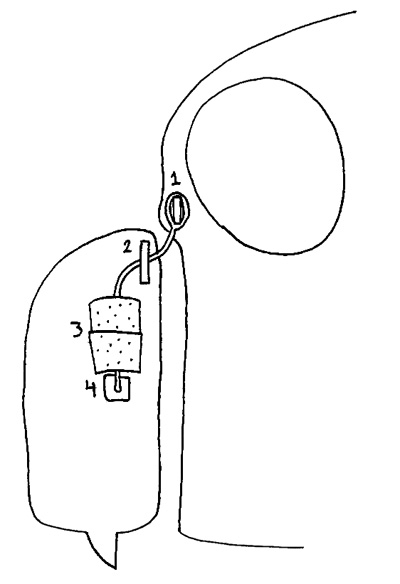
1. This is a short segment of a wooden coffee stirrer (you’re looking at a cross section of it). I tied the string around this and hot-glued it in place inside the mask. This sits right under the eyes and above the mouth opening. I then covered the ends of the stirrer with paper maché to really lock them in the mask.
2. A tiny metal washer (you’re looking at a cross section of it). This paper maché’d into the back of the fangs; it’s there just to protect the hole in the fangs and keep it from tearing.
3. Two little chunks of foam insulation tubing, stacked up, and I’ve poked a hole through them with an awl so the string can pass through. The foam is there to act as a spring. When the mouth opens, it pulls on the string, and the foam gets compressed a little bit. When the mouth closes, the foam decompresses as the string comes back into the fangs.
4. A wooden bead to lock the string in place.
Of course there are two fangs and two strings, so there are two copies of all this stuff, side by side.
Magnets to keep the mouth shut
Backing up… before painting the fangs, I embedded two tiny magnets near the bottom of them, in the back, at the outer edges. I covered these with tape and paper maché.
Now, to add magnets in the mouth opening for these to connect to. The fangs piece is a little smaller than mouth opening, so I had to add two little tabs that stick out from inside the mouth, and put the magnets on those. I made these out of a wooden coffee stirrer.
I experimented with covering the magnets in a few layers of tape to weaken the connections a bit — I wanted the door to be very easy to flip open but to stay somewhat firmly closed when I’m not touching it; I didn’t want the thing flapping around while I’m walking. Once I figured out the right strength for the magnets, I covered them over with one layer of paper maché.
When these tabs with the magnets were dry, I painted them black.
Installing the screen
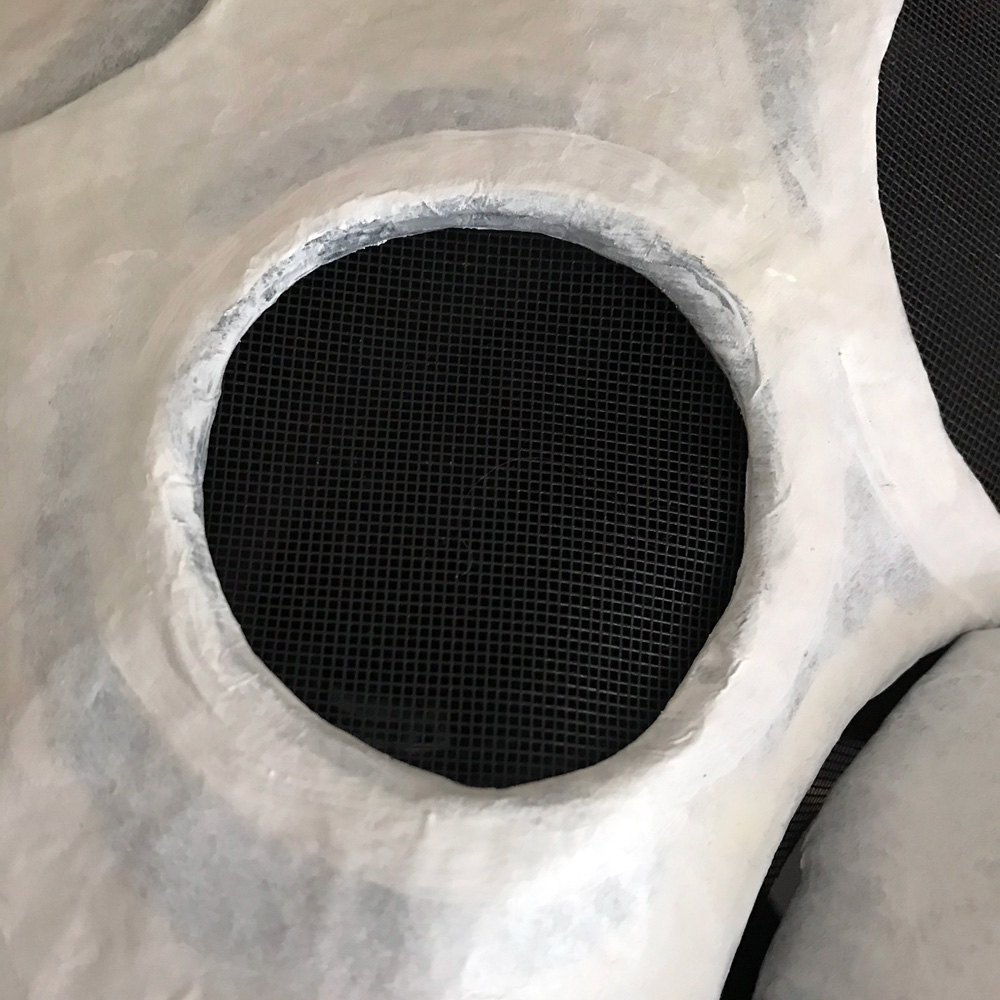
I measured and cut pieces of screen door material and carefully hot-glued them into the mask to cover all the eye holes. I use magnets to hold the screen in place while I’m hot-gluing it.
I also installed some screen all around the inner edge of the mouth, since there’s a little bit of open space all around the fangs.
I almost forgot: I bought a small sheet of this thicker white screen material a while back; at the time I wasn’t sure what I was going to do with it. I ended up using it for this mask, for the holes under the cheekbones.
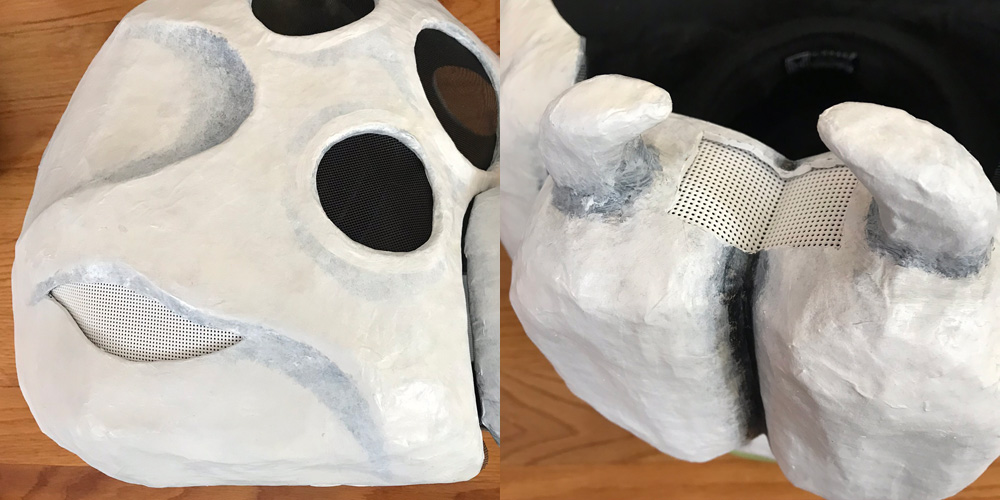
In trying on the mask, I didn’t like that I had very little visibility facing the ground; you don’t realize how important this is in a mask until you try walking around in it! So I decided to cut a hole in the bottom of the fangs and install a piece of the white screen in there too.
Installing the hat
I built a structure out of foam board, tape, and paper maché to fit perfectly onto the hat that I bought. I built this right onto the hat. I covered the hat with aluminum foil to protect it from the paper maché. I cut out a bunch of long thin (~1″?) strips of foam board and curled them up around a wine bottle, and then placed them around the hat, stacking them up. I trimmed each one with scissors and taped it in place.
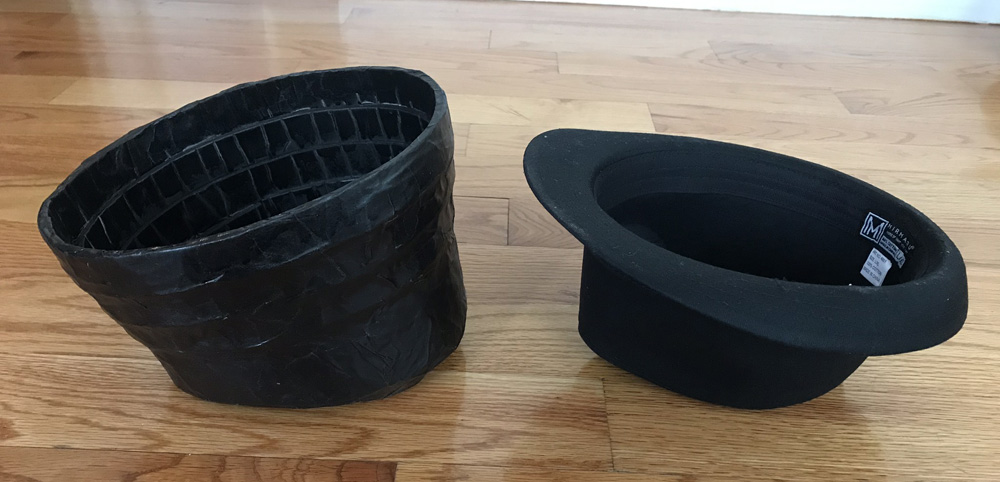
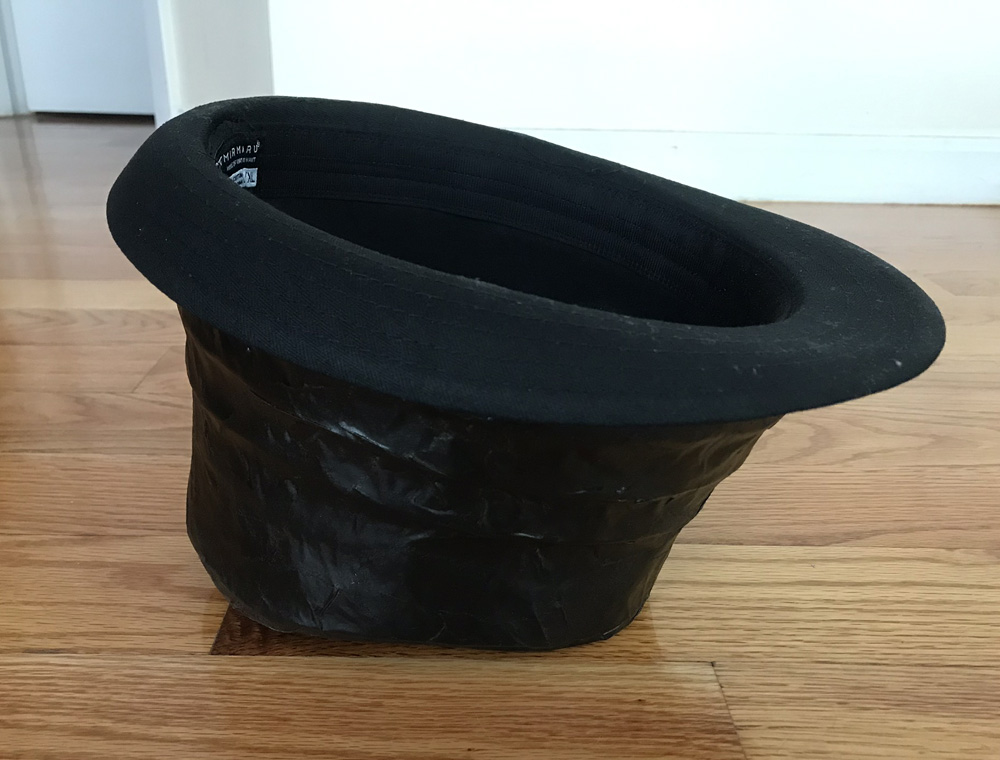
When this structure was done, I knew that I needed to build up some more height on the thing so that it reaches the top of the mask at the right height to keep my eyes lined up with the eye holes in the mask. To do this, I did some trial and error with adding layers of foam board on top of the hat structure and trying it in the mask. When I got the height and angle correct, I then covered the entire hat structure with five layers of paper maché. When it was dry I removed the hat and painted the structure black. Above you can see the finished thing, next to the hat and on the hat. It’s a perfect fit.
I then turned the mask upside down and glued the hat structure into it with Gorilla Glue. Since Gorilla Glue expands a lot as it dries, I weighed down the hat structure with a a bag of coins so that the glue couldn’t push it out of position.
(I actually screwed this up the first time — when the glue was dry the hat structure had shifted a bit! It was obvious as soon as I tried the mask on. So I simply ripped the whole structure out of the mask, which was scary but luckily it didn’t damage anything. Then I glued it in again and it was fine.)
When this was all done the hat structure was very firmly attached inside the mask. It’s easy to put the hat into this structure and then flip the mask upside down and put the whole thing on. I can easily take the hat out any time to wear it by itself. The only downside of this whole arrangement is that I need the hat in order to wear the mask; it’s not really wearable without it. No big deal!
Note: one important thing I learned here is that using a hat only works for masks that are very lightweight! Luckily this one is, but even so the hat wants to squish down on my head a little more than I’d like. If the mask were heavier this could’ve been a problem. With a hard hat I’m used to having the straps inside that sit right on my head and stabilize the whole thing, which works fine even for heavy masks.
One neat thing about this mask: most of my big masks end up being very unbalanced and require a counterweight of some sort, usually in the back, along the inner-bottom edge. This one is so light it feels nice and balanced, with no counterweight needed.
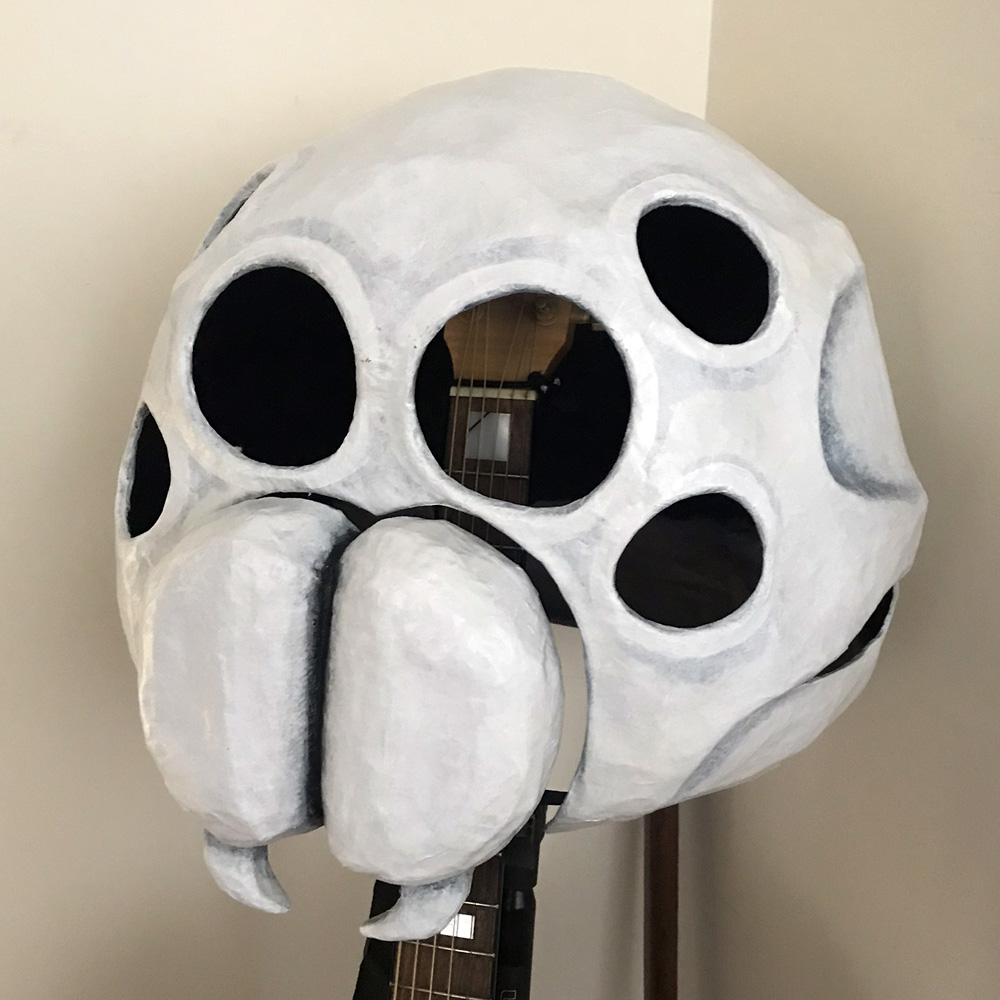
Woohoo, this mask is done! However, at this point, I still had the whole spider costume to finish though. On to part two: making the hands, arms, etc…
 About Manning Krull
 How to make a 4-foot paper maché alligator
 My violin skull mask, Mardi Gras 2015
 Three-headed paper maché dragon sculpture
February 25th, 2020 at 1:50 pm
Hey Manning , I hope all is well. So I am finally going public with my Halloween party this year. I decided to rent a hall and throw a big party. Sell tickets and go all out. I am already getting myself organized and the most fun and exciting part of the whole process is obviously planning the decoration . And being a big fan of yours as I am , here is where I would like to ask you for ideas and suggestion 🤗.
The theme I have in mind is Monster ball, mostly for costumes ideas ,I guess.
The hall is very spacious and with high ceiling . It has a stage as well. The outside is just a square 2 stories building .
I thought about having black neon lights on the outside of the entire building and hang some papier-mâché monster all in white on the facade – I think that would look pretty clean and effective .
On the inside of the hall I thought about hanging spider egg sacs made with balloons with water and a glow stick hanging from the ceiling inside white stockings all over the hall main floor. Also clean and effective decor, I think.
On the lateral walls I thought about having some hairy big spiders and some papier-mâché severed heads glued on the walls all well.
On the stage I thought about having a big papier-mâché witch ( 10feet tall) all lit up in purple and orange . And keep some space for the dj.
That’s basically what I have in mind. The cool disco lights would do the rest. Does it sound too simple ? Keep in mind that it’s a large hall and the decoration has to be put up on the day of the event so it needs to be a decor that’s clean , impactful and at the same time easy to set up and clean up . I would love your suggestions . What would you do Manning?
Thank you a bunch!!
February 29th, 2020 at 5:15 pm
Hey Everaldo! I’m still recovering from Mardi Gras but will email you soon about all this! I love the idea!!
June 5th, 2020 at 1:23 pm
Thanks for publishing this incredibly detailed post! I love seeing into artists’ processes, and there are some great tips you’ve shared. The final product looks absolutely stellar, it makes me think of a 3D rendition of 1920s cartoon characters.
June 11th, 2020 at 10:55 pm
Thank you so much, Lindsay!!!