
Paper maché Necronomicon sculpture — part 2
Published by Manning on October 2nd, 2017
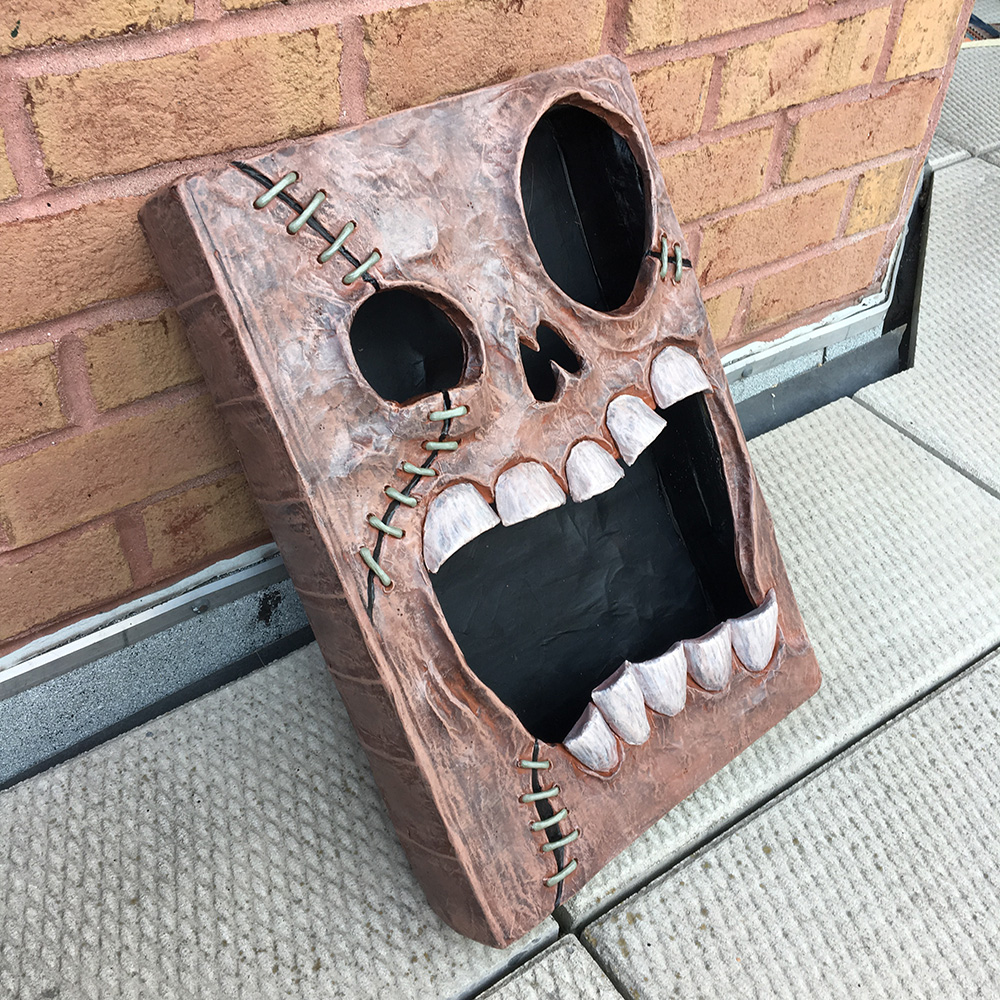
This is part two of two of my paper maché demonic book project. See part one here.
Making the 3d “BOO!” logo
To create the “BOO!” logo in the mouth, I started out by printing several copies of the logo (designed by my friend Jon Morris) at the actual size; I’d planned out my sketch for the face along with the logo in Photoshop so I’d be able to plan all of these parts to fit together the way I wanted.
The logo is three layers of material: there’s the background part that includes the outside stroke, then the letters themselves, and the last part is the little ghost/skull faces that make up the holes in the letters.
![]()
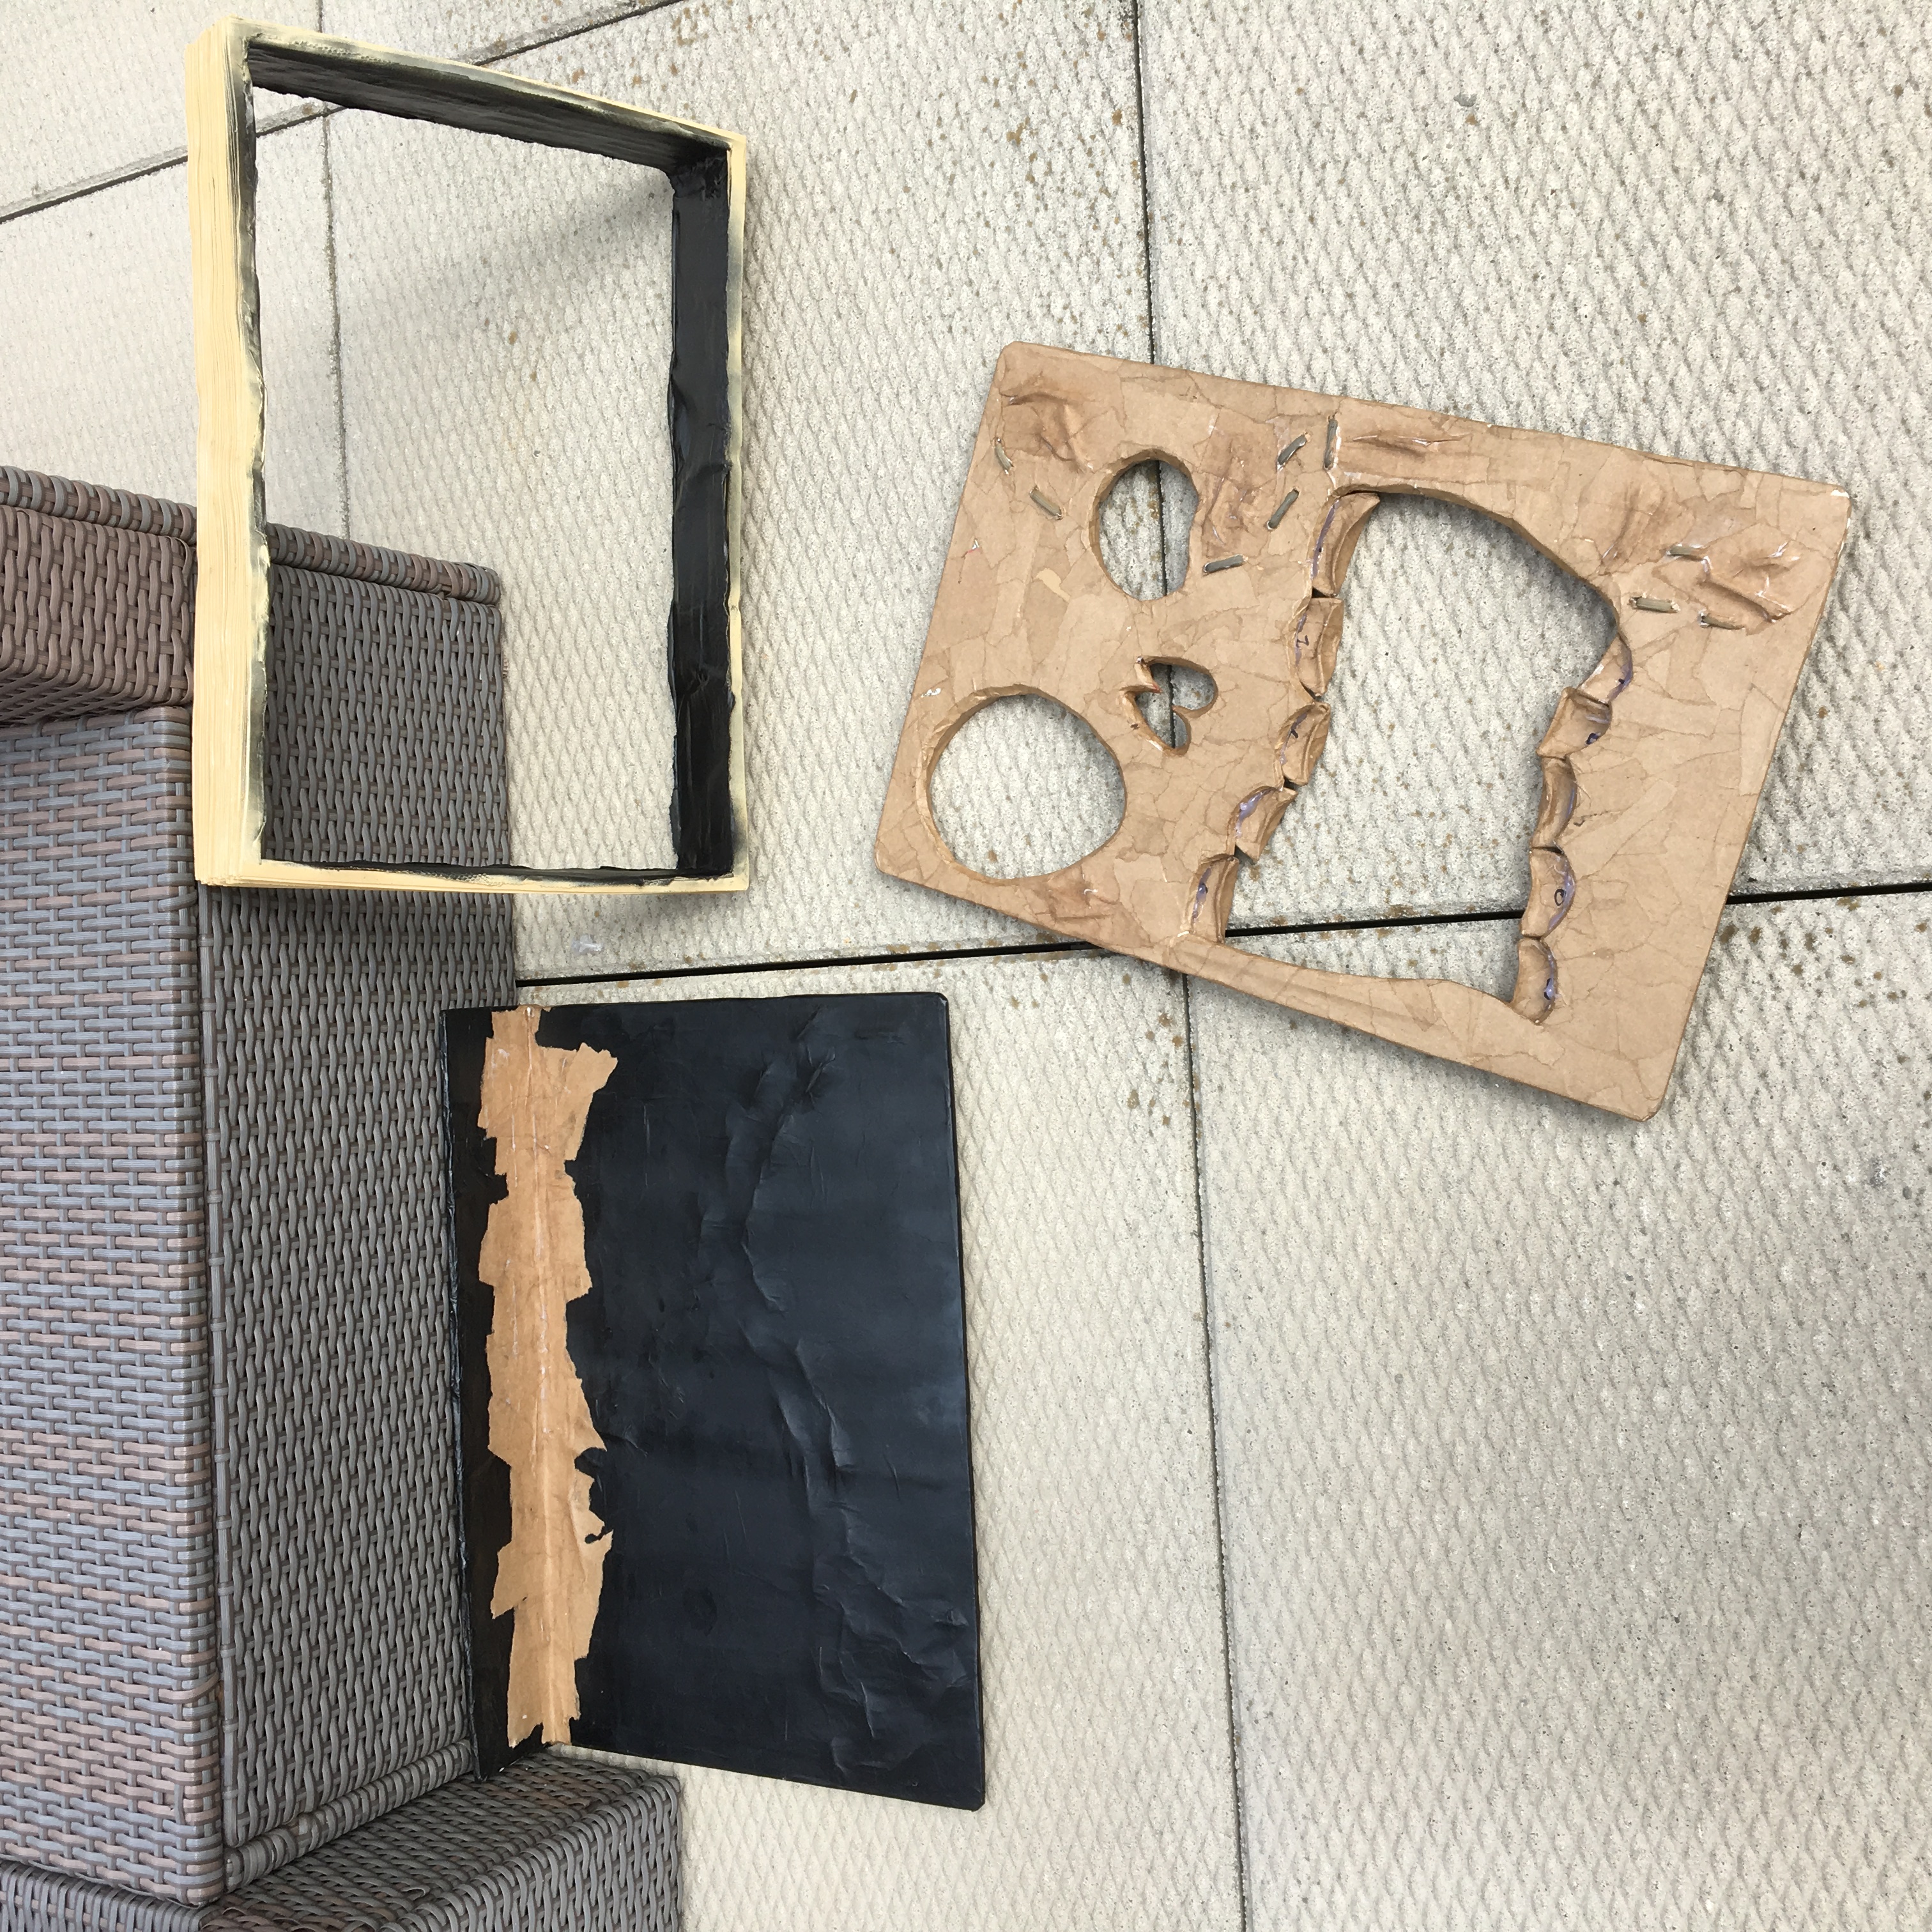
I made the background layer out of 3/8″ foam board; I cut out one of my printouts, traced it onto the foam board with a pen, cut that out very carefully with my X-acto knife, and then covered it with small pieces of packing tape on both sides to prevent warping, and then I added one layer of very tiny pieces of papier maché.
![]()
I made the big letter shapes layer out of craft foam (the tan stuff above), and the tiny skulls out of this nice thick porous paper from a document from my work (sssh!). I pasted one of my logo printouts onto the craft foam and another onto the thick paper, both with wallpaper adhesive and a brush. When dry, I carefully cut out all the shapes with an X-acto knife. The tiny ghost/skull shapes were murder; you definitely want to use a brand new blade for this level of detail!
I ran the cut-out craft foam piece under water to let the paper soften and fall away, and then I rinsed all the paste off of the remaining foam shapes. For the ghost/skull shapes, I just left them glued to the paper; no need to peel anything away.
![]()
![]()
I pasted the foam pieces onto the big background layer with wallpaper adhesive, and then I pasted the ghost/skull shapes onto the letters with the same adhesive. I placed them carefully with tweezers, and after giving the paper a couple minutes to set and absorb the paste, I brushed more paste over all of this, covering the entire shape.
![]()
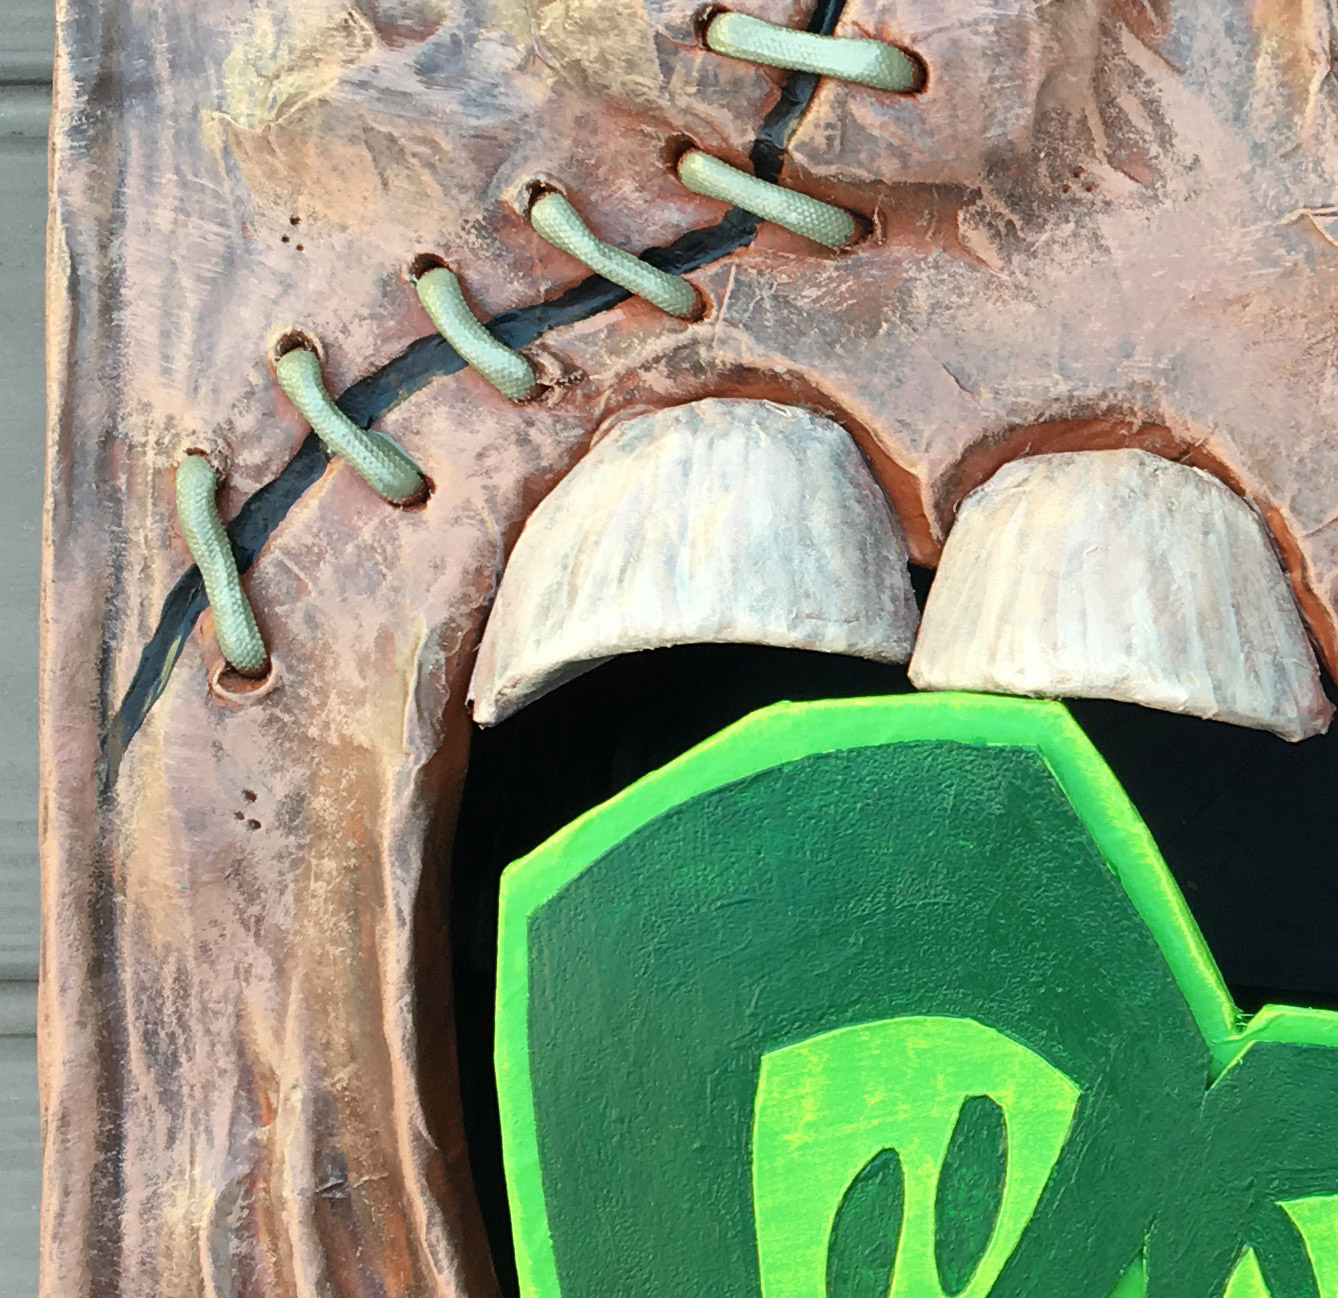
I spray painted the logo black; you can really see all the different layers and textures now.
![]()
I then spray painted the whole thing a light green (left over from Isabella the three-headed sea serpent), let that dry, and did some light dry-brushing with yellow acrylic paint over the little ghost/skull shapes. I then started the very painstaking process of hand-painting the dark green space around the ghost/skull shapes. I bought the tiniest paintbrush I’ve ever used for this! The raised edges of the thick paper really help guide the brush around all those tiny corners.
![]()
I used a larger brush to fill in the rest of the space; two coats for all of this dark green stuff. Oh yeah, there’s the band-aid too; that part is coming up next.
![]()
I wanted the “BOO!” logo to stand up on its own in the mouth on a hidden stand, attached in the mouth with magnets. To make this stand, I started by attaching two magnets to the magnets that are already hidden inside the back cover. The purpose of this was to precisely measure the distance the magnets need to have between them. I measured that with a ruler, then built a little stand for the logo out of foam board and tape. I placed the magnets in the bottom of the stand the same way as in the mouth; I cut little holes out, inserted the magnets, covered them with heavy duty packing tape, and then covered the whole stand with paper maché.
I taped the logo in place on the stand to get it in the right position, and then I reinforced the connection between the logo and the stand with more paper maché.
Band-aid
A little background here: my partner on this Halloween comics anthology project, Jon Morris, adds band-aids in tons of his drawings of zombies and monsters and goons; it’s almost a signature of his. In our initial discussions about this project he whipped up a few sketches and suggested adding a band-aid; I love the idea because it helps balance out the horror element of this sculpture with a little bit of humor — it goes along perfectly with what I was trying to achieve with the different-sized eyes and the big dumb teeth. I considered using a real band-aid but in the end decided to make my own; after seeing how well the sculpture was coming out, I had a hunch that adding a real band-aid would make it look like it was an afterthought, and kind of a cheap gag. I wanted something that really looked integrated with the style of the sculpture, but I wanted it to be removable, like the BOO! logo, because I thought wherever this thing ends up being displayed, the owner might prefer not to have the band-aid and the BOO! logo and let this thing look somewhat more like an authentic demonic book. (Note: I’ve already found a home for the finished sculpture! Woohoo!)
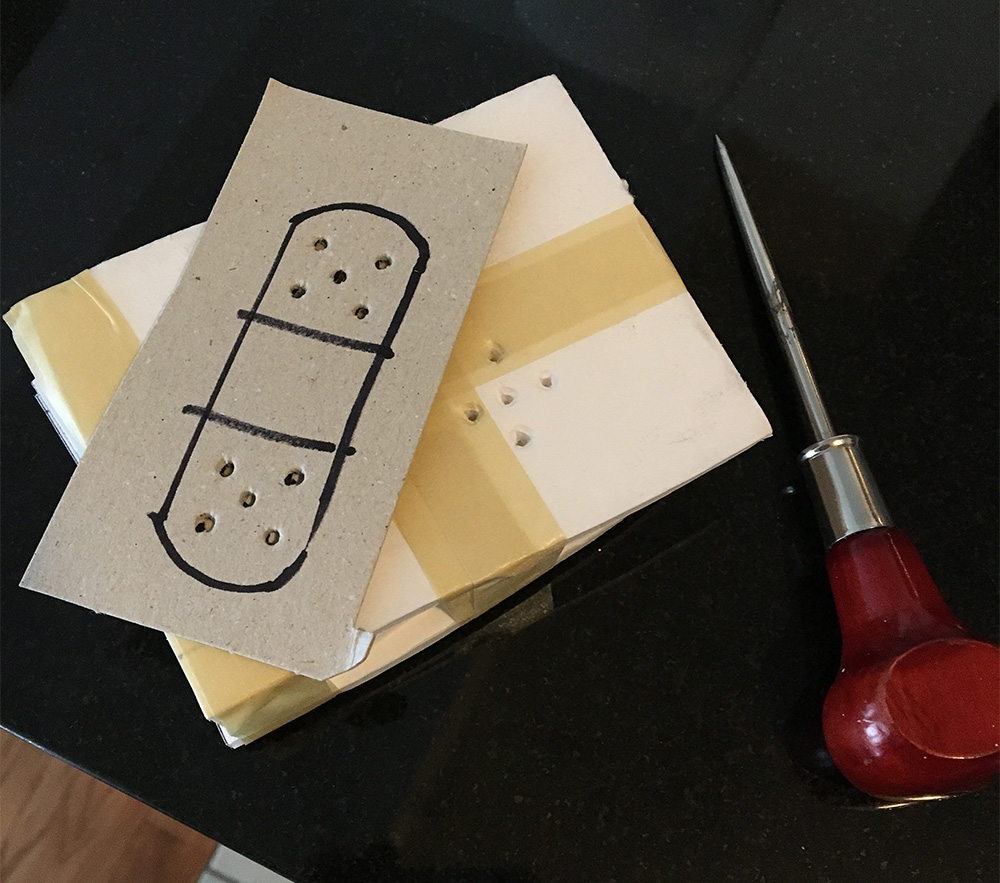
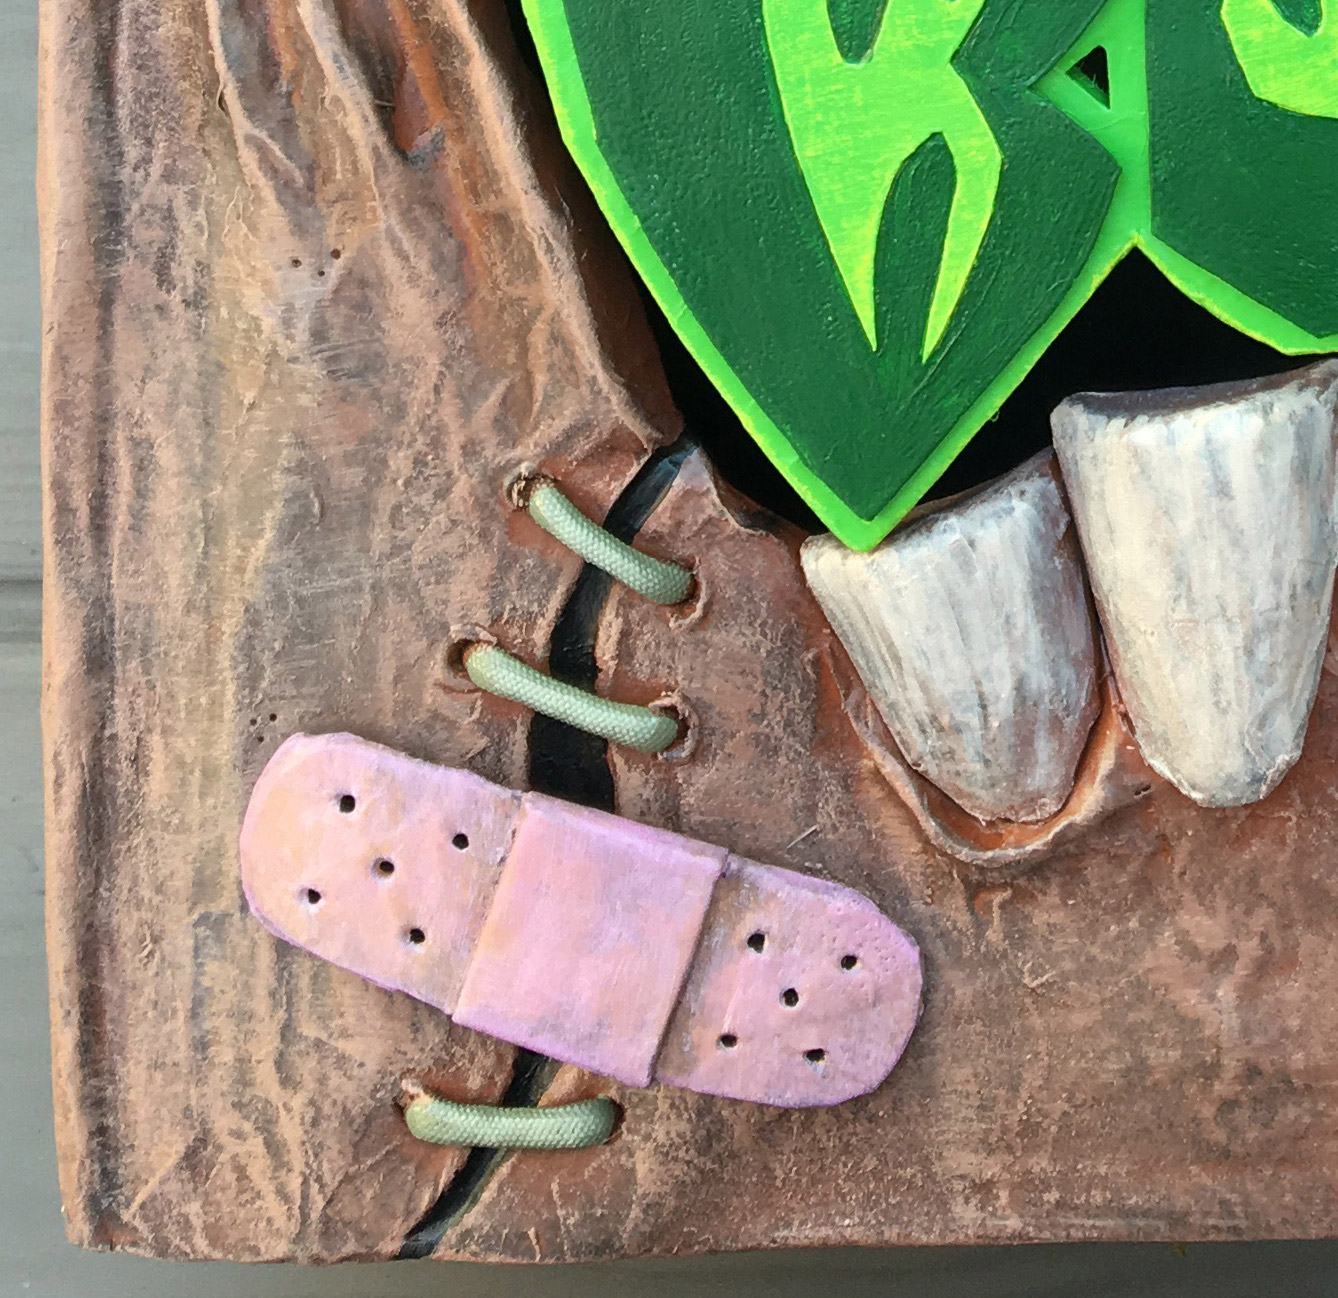
Anyway! I made the band-aid out of a scrap of this paste board material I had lying around. I cut out two pieces of this stuff; one for the top surface of the band-aid, and one for a background layer where I’d cut two holes and embed two magnets — I also embedded two around the stitches on the chin. Oh yeah, and I cut a little square to make the raised pad in the middle. I taped these parts together, working the pasteboard with my hands to curve it up a bit, and covered the whole thing with paper maché, using really tiny pieces of paper. I set the band-aid in a slightly arched position while it was drying so it would keep a permanent curve to help it fit naturally over the raised stitches on the face.
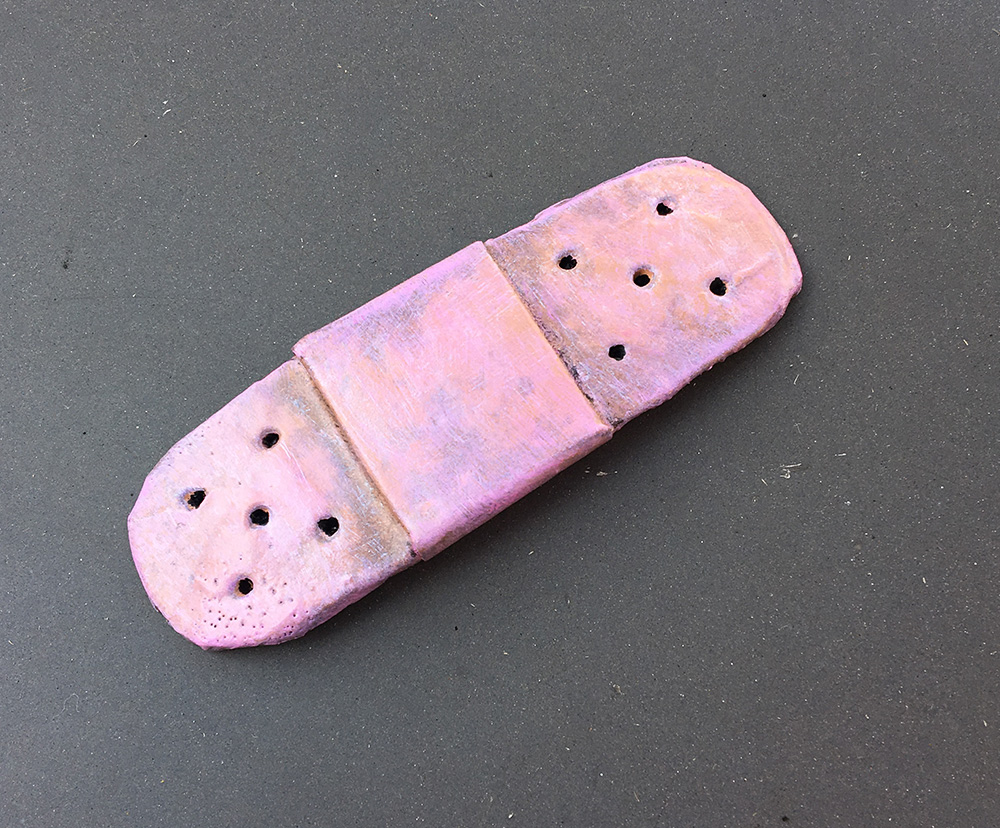
I spray painted the band-aid black, then a beige color I had lying around, and then I did some effects with acrylic paint: I dirtied up the whole band-aid with black paint and a damp sponge, then daubed pink and white paint on it with a damp sponge, smudged up the colors and let them blend a bit, and repeated this a few times. I poked some watered-down black acrylic into the holes as well.
Assembling and painting
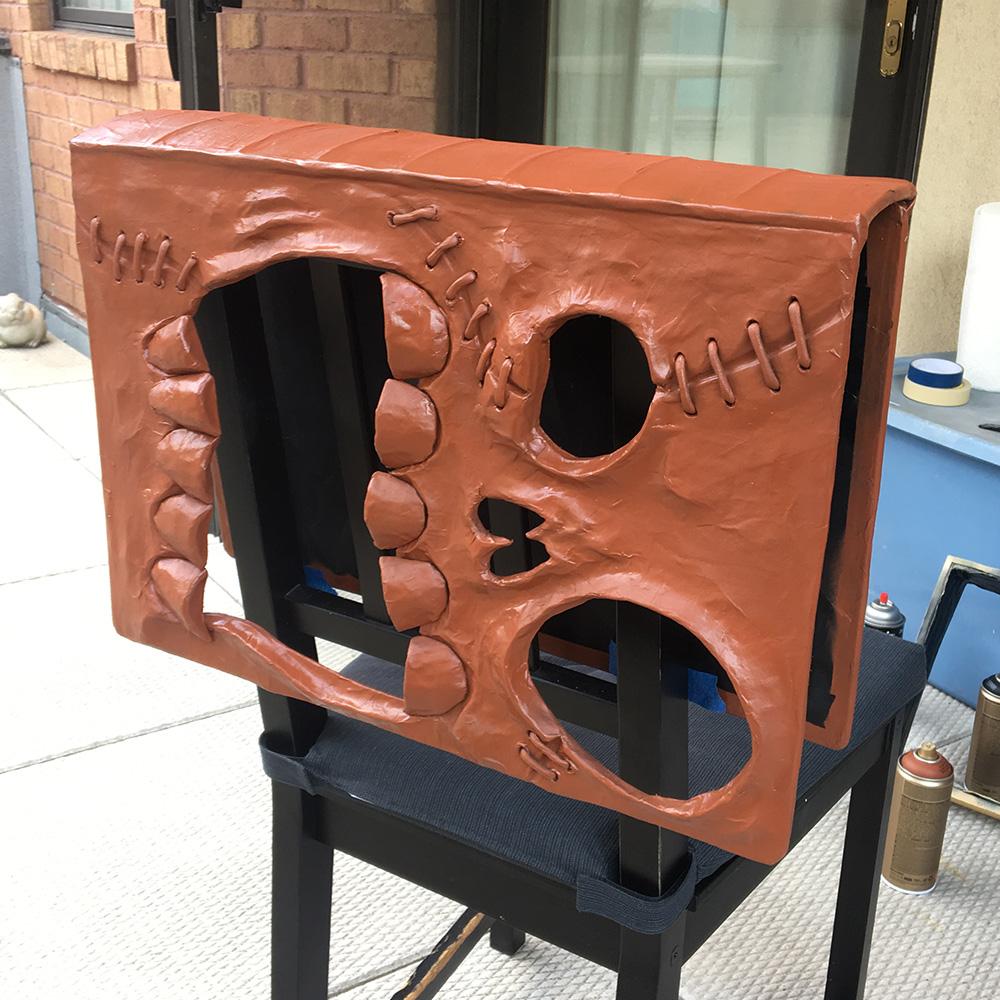
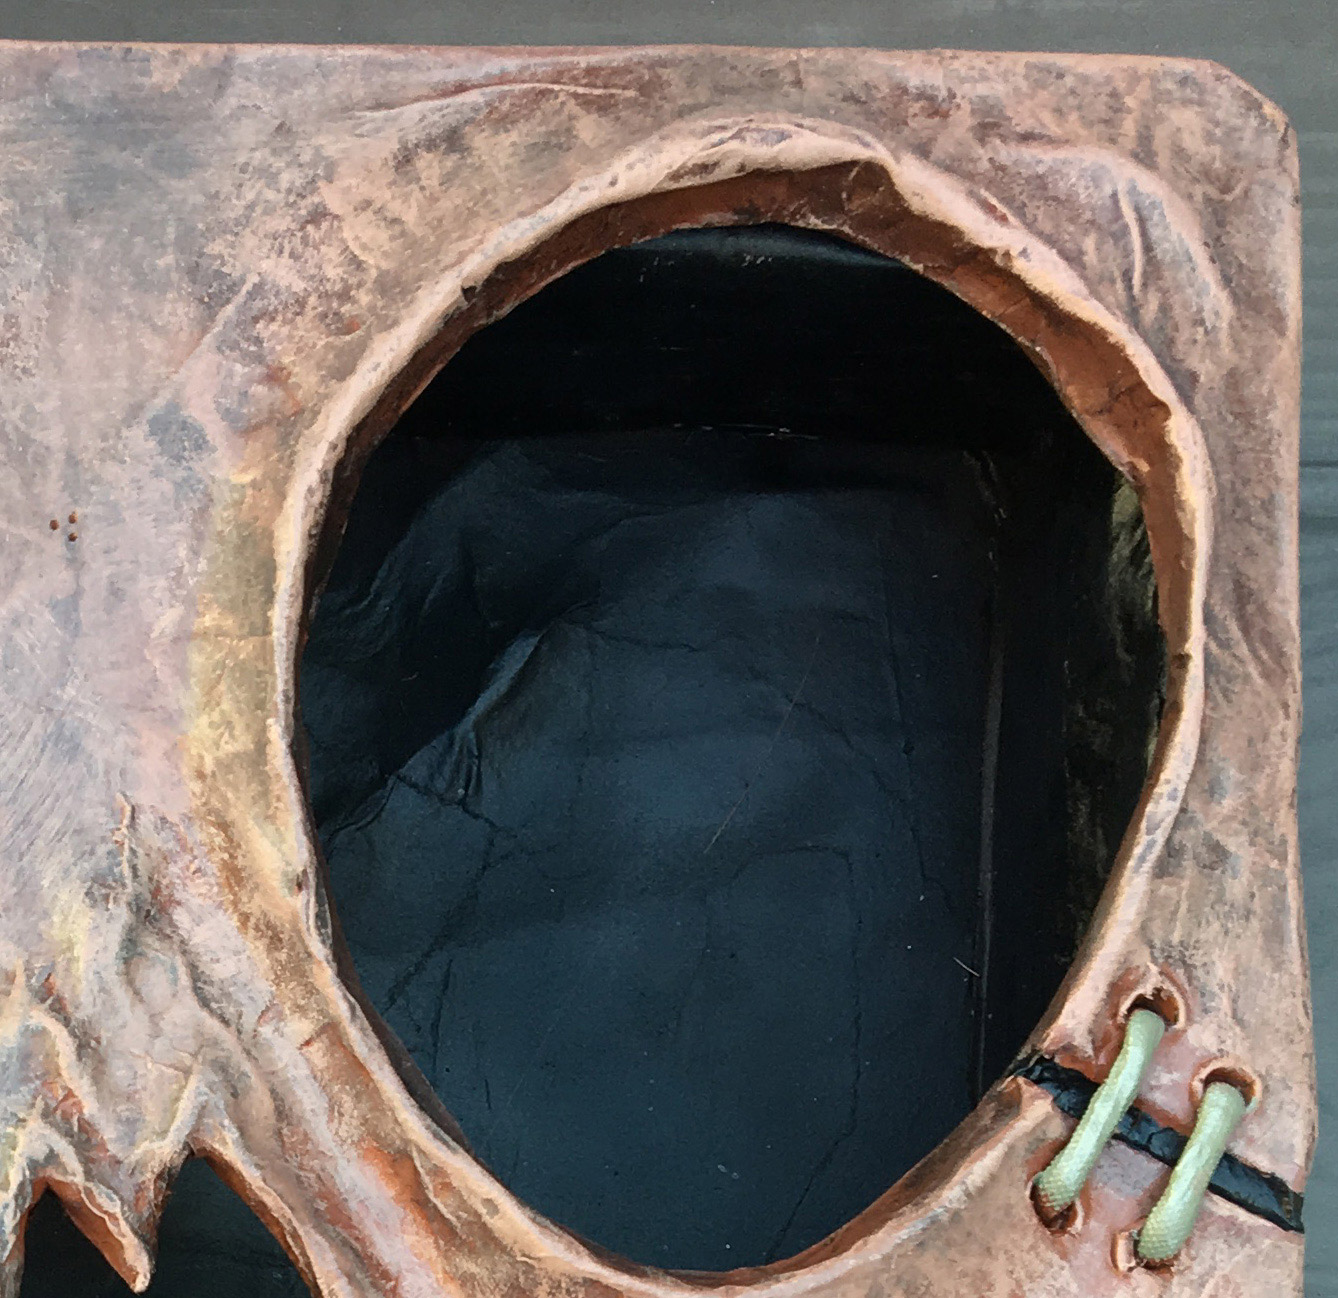
I took all the parts outside for spray painting. I painted the interior of the covers and spine with black spray paint. I added a coating of matte spray to the interior back cover to reduce any shininess when we see that area through the eyes/nose/mouth.
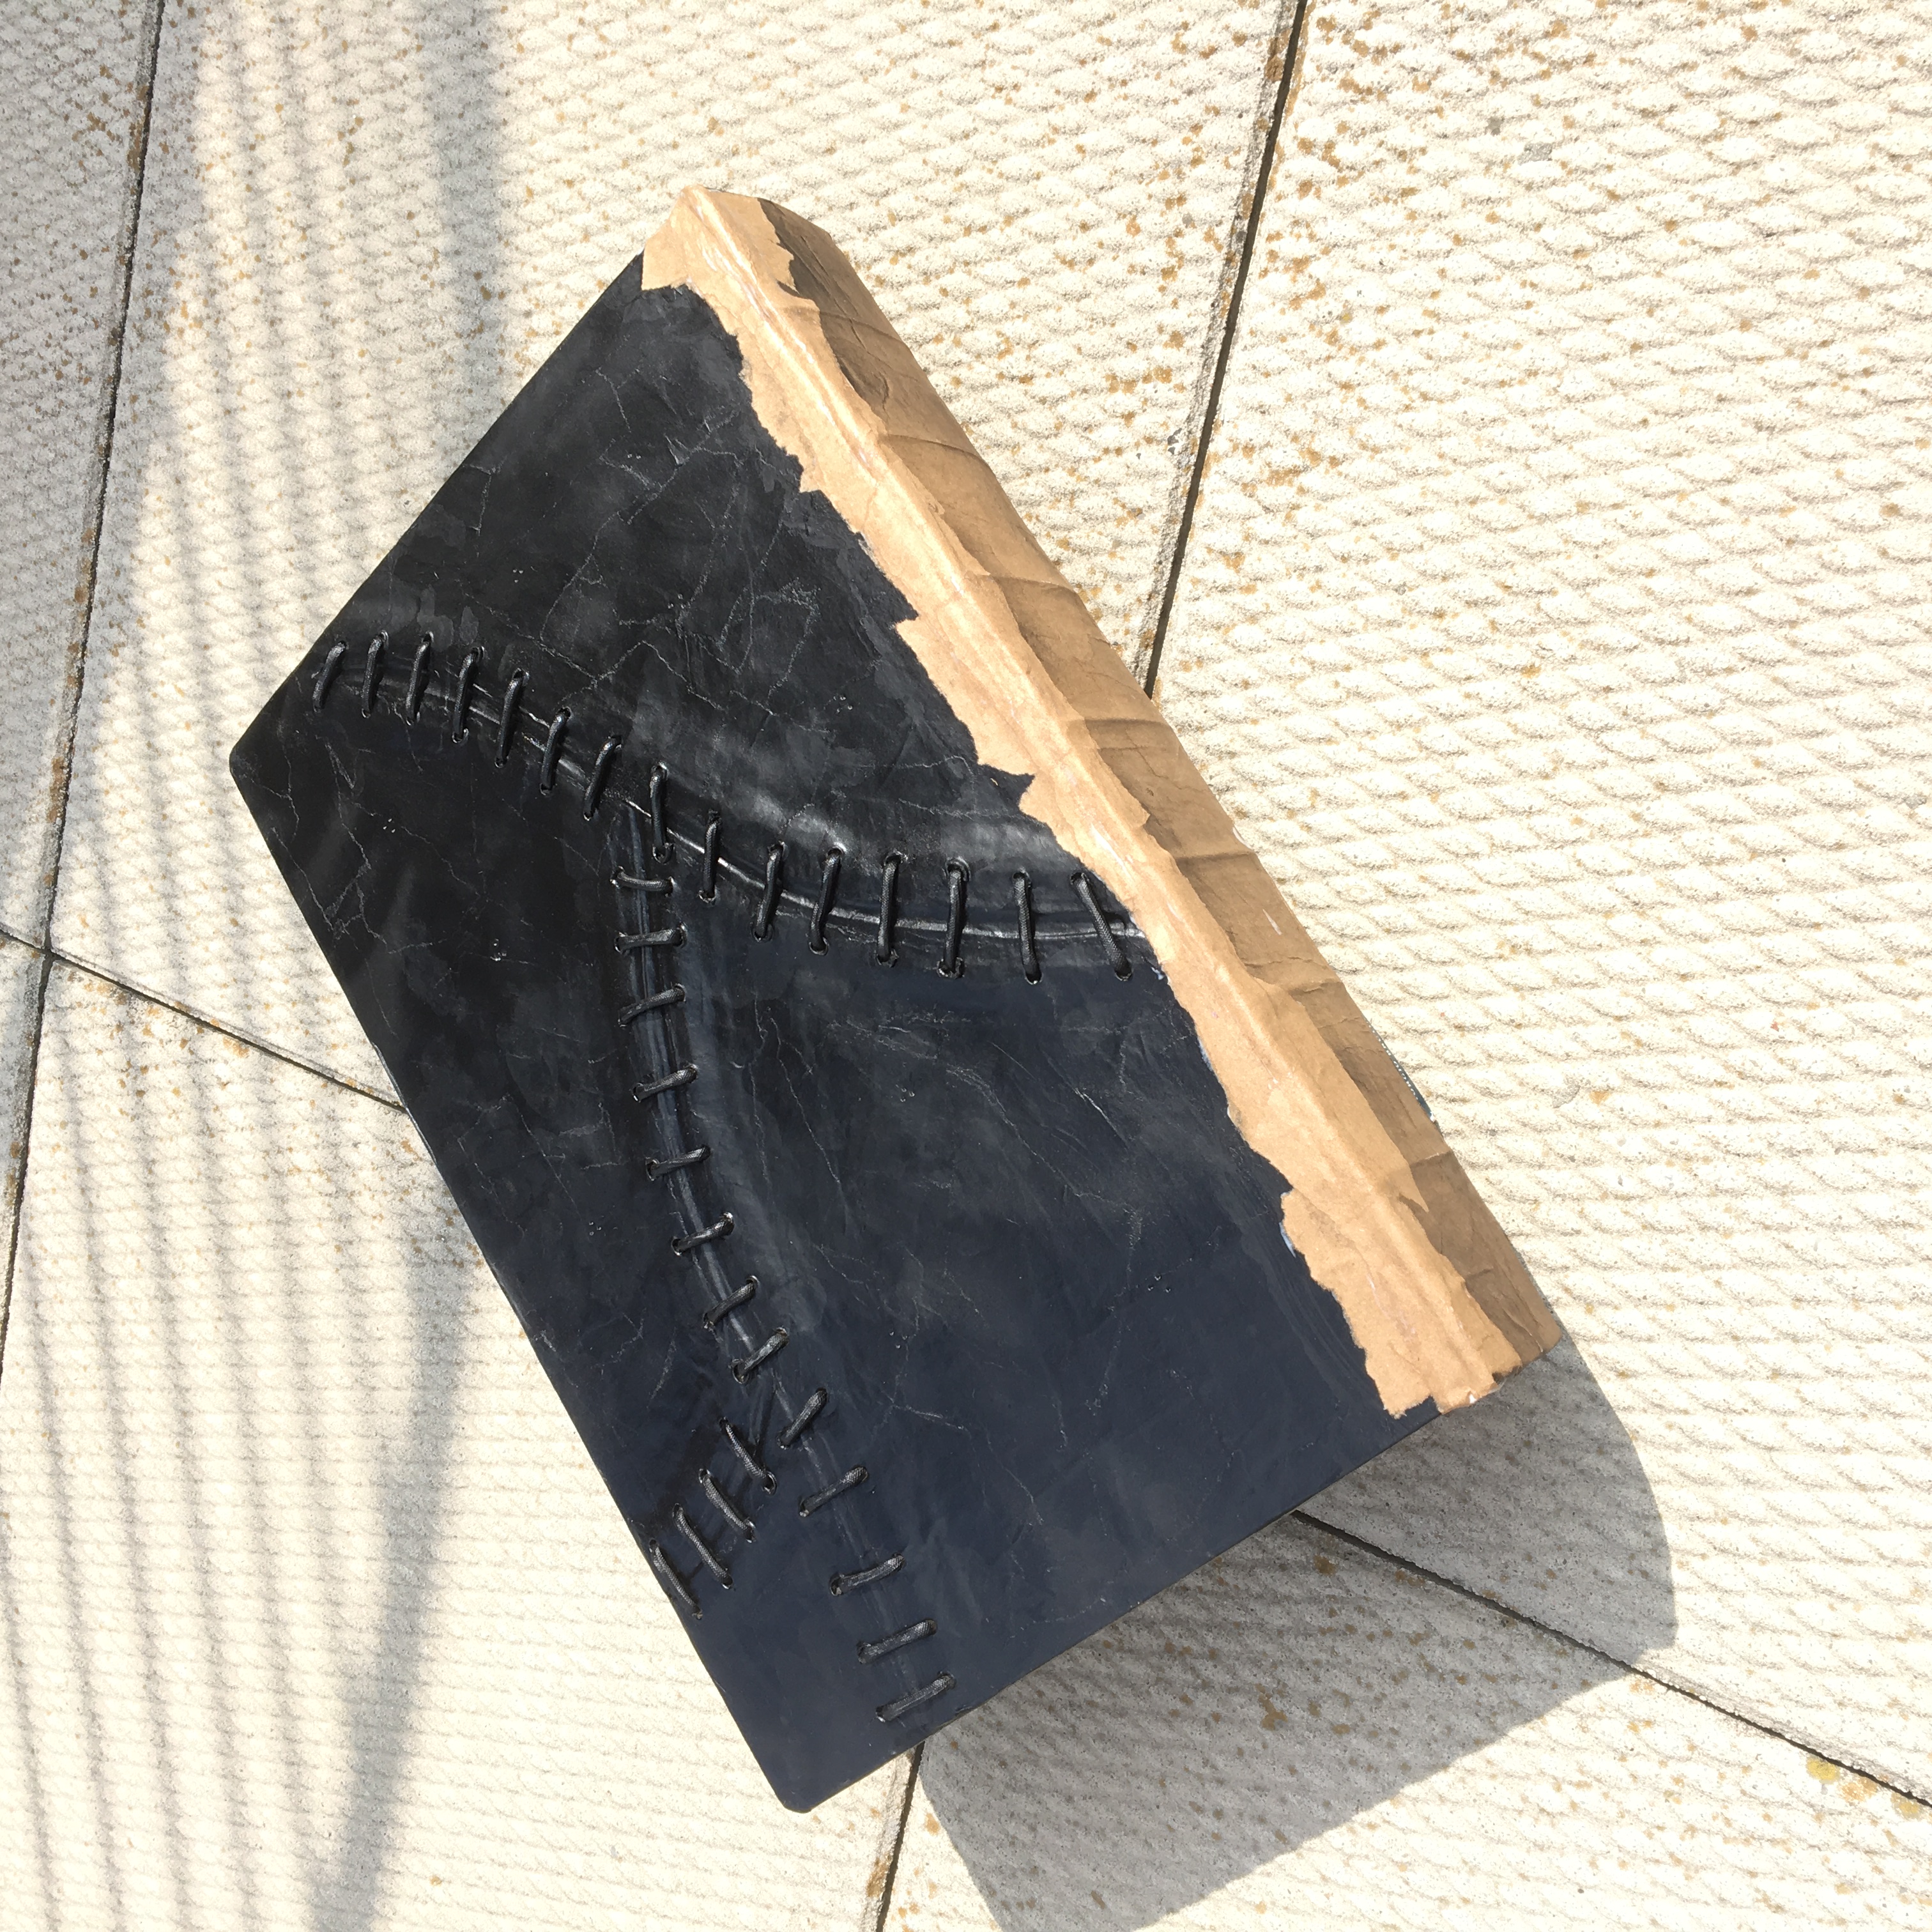
When all that was dry, I attached the front cover, back cover, and spine with masking tape. I inserted a box shape to take the place of the page edges and help hold the cover open at the correct distance. I covered the masking tape connections with paper maché and let them dry.

I then spray painted the entire outside of the book with black spray paint and let that dry. I then used blue masking tape and paper towels on the interior to protect the black paint in there. and sprayed painted the exterior of the book with an orange/brown color.
For the page edges, as I mentioned in part one, I spray-painted that section black all over, let dry, and then did a beige color on the exterior edge.
I glued the pages into the book cover with Elmer’s wood glue and weighted the whole thing down with books for a couple hours. It felt amazing to finally put these last big parts together!
I also added a little triangular foam board column (not shown) inside the book under the bridge of the nose to help support the whole shape; the face is a little heavy with all that clay in there, and that central area wanted to sag a bit.
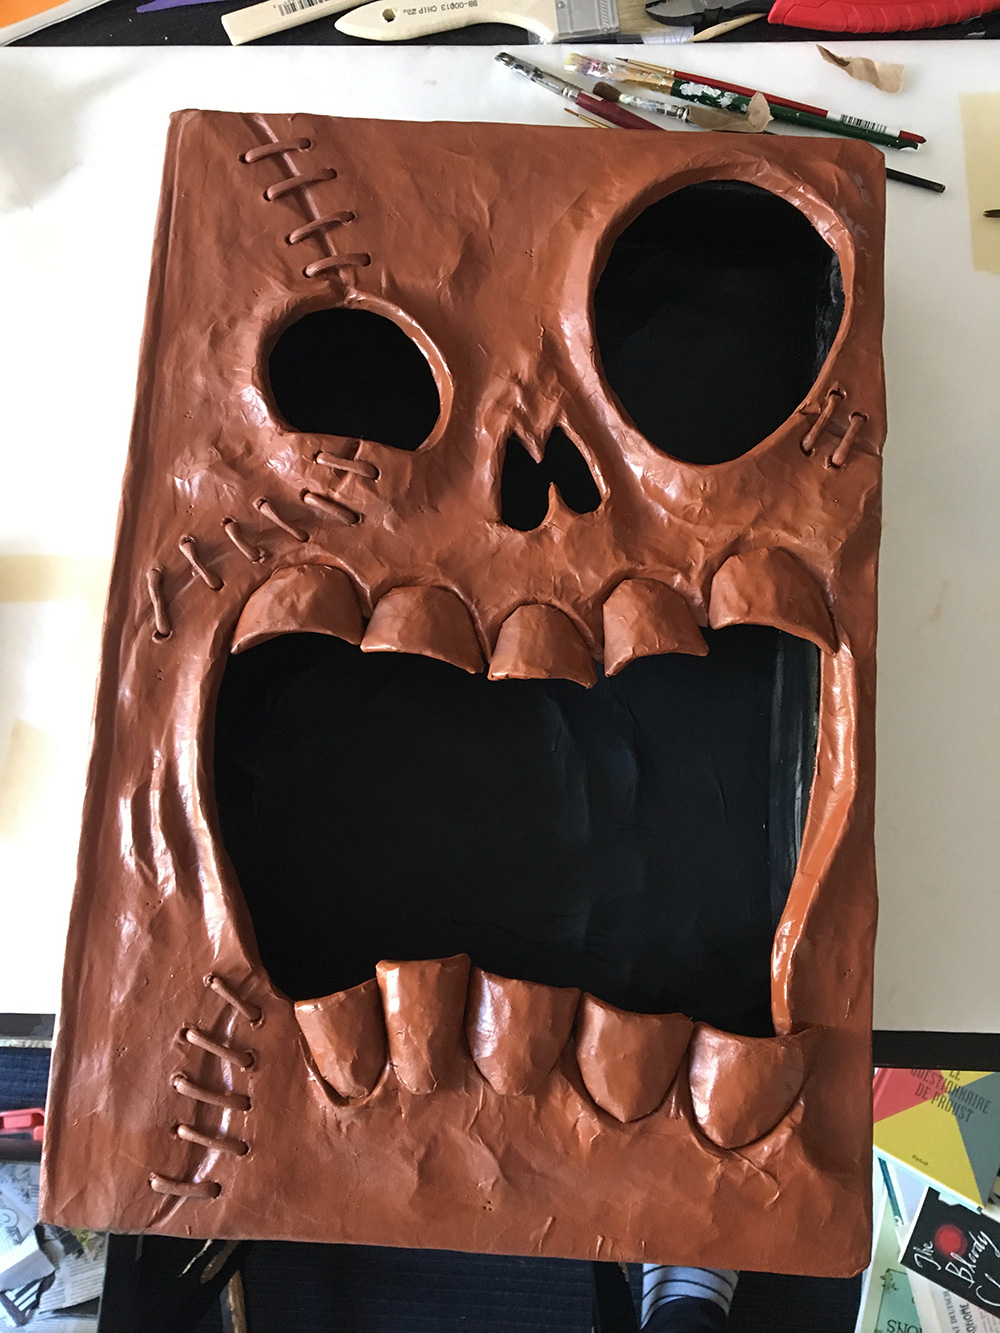
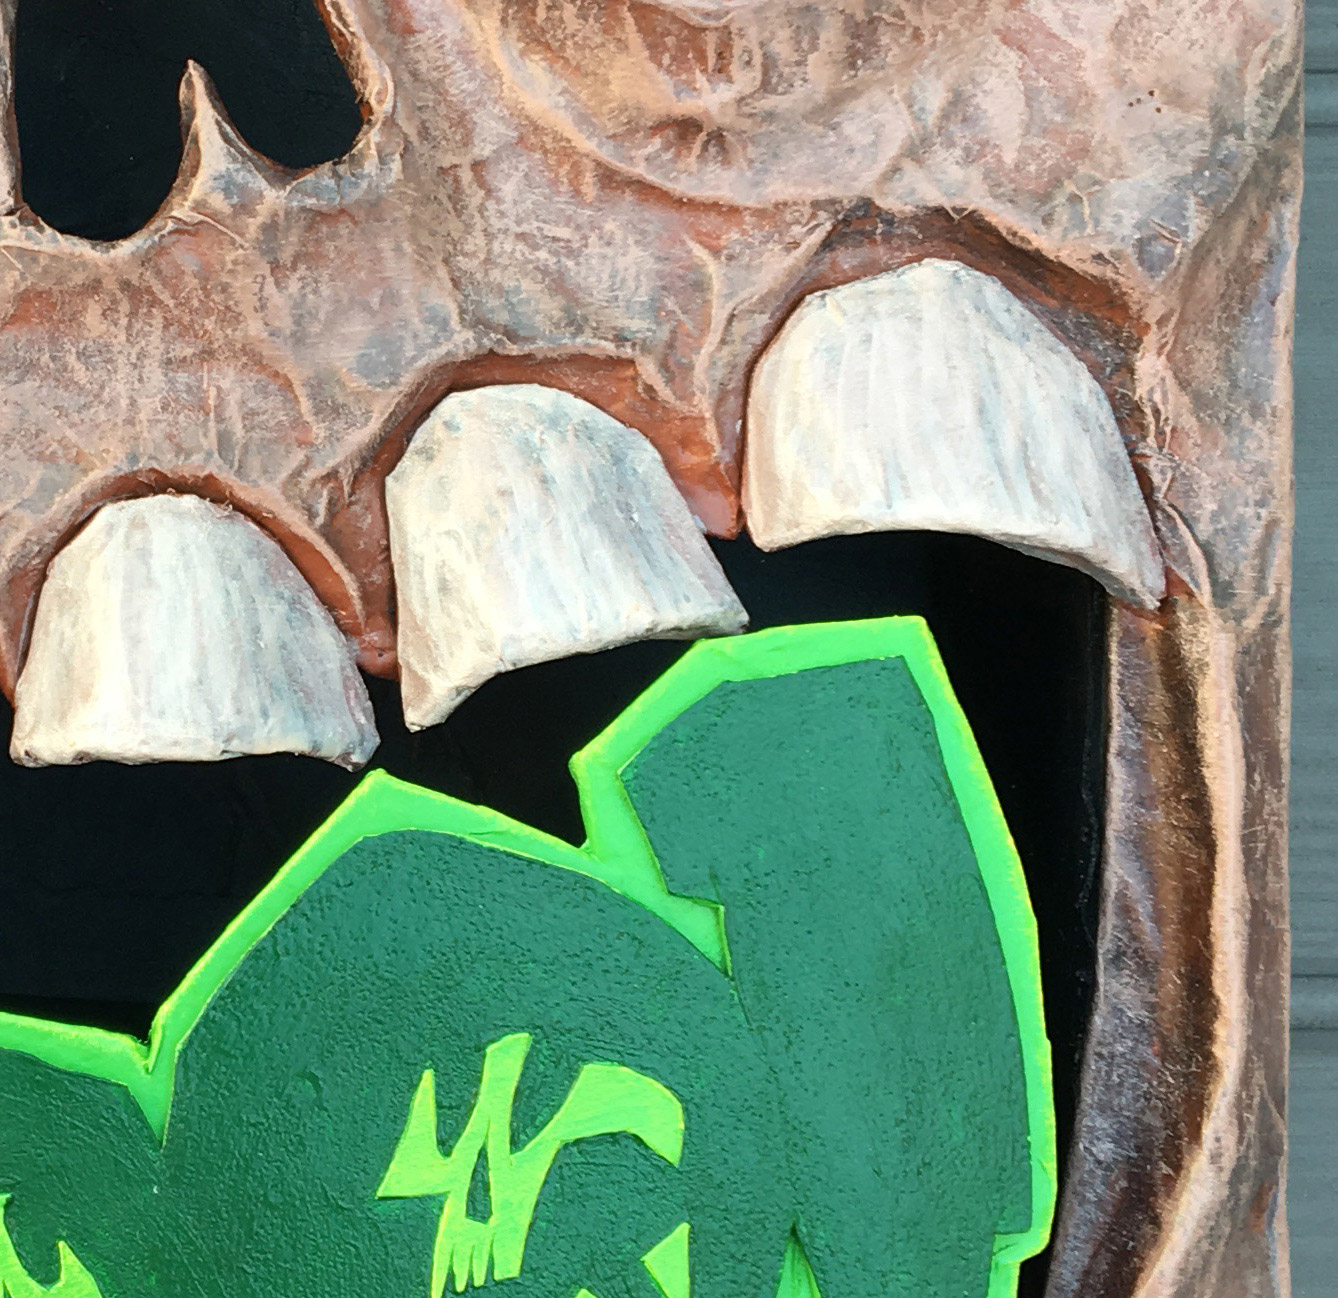
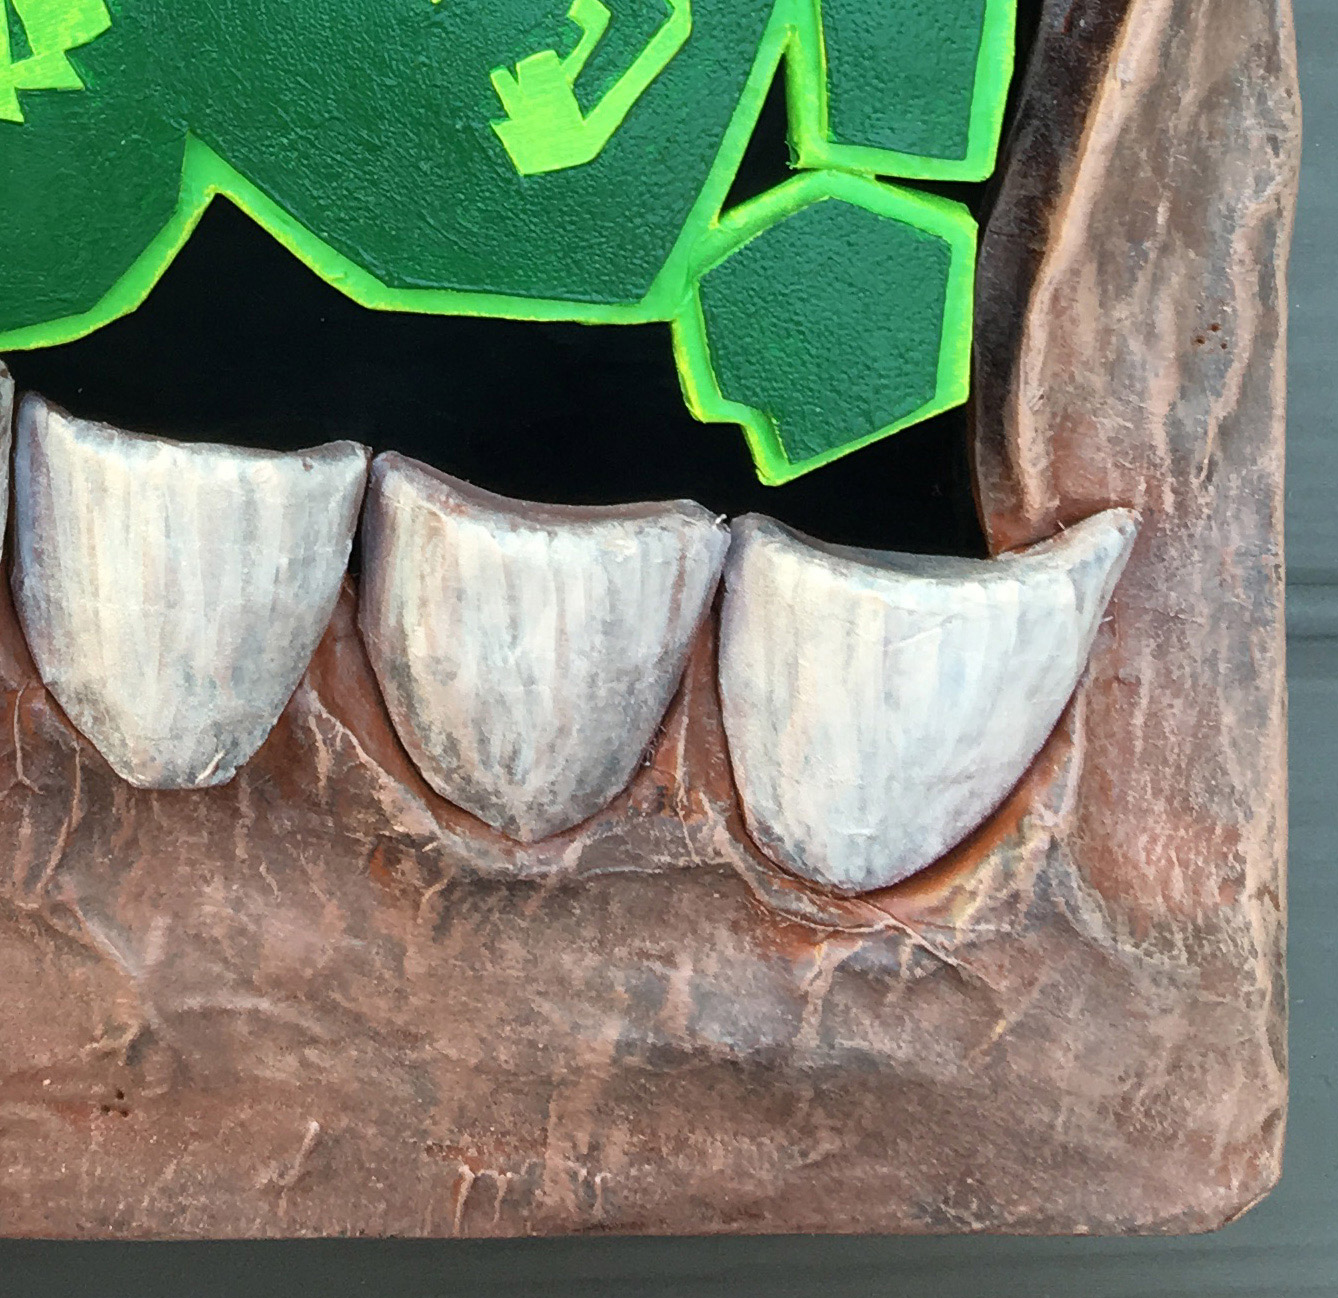
I let all the spray paint and glue set for a day, and I then used acrylic paint to complete all the details and shading for the whole sculpture; mostly lots of shadows applied with black acrylic paint and a damp sponge, and then lots of dry-brushing with a lighter brown, to bring out all the highlights on the contours of the face. You can read more about my painting materials and process here.
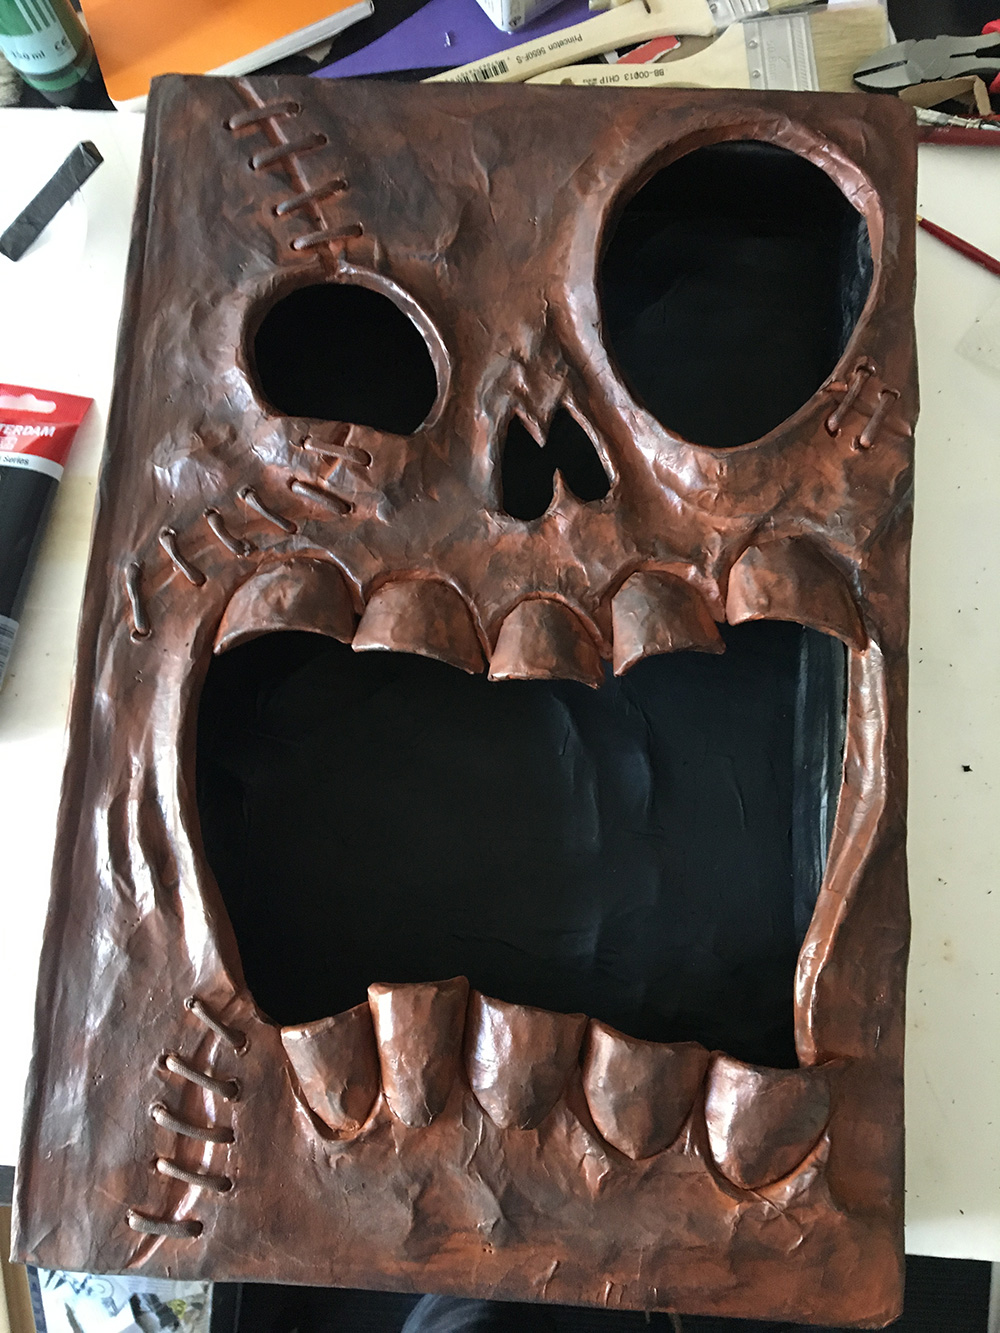
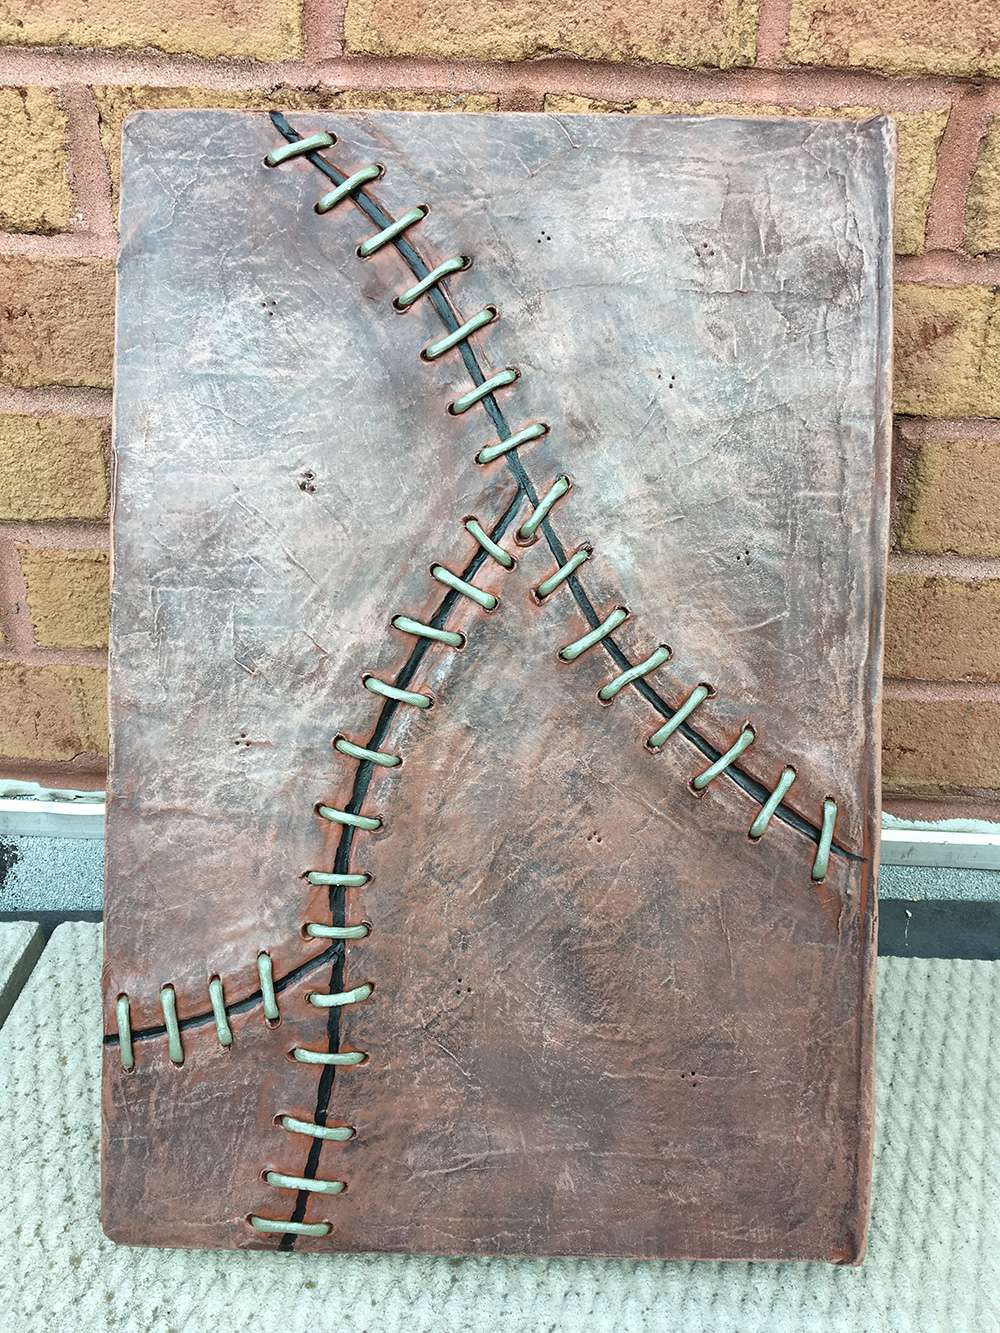
I also used an awl to jab some tiny holes in groupings of three all over the front and back covers and the spine, just to add some more texture and make this thing look a little more organic and cartoony and leathery and gross.
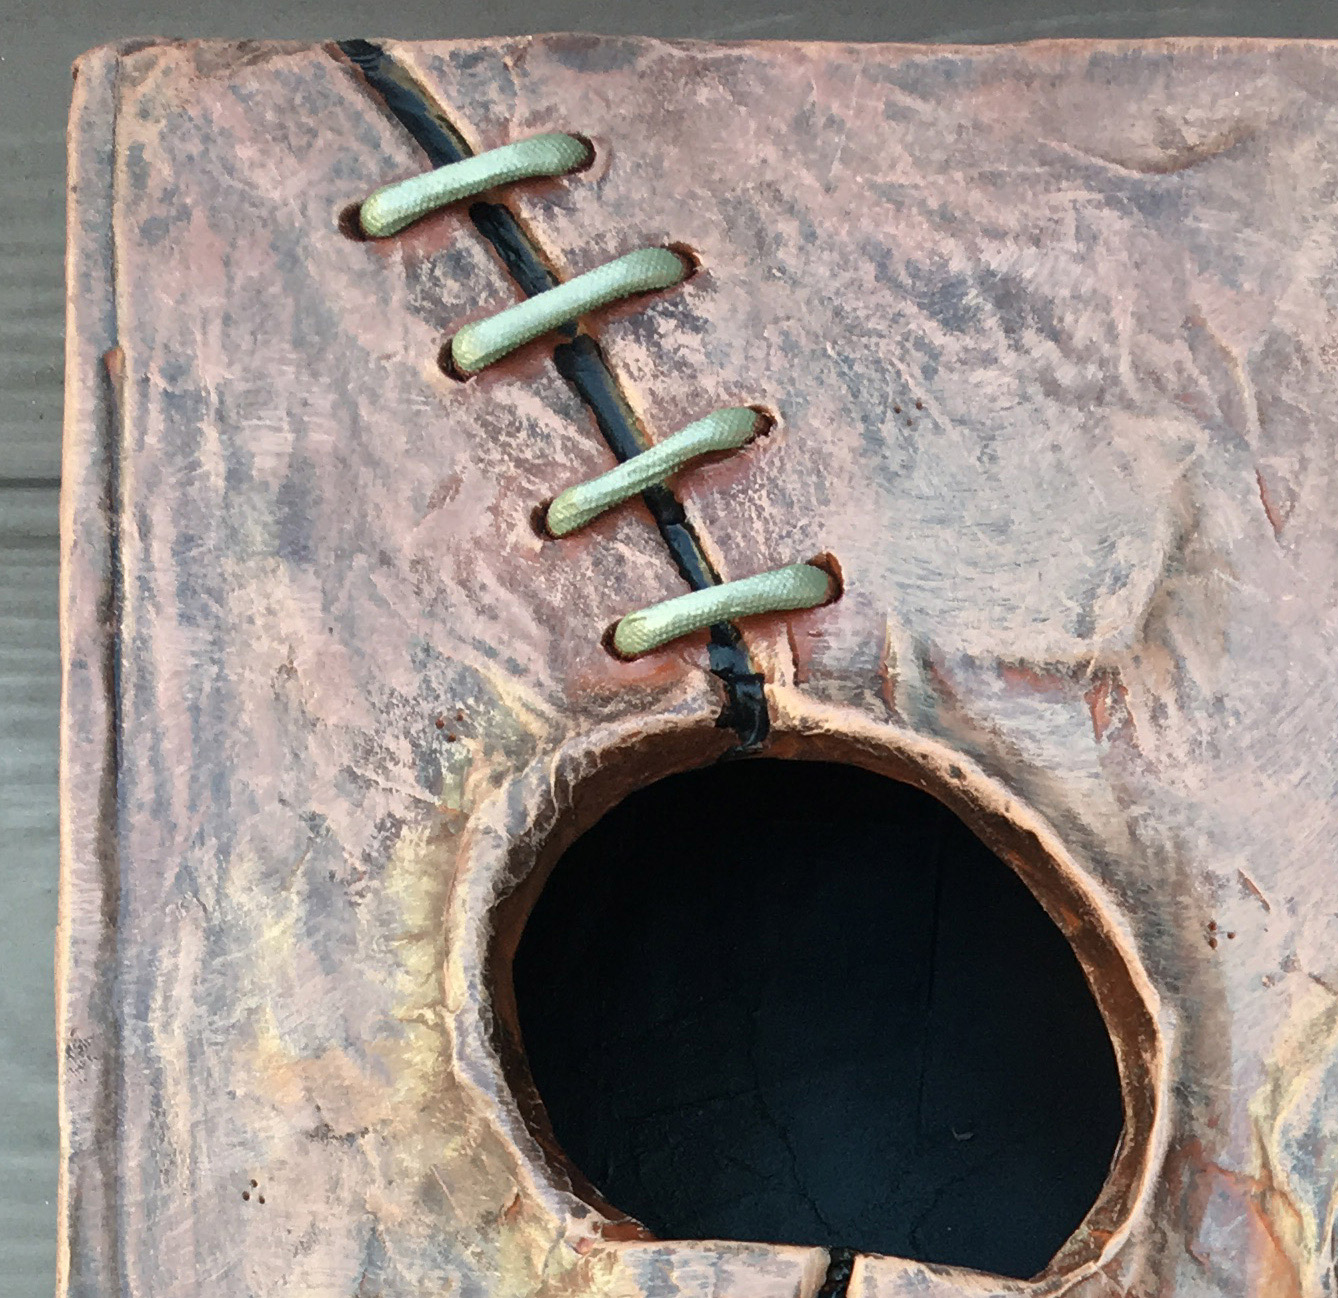
I painted the teeth a few times with heavily watered down white/brown paint, I painted a black line into the wounds, and I painted the stitches themselves with a green/gray color and then a lighter highlight.
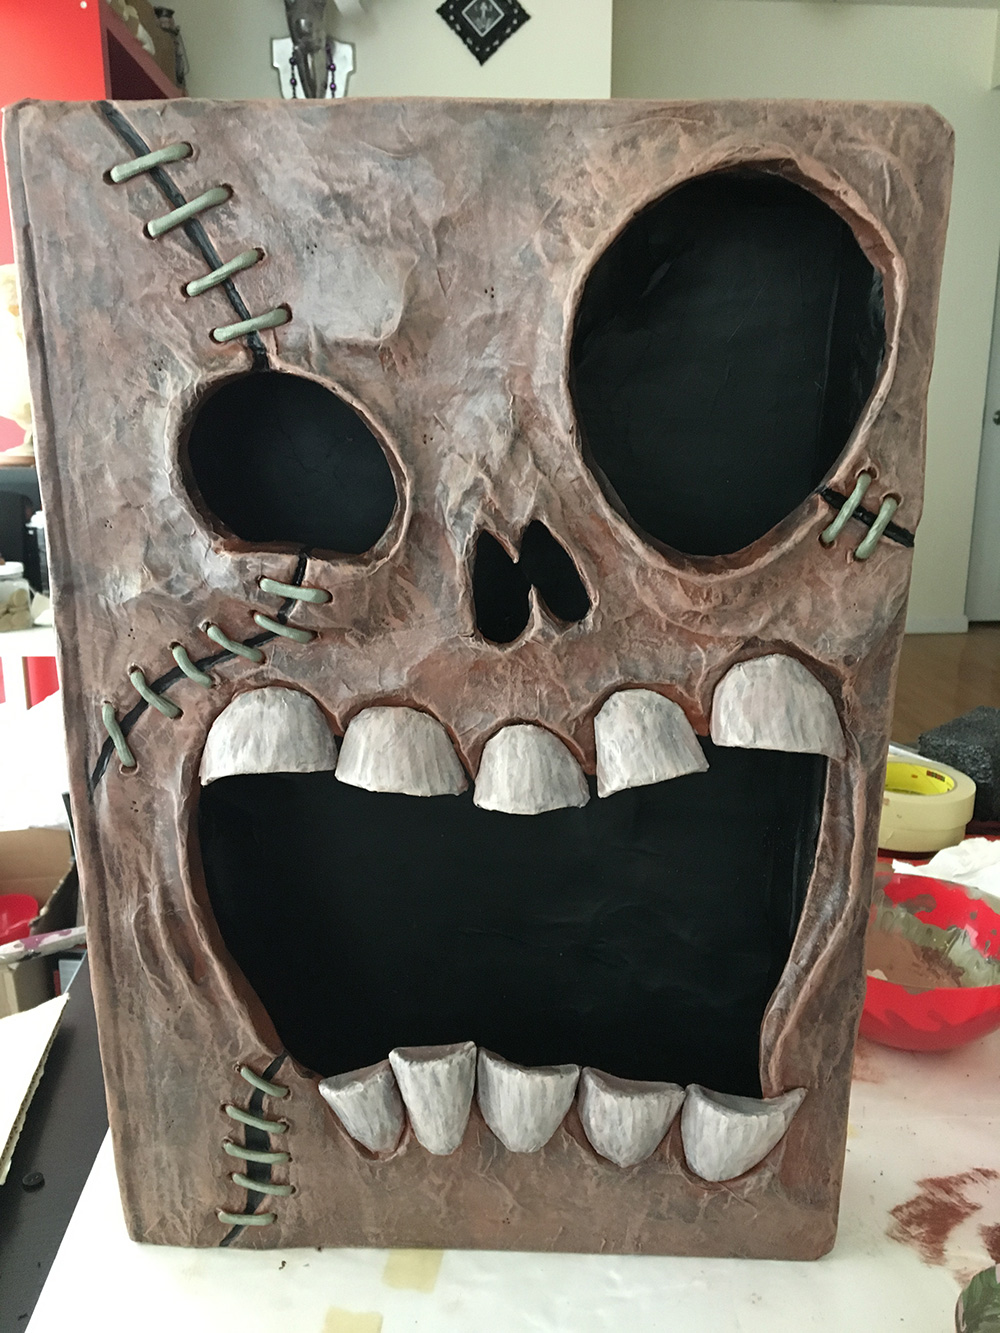
I let the paint set for a few hours and then applied a coat of matte spray. And with that, this thing was done!
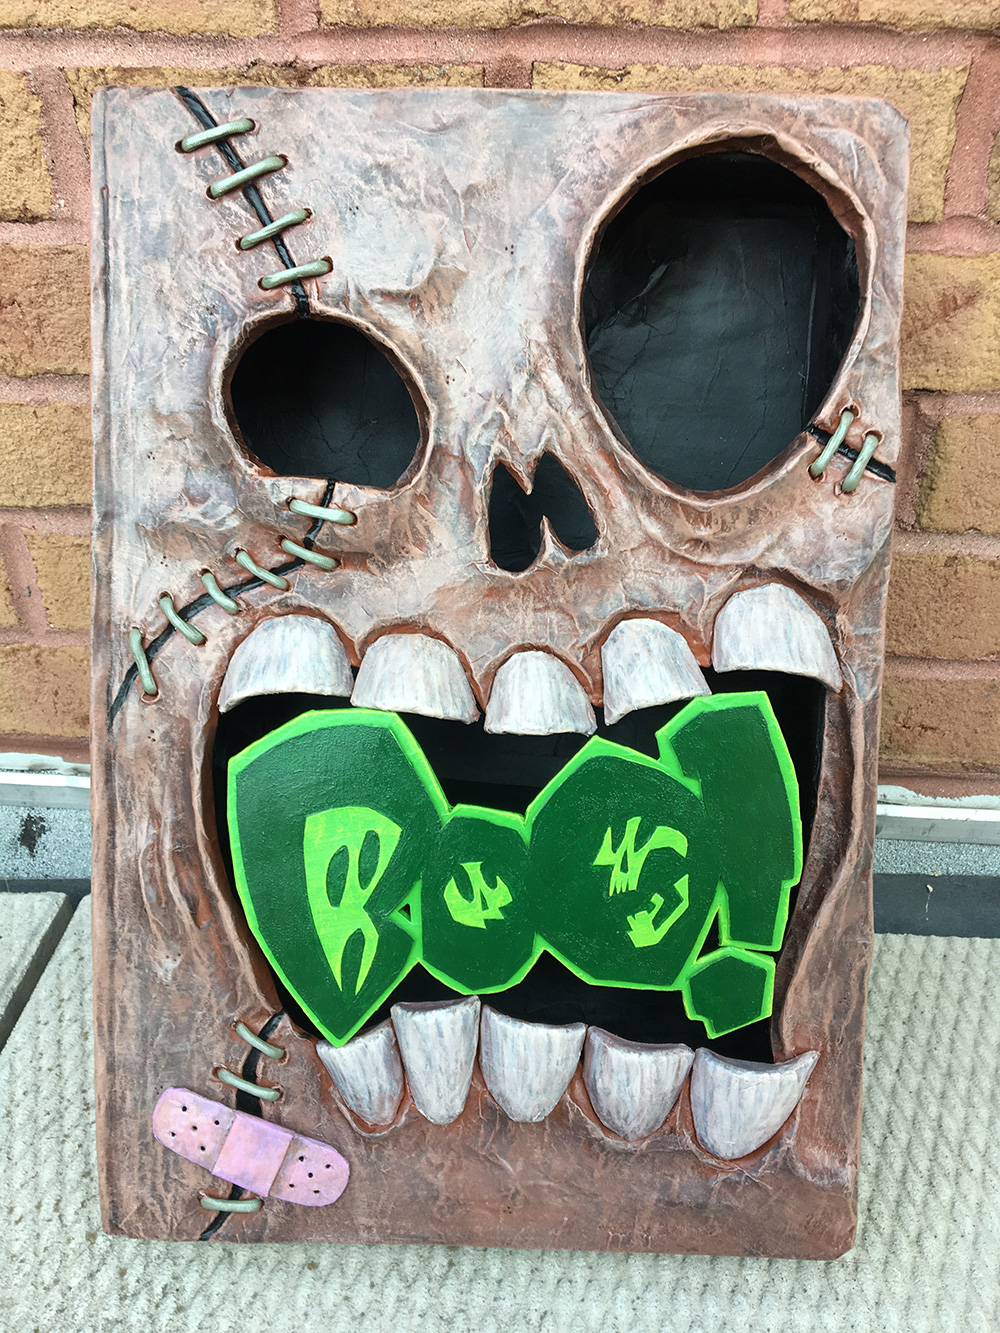
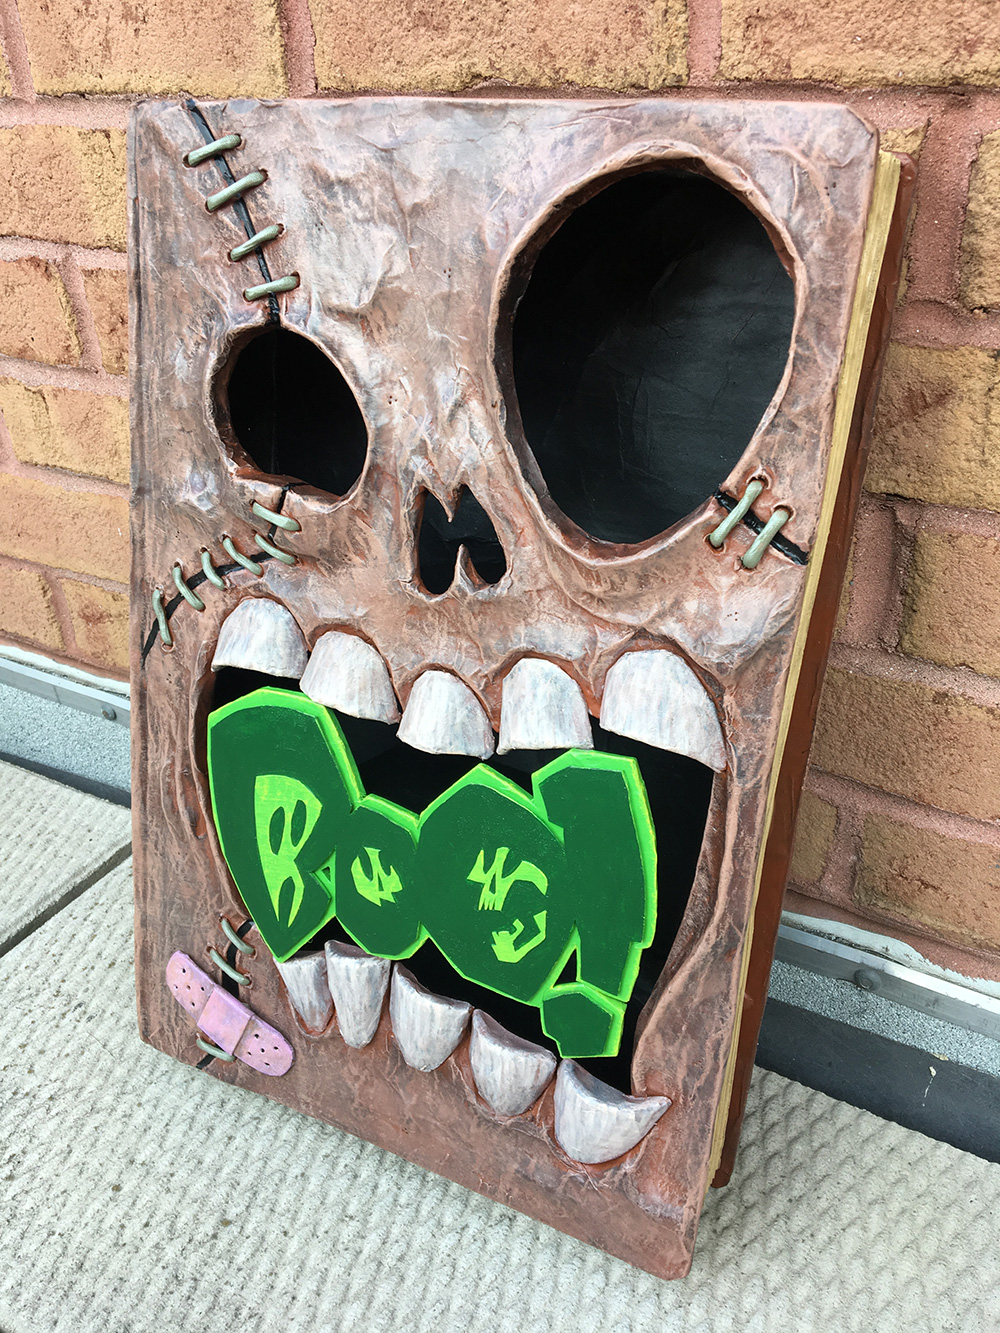
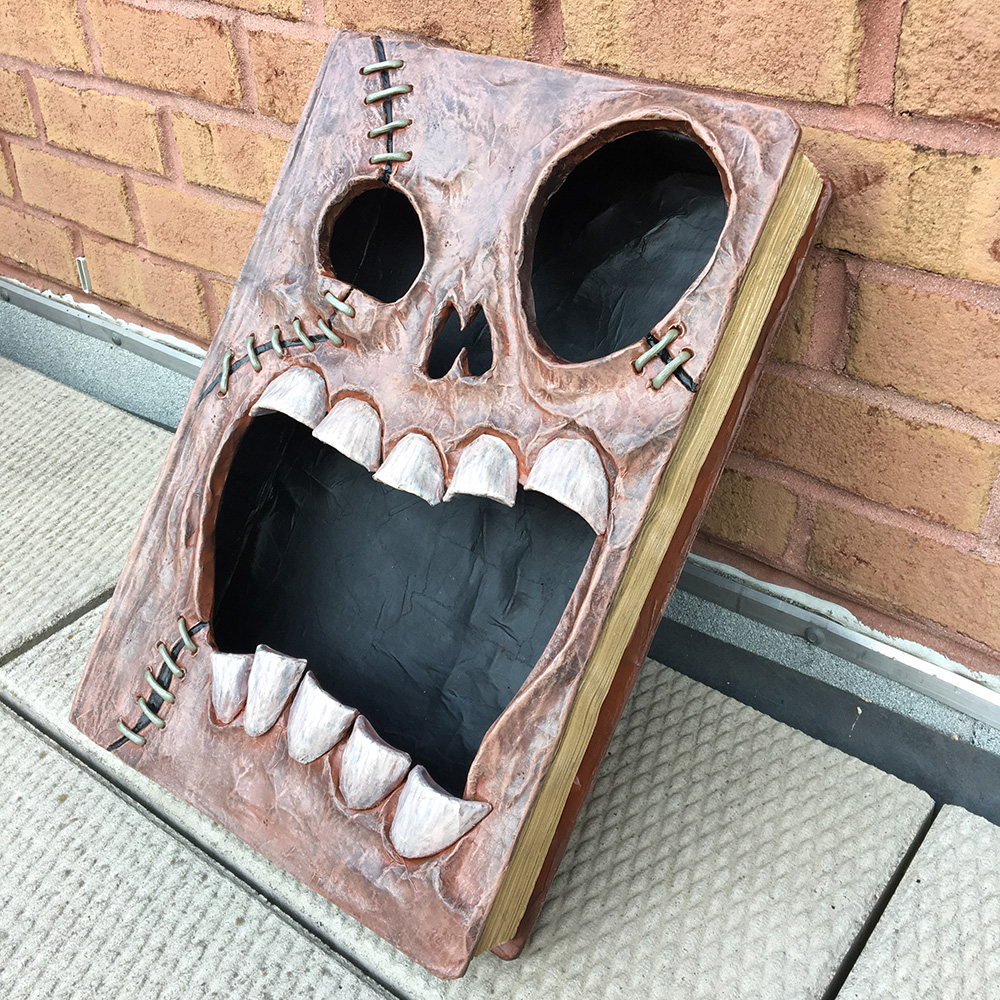
Here are some closeups of the details:
After completing the sculpture, I took some photos of it and created the actual cover for the digital comic using a Photoshop template that Jon provided. I’m really happy with how this thing came out; it’s one of my favorite things I’ve ever made! Don’t forget to check out BOO! Halloween Stories on Comixology! I also have a short comic I illustrated in there, written by Leonard Pierce, and I’ve drawn and written stories for all the recent editions over the years. They’re all a lot of fun; check ’em out!

 About Manning Krull
 How to make a 4-foot paper maché alligator
 My violin skull mask, Mardi Gras 2015
 Three-headed paper maché dragon sculpture
October 7th, 2017 at 5:20 am
Wow. The texture and painting is amazing. And the construction on all your projects is so innovative. Genius really! I have been reading your site all day (I was looking for tips for a paper mache volcano I am making for my son), and it is so interesting! I am no artist but will definitely try this shading/highlighting tecnique for the volcano surface. I have learned so much from your well written and photographed site. Can’t wait to see your next creation. Do you use gesso on all your projects before painting?
Thank you!
October 9th, 2017 at 7:50 pm
Thanks, Maggie, your comment made my day! I don’t use gesso on all my projects — I mostly make a point of using it on anything that I want to look relatively smooth, like most of my big skull masks. On something like this spooky book, I actually want the texture to be rough and weird and messed up, so I don’t bother with gesso. If I were making a volcano I’d probably skip the gesso; the rough texture of the paper will lend itself really well to making a neat volcanic rock surface. I think/hope you’ll find the painting techniques above to be really easy and produce impressive results! Best of luck on your project!!
September 28th, 2019 at 2:18 am
Dude!! Your stuff is super awesome! I just wanted to let you know how amazing it is and how much I like reading about it! Keep up the good work!
September 28th, 2019 at 4:26 am
Aw man, thanks Jason! I’m about to unleash a torrent of Halloween project posts over the next couple weeks; stay tuned!