
Six-foot Paper maché giant bat — part 1
Published October 14, 2015
For our Voodoo Bayou Halloween party, my fiancée told me she wanted a giant bat decoration. Okay!
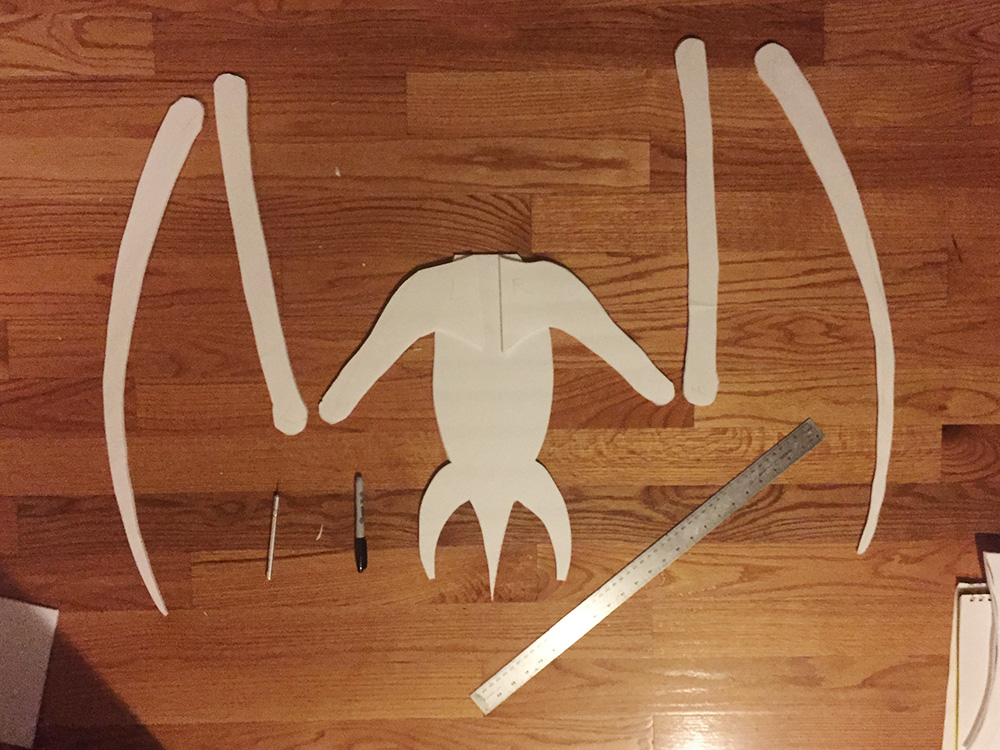
I started with a rough pencil sketch of a bat to figure out the proportions, and then I transferred that to two sheets of foam board. I started with just the wing bones and body; no head. I cut out those pieces with an X-acto knife.
I then glued the wing bones together with Elmer's Wood Glue. I was very worried about these thin pieces bending, so I used a trick I made up a while back: I reinforced all the edges of the foam board with plastic zip ties (pictured below). They're the perfect width, and they're sturdy enough to not want to bend from side to side. (Note: you've gotta snip off the fat square end of each zip tie with scissors first.) I taped the zip ties in place, all along the edges of the wing bones; both sides.
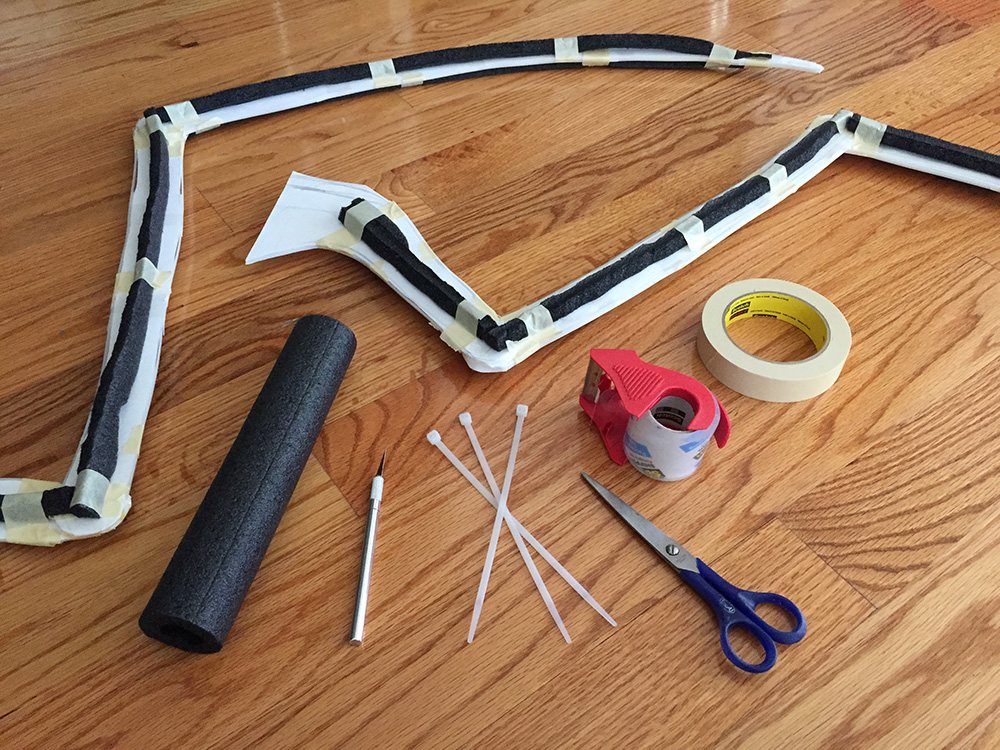
Then I chopped up a piece of black foam pipe insulation to add some bulk to the wings and make them a bit more 3-d. This stuff is great; super lightweight, flexible, and sturdy, and just $3 at Home Depot for four one-meter tubes. I sliced up the foam tubing with an X-acto knife, and taped it in place.
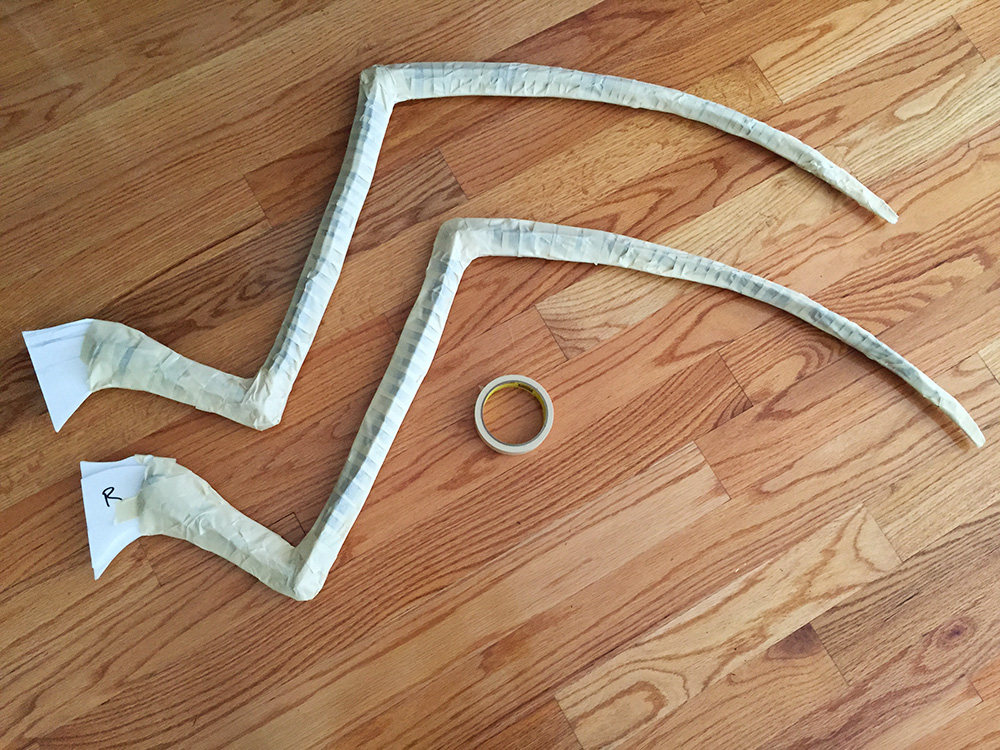
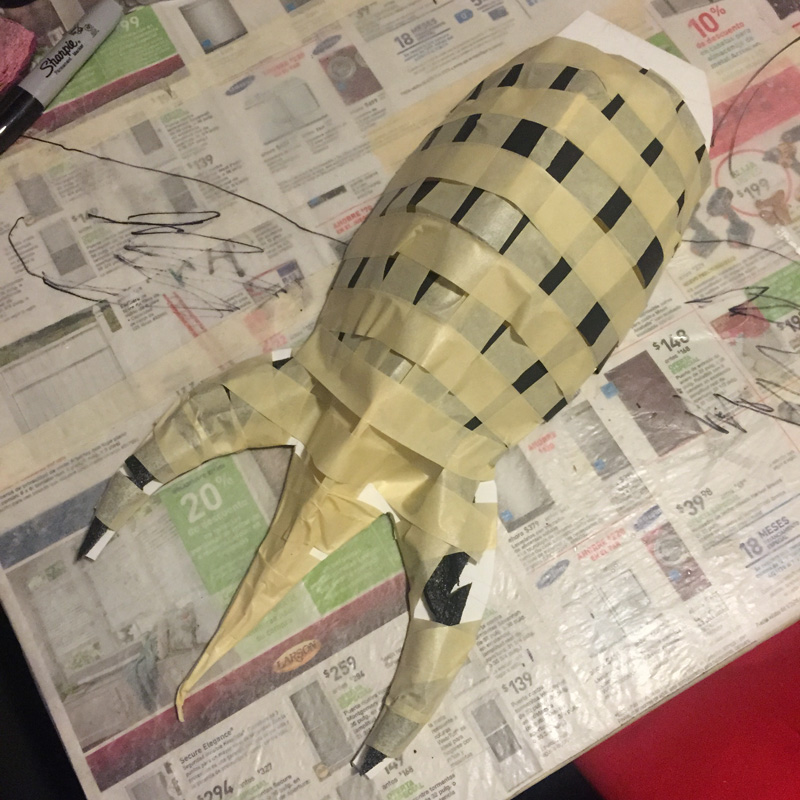
I then wrapped masking tape all around the wings. This is almost like a freebie layer of paper maché; way faster than paper maché, and it lends a little bit of solidness and sturdiness before you tackle the actual paper maché.
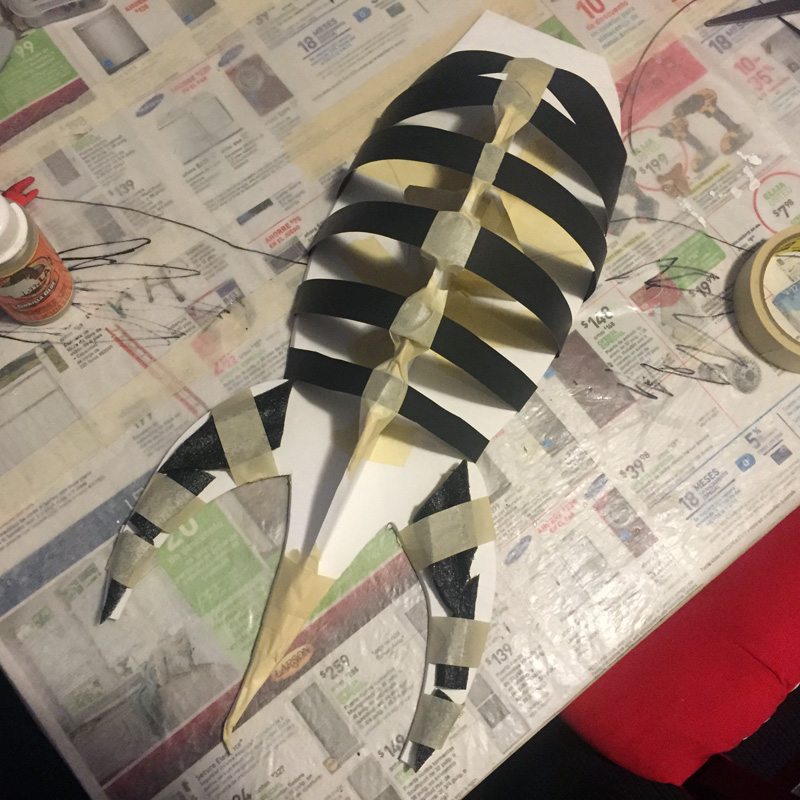
Then I switched to working on the body. I started with a simple foam board body shape, and I begain building a framework to put paper maché on. I started with a middle piece of foam board, held in place perpendicular to the body with two wedges of foam board on either side, and lots of masking tape. Then I cut strips of poster board and gently curved them over this middle piece and taped them around back. Kind of like ribs! I added some leftover chunks of foam tubing to the legs to give them some depth.
Next, I covered this whole shape in two layers of paper maché (you'll see in the pics coming up). You can read about my paper maché process and preferred materials here. The short version is: I use Roman PRO-543 universal wallpaper adhesive (paid link) and alternating layers of newspaper and brown wrapping paper.
The poster board ribs are pretty delicate, but once you carefully get some paper maché over them the whole thing starts to feel a lot more solid. I always wonder if what I'm making won't be sturdy enough, but as soon as you've got some paper maché on there and let it dry, your shape is suddenly a lot stronger.
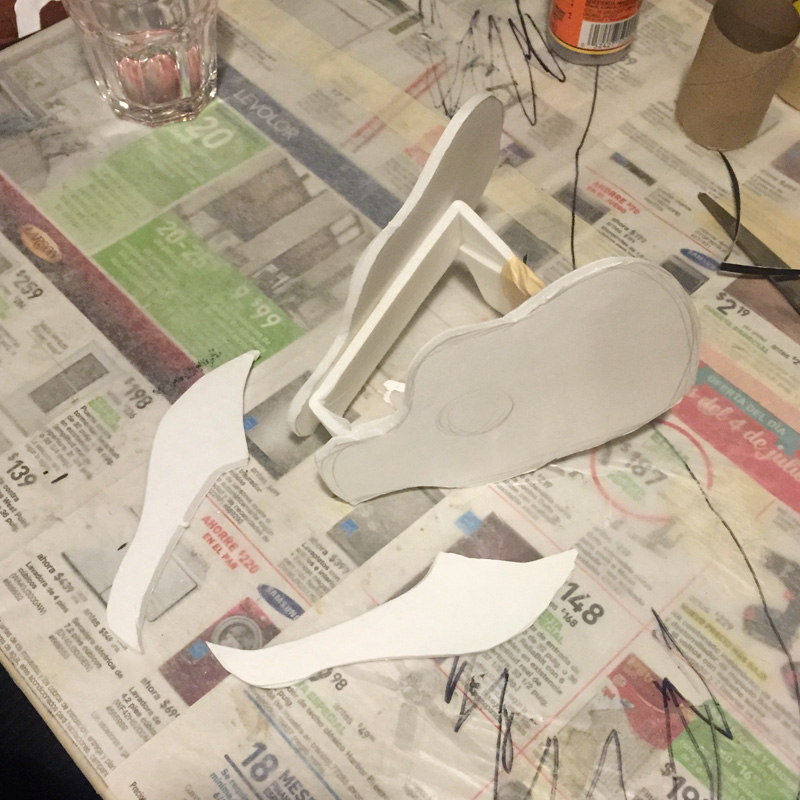
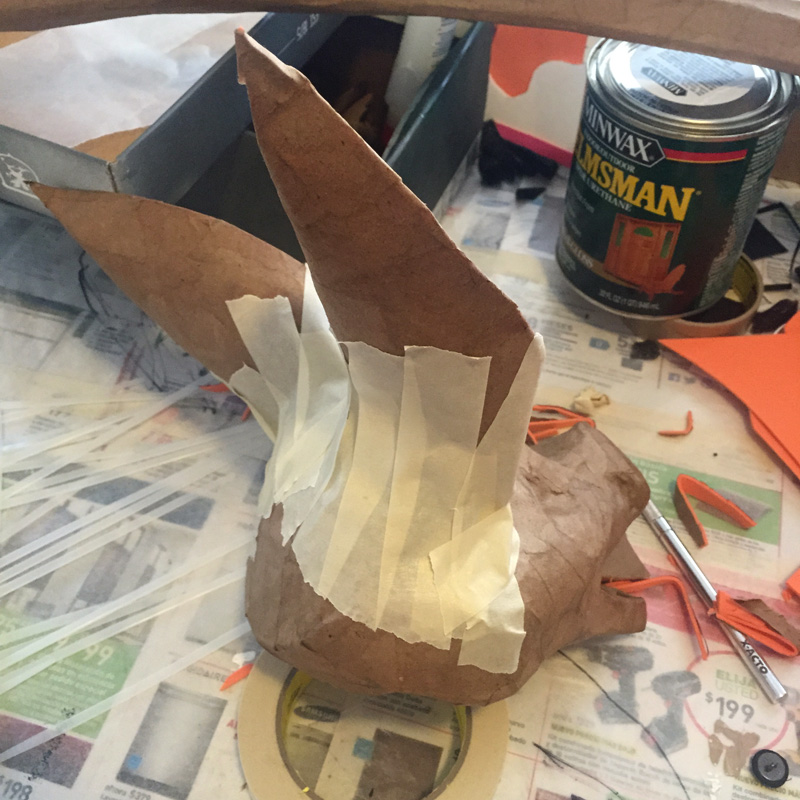
I then switched gears and worked on the head. I searched through some pictures of bat skulls and drew a very rough sketch on some foam board, cut it out, flipped it and traced it, and then cut the other side out. So, both sides of the head and both sides of the jaw. I built a small trapezoid shape with foam board and packing tape to use as the base of the head, and then I taped the skull and jaw pieces to that.
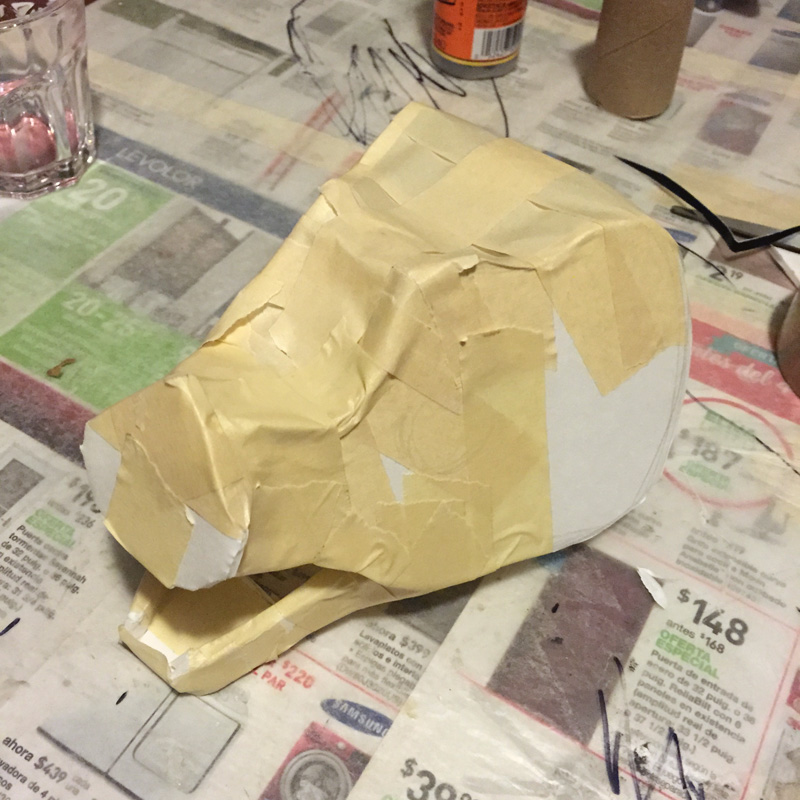
I then started covering the whole thing with masking tape, in order to smooth the edges out a bit and make the whole shape much more sturdy. I added a piece of foam board on the front for the bat's pig-like nose.
I built up the cheek areas with some foam tubing, sliced into a long shape that's tapered on both ends. Those eyes are just buttons I set in place to see how they would look; not bad! They're not attached. I also cut out a little craft foam shape for the nose, pictured at bottom right.
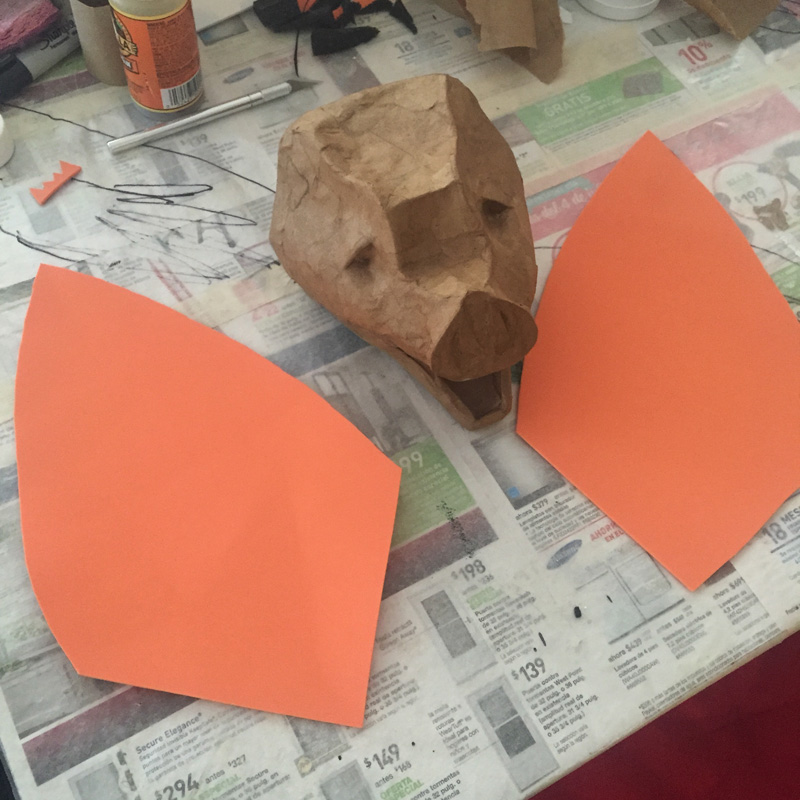
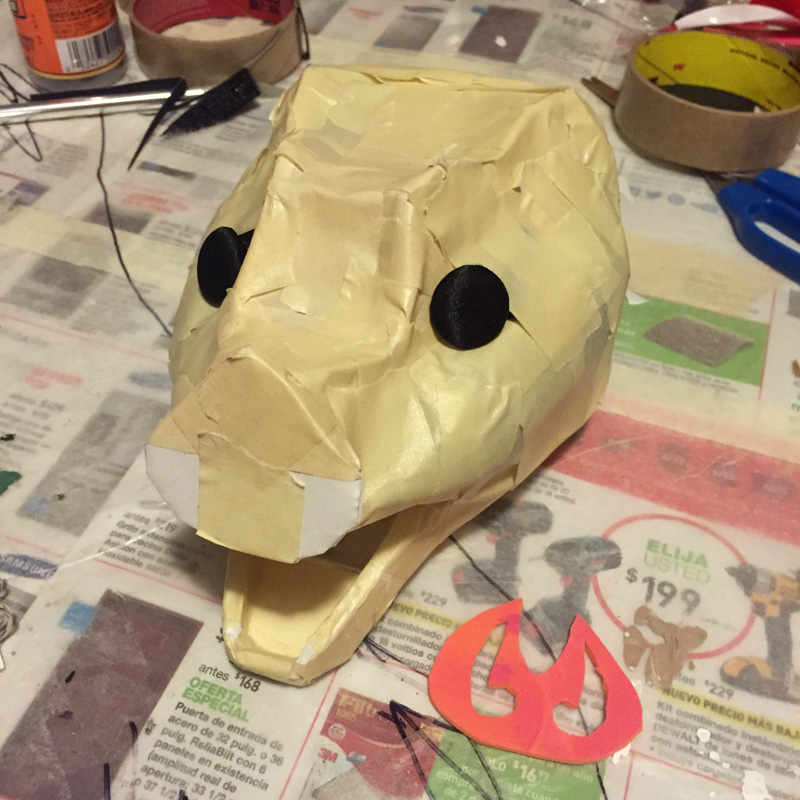
I added a layer of paper maché to the head, and then I started on the ears! I started with some craft foam, cut into two slightly rounded diamond shapes.
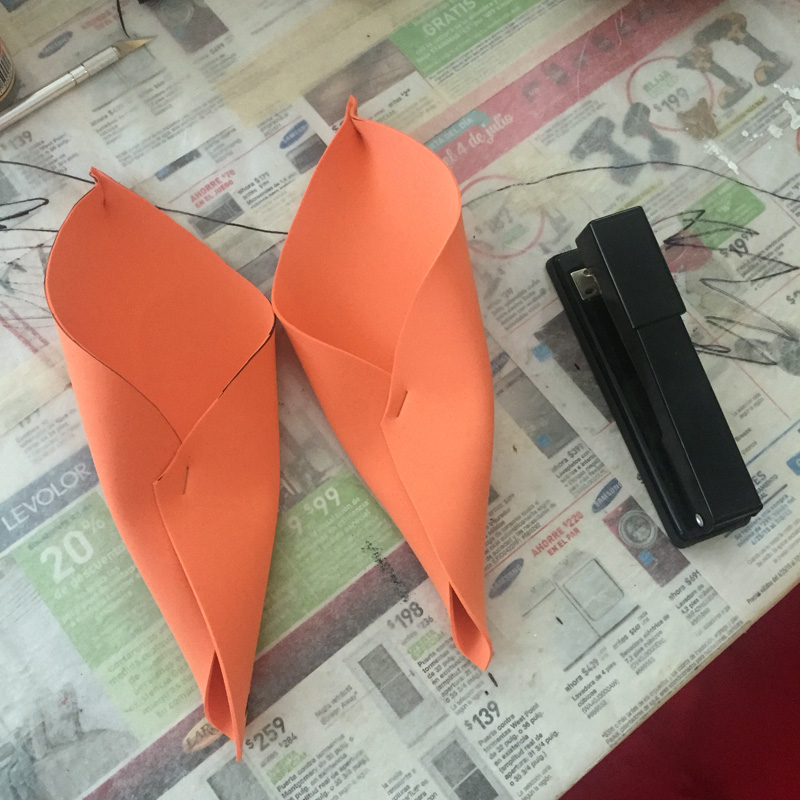
I curled and pinched the craft foam to make the ear shapes, and put two staples in each ear — one right at the tip, and another closer to the middle to hold the curve closed.
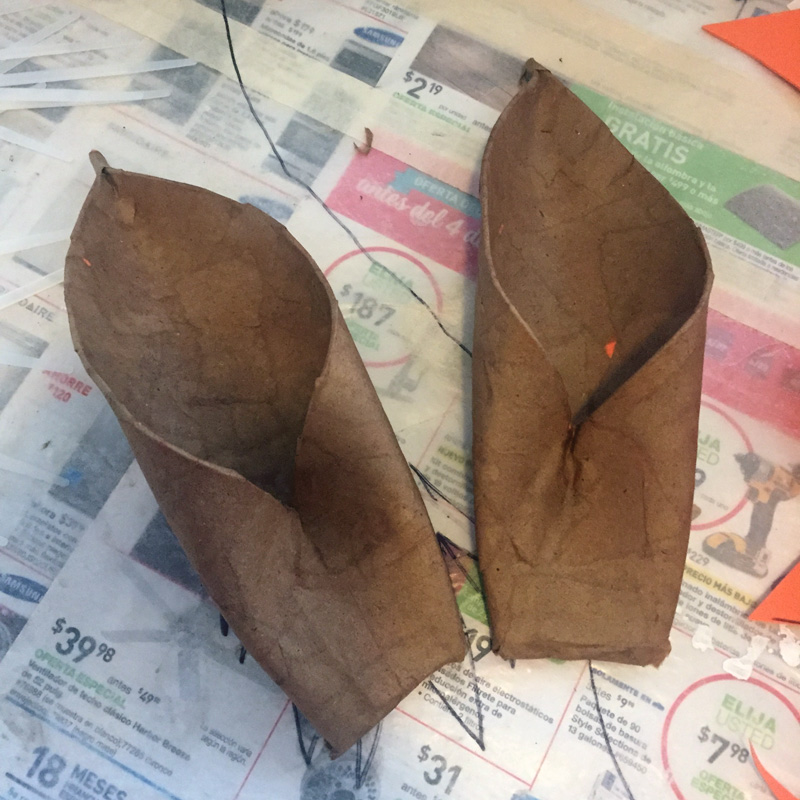
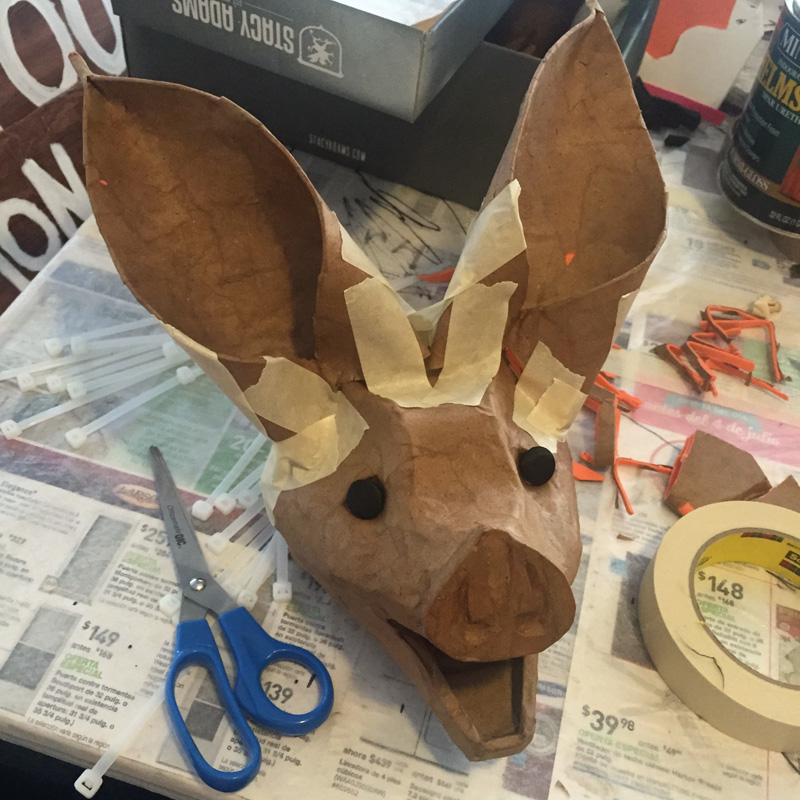
I covered the ears with a layer of paper maché and let them dry. Then I trimmed the bottom end of the ears to fit them to the head shape, and taped them in place on the head. The button eyes still aren't attached; they're just sitting there for show.
Back to the body! I attached the wings to the body with some wood glue and then a couple layers of paper maché. At this point I realized how huge this thing was going to be! About six and a half feet from wing tip to wing tip.
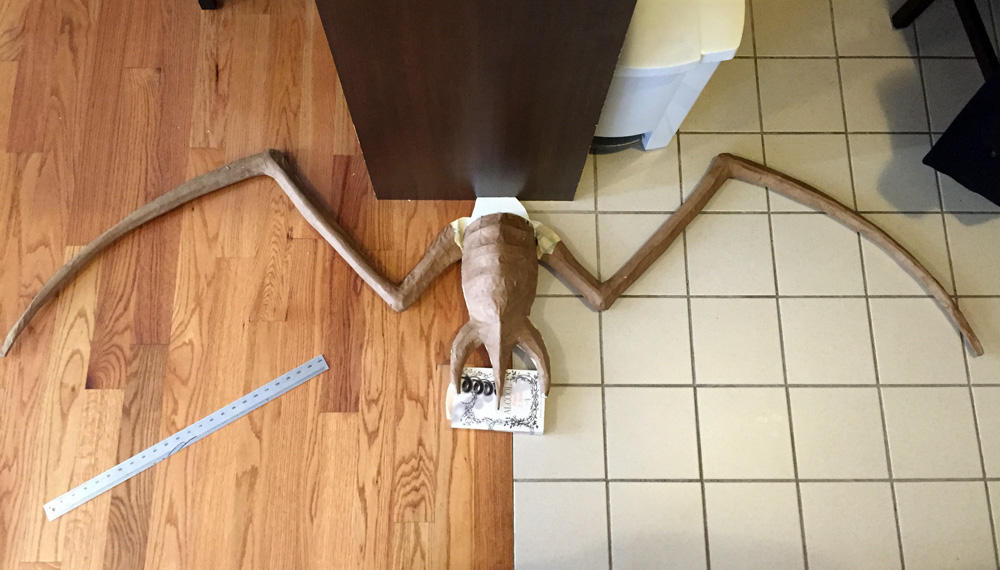
The places where the wings connect to the body needed to be very strong, since the weight of the wings is going to make them want to bend or snap off, so I did multiple layers of paper maché around those areas. Note: For all the paper maché elements of this project, I used just one layer of paper maché, with the exception of these shoulder areas. Normally I like to do at least two layers of paper maché everywhere, but one of my main goals with this bat was to keep it as lightweight as possible, even at the expense of some sturdiness. The end result is a pretty delicate decoration, but it does the job.
When the shoulders were all dry and feeling pretty sturdy, it was time to add the membranes of the wings! This was pretty tricky!
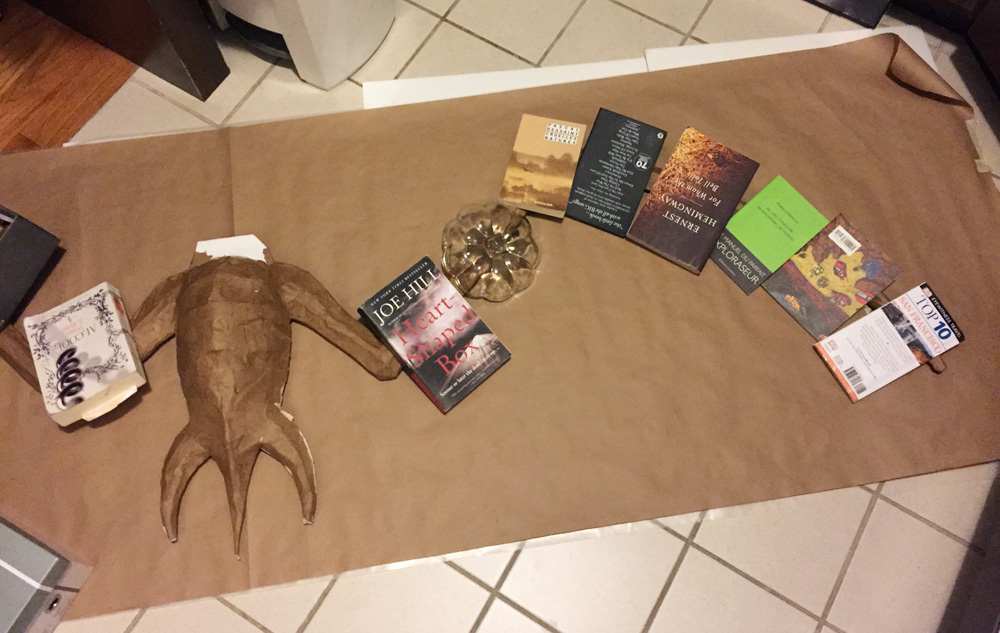
A little surveying and prep first. As a test, I laid the bat body down on my smooth kitchen floor and looked closely underneath the bottom edges of the wings. They weren't perfectly touching the floor all the way around, and this was a problem. I wanted to lay down a long sheet of paper, put glue on the bottom edges of the wings, and simply lay the whole thing down on the paper. But since the bottom surface of the wings wasn't perfectly even and flat, they wouldn't lay nicely on the paper all the way around. So here's how I dealt with that. I first put down a layer of foam board on the floor — four pieces. I then laid down a layer of wax paper on top of that, to keep the glue from sticking to the foam board. Then I laid down my long sheet of brown craft paper; this will be the wing membranes. Then I flipped over the bat, applied wood glue all along the edges of the wings (smoothed out with my finger), and flipped him back over, glue-side-down, onto the paper. I then weighed down the wings with books and other objects, all along the whole length. All of this helped get the not-perfectly-even wing edges to touch the paper all the way around, so the glue could stick evenly everywhere. The relatively soft foam board had enough give to it that the weight of the books pressed the entire edge of the wings onto the paper. Make sense? It was a lot of set-up but it was worth it; when the glue dried the paper membrane was perfectly attached all along both wings.
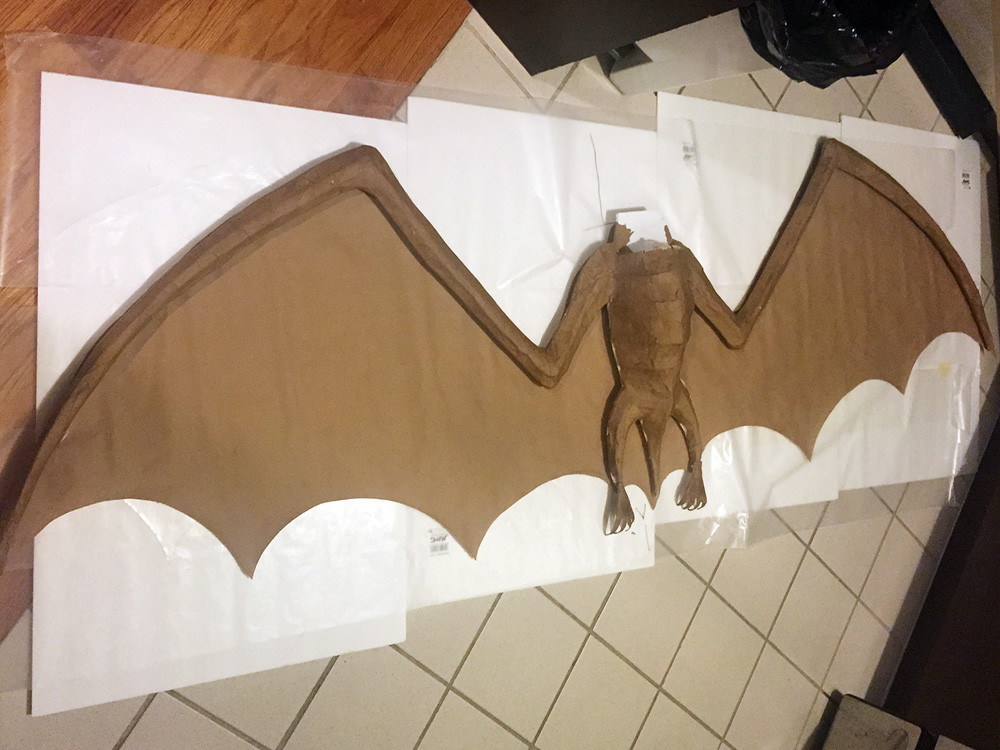
Next, I used an X-acto knife to cut out the wing shapes. The top edges of the wings had a little extra paper sticking up, so I flipped the bat over and glued down all the paper at the top part of the wings.
I also added the feet! I cut these out of scraps of an aluminum cookie sheet I'd used for another project. The aluminum was easy to cut and easy to curl into a natural pose. I added a small piece of craft foam to each foot to give it a little more thickness, and put a layer of paper maché over them. When they were dry, I first attached them to the legs with masking tape, then I added a layer of paper maché all around. Easy!
That's all for now. Next up: part 2 — attaching the head, adding finger bones down the middle of the wings, painting, and hanging!