
Making a giant paper maché bat decoration — part 2
Published October 20, 2015
See part one of this paper maché bat project here. Now, where were we? When we left off, I'd just added the wing membranes, and the head was nearly finished but not yet attached to the body.
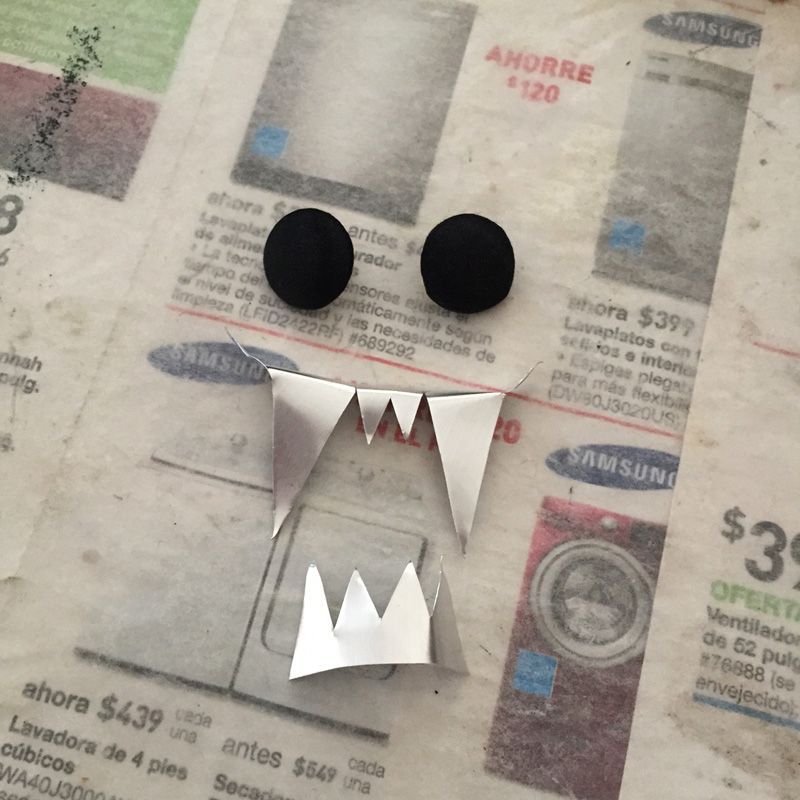
I cut the teeth out of an aluminum cookie sheet, and I put a layer of paper maché on them; this was very difficult and annoying because the shape was so small and intricate. For the eyes, I decided to stick with the buttons I'd been messing around with earlier, and cover them with paper maché so I can more easily paint them.
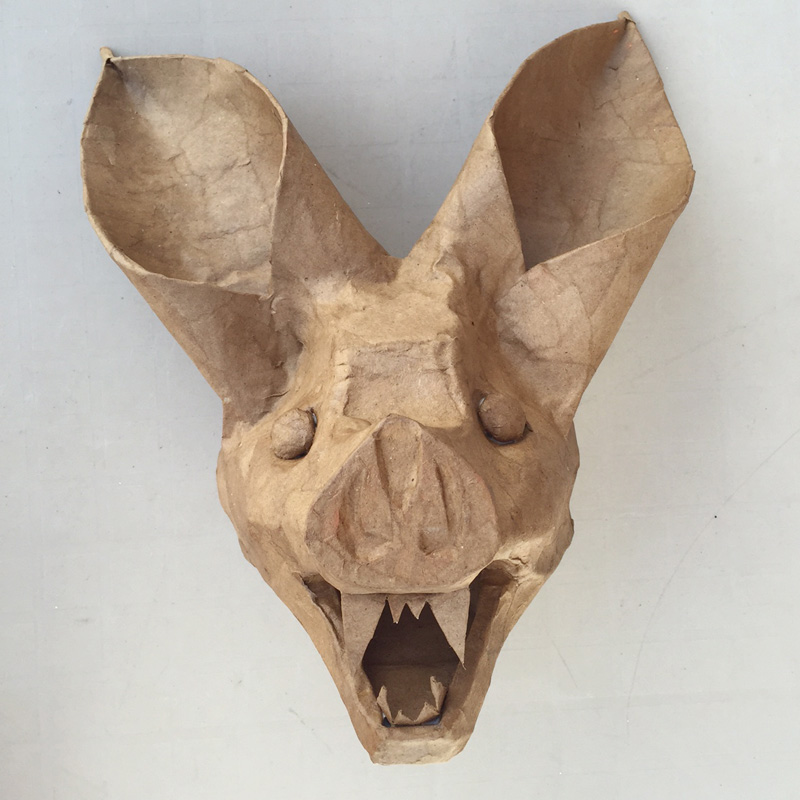
The head is finally finished! However, a little while later I decided I wasn't happy with how flat the fangs looked, so I added a thin strip of craft foam and paper maché'd over it; you'll see that in later pics.
Time to attach the head to the body! I had no idea how well this was going to work out, but it went great.
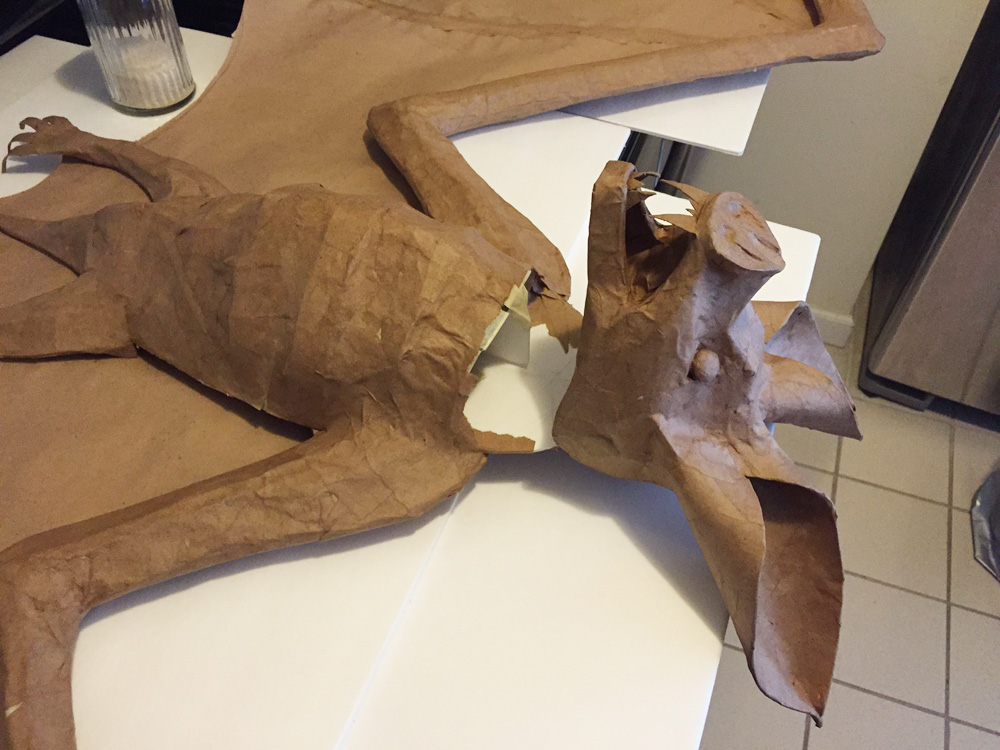
You'll see there's really no neck at all; I had to build up this neck area from scratch.
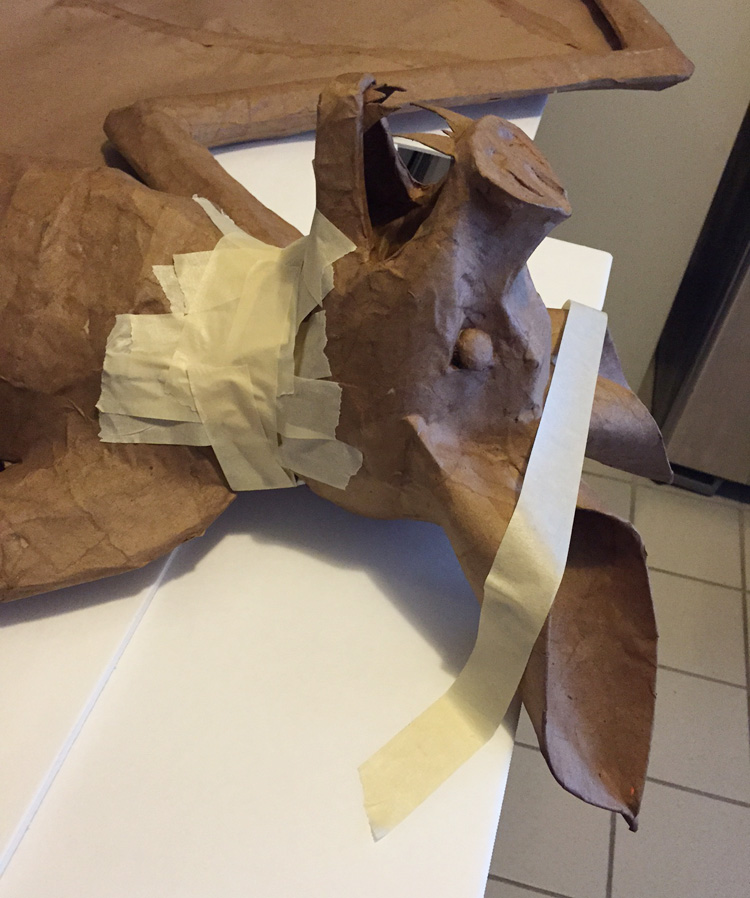
I taped down the head to keep it from moving, and I created a neck by just gently laying strips of masking tape down and building up a nice curved wall with that. This method always feels very flimsy and fragile when you start doing it — you're just laying tape over empty space — but after a second layer of tape the whole thing really takes shape and becomes a stronger, but still very flexible, surface.
I did two or three layers of paper maché over this neck area, since it'll have to support the weight of the head.
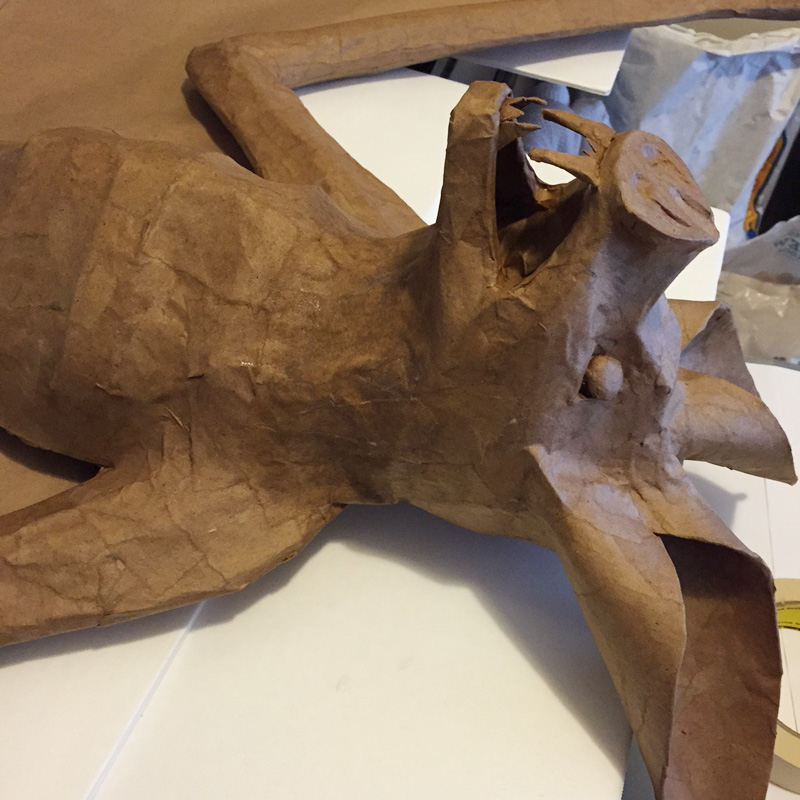
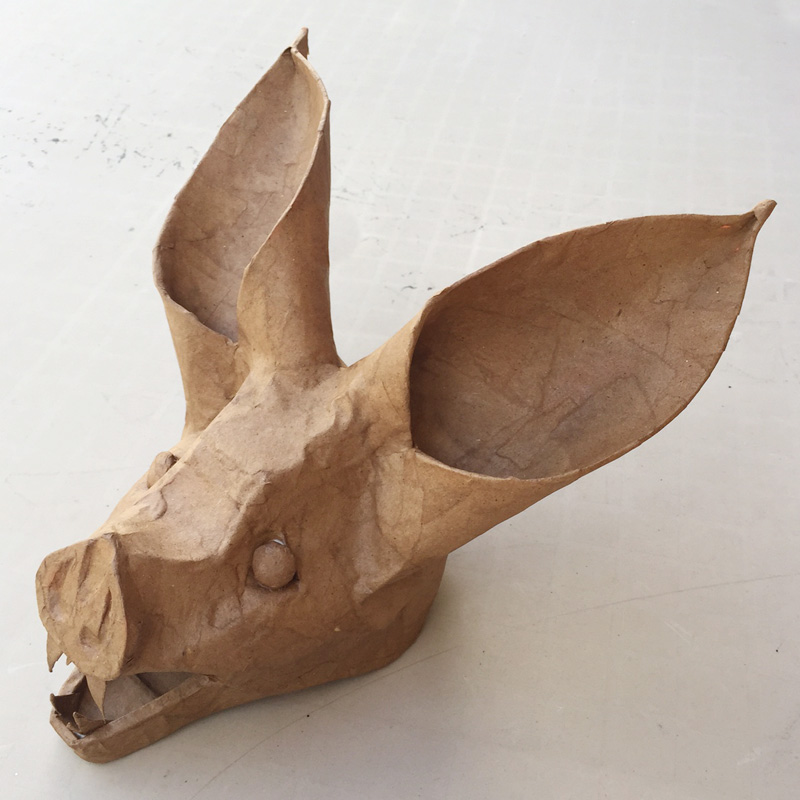
Just about done! And you can see the fangs are thicker now.
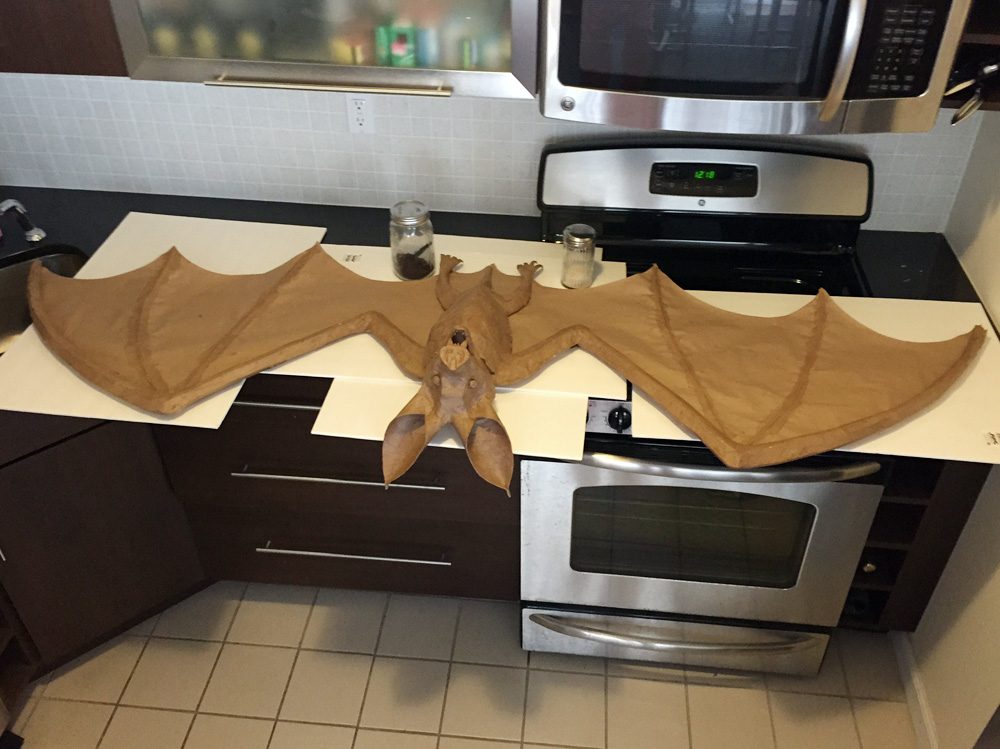
Here he is drying on my kitchen counter. One thing you can see here that I forgot to document is the finger bones running down the middle of the wings. I made these out of thin strips of craft foam that I cut out. I was very mindful of not letting the wings get too heavy, since the membranes are just one flimsy sheet of paper, so I cut the finger bones super thin — three bones each, for four fingers, so twelve pieces. They're held in place with small pieces of paper maché. Luckily they're lightweight enough to not cause the wings to sag at all.
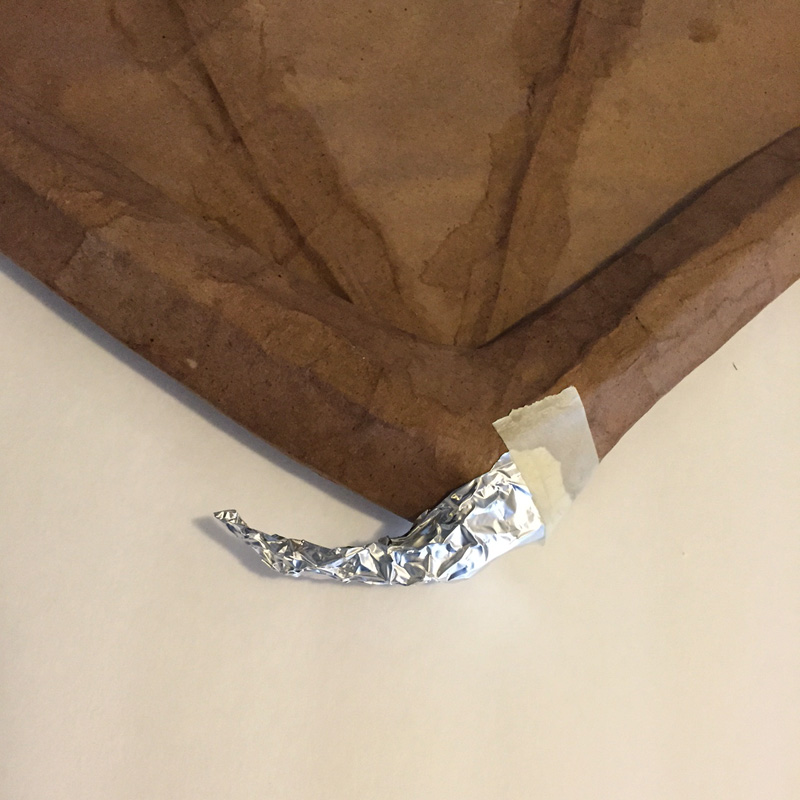
While the neck was drying, I added thumb bones on the corners of the wings; I made them out aluminum foil, taped them on, and added a layer of paper maché over them. Aluminum foil is nice and easy to turn into lightweight shapes, but it really doesn't want to take the paper maché at all, so it's annoying to work with. The paste-soaked paper won't stick to the aluminum foil, but it'll stick to itself, so it helps to start by wrapping a strip of paper around the shape so the ends connect, locking it in place, and then build out from there.
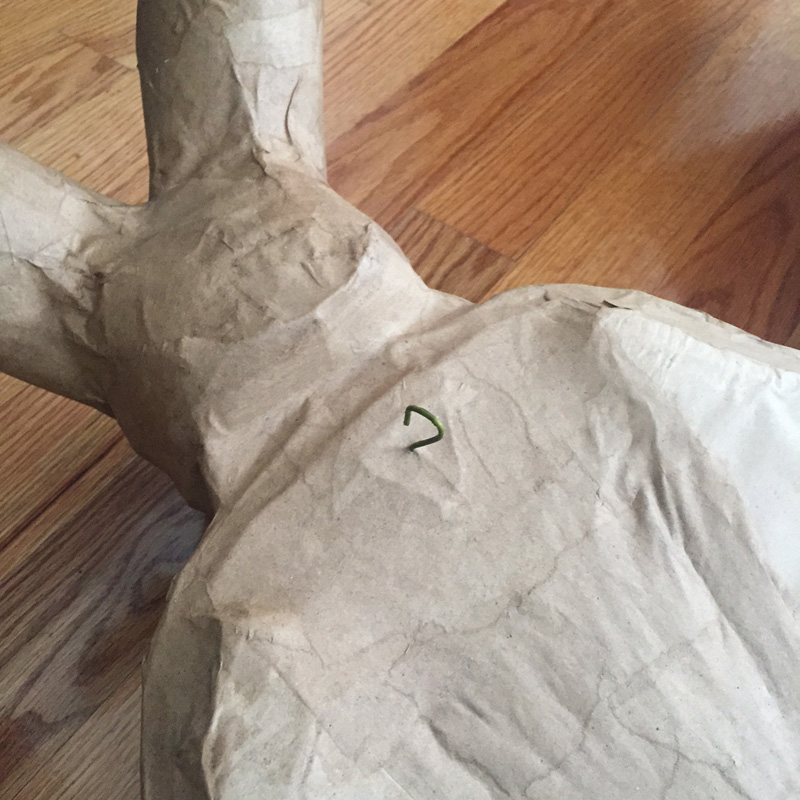
When all this paper maché was dry, I flipped the bat over and did some work on the back. I decided to be a bit lazy and not build out a real back shape for this guy — easy to justify 'cause no one will see this part when he's hanging up near the ceiling. So instead I just covered up all the exposed foam board and tape with some paper maché, just to neaten it up a bit. You can see the back in the last pic below.
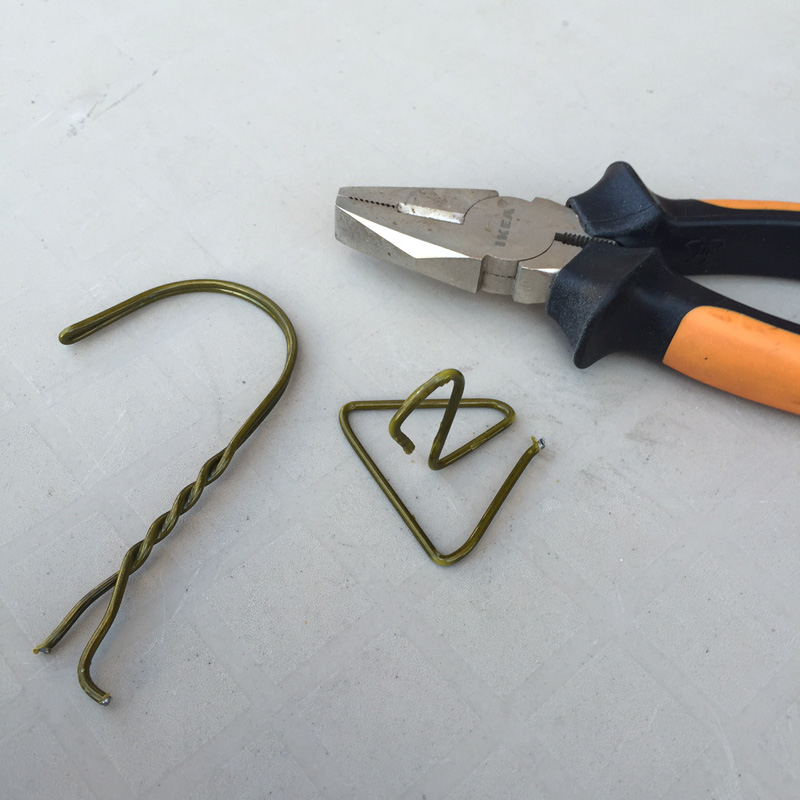
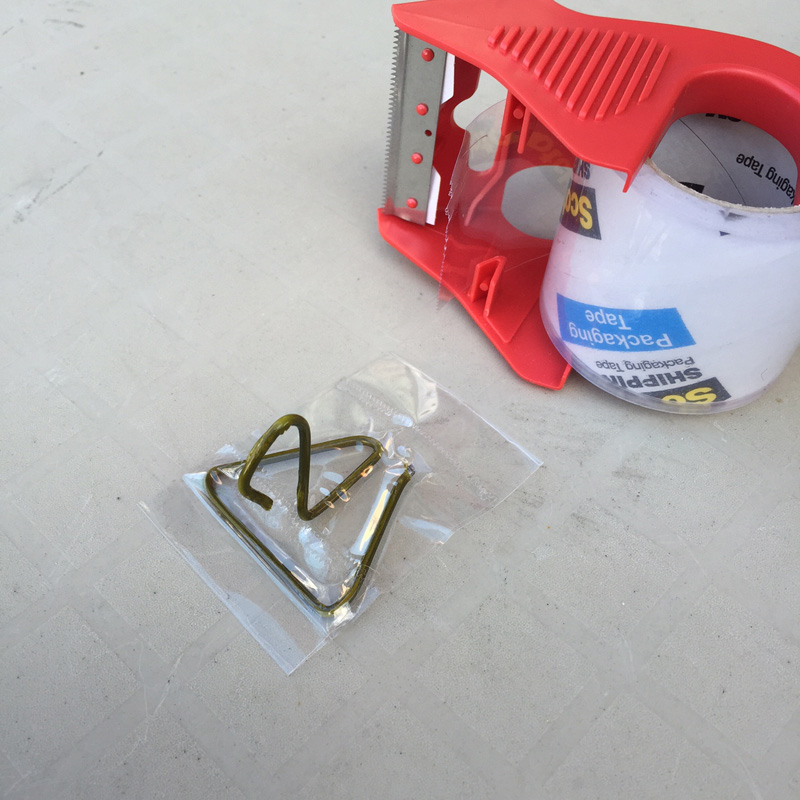
I also had to figure out how I'm eventually going to hang the bat on our ceiling during the Halloween party. I settled on a solution using a hook I made out of a piece of a wire hanger, and some heavy duty packing tape. The tape is key — if you were to install something like this hook right in the paper maché of the body, it's very likely to tear out, or at least stretch and warp that part of the sculpture. The packing tape lets you anchor the hook in a wide, flat, strong, non-tearable surface, and then you can paper maché over that to lock it in place. The tape won't rip, and the weight gets distributed much more evenly throughout the tape and the layer of paper maché that's covering it.
So this central hook will hang on a loop of fishing line that I'll attach to a toggle bolt I already have installed in my ceiling. I first inserted this toggle bolt to hold up a giant spider decoration I made a few years ago, and now just about every year I find a new use for it.
Anyway, I'm concerned that the bat's wings aren't sturdy enough to not sag under their own weight after a while — they don't sag when I pick the thing up, but a flimsy paper maché sculpture like this can definitely sag and warp over time due to gravity — so I'm going to attach the wings to ceiling as well. To do this I'll just loop some fishing line over each main wing bone and use a thumbtack to stick 'em to the ceiling. That should do it.
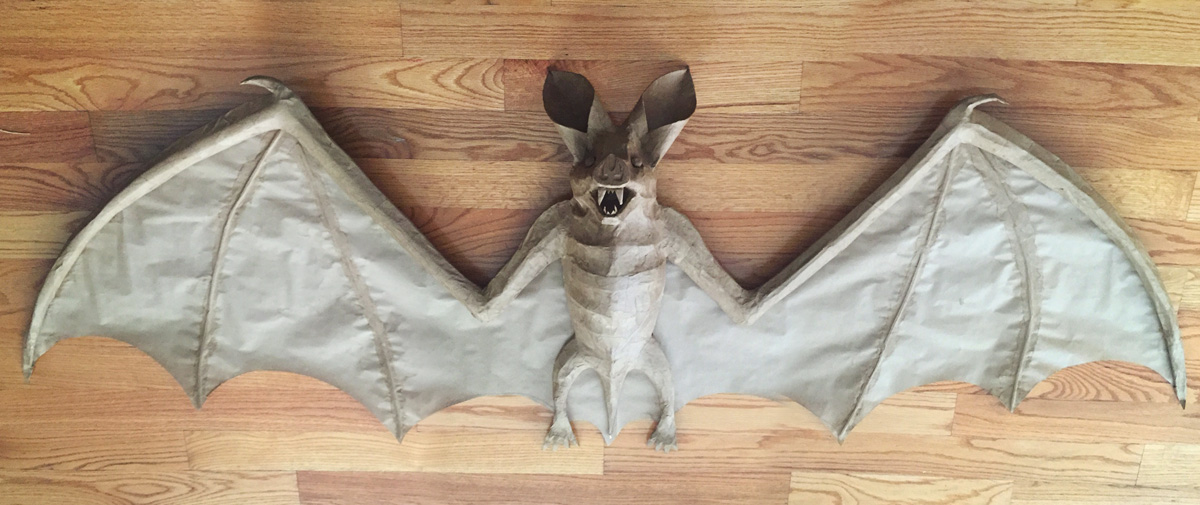
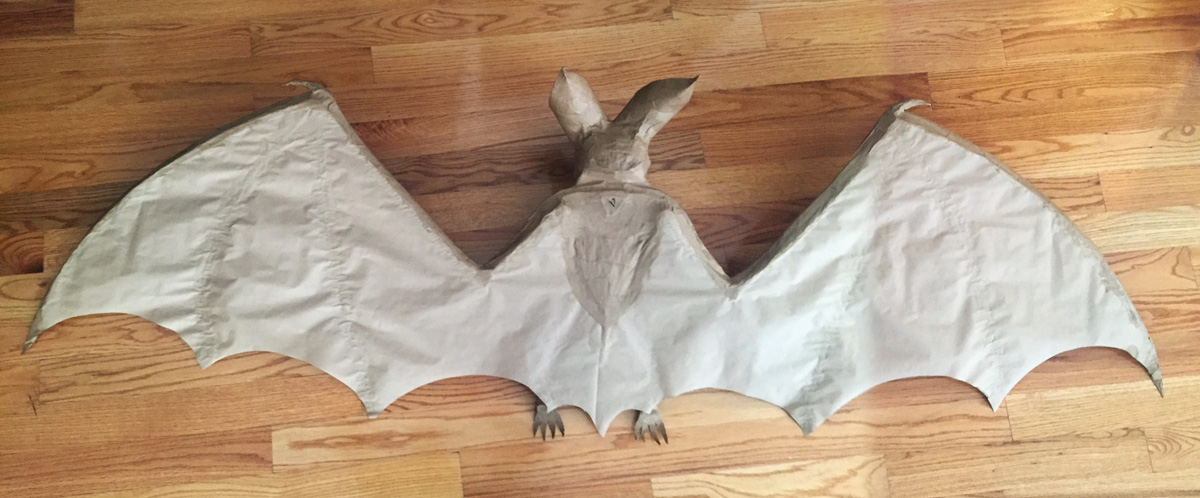
I won't actually hang the thing up 'til it's 100% finished. Let's take a look at our progress with the paper maché...
Next up: part 3 — painting and hanging!