
Three-headed paper maché dragon sculpture! — part 2
Published by Manning on September 5th, 2017
This is part two of two of Isabella the dragon! See the first part here.
The sea serpent’s bodies and heads and fins and other various parts were done, but I had to do some other steps before assembling them. It made sense to switch gears here and work on the pedestal and tray area, to figure out how they’ll fit with the dragons.
Making the tray area and pedestal
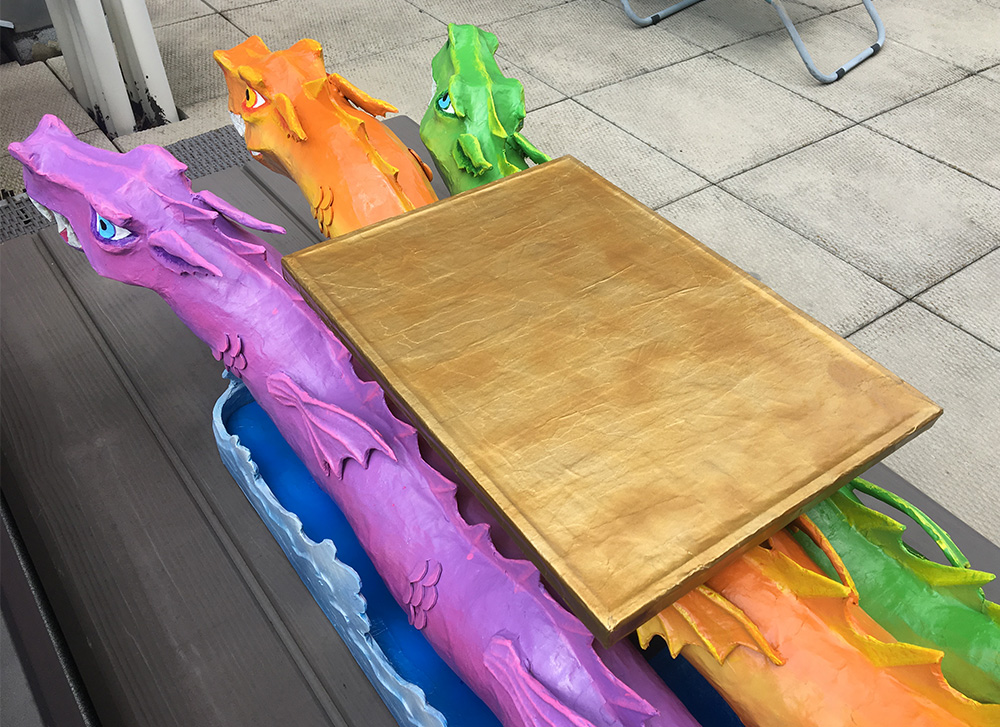
For the tray area, I decided to use an actual plastic serving tray on top, so that it could be removed and washed; I found an 18″x14″ plastic tray on Amazon and designed the dimensions of everything else around that. The tray happened to be black, but the whole pedestal and tray area will be painted gold later on.
The main structure of the tray area and pedestal consists of: a large rectangle of foam board at the base, another rectangle of foam board at the top (supporting the tray), and in between is a column made from two big plastic water bottles from the dollar store. Whenever I’m doing a project like this, I go to the dollar store and search for any objects that are A) the right size, B) very sturdy, c) lightweight, and of course D) cheap! Since I’d designed everything on paper earlier I knew exactly how tall I wanted the pedestal to be, so after considering a bunch of different junk at the dollar store I finally found these water bottles and knew they’d be the perfect fit — and most importantly, they’d allow the pedestal section to be very sturdy and be able to support a lot of weight. The tray area can easily hold twenty pounds with these two bottles supporting it; probably even more, but I ain’t gonna push it.

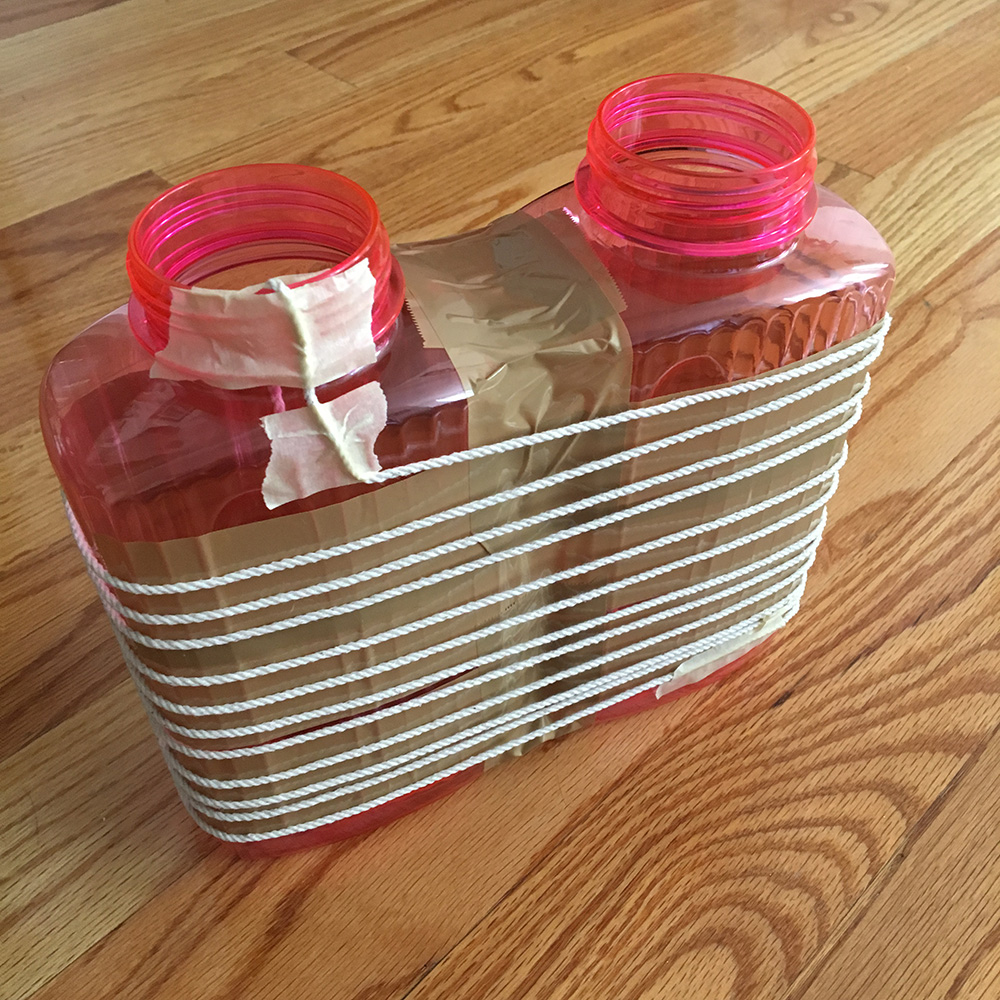
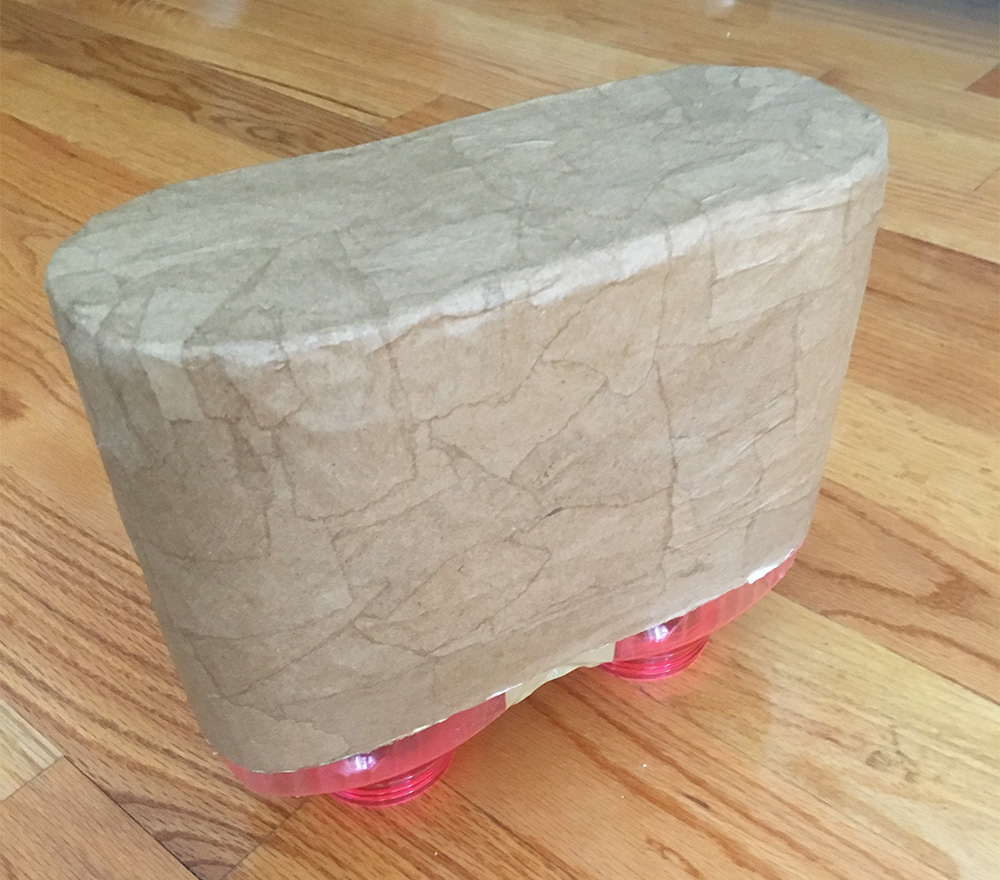
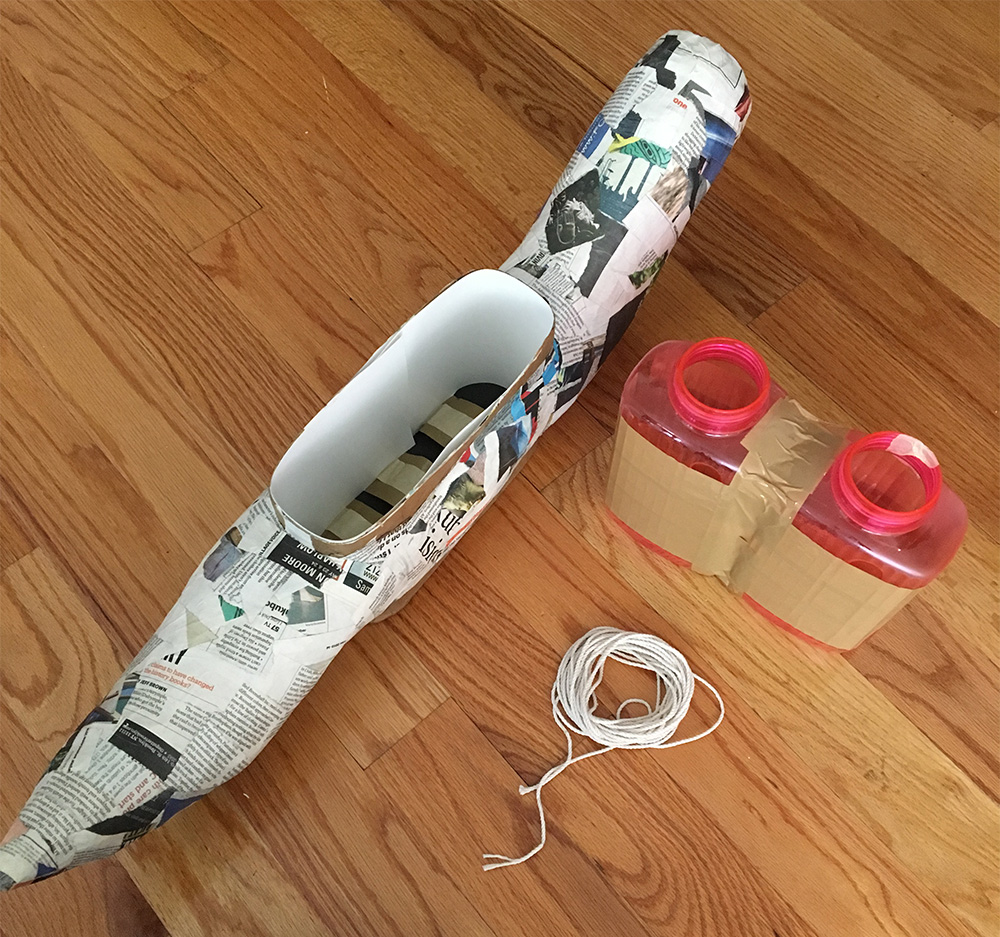
I started with the central column for the pedestal. I taped my two bottles together with packing tape, and then did something kind of weird to prepare them for the next steps: I wound a long piece of string around them in a spiral. Then I wrapped two layers of poster board around this, and covered that with packing tape. The string is there to create a little bit of space between the bottles and the poster board; you’ll see why in a minute. I covered this shape with five layers of paper maché and let it dry.
I took the middle dragon body and carefully cut a hole with an X-acto knife — the same length as the bottles, but a little bit more narrow. This was a ton of work as I had to cut up and remove all the inside junk — a mountain of tape and styrofoam cups and foam board.
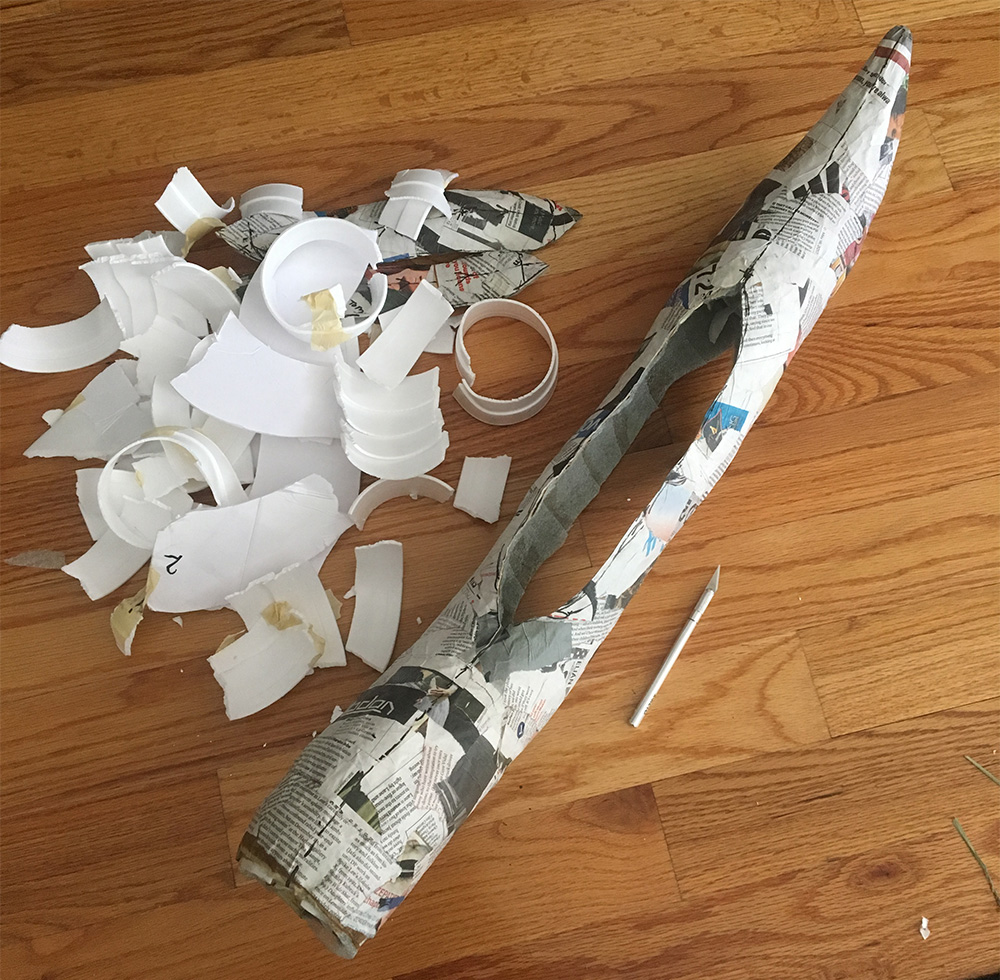
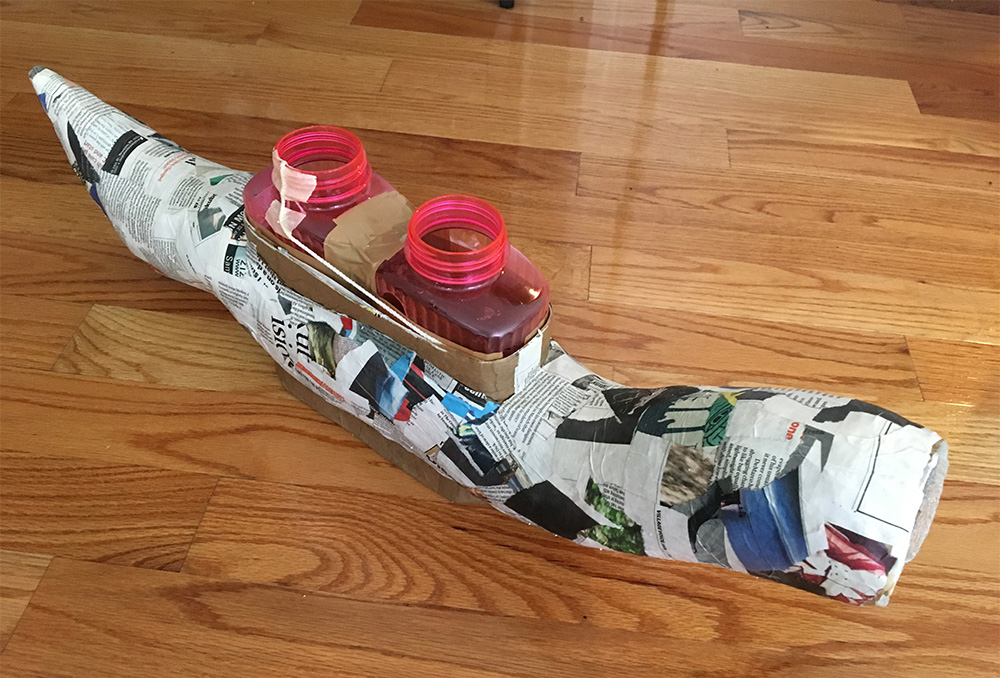
I inserted the column in this narrow opening, which stretched the body out a bit pretty much exactly how I hoped it would. I taped the column in place, and then applied five layers of paper maché around the edges of the hole to connect it to the column. When this was dry I carefully pulled the string out of the column, and then easily slid out the water bottles, leaving just the sturdy poster board/paper maché column shape in the hole. This worked out perfectly! Without the string, the friction of the poster board on the water bottles would’ve made them just about impossible to remove. Now I could cover all this stuff with some paper maché and the pieces’ll fit back together perfectly. I set aside the bottles to use for building the real column later.
I trimmed the hollow poster board column shape with an X-acto knife — making it flush with the edge of the hole at the bottom of the dragon body, and leaving just a little bit around the top edge, where I’ll attach the dorsal fin later. I secured all of this with some more masking tape, both inside the poster board column shape and also outside on the dragon body. I now had a nice sturdy wall inside the dragon that would perfectly fit the real column when it was time to add that later. Again, I wanted to build all these big parts completely separately so I could paint them separately and then assemble them at the end.
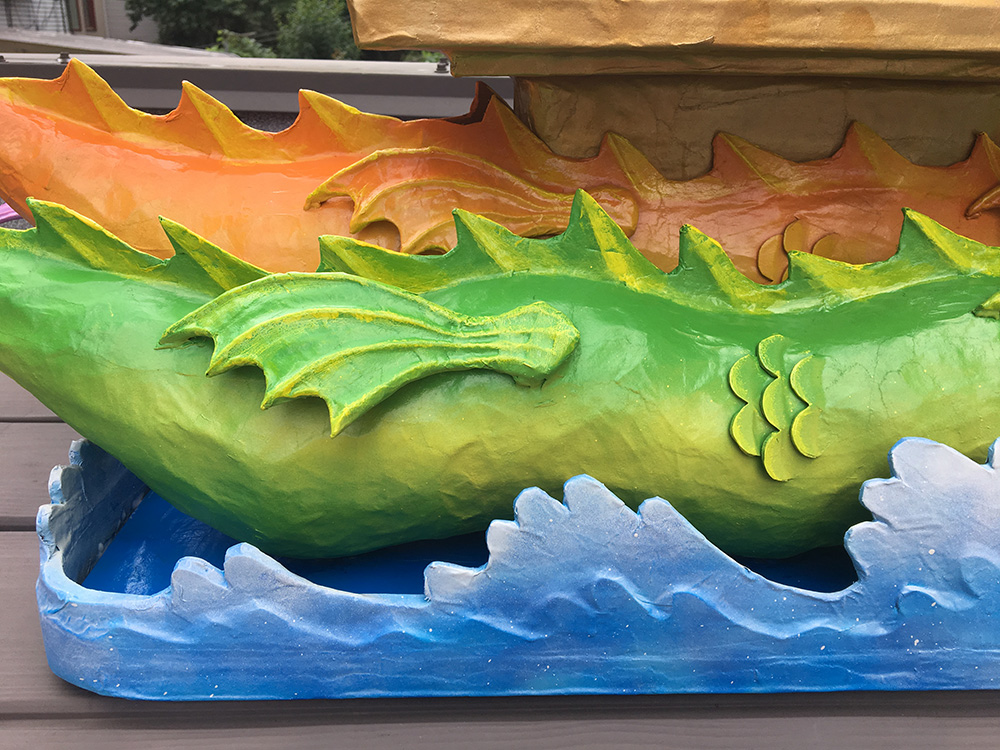
I added the craft foam dorsal fin all along this middle dragon body, just like with the other two dragon bodies, but on this one it splits apart and goes around the column. I covered all this stuff with a few layers of paper maché.
Now I could work on the real column and tray separate from the body. The plan was to build the tray area and column as one big piece, and the base as another, and then I would merge them together later. The reason for this is that I wanted to be able to spray paint all the big pieces separately before gluing them together. So, that means building the tray and column as one piece and spray painting it gold, then spray painting the middle dragon orange, and spray painting the base blue. Then when they’re all dry I could insert the tray/column through the dragon body and glue it into the base. This was way, way easier than attaching all the parts first and trying to carefully paint them like that.
So, back to the tray and pedestal. I grabbed the taped-together water bottles from earlier and built the permanent column shape around them with poster board and then paper maché.
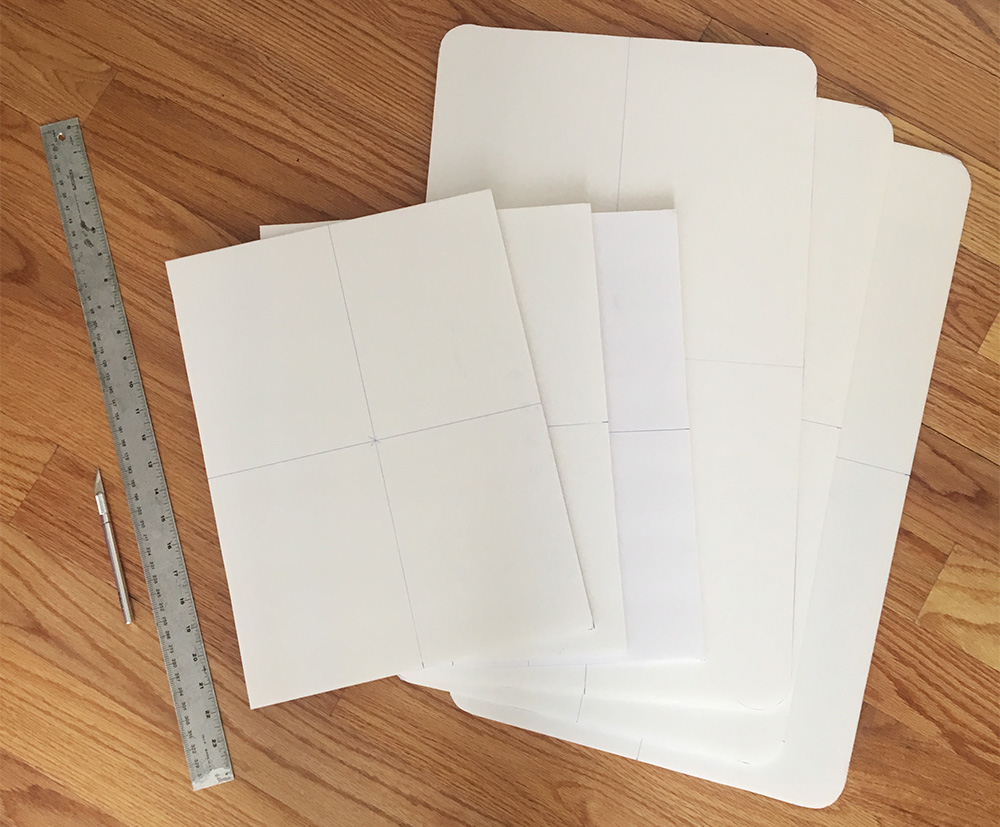
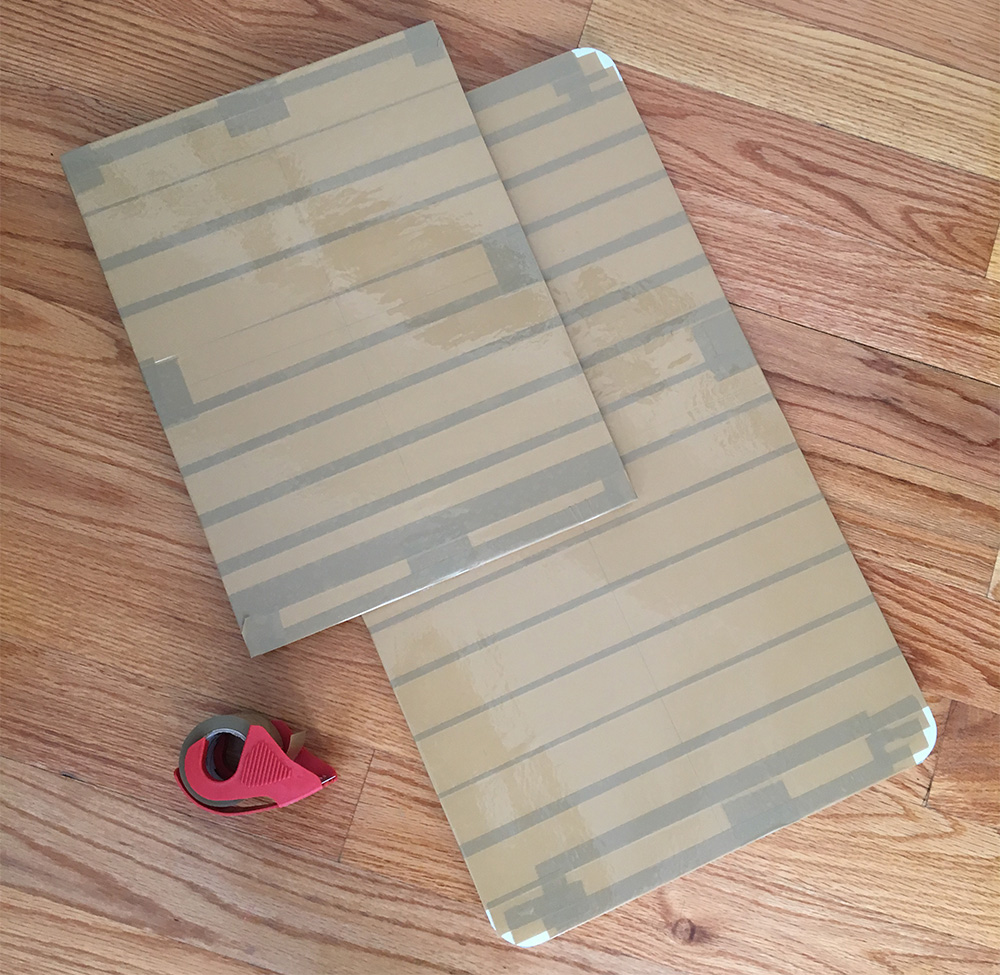
I made the tray area and the base out of foam board, three sheets thick, and covered them with packing tape. Whenever working with paper maché on large flat pieces of foam, it’s important to cover them with tape to reduce (or at least prevent) warping as the paper maché dries.
I built a box shape on the base with foam board; this is where the column will get inserted and glued in place when I assemble all the big pieces after painting.
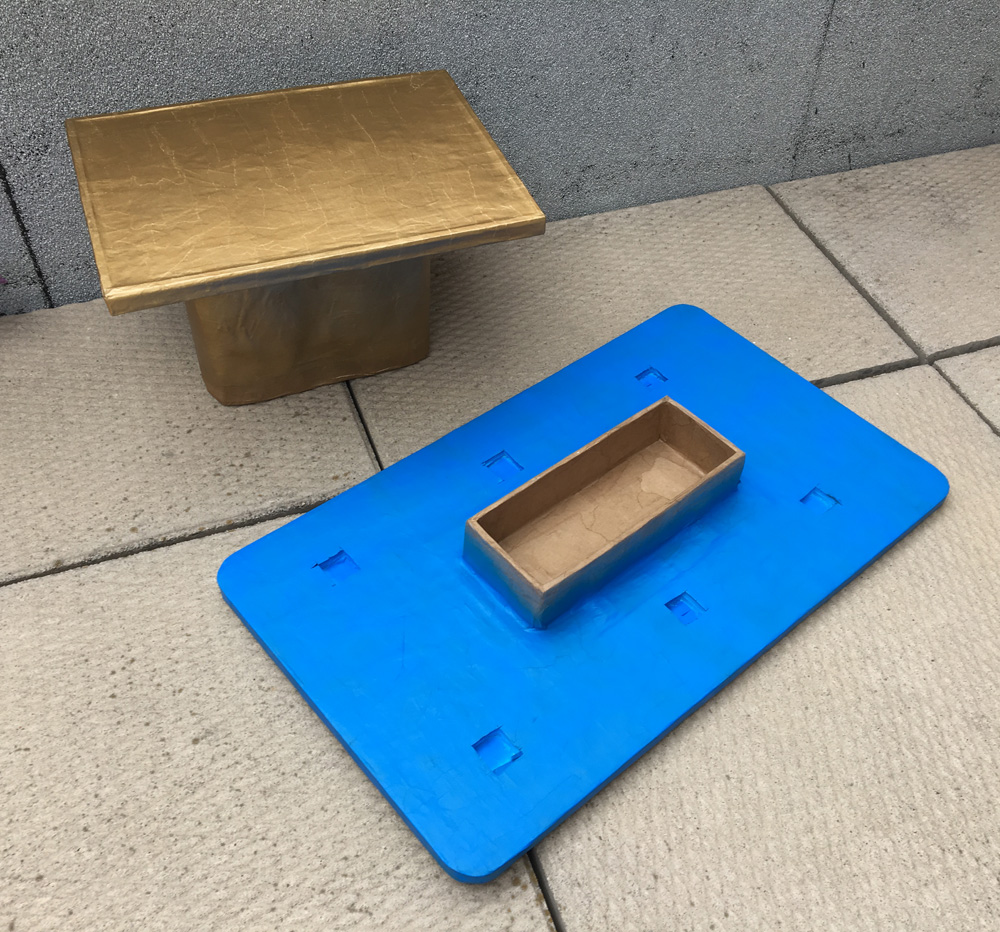
I cut six square holes into the base; these are where the pegs on the sea serpent bodies will get attached later, after everything is painted.
I didn’t want the flat bottom surface of the pedestal to rest directly on the table when the sculpture was done; I wanted it to be ever so slightly raised so if there were any spills or anything, the sculpture wouldn’t sit directly in liquid; given enough time liquid would seep into the paper maché and damage it. So I bought some plastic furniture feet — basically like oversized thumbtacks — and stuck these in the bottom surface, with a tiny bit of Gorilla Glue to really lock them in place.
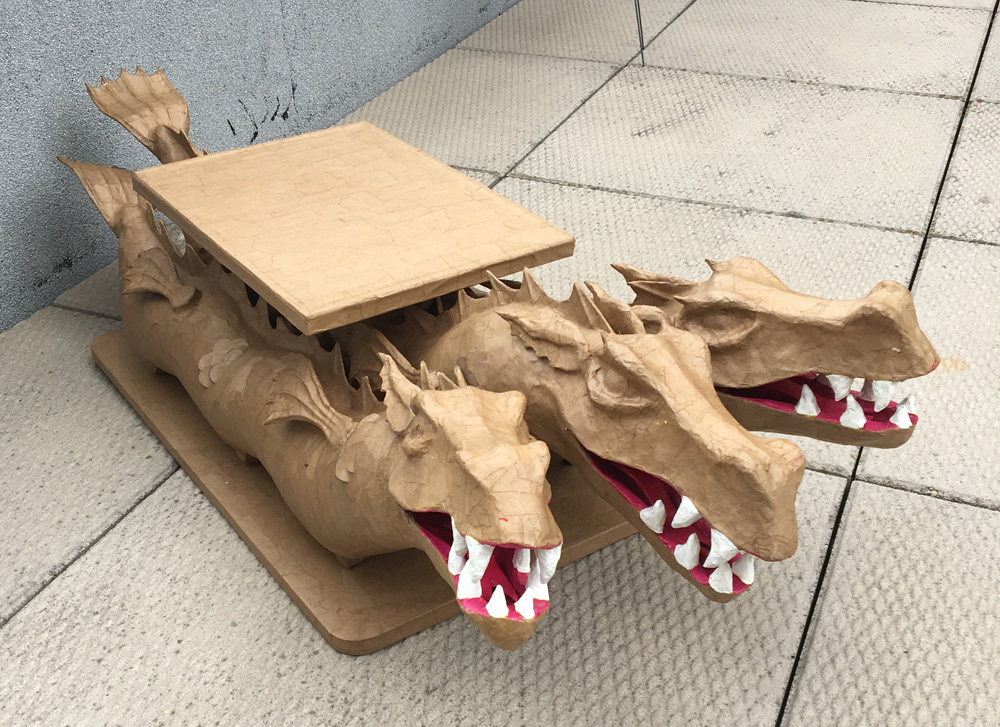
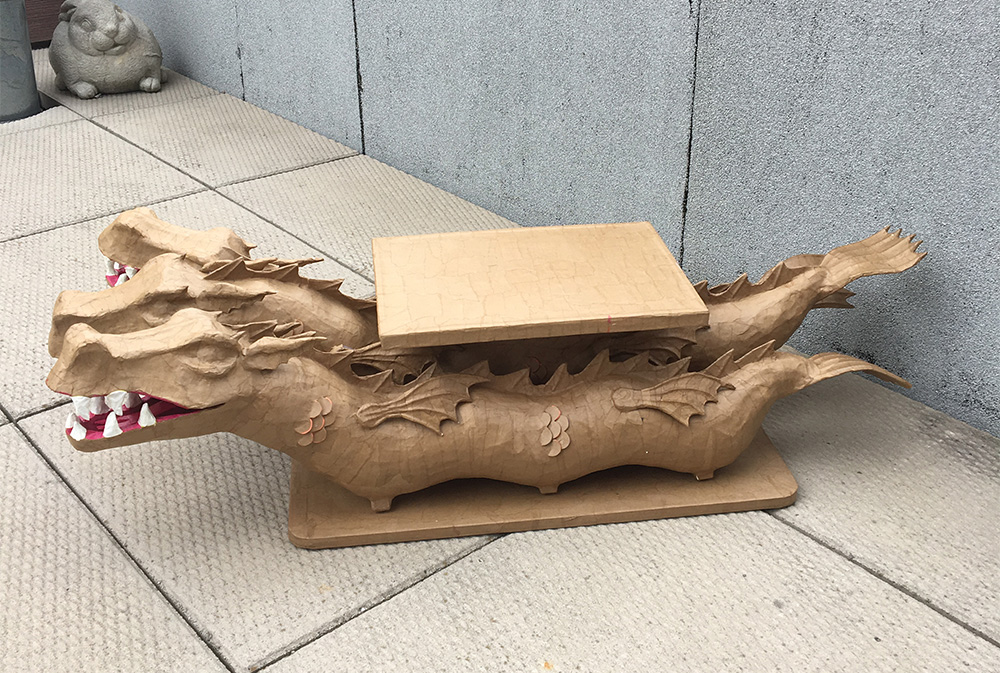
The above is all the finished pieces, not yet painted or glued together.
Making the base and water
Before making the water shape, I taped all the other parts together — the dragon bodies, and the tray area and pedestal and base. This is so I could design the water shape around everything else so the water doesn’t interfere with the placement of the heads and tails.
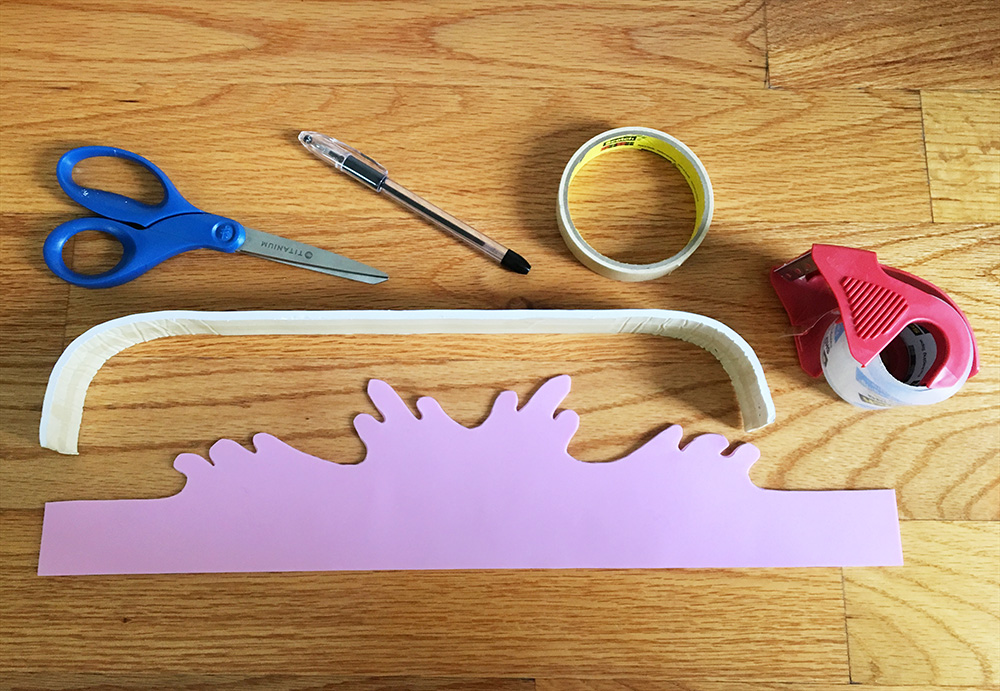
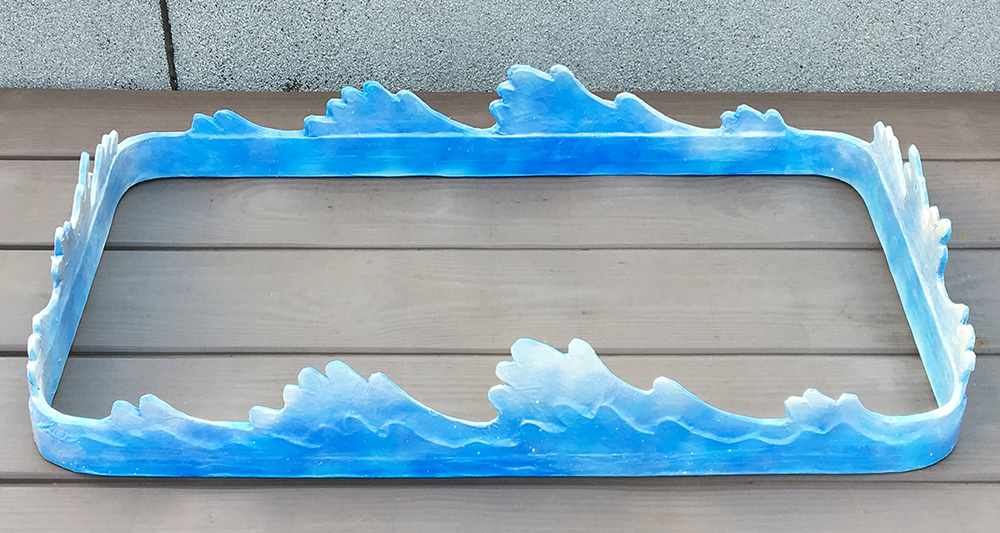
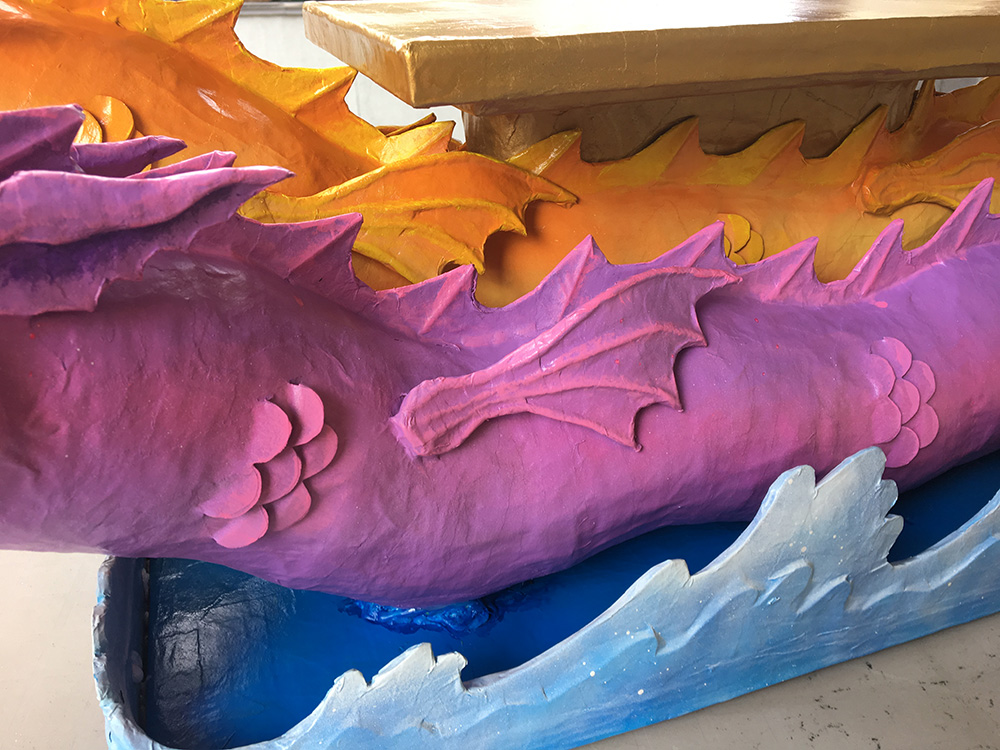
I made the water border with foam board and craft foam. I used my usual trick for making the foam board pliable; I cut out the basic wall shapes, covered them with masking tape on both sides, and then carefully rolled them up, crunching up all the foam inside to make it bendable while the tape on the outside prevents it from breaking. I added waves cut out of craft foam, and then applied a few layers of paper maché on everything.
Painting everything!
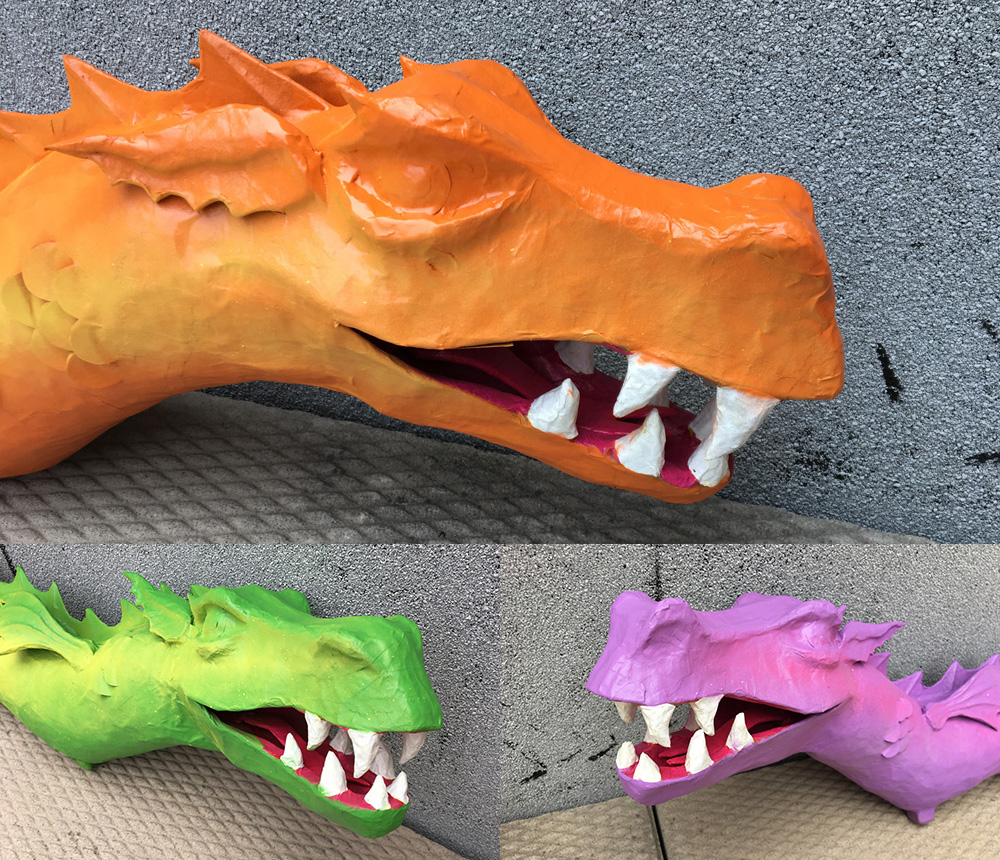
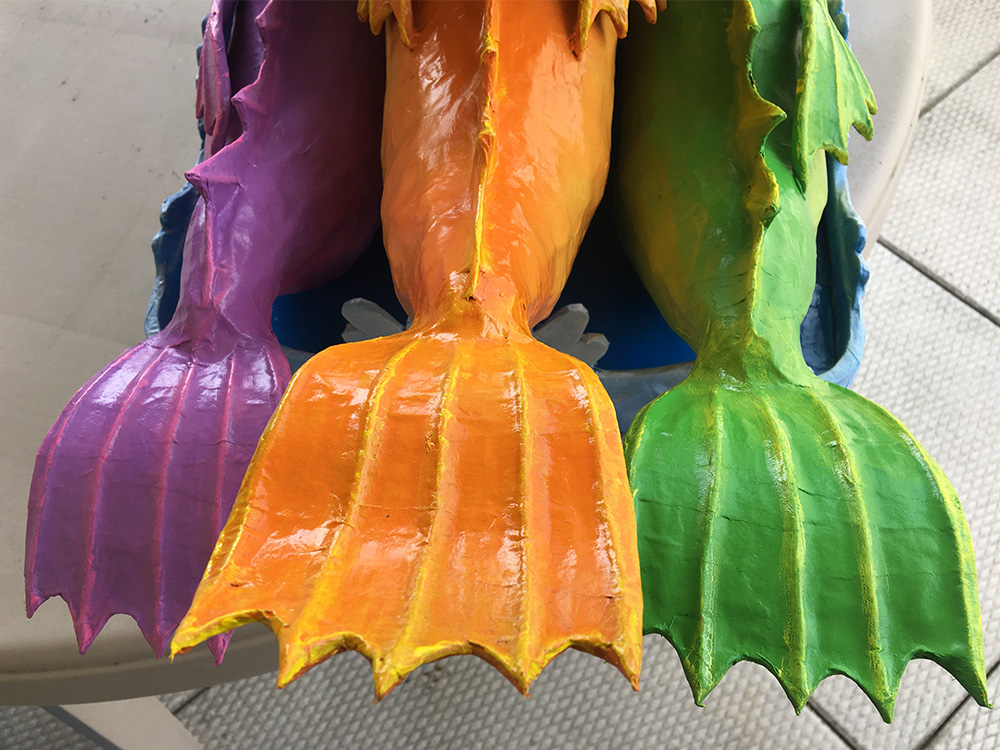
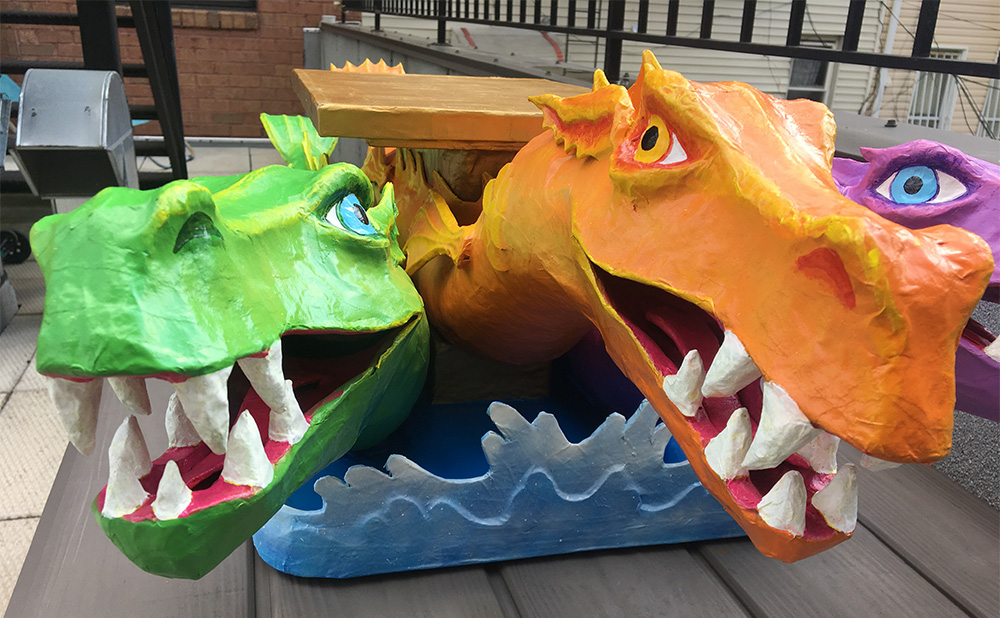
As I mentioned, I intentionally designed all of these big parts to be built separately so I could paint them separately and then assemble them at the very end. I bought five colors of spray paint: green/orange/purple for the three sea serpents, gold for the tray/pedestal, and blue for the water. I did two quick coats of spray paint on all the big pieces. Since I’d painted the interior of the sea serpents’ mouths earlier, I protected those areas with blue masking tape before spray painting.
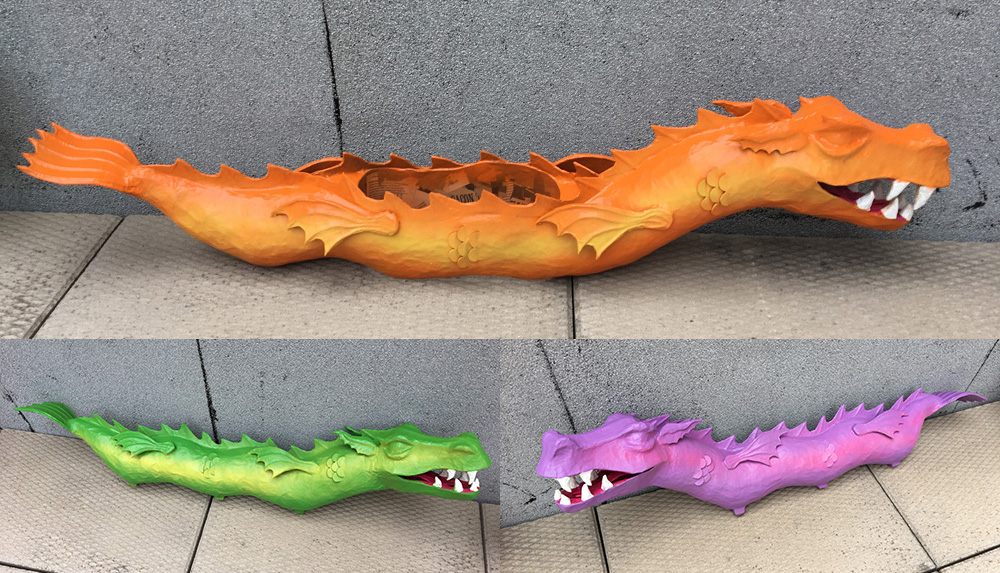
I painted the three dragon bodies their respective colors, and then added a soft highlight color on each with a light dusting of spray paint in a long wavy line — yellow for the green and orange bodies, pink for the purple one.
I let the spray paint dry and air out for a few days outside. Whenever I need to leave a project outside for a few days at a time, I use this big plastic storage box that holds the cushions for our patio furniture; I bring the cushions inside, prop up my project in the box with wine bottles and other various items to reduce points of contact, and then I prop the lid of the box open with just an inch or two of space, to prevent rain and wind/dust from getting in. If I’m expecting lots of rain/wind/snow I’ll cover the opening with trash bags, taped loosely in place to allow air to get in but so that no weather can blow into the open space. I always leave anything spray painted outside for at least three days before bringing it in. Otherwise the apartment fills up with paint fumes.
Anyway, after airing out the spray painted parts, I painted all the details by hand with acrylic paint and various sized brushes. You can read about my painting techniques here.
When all the painting was done, I applied a couple coats of gloss spray to protect the paint job.
I glued all the parts together with Gorilla Glue — I love Gorilla Glue because it’s insanely strong, but you have to be very careful when applying it because it expands a huge amount when drying, and it can ooze out of the areas you’re gluing and create big visible blobs of glue where you don’t want them. Less is more with this stuff. I recommend doing a test to see how much it expands before you commit to using it on a real piece.
And finally, finally, this whole thing was done! Woohoo! Take a look! I snapped a ton of pictures, and took a quick video…
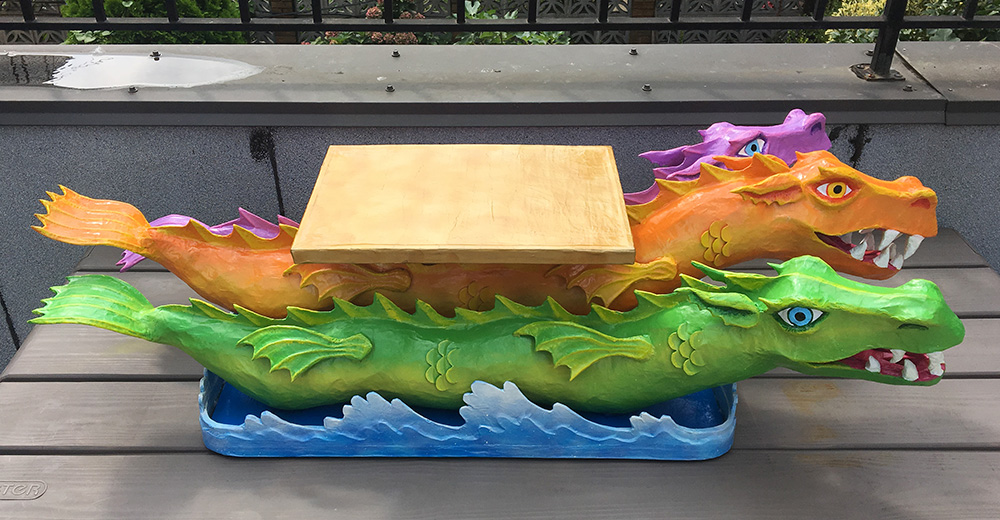
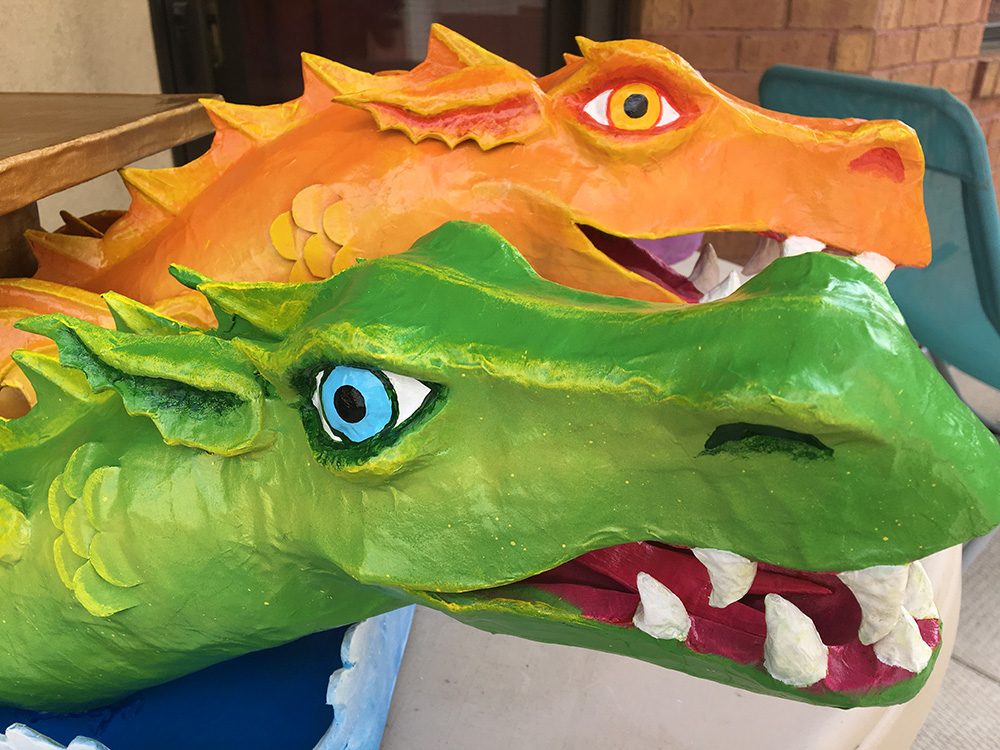

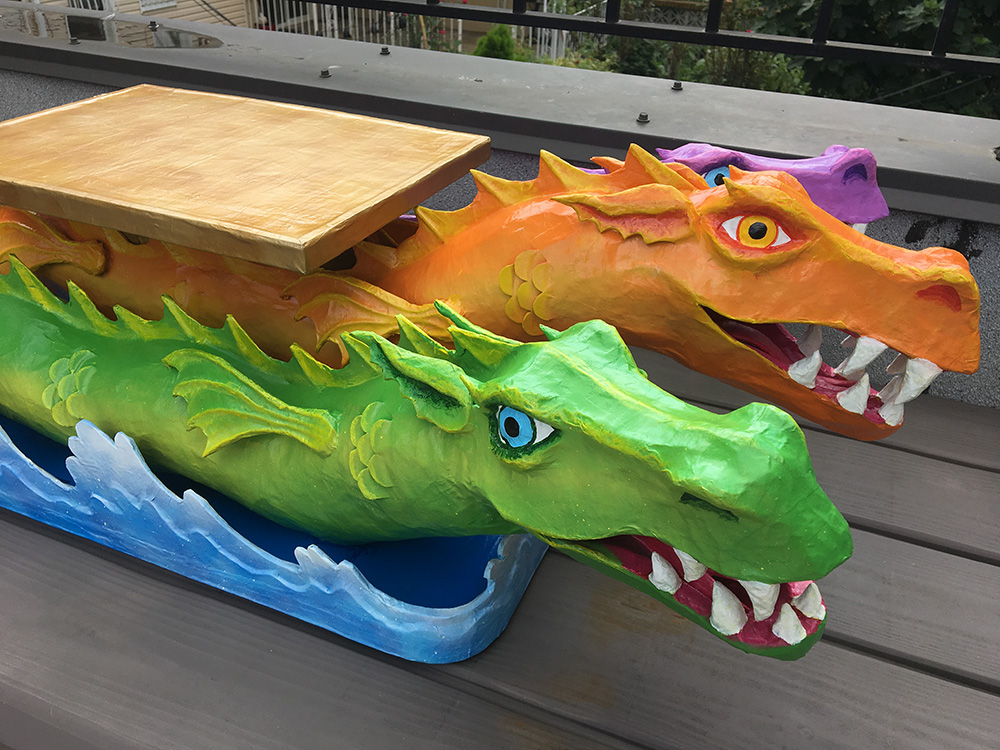
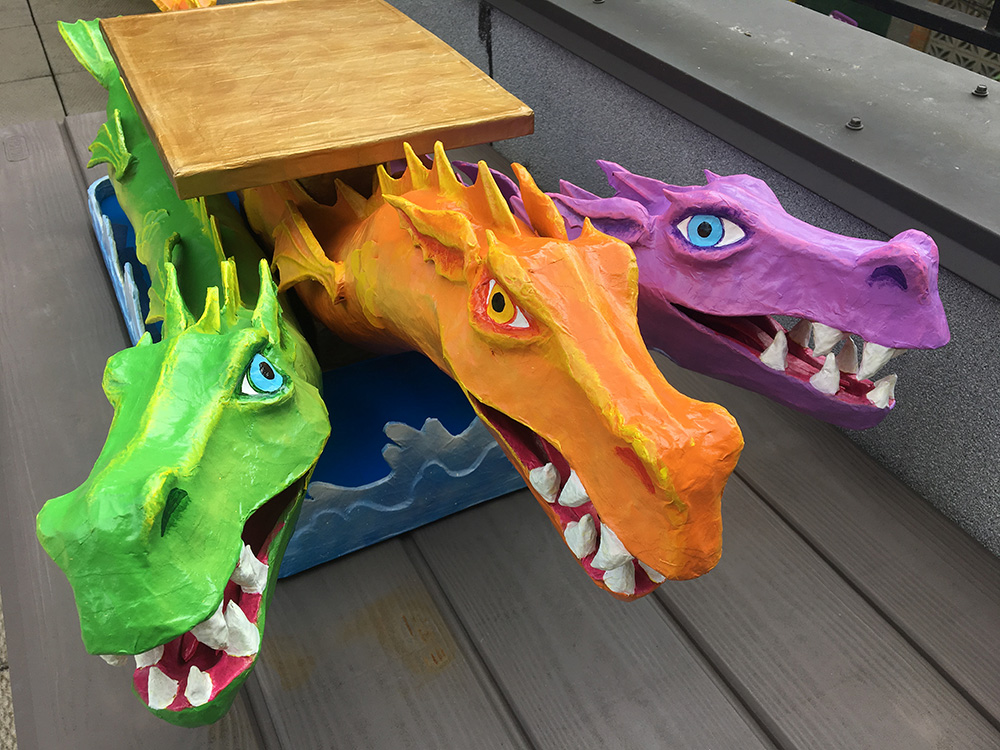
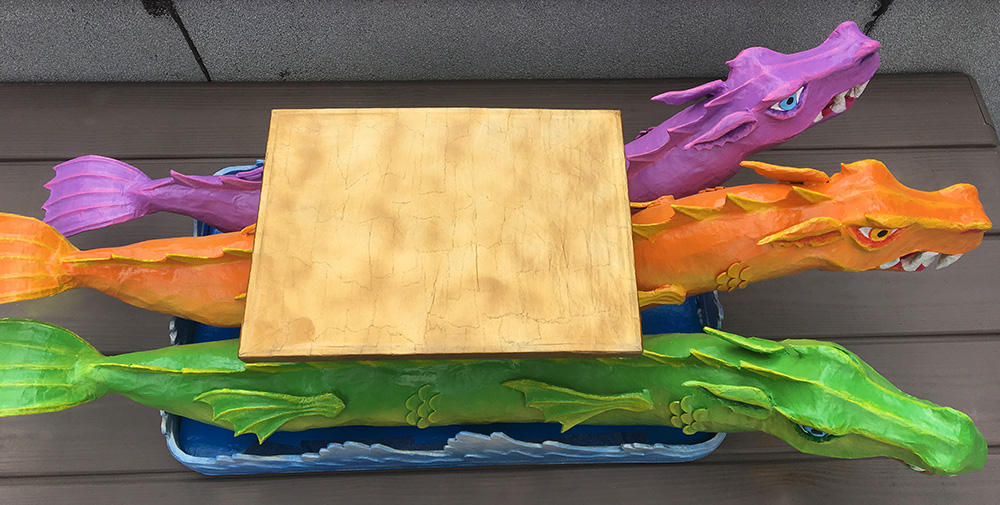
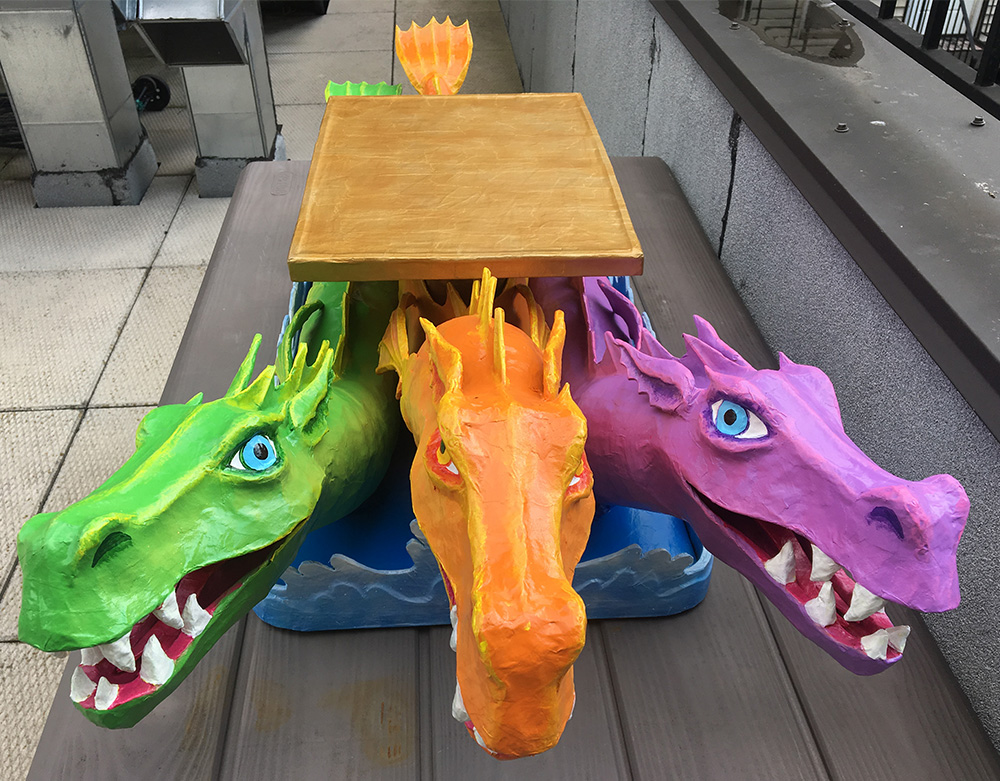
She’s ready to ship out! I’ll really miss this thing! Now on to the next project…
That’s all for part two! Back to part one here.
 About Manning Krull
 How to make a 4-foot paper maché alligator
 My violin skull mask, Mardi Gras 2015
 Three-headed paper maché dragon sculpture
February 5th, 2018 at 6:09 pm
I really enjoyed reading all the steps to create this masterpiece after seeing Isabella up close at the Crewe of Columbus Barn Party this weekend. Now my ADD brain is running amuck with creativity of neat projects to use your ingenious techniques! Really, I have more projects on my plate than I could probably finish in my lifetime in addition to being a nurse, but AGAIN thanks for sharing!
February 6th, 2018 at 6:23 pm
Wow, thanks India! Your comment made my day! I hope I get to see a couple pics of Isabella at the party!
June 3rd, 2018 at 12:37 am
Hi Manning, my name is Lisa. I have been doing paper mache for over 20 years. I just found your project blogs. I have learned much more than I imagined. Thank you for sharing these amazing techniques. I would love to show you my work is this possible? I am making a wolf now. Would love to show you my amazing work.your my inspiration. Lisa
June 5th, 2018 at 12:11 pm
Hey Lisa, thank you so much! I just received your email with your pics; they’re fantastic! You might want to consider doing a blog like mine; I think you have a tremendous amount to share with people! And I’d love to see that wolf!
October 15th, 2018 at 12:59 am
Hi Manning, I saw your gator project and clicked your link. Wow! I ended up spending way more time than I planned. I loved all your explanations. I teach art and also love working with paper mâché. Your discussion on the New York Times vs New Jersey paper. LOL. So true. I did want to throw in one more great brown paper. I have fallen in love with the brown institutional paper rolls that the school dispensers are using. You may already be familiar with them.
Next, I saw your fantastic PSA on x-acto knives. So I wanted to mention using a jig saw or get yourself a Dewalt scroll saw. It cuts quietly similar to the sound of a sewing machine. I use it for foam board, foam sheets, wood, cardboard., anything heavier than paper. Boy, it sure speeds up the process! Strangely, I had a student cut the tip of her finger OFF using an xacto knife, yikes. She had to go to the hospital:( I have NEVER had a student get injured with the scroll saw. Knock on wood!! I feel the kids have more control with cutting when they use the scroll saw. Plus, I only have a short amount of time per project. The scroll saw really helps. Love your blog! Jeanine
October 15th, 2018 at 6:47 pm
Thanks Jeanine! I can picture exactly the brown paper towels you’re talking about; I need to try them! And I’ve got to get a scroll saw! I’ve never worked with anything that professional/serious before. Time to upgrade…
July 20th, 2021 at 4:37 am
Thank you for sharing your projects. You have a great eye for art. I am wanting to make an Alice in Wonderland putt putt course and I am looking at ways to shape large pieces and make them waterproof and hope they stand the test of time. Your site has some great techniques. I appreciate it. I mixed latex paint with cement years ago and it looked like it could hold up to anything so I might try that for the outside coat or lime in place of cement but the rest I am relying on people like you to learn from. Thanks again for sharing.
July 20th, 2021 at 2:55 pm
Hello Kristina! Thank you for your comment! I found this great article a while back where someone tried many different products in an attempt to weather-proof some paper mache sculptures. Here’s the link; it’s six parts and goes into tons of detail. Looks like yacht varnish was the winner. Good luck!!