
Paper maché alligator — waterproofing and painting
Published by Manning on July 27th, 2015
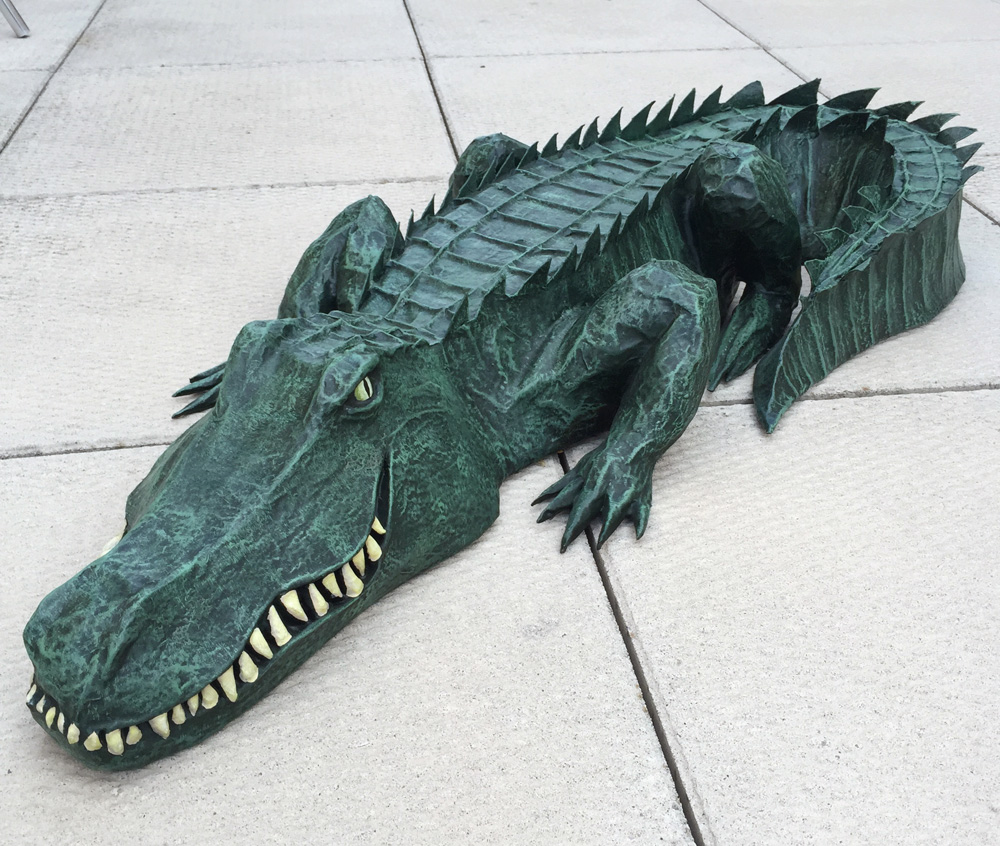
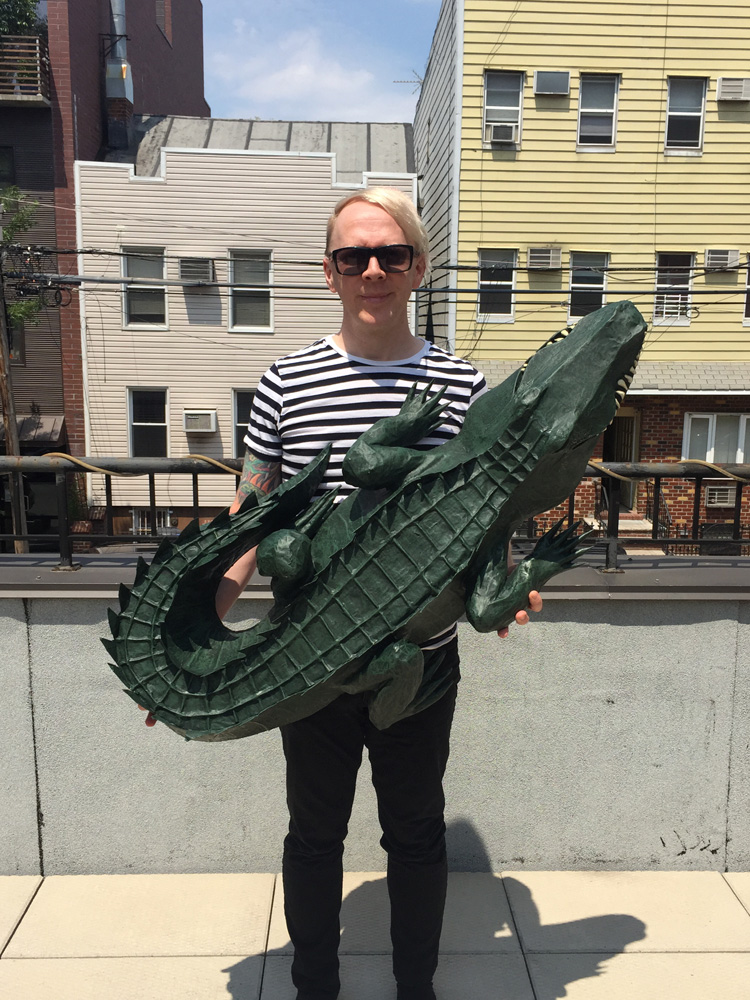
It’s finally done! This is part three of my paper maché alligator project. See part one and part two.
With all the paper maché done, it was time to waterproof and paint the alligator. Originally this guy was just meant to go in the bathtub during my Halloween party and then get thrown out, but as I made the thing I got pretty attached to it, so now I’m hoping to be able to waterproof it well enough so that it might not be in too bad shape after being submerged in water during the party, and maybe I can keep it and use it as an all-year-round decoration in my apartment, maybe on top of my bookshelf, or hanging on a wall. So I’m trying to approach decorating this thing like it needs to look good not just in the tub but anywhere.
For waterproofing, I bought Helmsman spar urethane, which I learned about from this great article on Spookyblue.com. I chose semi-gloss just ’cause I couldn’t make up my mind between satin and gloss. (It turned out looking really glossy, much more than I expected, but the matte spray at the end dulled the whole thing quite a bit.) Now, this guy recommends spar urethane for protecting paper maché from rain and the elements; I couldn’t find anything online anywhere about making paper maché truly waterproof. I’m probably the only idiot in the world who wants to submerge a paper maché project in water!
Before I applied the spar urethane, I did two things. I’d noticed that, despite my best efforts, there were some tiny holes and open cracks in my paper maché (particularly around the small details; the teeth, the toes, etc), and it was easy to imagine water getting in there and waterlogging the alligator from the inside. I know the spar urethane will make the paper surfaces it soaks into good and waterproof, but I didn’t think it would be thick enough to close those holes; so the exterior paper would be waterproof but then the water could just seep into those open cracks and holes and slowly waterlog the whole interior. No good. I wanted to seal the entire exterior of this thing so no water can enter at all.
So! I already had a bottle of Golden Mediums polymer medium (gloss) sitting around from previous years’ projects. This stuff is very thick and dries into a smooth, clear, rubbery surface. (However, it’s water-based, so I definitely need the spar urethane afterward to waterproof everything.) I knew it would be good at plugging those tiny holes, and I was right. Just painting this gloss over those places with little cracks, and dabbing the brush in at the crevices a bit, filled up all the holes. While I was at it, I did a coat of this gloss all over the bottom surface of the alligator, and the legs.
When the gloss dried, it left an uneven look to the brown paper maché; the areas with gloss were smooth and shiny, and the areas without gloss were rough and matte. I wanted to make sure that my finished alligator would not have this uneven look, so I decided to do a preliminary coat of spray paint. I used white — more on that later — and fortunately it left a nice even look to all the surfaces, with and without gloss underneath. Cool.
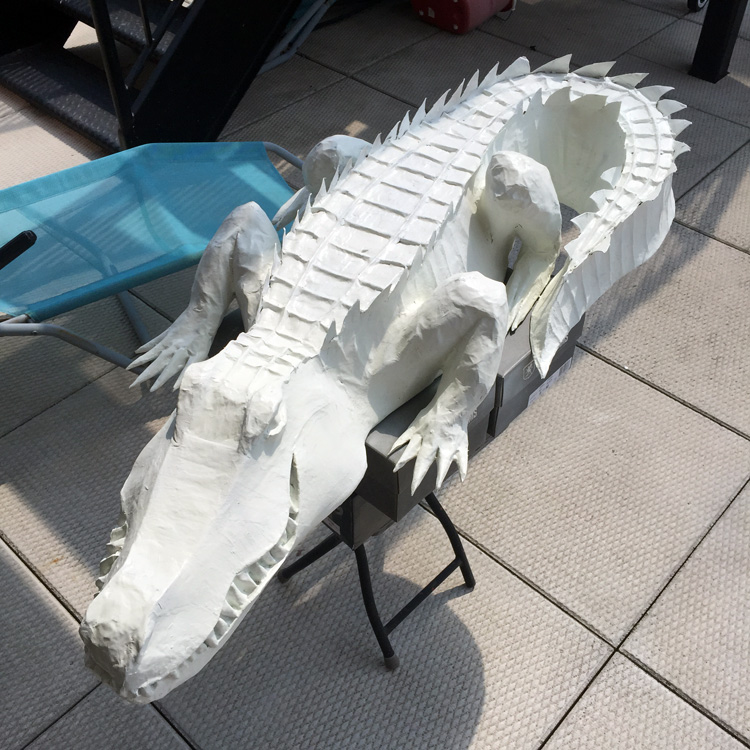
Whoa, he actually looks pretty cool in white! The white paint helped to expose a few more tiny holes that I couldn’t see before, so I applied some more of the polymer gloss. Then I let that dry, then applied more white spray paint.
Next, I did a coat of dark green spray paint.
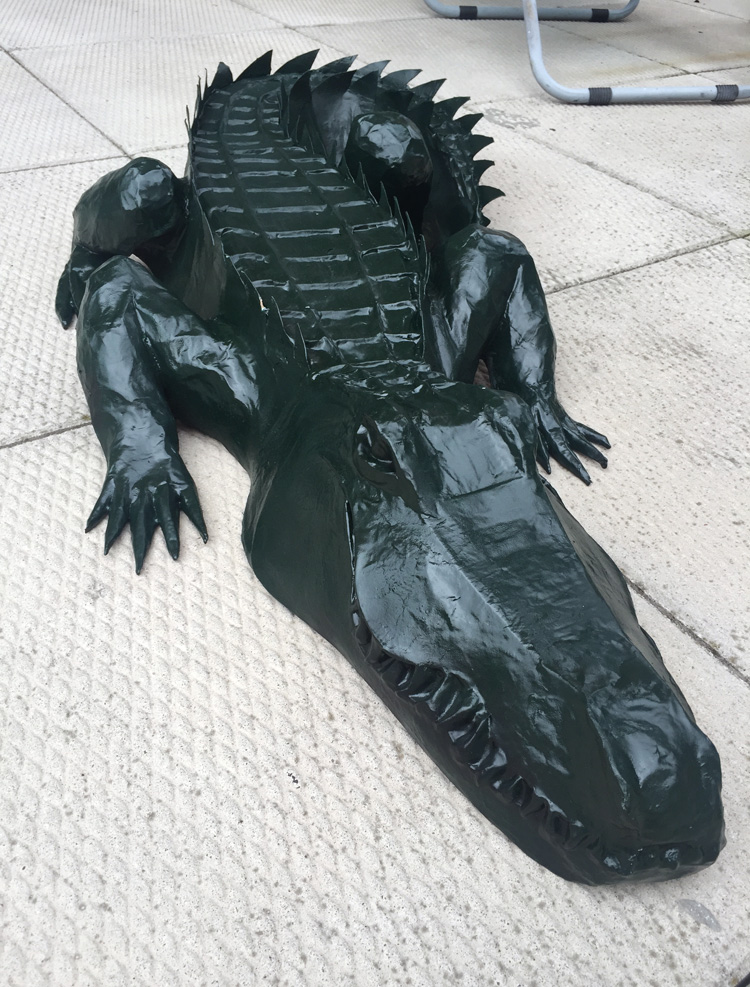
Oooh! Finally starting to look like a real alligator. Now, here’s why I did white before: if you do two coats in a row of the same color, it’s impossible to tell how well you’re doing the second coat; you can’t see what parts you’ve already covered. So it’s best to do each coat with a different color. (This is the same reason why I alternate layers of newspaper and craft paper when doing paper maché; to keep track of what parts I’ve covered.)
With the dark green paint all done, it was time for the spar urethane. I painted several coats of spar urethane all over the alligator. I was originally only going to do the bottom surface, legs, feet, and a few inches up the sides, because those are the only parts that are going to be underwater. But I was a bit concerned that having only part of the alligator covered with urethane would create an uneven look, even after painting; I just don’t know, so I opted to cover the whole thing to be safe. I did one coat on the upper surfaces and three on the lower surfaces.
When the last coat of spar urethane was dry, it was time to finish the painting! The spray paint and urethane left the alligator looking much shinier than I wanted, and I wasn’t sure if the rest of my painting process would change that, but it sure did. Pics coming up.
I did a lot of quick drybrushing all over the alligator with acrylic paint and a big wide brush, using a mixture I made of a slightly lighter dull green. The drybrushing really brings out all the neat textures of the surface of the alligator; it’s a super-easy and impressive effect. See my article about painting paper maché projects to learn more about drybrushing.
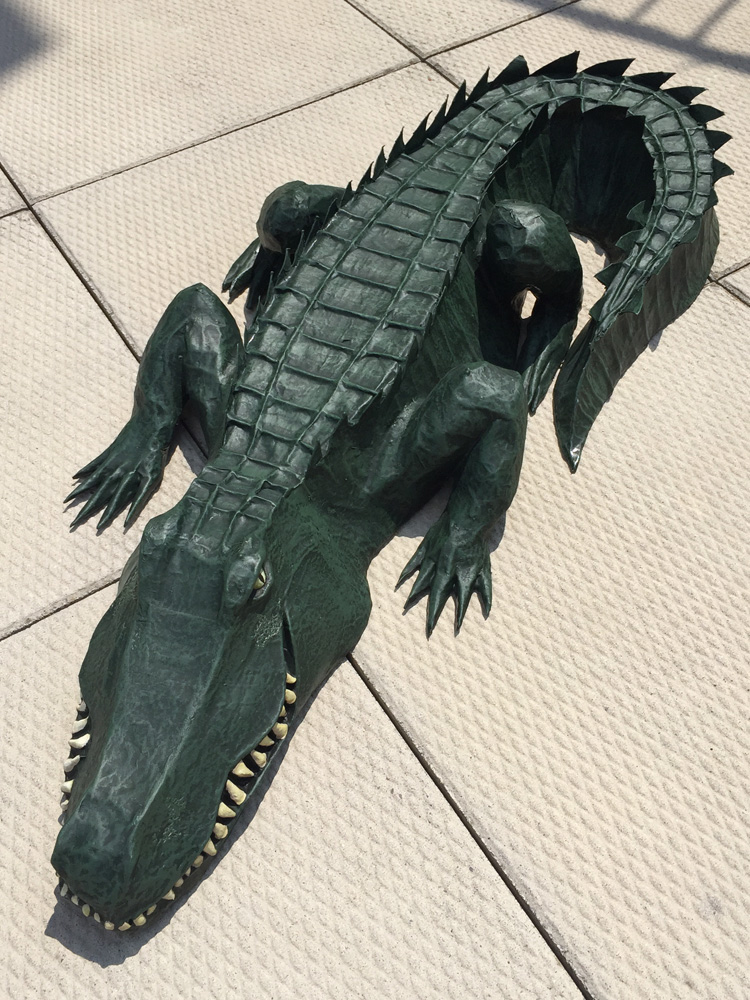
When that was done I did the eyes and teeth with more acrylic paint and a smaller brush; this really brought the thing to life!
And then when all the paint was dry, I did a couple coats of clear matte spray, to protect the paint job and hopefully waterproof the thing a bit more. A disappointing thing happened when I did the matte spray; a few places on the face bubbled up and cracked just seconds after I applied the matte spray. I’m not sure why; I use this same combination of spray paint / acrylic paint / matte spray on all my big skull masks and other paper maché projects. The only two different factors here are: A) the spar urethane, and B) the heat. I usually do these projects in colder weather; right before Halloween and right before Mardi Gras. I did this one over the course of several hot summer days. If the bubbling and cracking were caused by the spar urethane, I’d imagine it would happen most on the areas with the most urethane, but that was not the case. Most of the damage is higher up on the face, where there’s just one coat of urethane. So maybe the heat is the culprit. I’ll also mention, the face is the only part of the alligator that has craft foam in it, but that’s covered by paper maché, two coats of paint, and the urethane, so I doubt it could react with the matte spray — could it? Anyway, the damage isn’t super noticeable but it’s very disappointing. You can see it a bit in this closeup, under the eye and near the nose:
(Update! I’ve learned what probably caused this crackled look: not letting the various coats of paint dry long enough before applying the matte spray. Even when paint feels dry, it still needs several hours or a few days to completely set and harden. Applying any kind of spray — matte spray or spray paint — before the last coat is 100% dry can cause this crackling effect. The fact that it only occurred in these isolated areas is probably due to the fact that the craft foam is in there, and that synthetic surface behind the paper maché may have caused the paint there to dry more slowly than on the more porous or hollow parts. Probably! Who knows?!)

Anyway, that’s about it! My plan for this prop is to put it in my bathtub for the duration of my Halloween party — my guess is it’ll be in there for a total of about seven or eight hours. I’ll mix some green and black tempera paint into the water in the tub to make it murky and opaque, and I’ll probably set the alligator on some objects to raise it up a bit. I don’t want to let it just float or sink in the water; I want to control the level where it sits as best I can. I might even have to weigh it down to get it submerged exactly as I want.
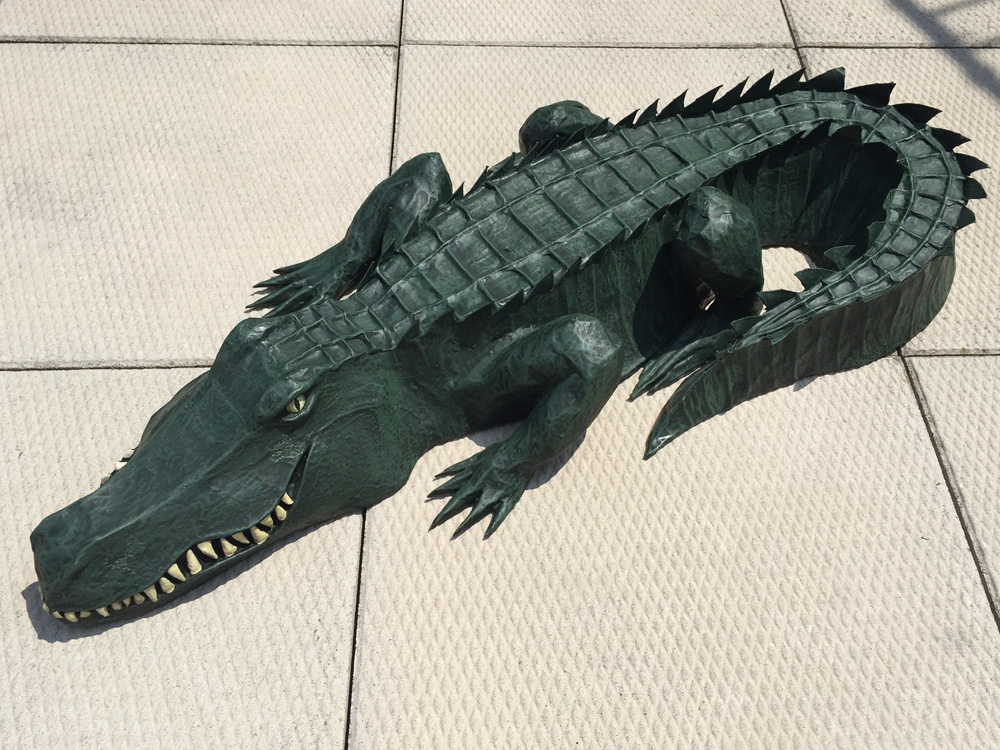
I thought I was done, but a couple days later I realized I was no longer happy with this paint job; the dry brushing I did is barely visible in most lighting situations, so there’s really no contrast at all. Also, the matte spray I used killed any shininess the alligator had, and made him look dull and lifeless. So I decided to do another round of drybrushing, this time with slightly lighter green paint (mixed from green, black, white, and a little yellow). Along with enhancing the contrast and textures, this had an unexpected benefit: it effectively hid the weird bubbled/cracked areas that occurred on the face. The new higher-contrast texture blends nicely with those damaged areas so that they’re barely visible. When the drybrushing was dry, I then applied a coat of gloss spray rather than my usual matte spray. I didn’t want to make him too shiny, so I only gave him a light dusting, and then concentrated a bit more on the eyes and teeth to really make them shine. I’m very pleased with the results! I think I can finally, finally call this guy done.
Cost of materials
I decided to try totalling up all the costs involved in this project; something I’ve never done before. These figures are just the arts and crafts materials; I’m not counting reusable tools like scissors, paintbrushes, my trusty X-acto knife, etc, and I’m not counting household stuff like paper towels, wax paper to protect my work space, etc. All prices are rounded up to the nearest dollar.
Making the alligator:
Foam board1 — 2 sheets — $2
Poster board — 1 sheet — $1
Packing tape2 — 1 roll — $4
Masking tape — 1 roll — $3
Wallpaper adhesive — 1 quart — $7
Craft paper — 1 roll — $1
Newspaper — free!
Craft foam — one sheet — $1
Clay3 — part of 1 pack — $2
Polymer gloss4 — $1
Spray paint (dark green) — 1 can — $8
Acrylic paint5 — $0
Subtotal: $30.00
Waterproofing the alligator:
Spar urethane6 — $18
Second can of spray paint7 — $8
Matte Spray — $4
Subtotal: $30.00
Total for building the alligator and waterproofing it: $60.00
Wow! All that stuff, plus a few dozen hours of labor. Oh yeah, some notes about those prices:
| 1 | See my post about the great deal I found on foam board here. |
| 2 | I found a fantastic deal on Scotch heavy duty packing tape on Amazon Prime — $14 for 4 rolls! |
| 3 | I used about 20% of a $10 pack of clay for this project, so I’m calling that 2 bucks. |
| 4 | I used a small amount from one bottle of gloss; let’s call it a buck. |
| 5 | It’s impossible to put an accurate price on the acrylic paint I used to do all the details of the alligator; I used a tiny bit of black, white, bright green, and bright yellow. I already had these lying around for other projects; if I’d bought them just for this project it would’ve cost around $20 for all those colors, but I’m counting that part as free ’cause I already had them and I used just a tiny amount of each. |
| 6 | I only used half of this can of spar urethane, but I may never need the rest, so I’m counting the full price of the can for this project. |
| 7 | If I weren’t trying to waterproof this thing, I wouldn’t have done the first coat of white paint. I happened to have this full can of white handy and figured it might help give a little more water resistance to the alligator, so I sacrificed it for this project. |
Update! Oh man, you guys are going to kill me — after all that research and effort put into waterproofing the alligator, we ended up not submerging it in water for the party! My original plan was to leave it in water the whole time (~8 hours) and then be prepared for it get to substantially damaged over the course of the party, in which case I’d just throw it out. But after seeing how nice the alligator came out my fiancée forbade me from letting it get ruined; she wanted to keep it as a year-round decoration. So, we just displayed the alligator in the tub without water during our party, and it looked great as-is (we propped it up on books to make it look like it was floating, and this looked great!). HOWEVER! I did do a quick test to see how it would do in water for a short period of time, and it was perfect! The water beaded up and rolled right off of the alligator’s surface, and the whole thing was sealed well enough all over that it floated on top of the water for the few minutes I tried it out. No damage whatsoever, no waterlogging, nothing. It came out of the water looking just like before it went in. In fact, it was so well-sealed that it floated higher on the water than I would’ve wanted it; if I had decided to leave it in water for the party I would’ve had to figure out a way to weight it down from the inside.
Despite not really putting this thing to the test I’m convinced the spar urethane was a complete success, and if I ever need to waterproof any other paper maché projects I’ll certainly do them the same way. Especially for large, flat surfaces without a lot of detail, the spar urethane creates a perfect seal. I’m sure you could make a paper maché boat, for example, treat it with spar urethane, and it would stay afloat for many hours, even days. The danger with a shape like this alligator is all the nooks and crannies around the leg joints, toes, teeth, etc; they’re a bit harder to coat perfectly with the spar urethane and I could see water working its way into those areas after some time.
[Jump to paper maché alligator part one, part two, part three]
 About Manning Krull
 How to make a 4-foot paper maché alligator
 My violin skull mask, Mardi Gras 2015
 Three-headed paper maché dragon sculpture
January 19th, 2016 at 11:27 pm
This is amazing!!! Thanks for sharing
January 20th, 2016 at 12:00 pm
Thanks Wade!
February 27th, 2016 at 6:52 am
Wow, the alligator is truly outstanding! This is by far one of the best paper mache projects I have ever seen, not to mention the step by step directions were incredible. Thank you for all the in-depth information about the products and supplies you used-very helpful for us rookies. I feel like I have the courage to make something now. Thank you again for all the tutorials-simply the best. You are the King of Paper Mache-Manning. Look forward to seeing your next projects.
February 29th, 2016 at 1:39 pm
Thank you, Debbie! Your comment made my day!
March 10th, 2016 at 7:21 pm
Hi – Thank you for taking the time to post your steps in creating such a cool piece. I’m working on one now and will be using Versa-Bond after one coat of prime paint. Except for the craft foam, I had used much the same materials as you, but I was “stuck” on a couple of details. Thank you for getting me past my “block” (specifically, besides craft foam, I love the two pieces you cut for the back ridges – perfect!). Thanks again.
March 10th, 2016 at 7:22 pm
Should have said, “I’m working on an alligator now – to go on our island”
March 10th, 2016 at 11:03 pm
Thanks Kathy! I’m really interested to hear how the Versa-Bond works out! Good luck!
March 12th, 2016 at 3:10 pm
Versa-Bond is great! I used it on two papier mache/plaster horse head statues for our gate entrance. I restored them after my husband declared they could not be saved. The look great and are holding up well. We’ve had insanely high winds and 12 inches of rain in the past week and no problems so far. I’ll let you know if Texas heat causes problems in July/August. After all the restoration work was complete, I mixed a small batch of Versa-Bond per instructions then used plain water to thin a bit. I brushed it on and allowed a full day’s dry time. I repeated this two or three times, but on the last batch, I added pigment (the type used to color concrete) and mixed a separate batch of color to finish the base color after about 1/2 day’s dry time. Then, I finished the painting with various colors/techniques. Lastly, I used a thin polyurethane to seal ~ several coats with adequate dry time in between. They are heavy and there were a few problems moving them so after they were both set on the gate posts, I touched up with plain acrylic and sealed those spots with poly. So far, so good.
April 10th, 2016 at 11:20 pm
Great step-by-step. This was extremely helpful in helping my 12-year old son complete his class project! Thank you for all the details and pictures!
April 17th, 2016 at 2:52 pm
Thanks Danno! I would love to see how it comes out!
April 11th, 2017 at 6:35 pm
Thank you Thank you Thank you! My daughter has a 2nd grade project and she choose a salt water crocodile. Your tutorial was amazing! We had so much fun working on it.
April 11th, 2017 at 7:29 pm
Thanks Sheri! That makes my day; I’d love to see a pic!
April 17th, 2017 at 2:11 pm
Thanks for the tutorial and the tips. I plan on making an alligator for Halloween this year. He will be outside for a couple weekends in the VooDoo Sawmp so I might not start with poster/foam board but use styrofoam instead. I was wondering how to protect it from the water and I will be looking for your Spar Urethane. I will be looking at your model for inspiration. Job well done.
April 17th, 2017 at 10:17 pm
Thanks Teresa! Styrofoam sounds like a great idea for the base for something like this. And the spar urethane is really amazing! Water just beads up and rolls off of it. Good luck!
April 25th, 2017 at 5:24 am
use cellophane clear taped to tub and glued to crock
to look like water
April 26th, 2017 at 11:54 am
Hey Mike! I wish I had thought to do that! I bet that would look amazing, especially in the low green lighting we used.
November 3rd, 2018 at 11:15 pm
Really cool project. It looks awesome. I didn’t actually think I’d get a hit when I searched for paper mache alligator..haha
November 4th, 2018 at 5:35 pm
Thanks T.W.! I’ve done the search too and have been pleasantly surprised to see there are a bunch of ’em!
November 19th, 2022 at 9:13 pm
Looking at this in 2022 after my own first attempt at a papermache sculpture. I wanted to say that this alligator 🐊 is super cool. Love it!
August 5th, 2023 at 4:19 pm
LOVE your alligator and will make it today; SHE will be an albino. I work with animal energies and alligator is my main helper. Your alligator is amazing! Thank you for sharing it so generously! :)
August 9th, 2023 at 12:16 am
Good luck, I’d love to see pics!!!
June 4th, 2024 at 7:39 pm
I am SO IMPRESSED! I manage a neighborhood Mardi Gras parade in Central Florida and want to add a gator float in 2025. This gator is perfect! Thank you so much for all of the information. I can’t wait to get started.
June 12th, 2024 at 2:23 pm
Cool, I would love to see what you end up doing!!