
Paper maché globe decorations
Published December 10th, 2017
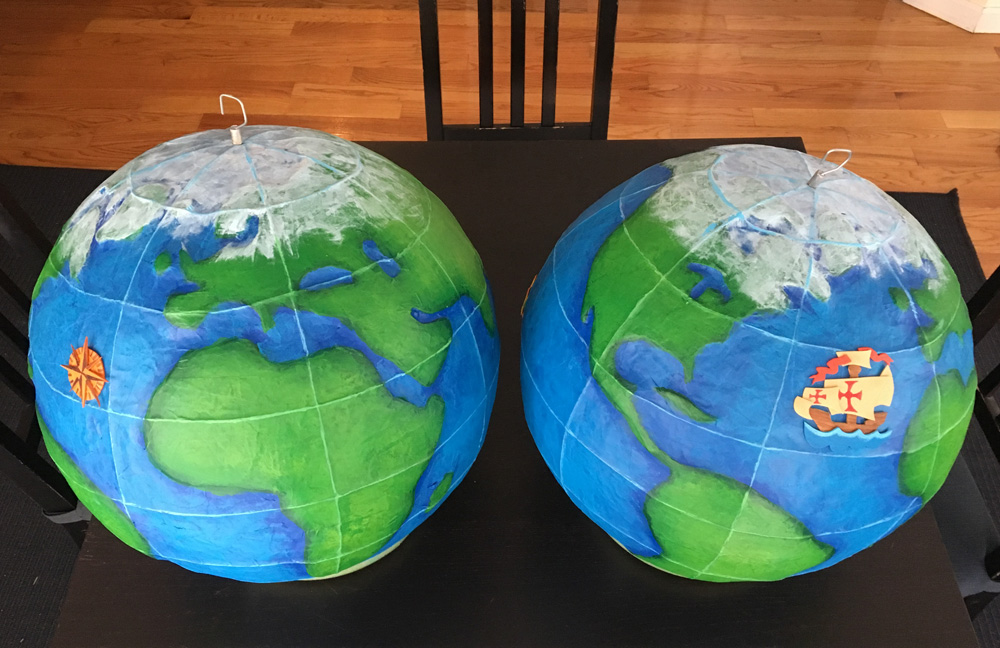
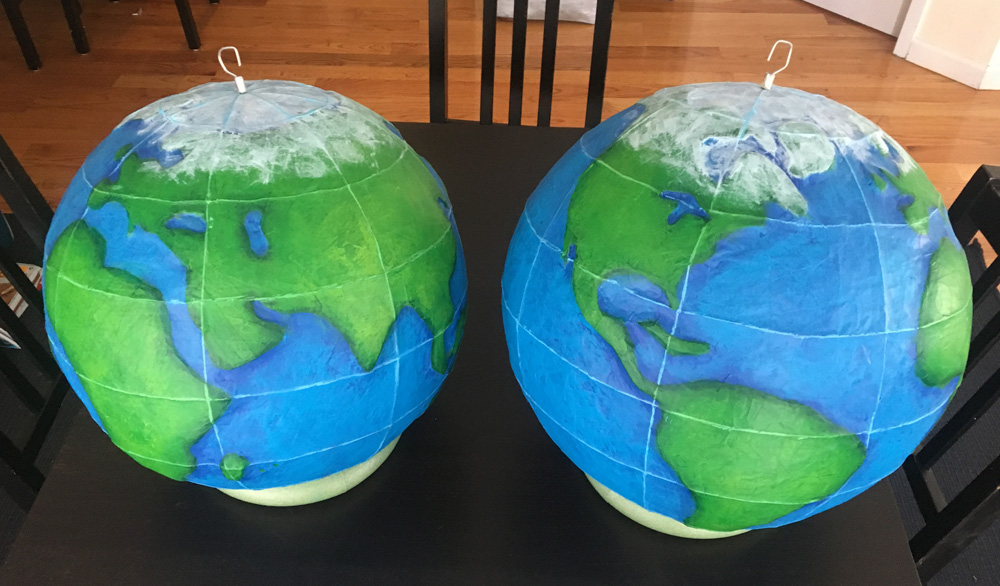
You may remember recently I posted about making a three-headed sea serpent sculpture for the Crewe of Columbus, a Mardi Gras parade group in Mobile, Alabama. The same wonderful client from that project also commissioned this pair of paper maché globes, which go along with the Crewe's theme of world exploration; they're going to be hung up as decorations in the same ballroom as Isabella. These were really fun to make!
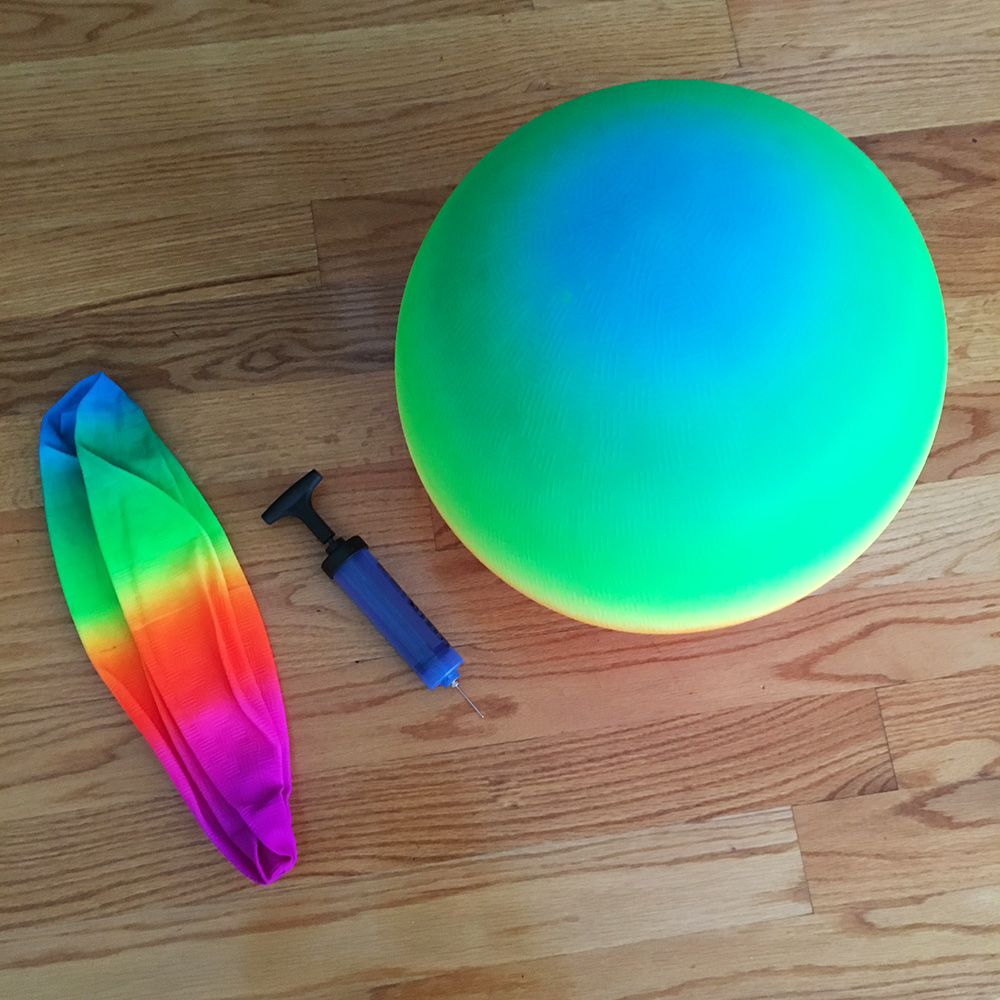
I started by buying two big 16" inflatable balls to use as a base, along with an inexpensive pump to blow 'em up. I inflated them as fully as I could, to get them to be as firm as possible — they ended up being about 15.5"; I was scared to inflate them any further but they probably could've gone all the way to 16".
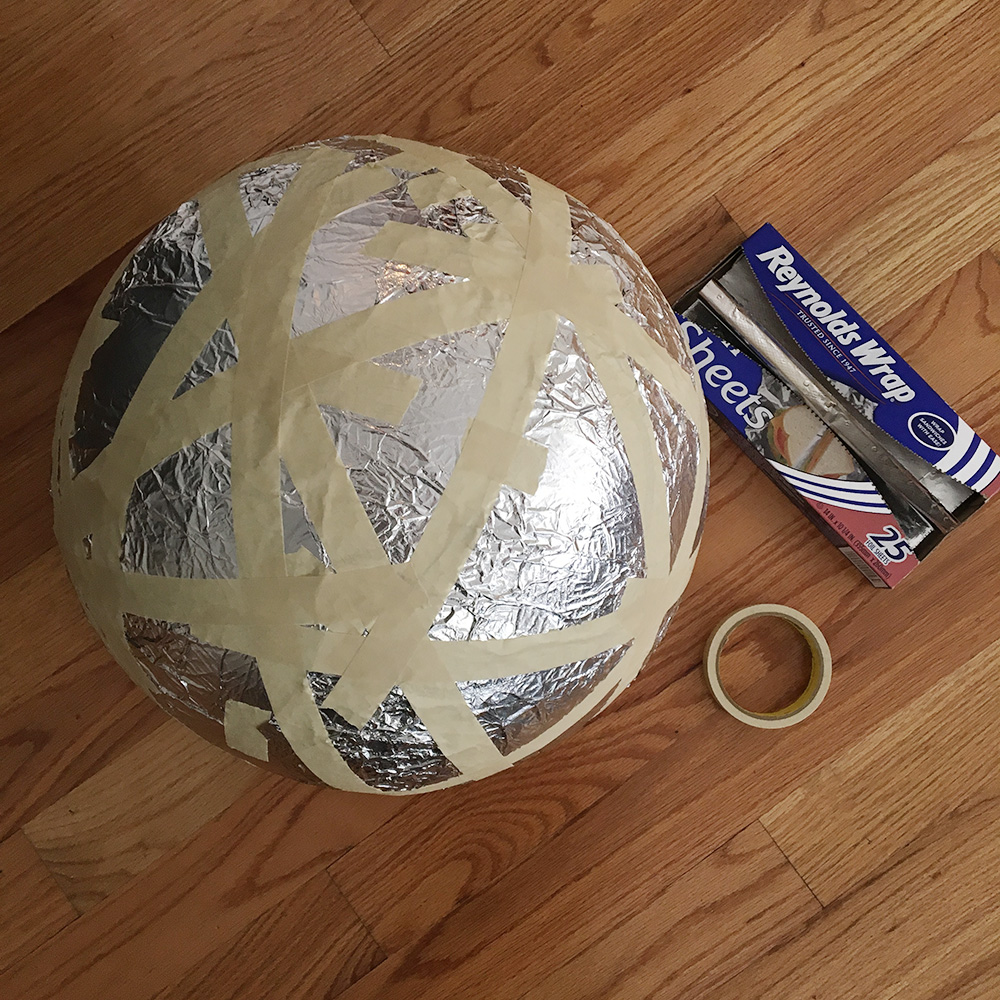
Before applying any paper maché, I first covered the ball with aluminum foil, applying it as smoothly as I could get it. I secured the foil with tiny bits of masking tape (which didn't wanna stick to the plastic ball at all; only to the foil itself), then wrapped several longer pieces of masking tape around the whole shape to get the foil to lay as flat and tight as possible. The foil is there to act as a release agent for the paper maché; the idea is that the paper maché will stick firmly to the foil but the foil won't stick to the ball, so once the paper maché is done I can slice it open and it will easily separate from the ball. I've used this same technique on my twin paper maché skull masks, my 18" paper maché baby chicks, and a few other projects, with great success. This foil-as-release-agent technique is perfect on any paper maché project where there's not a lot of fine detail on the base. Of course, if you don't care about weight, then you don't need to make a plan for removing your base at all.
Papier maché
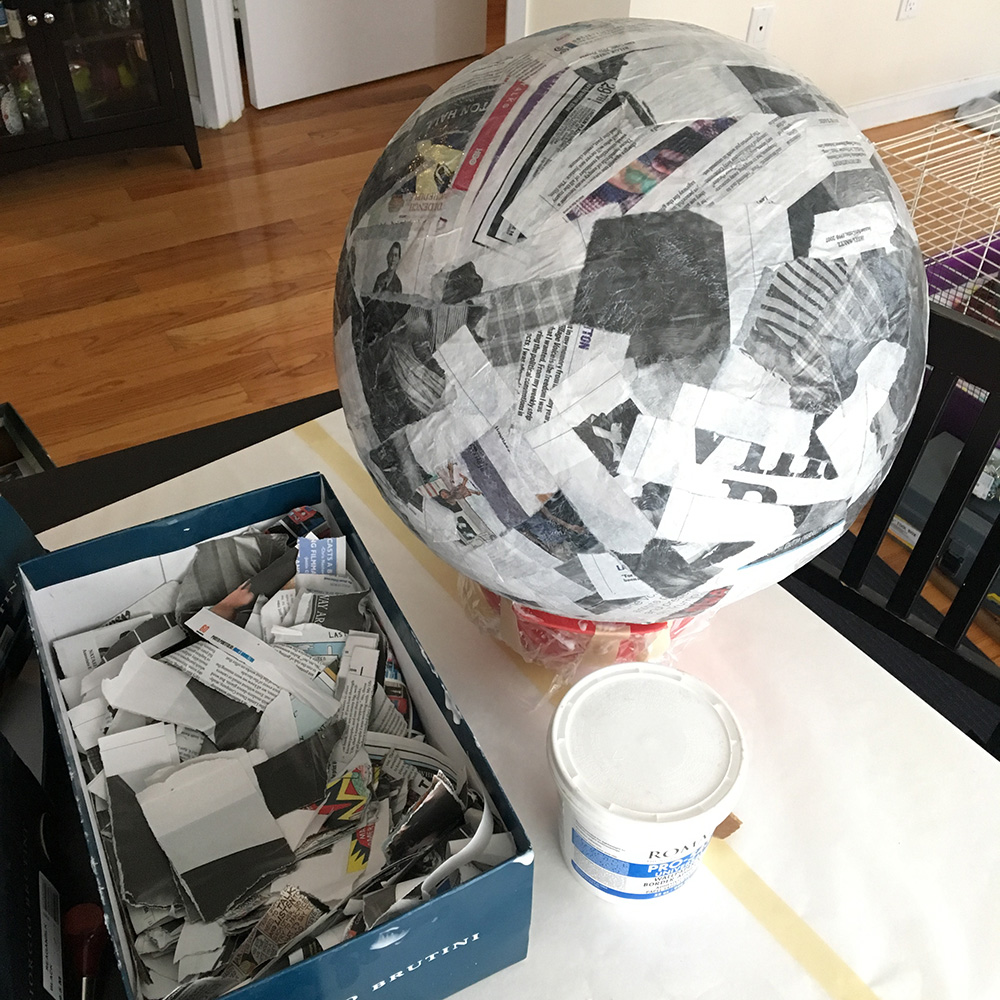
I then applied six layers of papier maché over the whole shape over the course of a couple days. You can read all about my papier maché process and materials here. The short version is: I use Roman PRO-543 universal wallpaper adhesive (paid link) and alternating layers of newspaper and brown wrapping paper.
I did the last layer with a type of paper I'd never tried before — packing paper, which is essentially blank newspaper. Newspaper tends to go on a little smoother than the brown wrapping paper I usually do my last layer with, but I don't like using newspaper for the last layer because the newsprint can be hard to conceal completely with paint. So this blank newspaper was the perfect solution! I'll probably keep using it for projects going forward where I need the final surface to be very smooth. It's more expensive than the other kinds of paper that I use (i.e. brown paper at a dollar a roll, and free newspaper), but it's worth it for my more important projects. For fast and dirty Halloween projects, for example, I'll probably stick with the rougher and cheaper brown craft paper.
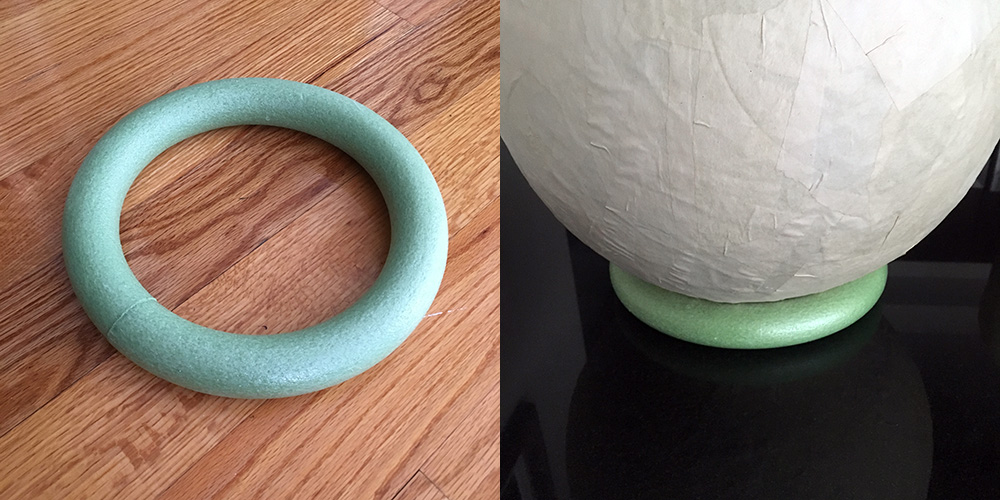
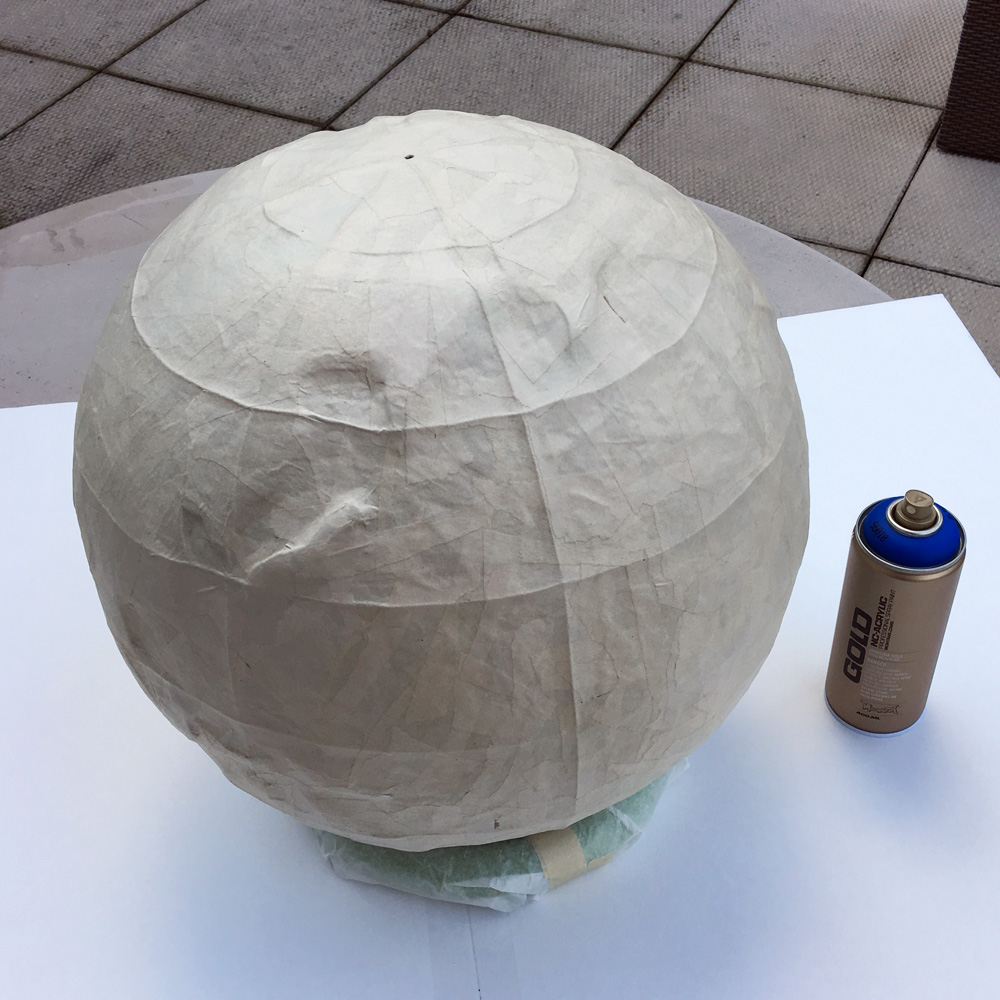
Here's a weird tip: A big sphere like this is hard to work with on a flat table top, so first I set it on a small mixing bowl that I'd wrapped in cling wrap, and that made it easier to deal with. But the edge of the bowl kind of dug into the paper maché surface and created a circular indentation, and I was worried that would remain visible when the paper maché dried (you can actually see part of this groove in the pic at above-right, near the top). The bowl also wanted to tip over all the time as I moved the sphere around. So, I found a much better object to use for a stand: a big ring of green foam that's used for floral arrangements and wreaths and stuff. I had a couple of these left over from another art project; I get 'em at the dollar store. The foam ring made for a very stable base; the soft rounded surface didn't dig into the sphere, and it's impossible to tip the thing over.
Drawing the latitude and longitude lines
I wanted to draw the latitude and longitude lines before moving on to adding the continents, because I knew it would be way easier while the surface was still smooth. Since the design I was going for with these globes was simplified and not realistic, I decided to do just 7 latitude lines and 8 longitude lines.
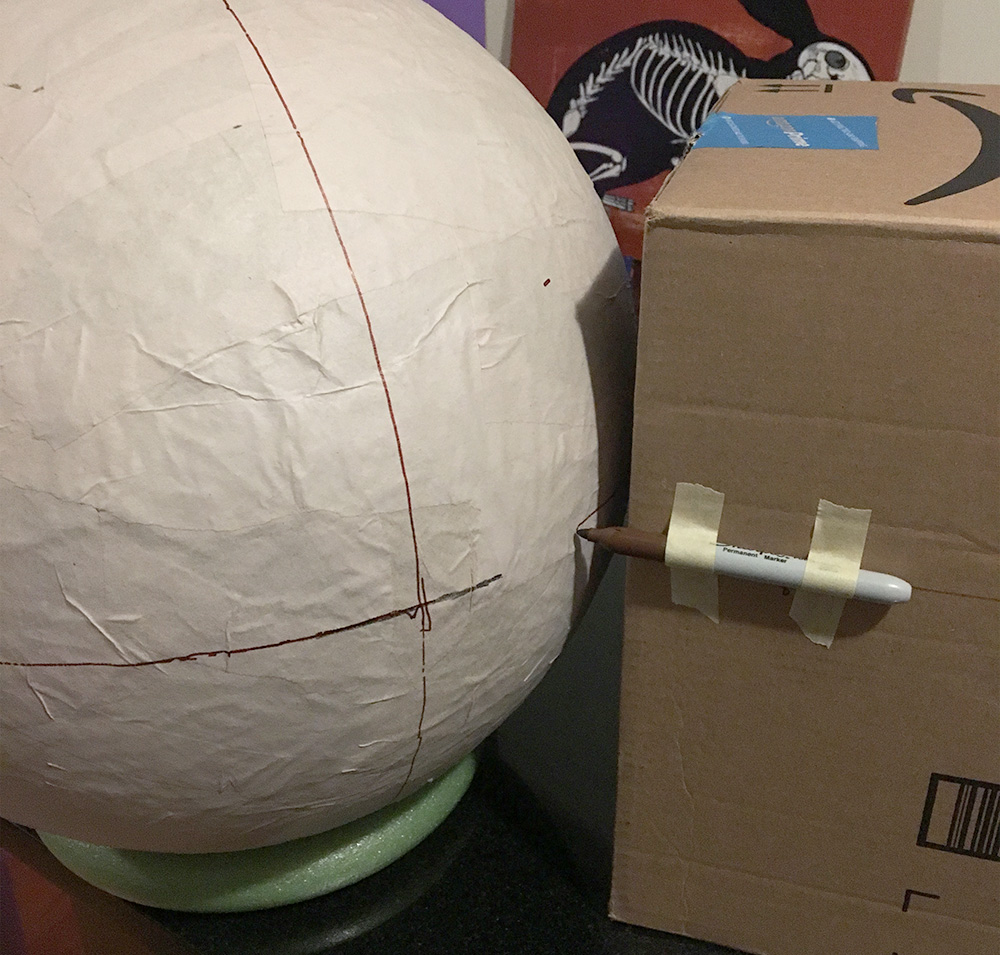
The techniques I used to measure and draw the latitude and longitude lines were extremely convoluted — not to mention inexact, but good enough for these cartoony globes — and they're probably only of interest if you're actually trying to make your own globe. I'll skip that stuff here.
Now back to the good stuff...
Removing the base
When you're working with paper maché and aluminum foil on a removable base, it's extremely important that you let the paper maché dry 100% before cutting it open. If you start to cut it while it's even a little bit damp inside, your incision will be all shredded up and gross. You want the cleanest incision possible so you can easily patch it back up and have it be invisible. So I always let the paper maché dry an extra day or two before cutting into it, even when it seems dry on the outside. The inside layers will definitely take longer to dry completely because they're against the aluminum foil.
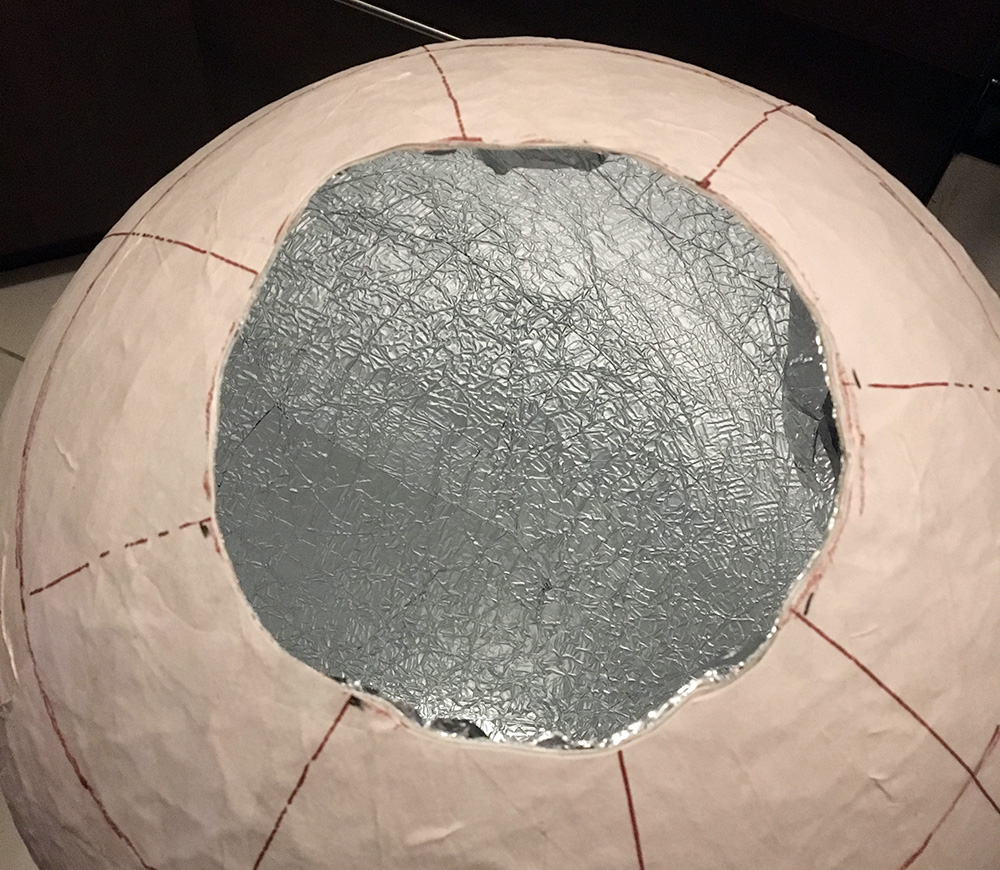
So, I sliced open the paper maché with an X-acto knife, and I wasn't worried about ruining the inflatable ball inside, since I had another one to use for the other globe. It was hilarious when the ball popped; it didn't make a noise but I felt the paper maché sphere jump!, and then air hissed out of the incision! I cut out a round hole around the South Pole. I always cut a wavy line rather than a straight one; this is to make it easier to line up the pieces when putting them back together, like puzzle pieces. When the incision was complete it was easy to remove the ball and some of the aluminum foil; now the hollow paper maché sphere was surprisingly sturdy and surprisingly lightweight.
At this time I also poked a hole through the North Pole using an awl; this is where I'll install a hook later, to hang the globe.
A note about safety: While of course it's important to be careful with the X-acto knife, you probably wouldn't think to be careful not to cut yourself on the edges of the paper maché, but watch out! When you cut a thick surface of paper maché with a very sharp blade, the resulting paper edges can be surprisingly sharp! I've actually cut myself this way! We're talkin' nowhere near as sharp as the X-acto knife itself, but still sharp enough that you can hurt yourself. The thing that makes it dangerous is really that you're not expecting it, so you wouldn't even think to be careful when handling those paper edges. Anyway, now you know!
I reattached the circular area I'd cut off with two layers of masking tape to smooth out the incision mark; this will get covered over with paper maché a few steps later...
Continents
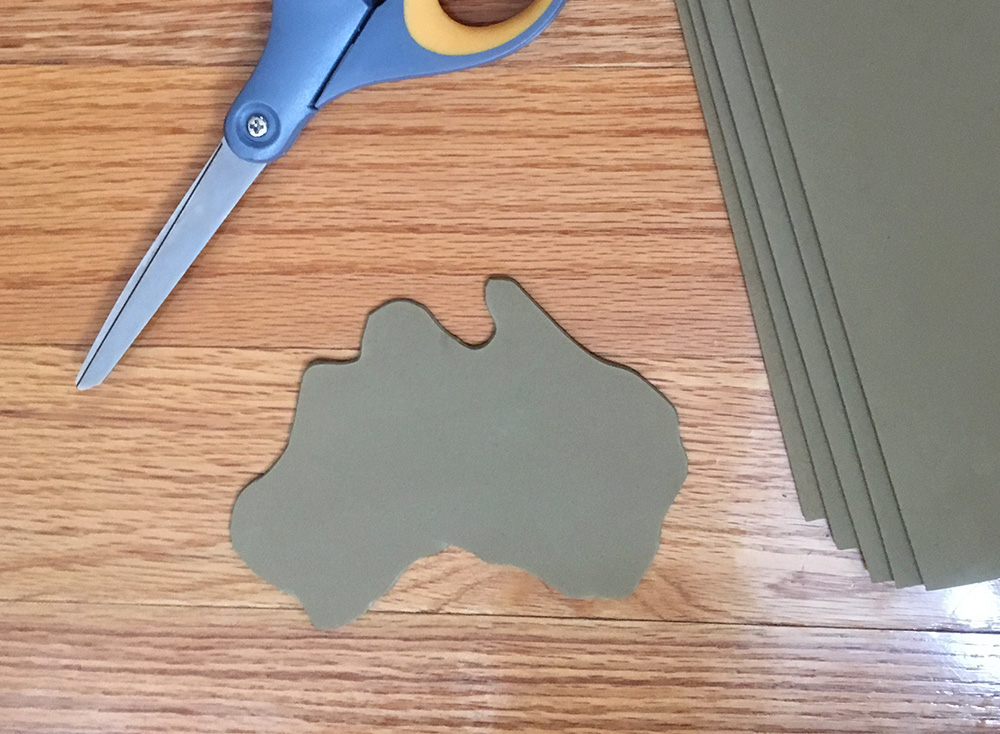
I cut the shapes for the continents out of craft foam (aka wonderfoam) — I happened to have a ton of tan craft foam left over from Halloween projects.
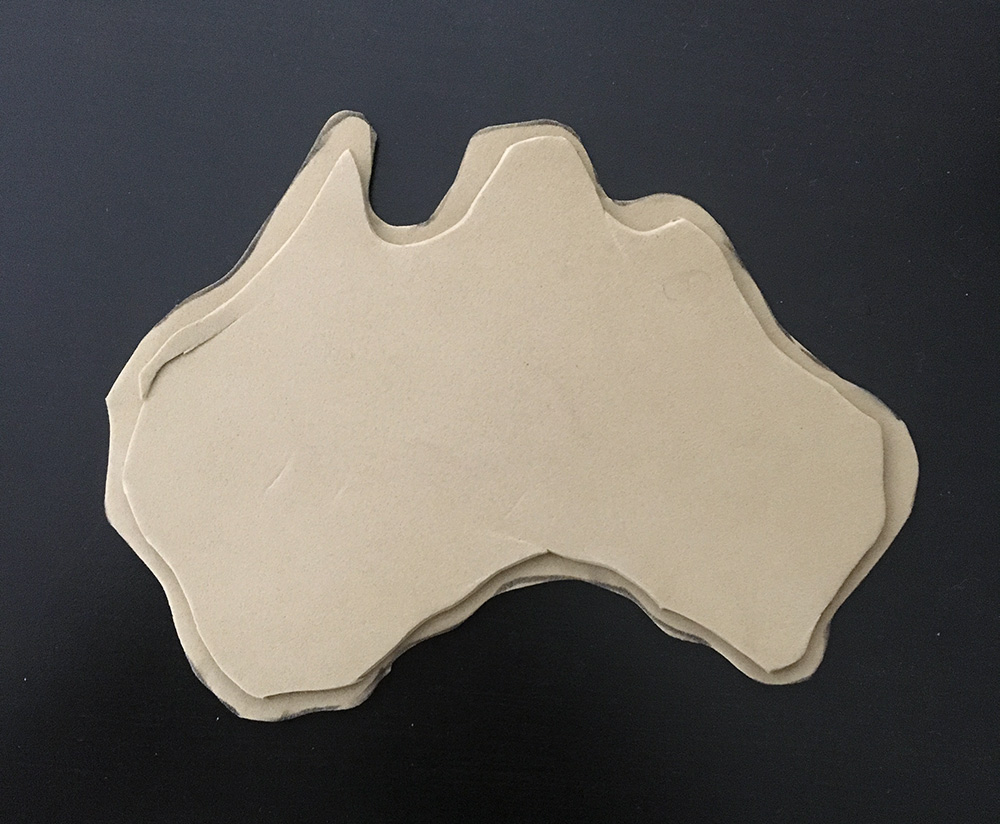
I actually used two layers of craft foam for each continent. I cut the second one to be a little smaller than the first. The smaller one actually goes underneath the larger one; the idea is that the edges of the outer layer can curve downward a little bit to make a nice incline down to where they meet the ocean.
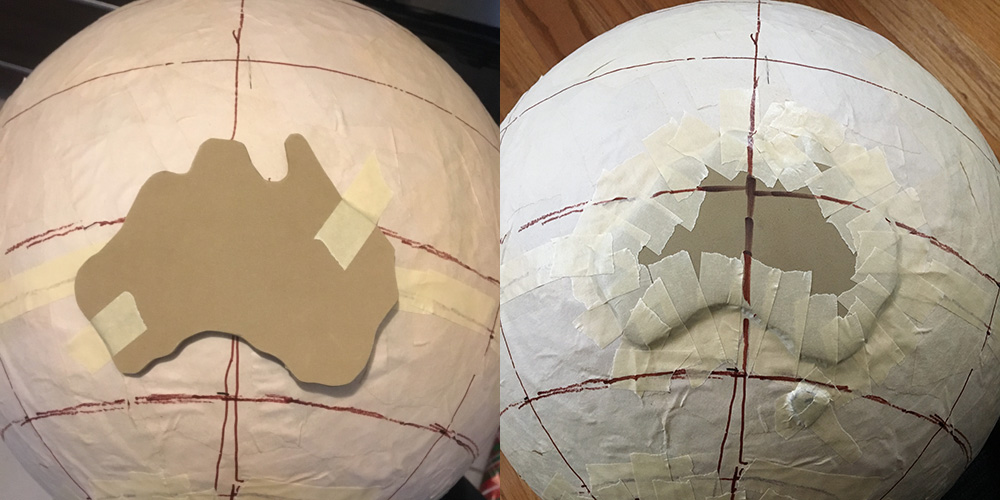
I taped the continents in place with masking tape, and then taped down the edges all the way around.
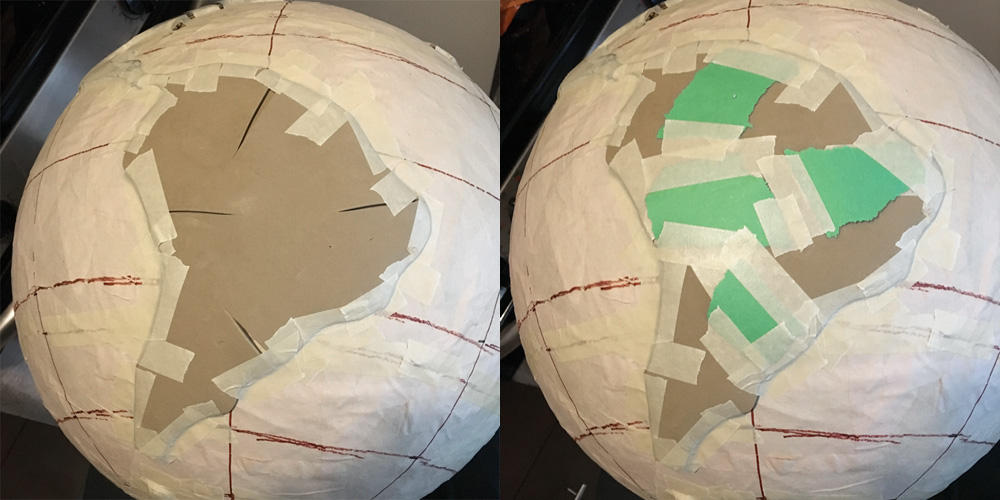
Craft foam is great to work with because it's very easy to cut in precise shapes and it's super flexible. However, I knew the larger continent shapes wouldn't want to lay nicely over the rounded surface of the sphere, so I cut some very thin wedges out of them to let them mold onto the sphere a little better; you can see these incisions in the pic at the left, above. Without these wedges cut out, the foam continents want to warp and bunch up as you tape them down.
You can see I added some pieces of green construction paper to conceal the cut-out wedges.
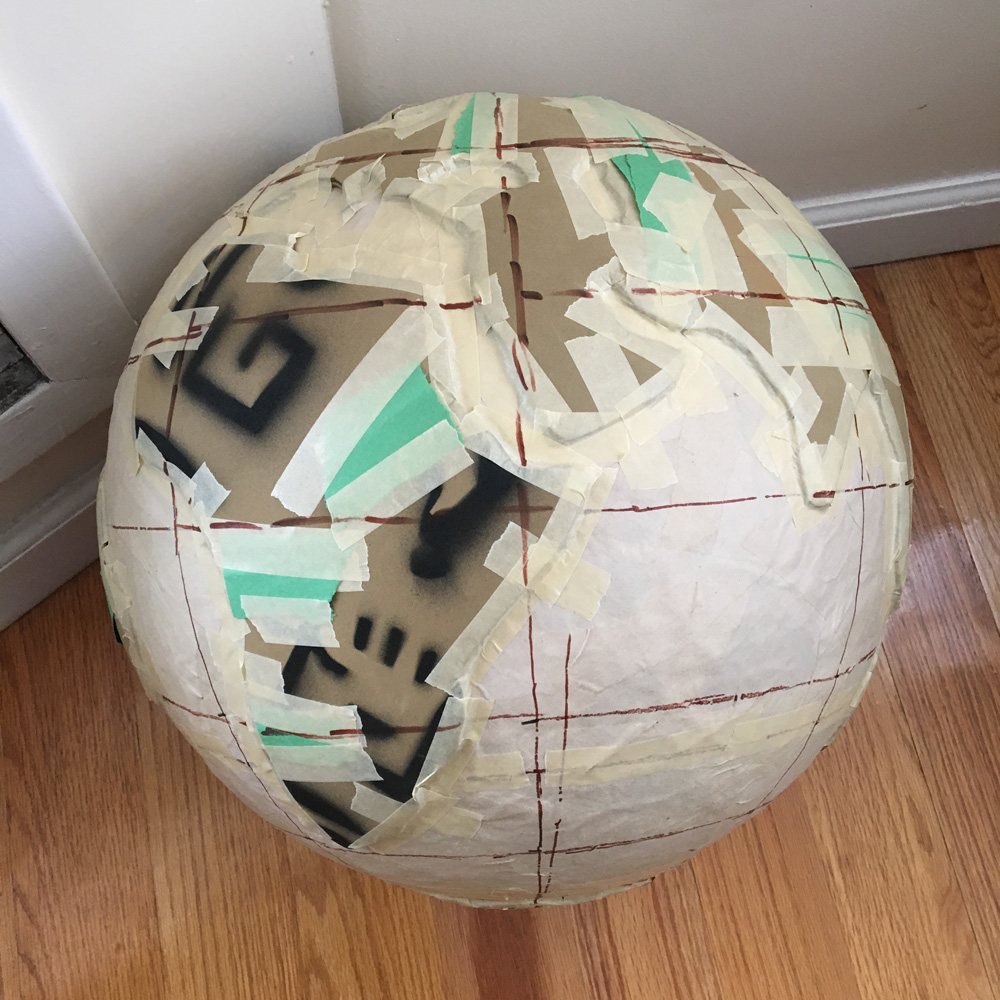
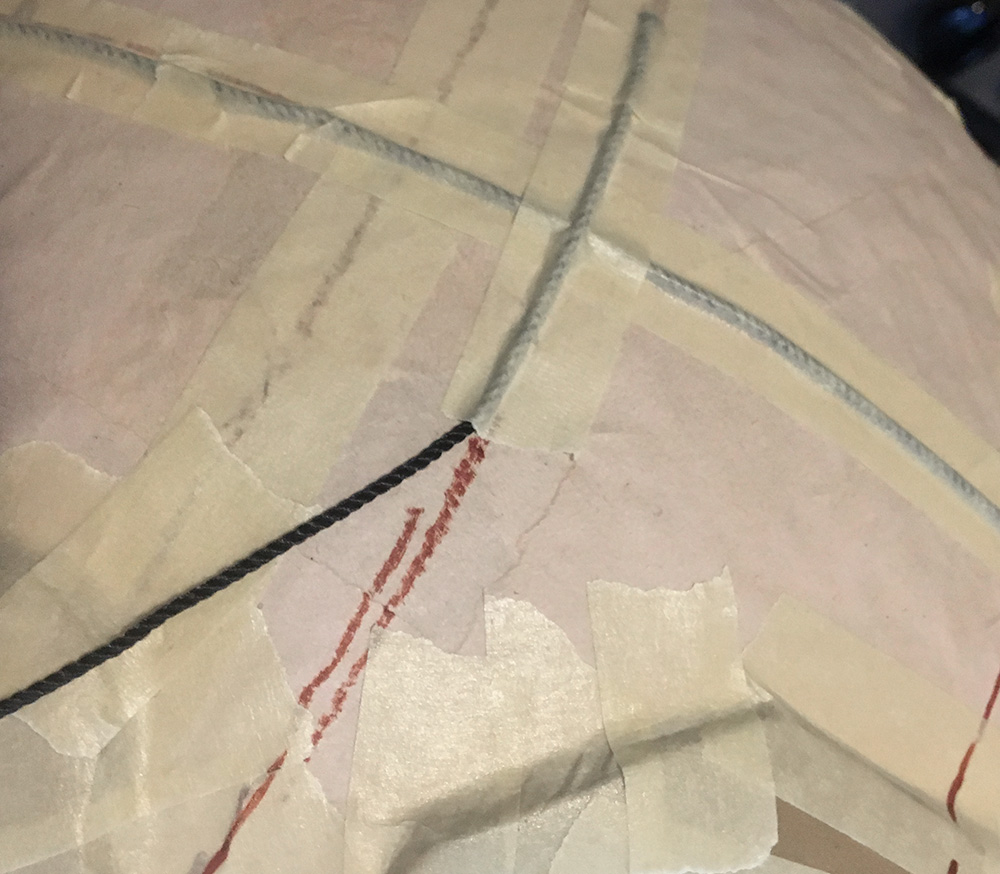
I decided to add the latitude and longitude lines as 3d elements rather than just paint them on; I knew that if I tried to paint them on it would be next to impossible to get them nice and smooth and even, and I figured another bit of 3d relief would make these sculptures look even cooler. So I made the lines out of string, taped in place.
I then covered the entire globe with two more layers of papier maché, using small strips of paper so as to preserve the details as much as possible. I finished with a layer of the blank packing paper stuff.
Painting
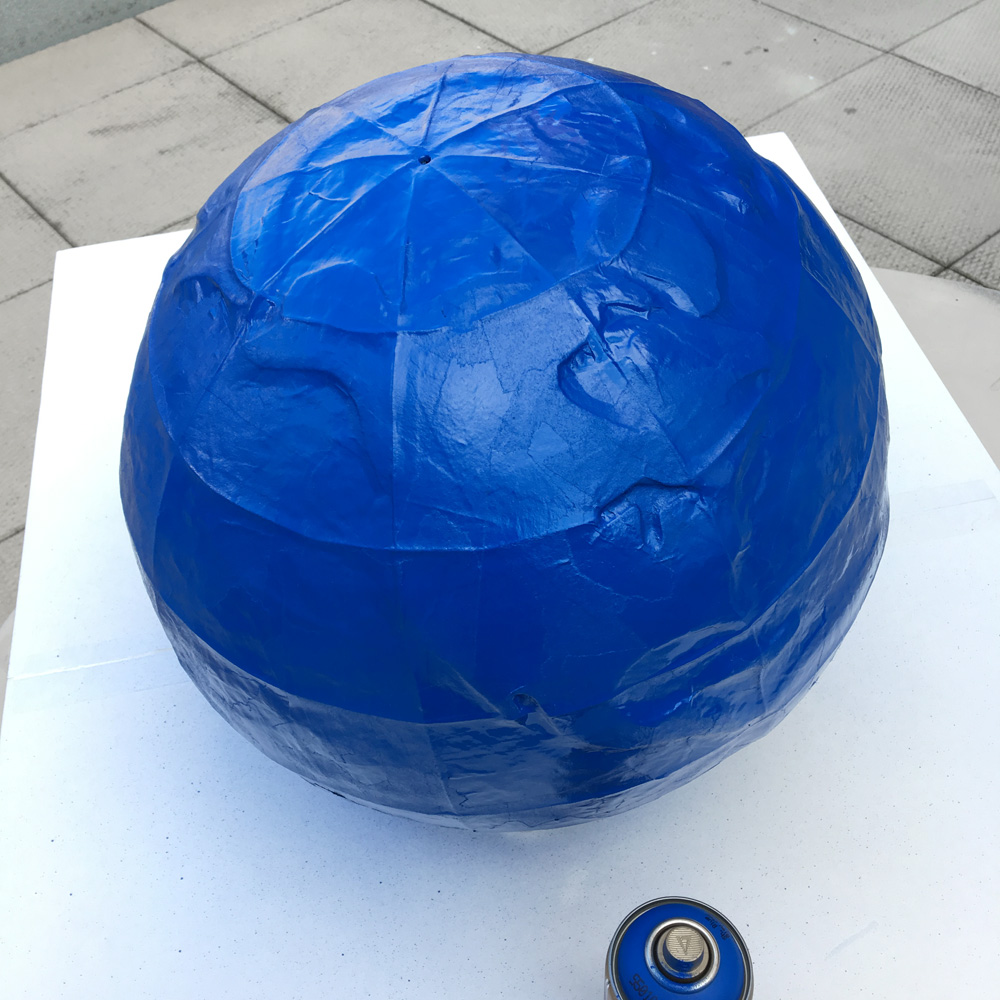
With the sculptures finished, it was time to paint! I started off with a coating of blue spray paint. I sprayed the top halves of the globes, let that dry and set for a full day, then flipped them over and painted the bottom halves. I used those same green foam rings to support the globes while drying, and I covered the rings with a sheet of wax paper to protect the paint. I let the globes air out outside for three days. To keep them from blowing away or getting rained on, I set them up in a big plastic storage box outside with the lid propped open slightly.
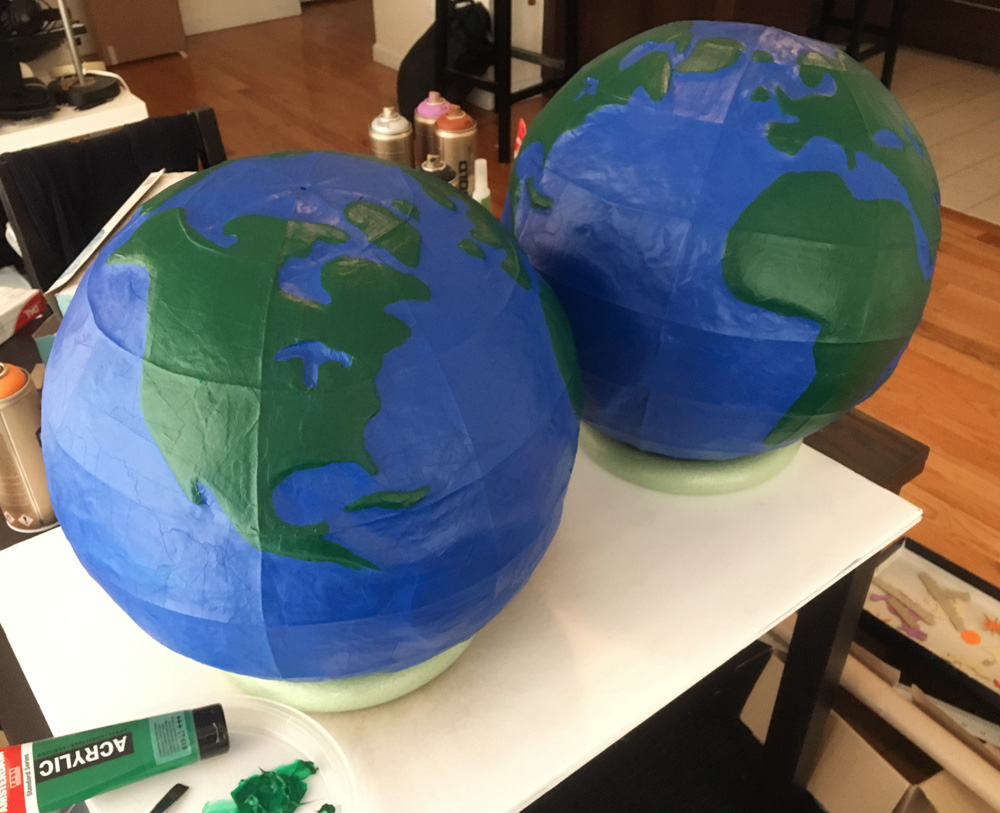
I then brought the globes inside and painted the continents by hand with a darkish-green acrylic paint; two coats to get it nice and opaque. Oh yeah, and I painted Antarctica a very light blue. At this stage both the oceans and the continents look quite a bit darker than the fun, vibrant, Carnival vibe I was going for — after all, these globes are going to be decorations in a very brightly-decorated ballroom for Carnival season — but no worries, they'll get lighter and brighter in the following steps.
I then used a damp sponge and a lighter blue acrylic paint to lighten up the interior of the oceans, going for a layered, textured effect fading from light to dark. I accidentally got some blue on the continents, so I fixed those parts with more green.
Along with painting all the raised land masses, I also added a little green dot for the island where my fiancée is from, Reunion Island, as well as a dot for Mauritius next to it. Hey, why not? I like giving these projects little personal touches and little secrets when I can.
When that was dry I used a sponge and a lighter green to do the same kind of textured effect on the interior of the continents, and when that was dry I did another very thin coat with yellow acrylic. I did the same sponge effect with white acrylic to fill up most of Antarctica, and then the same thing for the North Pole and on the northern-most parts of North America and Eurasia.
Finally the globes were looking a lot brighter and more colorful!
I painted all the 3d latitude and longitude lines by hand with a small flat brush; the relief of the string made this super easy! I thought solid black or white lines would be too contrast-y, so I painted light blue lines over the oceans and light green lines over the land — oh yeah, and light blue lines over Antarctica and the North Pole.
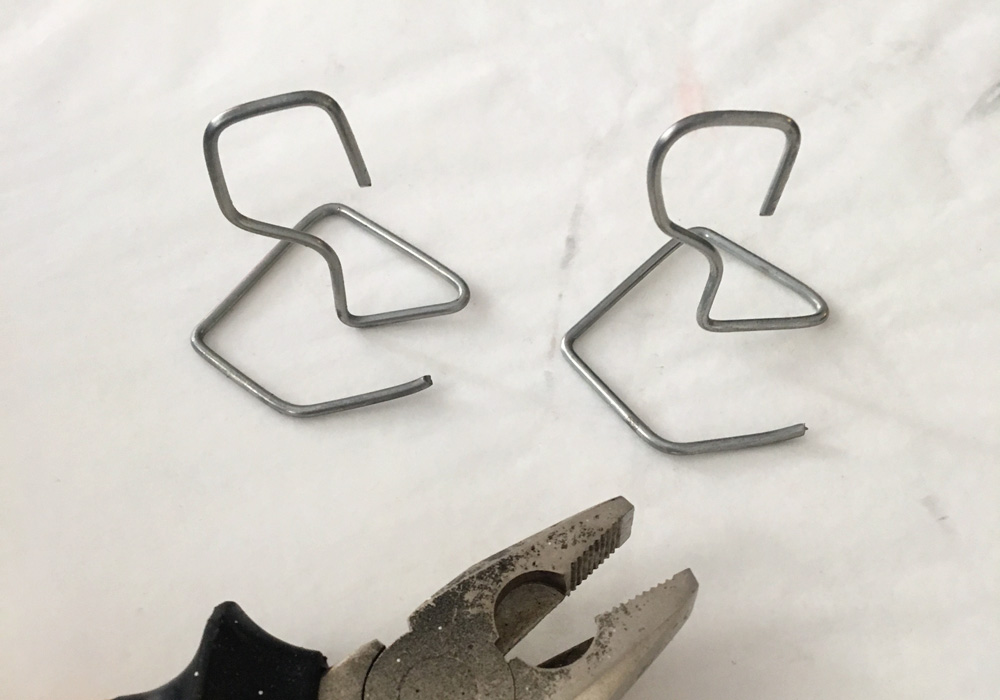
I made two big hooks (one for each globe) from a wire hanger; I snipped a couple lengths of wire off the hanger with wire cutters and bent them into shape with pliers. I installed these hooks by just twisting them into place, working the bent wire shape through the holes I made earlier in each globe. They feel very sturdy and easily support the weight of the hollow globes.
I then brought the globes outside and applied a quick coating of matte spray all over, and let them air out outside for another two days.
Adding little images in relief
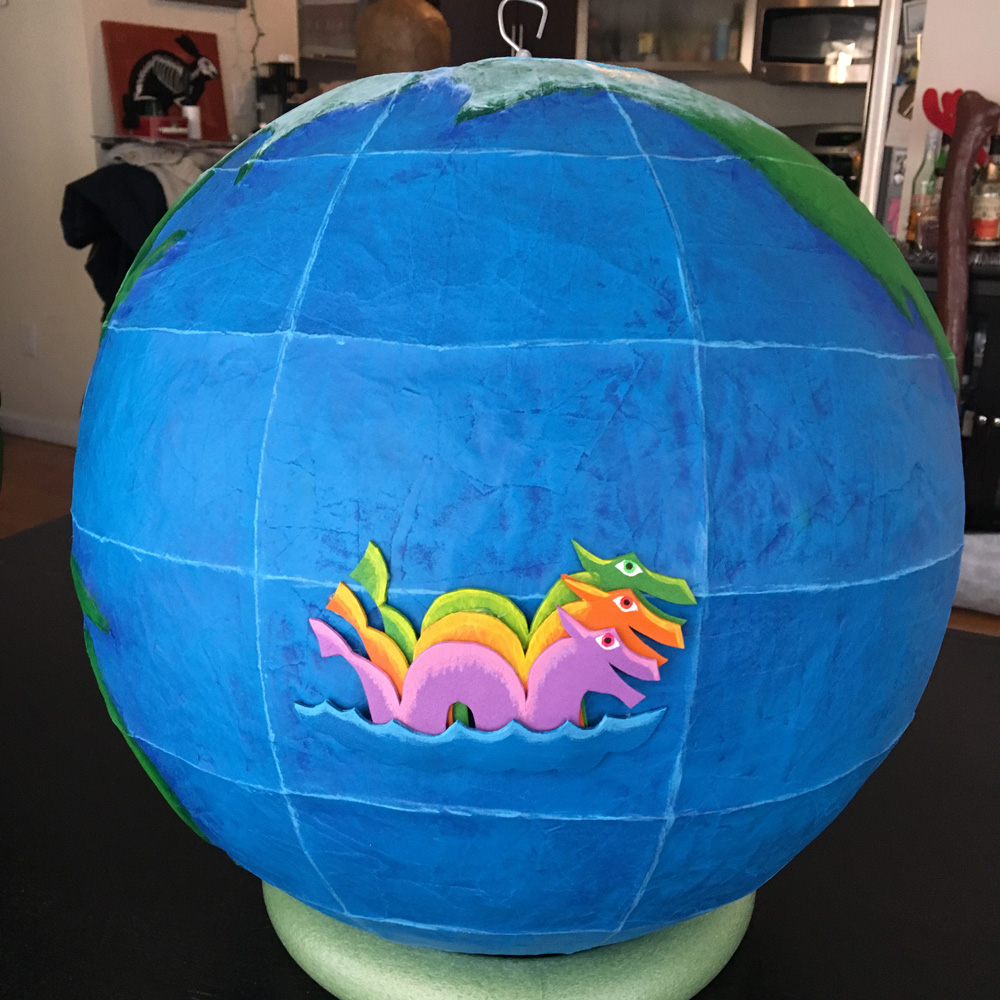
My client had the great idea of adding Isabella the three-headed sea serpent in the ocean on the globes. I made her out of the same kind of craft foam I used for the continents, and I also added a little ship based on the Crewe of Columbus logo, as well as a compass. I wrote a separate article about my process for these: Craft foam sea serpent and other relief shapes.
I glued the craft foam relief shapes into place on the globes with a hot glue gun. And with that, these things were ready to ship!
These globes were really fun and relatively easy to do, with some really neat challenges to figure out. Now, on to the next project!
Interested in commissioning a paper maché sculpture, mask, or cosplay accessory? See my page about custom paper maché pieces.