
Paper maché table for my séance party
Published by Manning on October 12th, 2016
This is part two of my paper maché furniture projects for my séance Halloween party; see part one (chairs!) here.

With the chairs done, I moved on to the table! Unlike the chairs, I didn’t have a real table handy to use as a model for this, so I just made up a table based on some Google image searches for victorian round table.
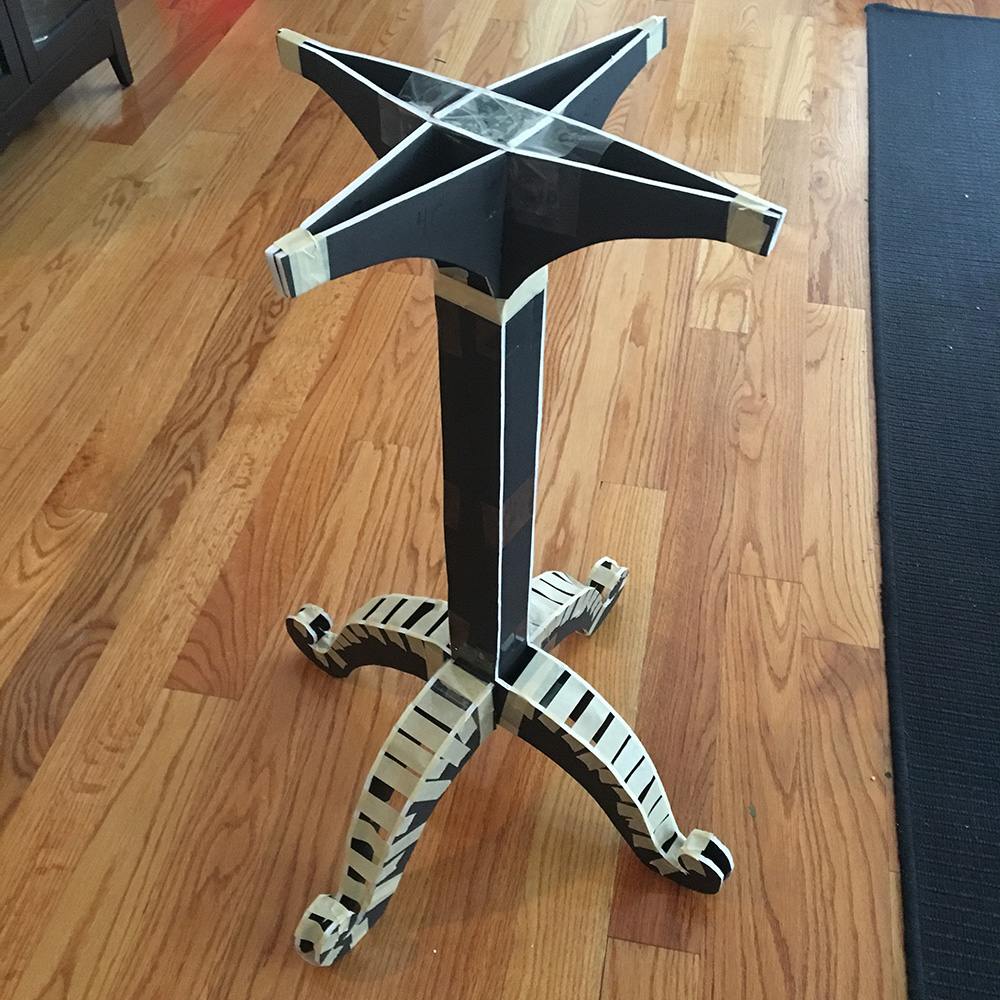
I started by cutting out a ton of foam board shapes for the table; here’s a picture of all of them:
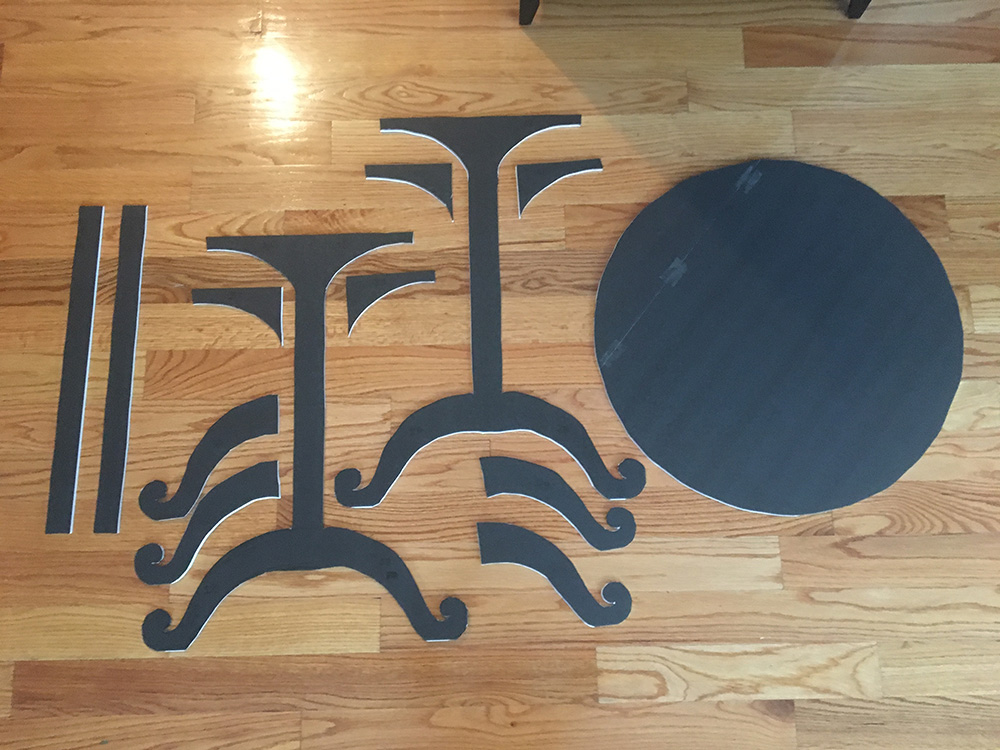
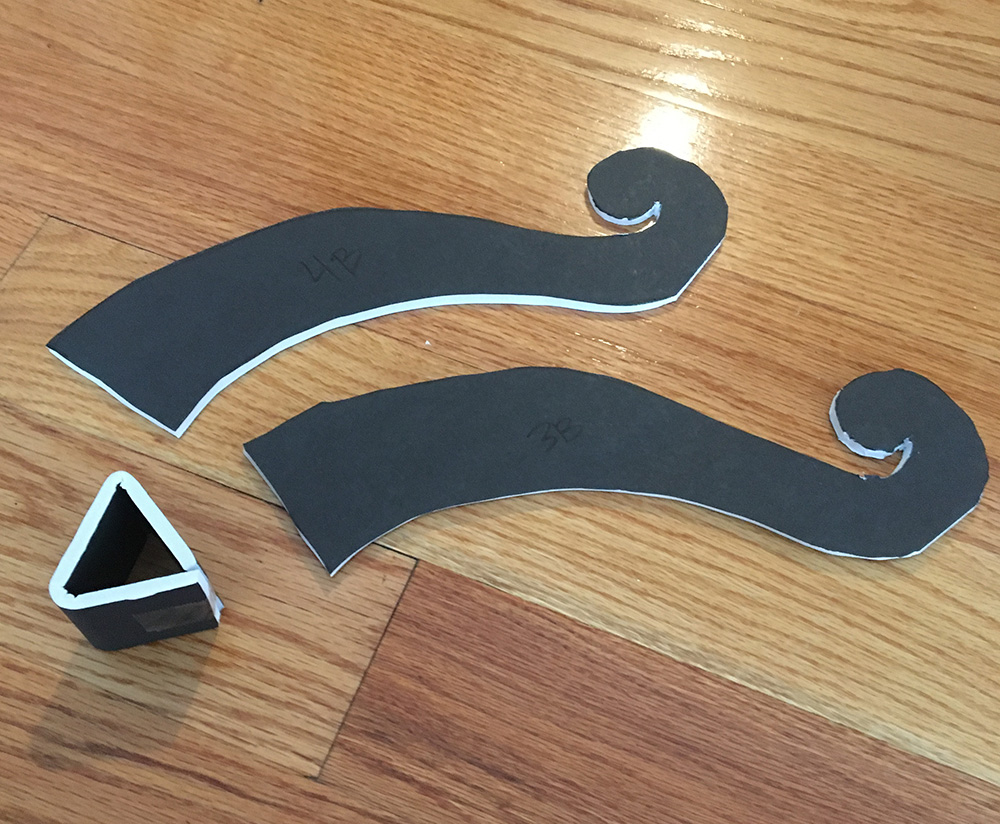
The two big pieces with the legs at the bottom make up the main central post and two of the legs. The small curved leg pieces make up the other two legs. The long straight pieces are the sides of the central post. The four small pieces near the top make up the supports for the big table top. (And of course the big circle is the table top; duh.) This will all be clearer when they’re all taped together…
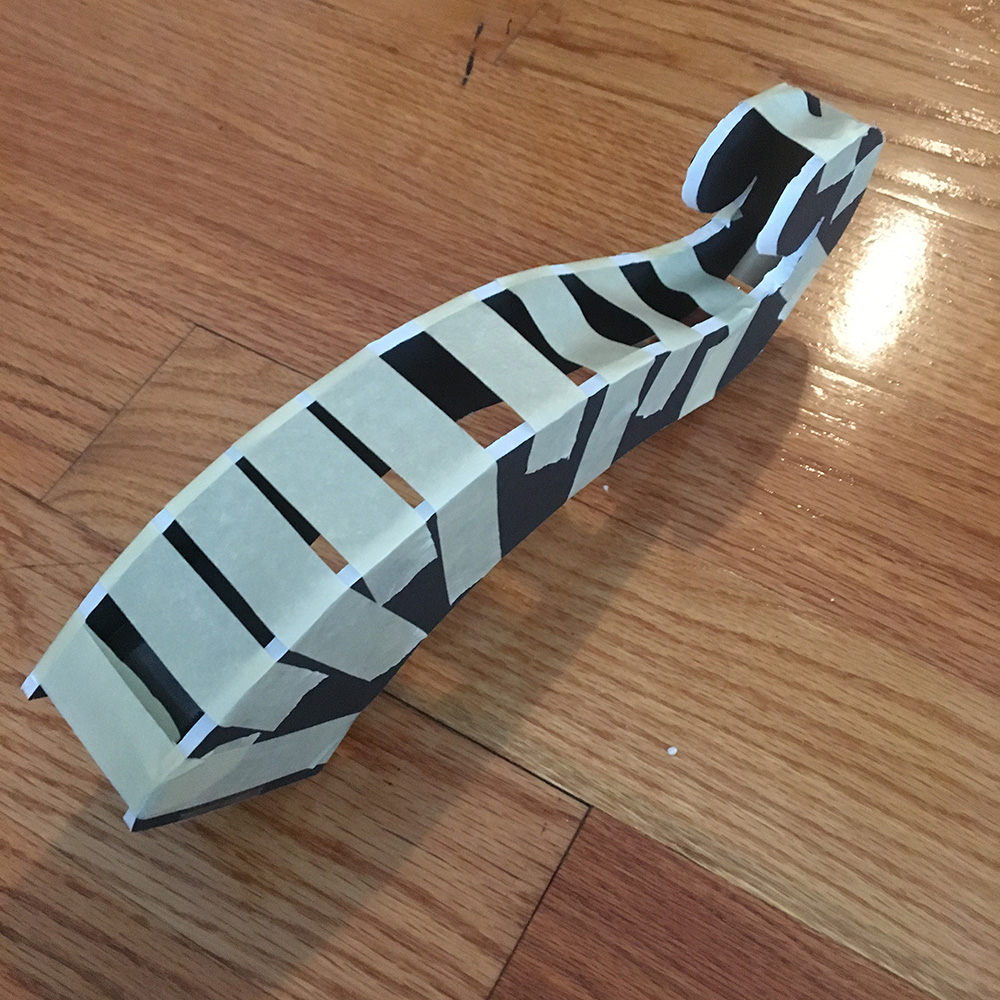
The foam board leg pieces you see are the sides of the legs. Rather than cut shapes for the top and bottom edges the legs, I decided to just use masking tape. I first installed a little folded triangle of foam board inside the legs pieces to hold them in the position I wanted. Then I started laying masking tape over the edges of the legs, squeezing the leg shape a little tighter toward the bottom to make the legs taper a bit. This will all get covered over with paper maché later.
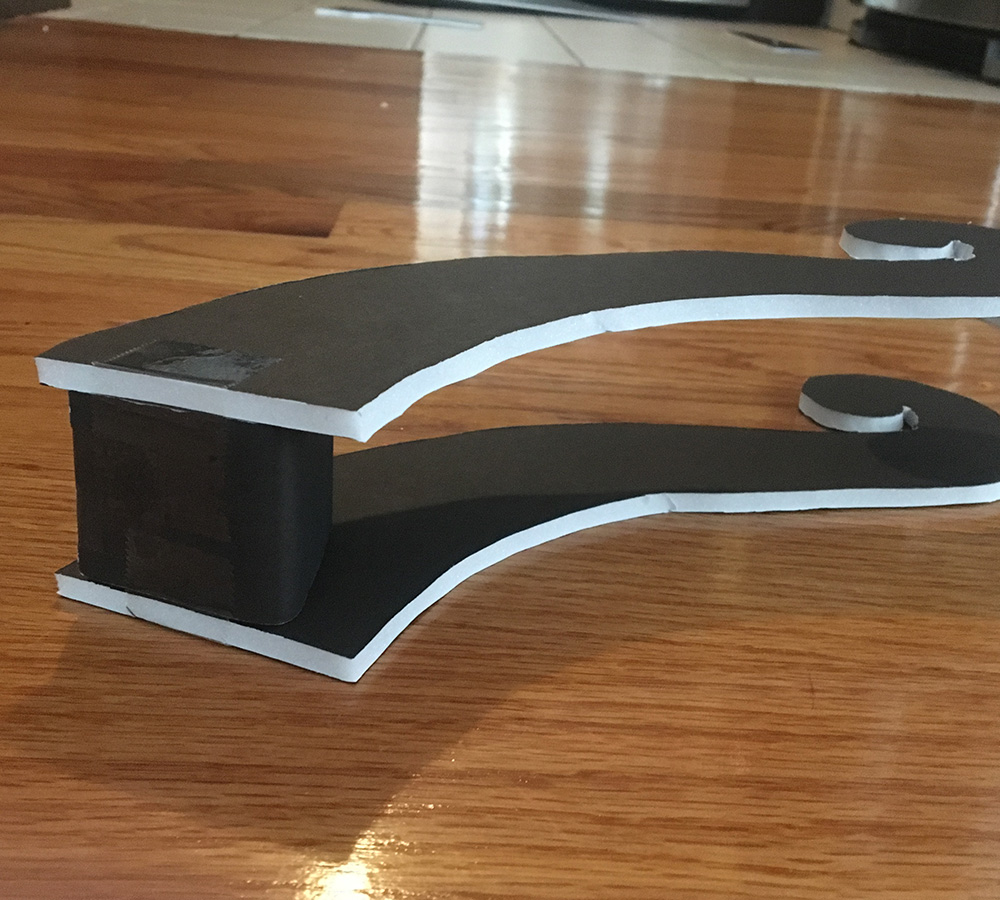
Once again, I’m trying to minimize weight since this table will be hung from the ceiling, so I’m leaving the bottom surface of the legs completely open; no tape or paper mache there. This whole table will be very flimsy; if I wanted to make something sturdier (let’s say for a theatrical set piece) I’d use a lot more tape and probably four or five layers of paper mache all around.
I taped everything together, and boom, this is starting to look like something!
I’d kept a plastic bottle from some almond milk that my fiancée buys; it’s a neat bowling-pin shape and I’d planned on making a lamp prop with it. But then I realized the shape would be great for the base of this table. Rather than use the bottle itself, I decided to see if I could apply paper maché to it in a way that could be removed, so I’d still have the bottle intact to make the lamp. It worked! Here’s what I did.

I first wrapped the bottle in strips of paper towels, held in place with masking tape, and then wrapped the whole thing tightly with a lot more masking tape. It’s important that you don’t stick the tape directly to the bottle; just wrap it around the paper towels to hold them tightly in place; this is so you can easily separate the paper maché from the bottle later on.
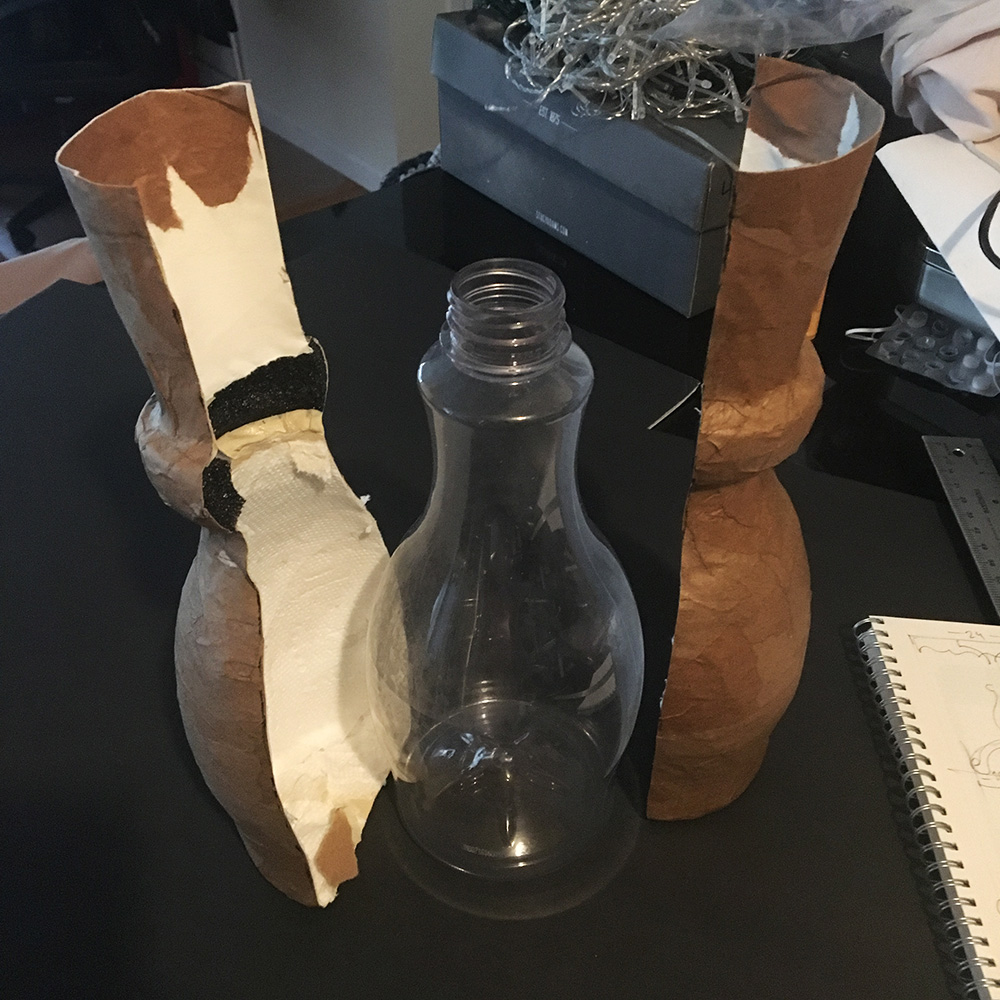
I also decided to add a little ring shape around the narrow part of the bottle. I used a scrap of foam pipe insulation for this. (I also added a flared tube of paper sticking up from the top, but in the end I didn’t need that bit so I cut it off.) Then I wrapped the whole bottle in two layers of paper maché.
When it was dry, I cut a vertical line down each side with an X-acto knife. My idea worked; the bottle came right out! I carefully removed as much of the masking tape, foam tubing, and paper towels from inside the shape as possible without tearing it. (I also cut off that flared bit at the top that I didn’t want.)
I cut a rectangular hole at the bottom of the two halves of the bottle shape and slipped them on around the central post of the table. I taped them in place.
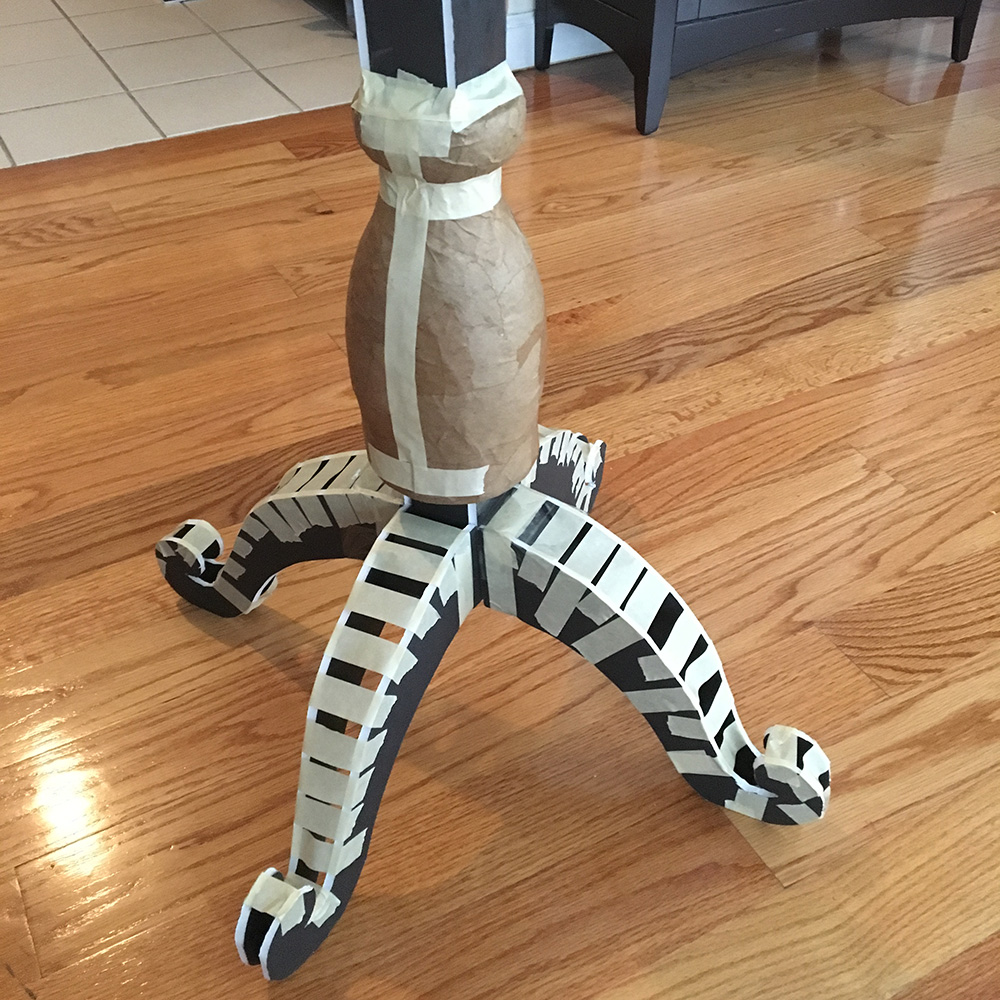
Then I added one layer of paper maché over the entire table base; the legs, the central post thing, and just enough on the bottle shape to cover the tape.
Now, on to the table top. I wanted to add a decorative edge hanging down from the table top. I started by flipping over the table top and installing a ring of foam board, about half an inch smaller than the table top all the way around.
Then I installed a long strip of poster board around that. The edge of the foam board ring gives the poster board strip a nice stable base. I taped all this stuff together with masking tape, and it felt nice and sturdy.
I made the decorative table edge with craft foam. I love working with this stuff! It’s so easy to cut nice perfect shapes with it — very refreshing after all that hard work cutting out tons of stubborn foam board. This craft foam cuts super easily with just scissors.

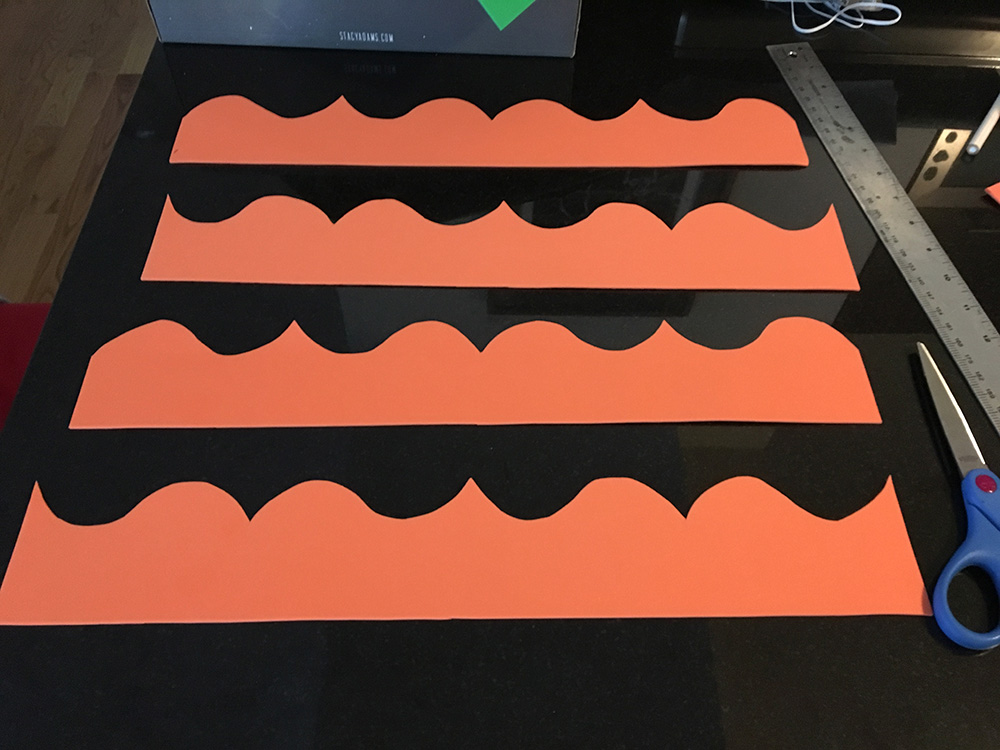
I measured, drew, and cut out my craft foam shapes, and attached them to my table top with masking tape. My measurements were a little bit off, so you can see I added a little bit of poster board to fill in a gap. No one’ll ever know.

I added a layer of paper maché over the entire table top, using really small pieces of paper for the complicated shapes of the decorative edge, and large pieces for the big flat part.
Whenever you put paper maché on a large surface of foam board, it tends to warp a lot as it dries. I let this piece dry for a few hours ’til it was tacky but not quite dry, and it was already starting to warp quite a bit, so I flipped it over onto wax paper and stacked a bunch of books on it to flatten it out. I left the books there overnight, and then in the morning I removed the books, and very slowly, carefully peeled away the wax paper. Luckily nothing tore, and the table top was dry and almost perfectly flat.
Almost done! I assembled the table top and base with tape and then some paper maché.
Then it was time to paint. I took the table outside, spray painted it black, and left it outside for a few days to air out.
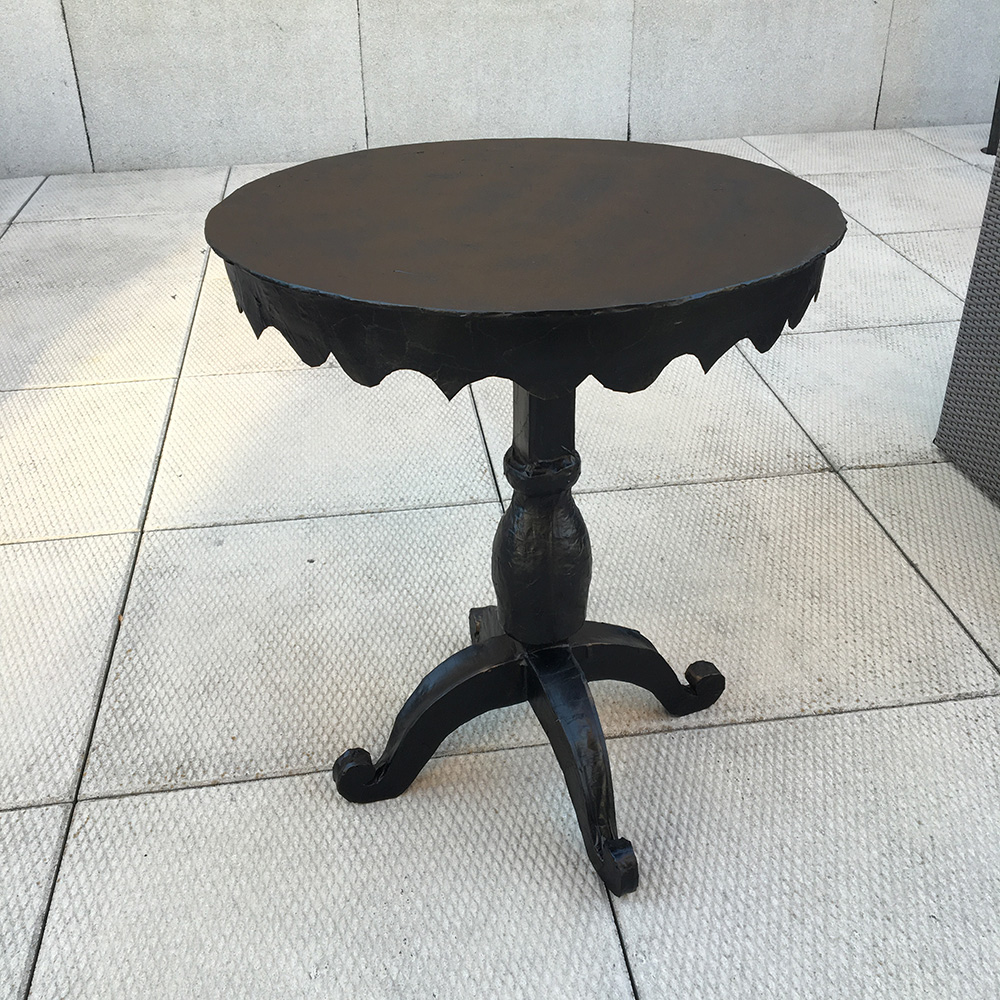
This table will be hung upside down from the ceiling with a glowing crystal ball (a post about that coming soon!) on it. Because of the combined weight of the table and the crystal ball/lights/batteries, I’ll be hanging it with a toggle bolt and some fishing line.
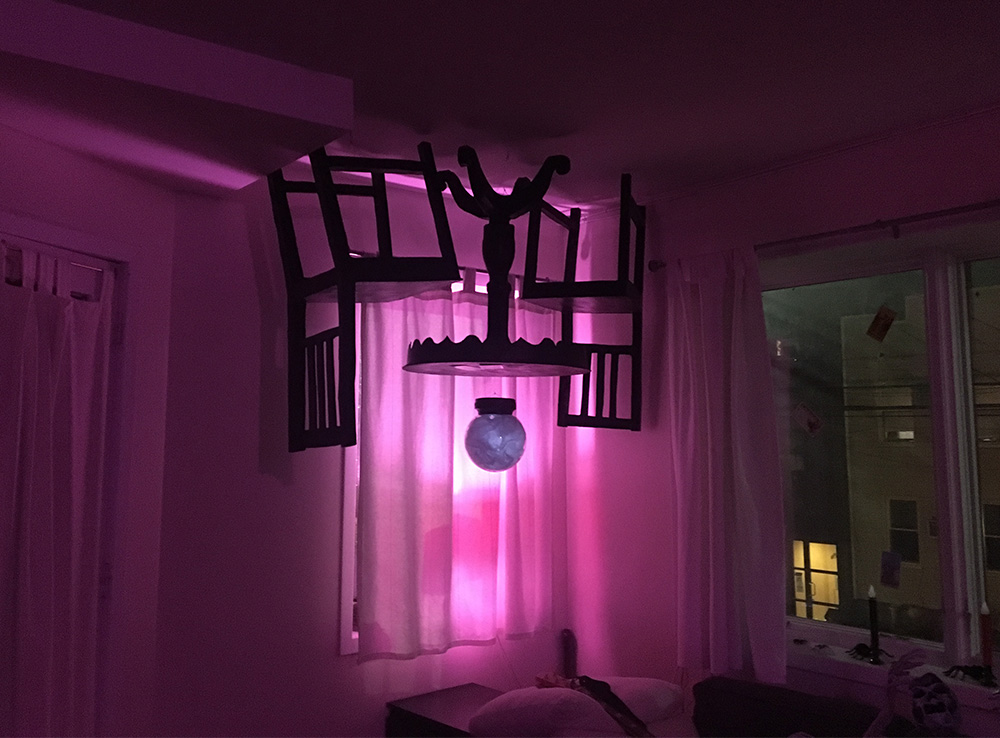
Update: Here’s everything hung up for the party!
See more paper maché furniture projects: chairs, table, mantel and fireplace, nightstand, lamp.
 About Manning Krull
 How to make a 4-foot paper maché alligator
 My violin skull mask, Mardi Gras 2015
 Three-headed paper maché dragon sculpture
Leave a comment