
Creating 3d relief shapes with craft foam
Published by Manning on January 10th, 2019
A few years ago I made up this method for cutting out precise shapes with craft foam, to create 3d relief shapes on a lot of my various sculpture projects.
Craft foam, aka wonder foam, is a soft rubbery material that I often describe as being similar to a yoga mat, but much thinner. You can buy it in any arts and crafts store, and it comes in tons of colors. Craft foam is cheap, it’s super easy to cut with scissors to create nice clean lines and shapes, and it takes paint and glue very well. It’s very lightweight and flexible and slightly stretchy.
I’ve used craft foam in a million projects where I need to create shapes that are somewhat 3d or raised — especially things like letters. Often, rather than drawing these shapes by hand, I need a much higher degree of precision, so I made up this method where I can work from a printout and create a truly precise shape.
First I design whatever I need in Photoshop, and print it out.
I then cut out these printed shapes, but loosely, with a bit of space around them; maybe half an inch or so.
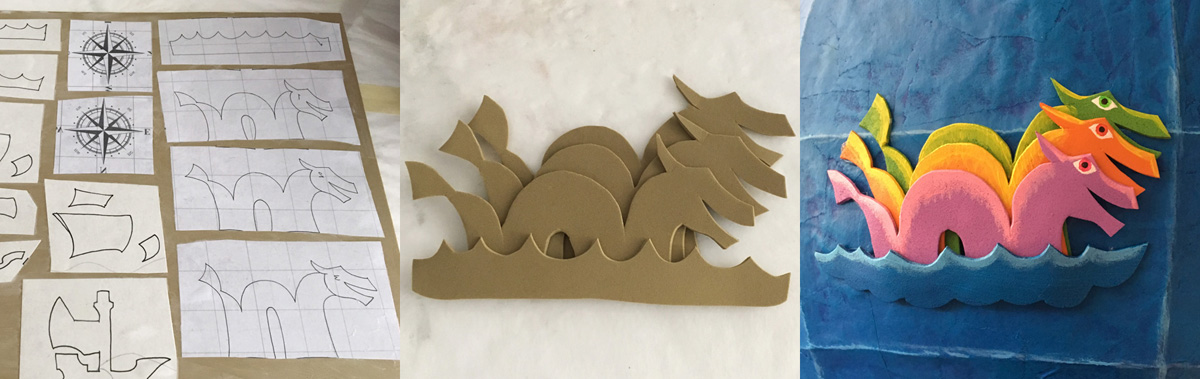 (Above: 3d sea serpents for some globe sculptures)
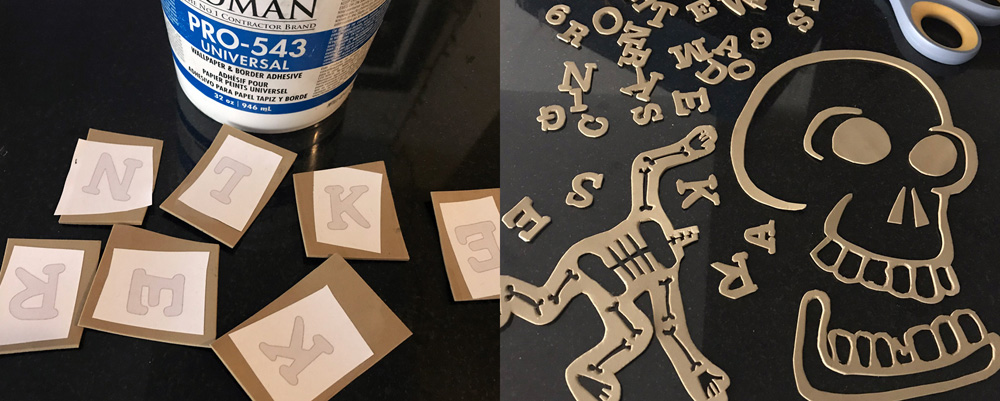
I protect my work area with newspaper, and lay down a sheet of craft foam. The kind I usually work with comes in 18″ x 12″ sheets, and I happen to have about a hundred tan sheets left over
from a project, so you’ll see boring tan foam in almost all my articles here.
I then spread wallpaper adhesive all over the craft foam, sometimes using my hands, and sometimes using a big cheap paintbrush. I use the same kind of wallpaper adhesive for this that I use for paper maché; it’s called Roman Pro-543 Universal Wallpaper Adhesive and I buy it at Home Depot or though Amazon.
I lay my printed out shapes onto the wallpaper paste, and then I smooth more paste over them with my hands, to make sure they’re full saturated.
I then let the foam and paper and paste dry completely; they have to be 100% dry for the next step. You’ll notice that the foam tends to curl up quite a bit as it dries; this is no problem, and it’ll uncurl completely after you remove the paper a few steps later.
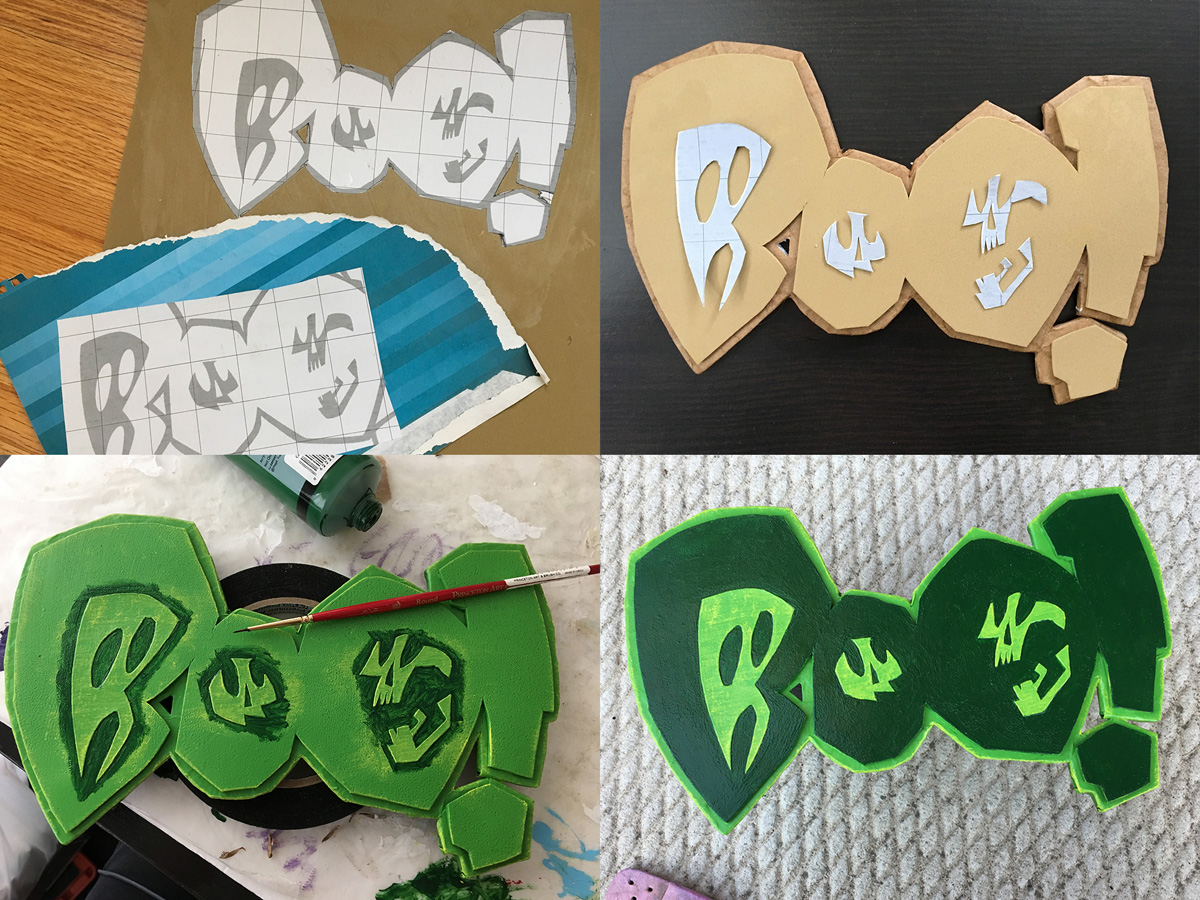 (Above: 3d “BOO!” logo for an evil book sculpture)
When everything’s dry, I then cut out the shapes with scissors, or for really intricate little pieces sometimes I’ll use an X-acto knife.
Before removing the paper, depending on the shapes, I’ll often mark the back of them with a Sharpie marker — partly to tell me which side is the back, and sometimes to tell me which side is up. This helps keep everything organized, especially when you’re working with a lot of cut-out letters or something along those lines.
To remove the paper, I’ve used two different methods that are both fine. One is to lay the shapes, paper-side down, in a tray of water; they’ll foat on the surface but the important thing is that the paper is touching the water. The other method is to lay a wet paper towel on a stone or plastic countertop, then lay the shapes down on that, and then press another wet paper towel over them and leave it to sit like that. Either way, if you soak the shapes for twenty minutes or so, the paper will be ready to slide off.
You can remove all the paper bits by hand, and then you’ll want to rinse off all the excess paste from the foam. When that’s done, I’ll lay down some paper towels and lay out all the foam pieces to dry for an hour or so.
That’s it! The craft foam shapes are ready to go. You can glue them down onto whatever you’re working with, or paint them, or glue them to each other, or paper maché over them.
Here are some projects where I’ve used this method to create craft foam shapes:
• Mechanical skull mask — all the gears and moving parts
• Paper maché globe sculptures — 3d sea serpents and other relief shapes
• Paper maché evil book — the “BOO!” logo in the mouth
• Giant Pez candies — the letters on the candies
• Giant scary clown Pez dispenser — the 3d shapes in the Pez logo
• SLY skull trophy — the letters on the base
I’ve also used craft foam for other things like:
• Giant bat sculpture — the ears and nose
• Cuckoo clock skull mask — the shingles and doors
• Mechanical skull mask — the little marching skeletons
Have fun!
 About Manning Krull
 How to make a 4-foot paper maché alligator
 My violin skull mask, Mardi Gras 2015
 Three-headed paper maché dragon sculpture
Leave a comment