
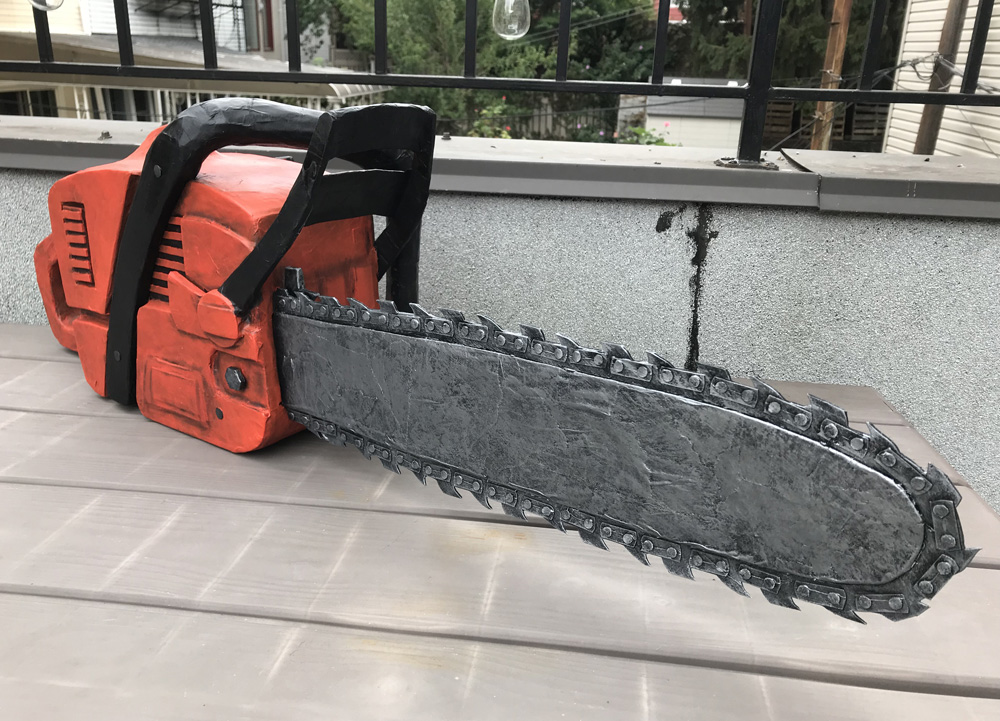
Paper maché chainsaw prop
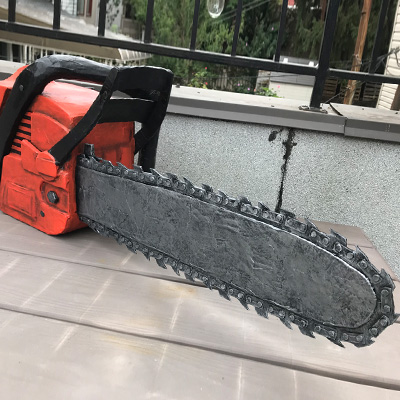
This thing was fun! And relatively easy, really! I made this paper maché chainsaw prop as a decoration for my 2019 Halloween party. There are so many different little shapes to this thing, and I was really winging it along the way, so there’s no way I can accurately write about every single step or this article would be twenty pages long. But I’ll show you some of the broad strokes…
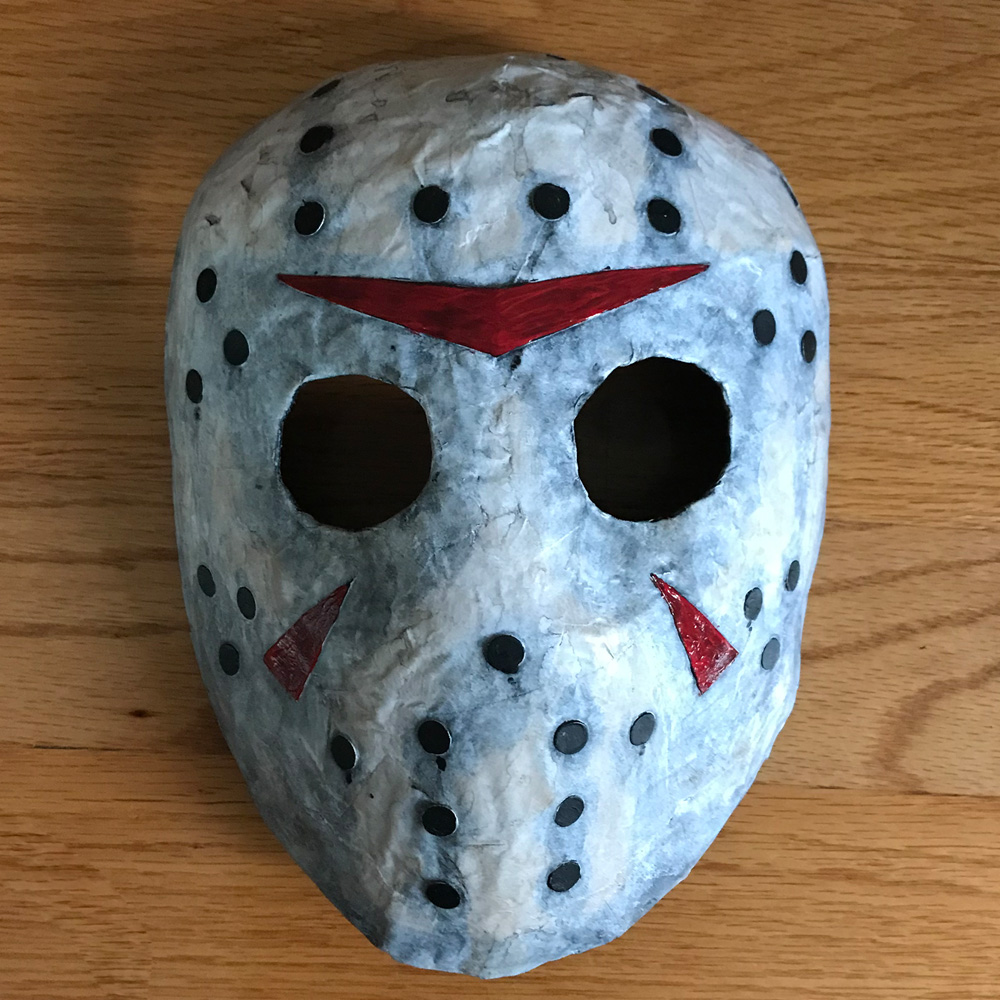
Home-made Jason Voorhees mask!

I made this very quick and easy Jason Voorhees mask prop for Halloween 2019. Sure I could’ve bought one for a few bucks, but it’s always more fun to make my own, and I like for all my Halloween decorations and props to have a really rough DIY look to ’em.
Making a paper maché rifle and gun rack prop
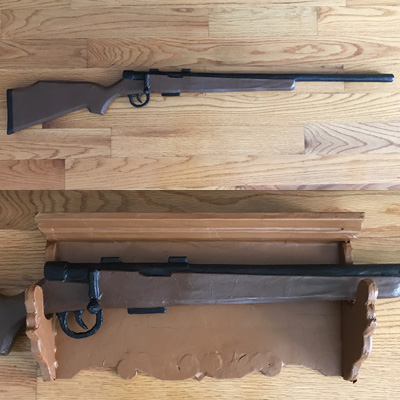
I made this paper maché hunting rifle and gun rack as a wall decoration for my summer camp slasher movie Halloween party. It was easy!
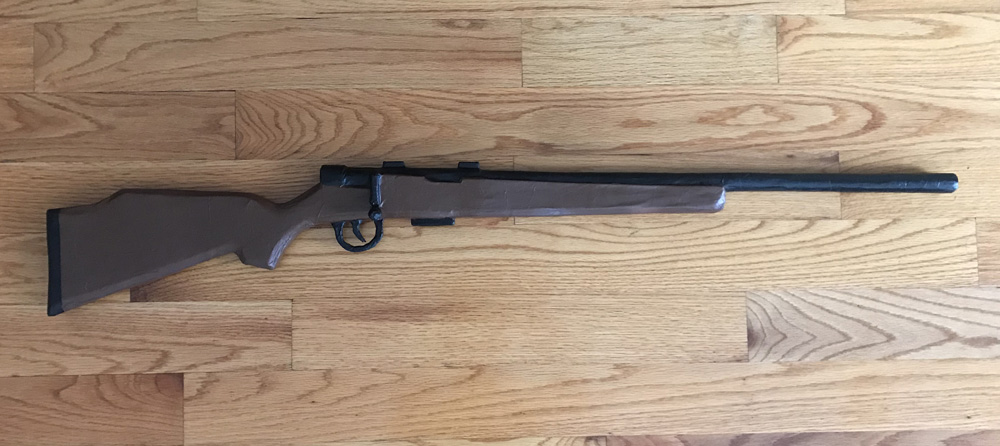
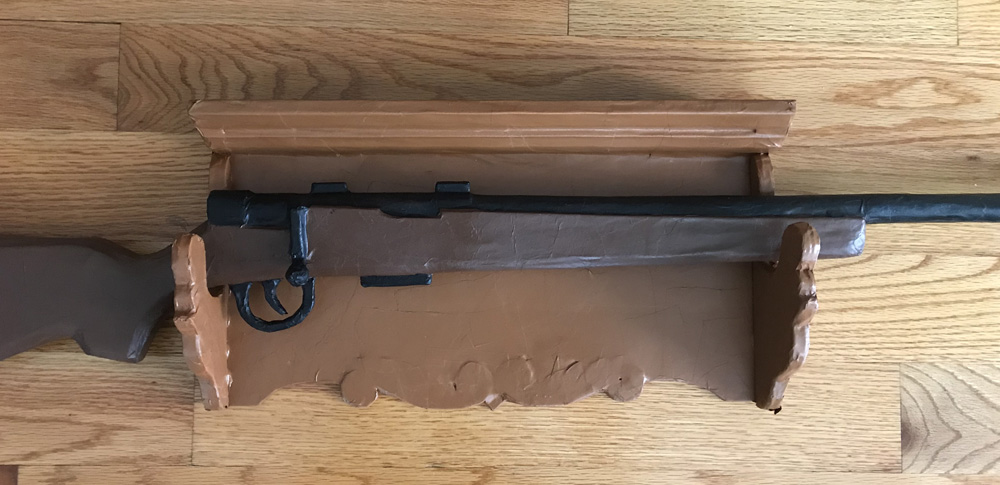
I started by doing some image searches for old hunting rifles, to get an idea of the shape and size. I found an image I wanted to use, scaled it up in Photoshop and printed it out as several pages, then taped the pages together and cut the rifle shape out.
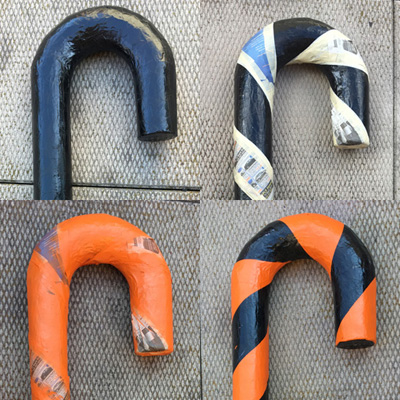
Paper maché axe prop
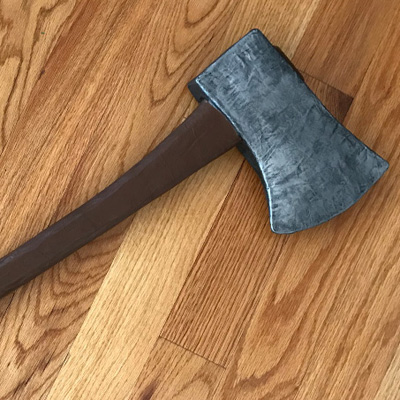
I made this here paper maché axe prop for my 2019 Halloween party — theme to be announced soon! It was really easy; here’s how I did it…
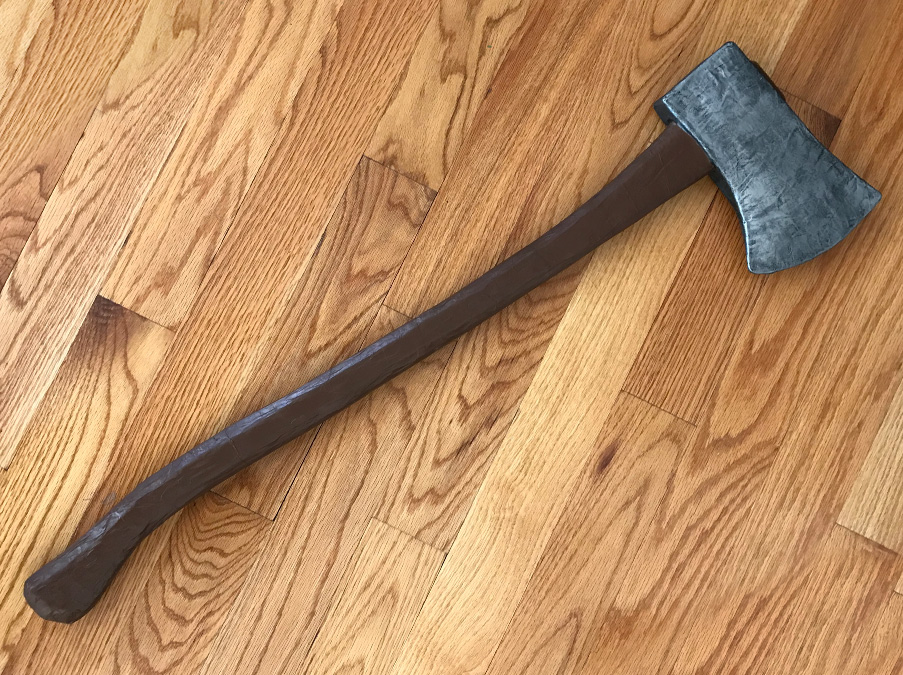
A little background: you may remember I made a way-oversized axe prop a while back for my Axe Man skeleton costume (why would you remember that?). So I’d already learned a few lessons from that project, and I decided to do this one a little differently. Along with being oversized, I intentionally designed that axe to be a little bit exaggerated in its proportions; almost a little cartoony. Read more…
Sculpture technique: making box shapes out of foam board
Most of my sculpture projects start with a base of foam board shapes connected with tape and/or glue. I made up this technique for creating sturdy box shapes in any kind of shape or size, and I use it for almost every project, with some slight variations. This technique works great for anything from very geometric shapes to completely irregular custom shapes, as long as they’re flat on two sides. Here’s what I do…
Custom paper maché sword piñata!
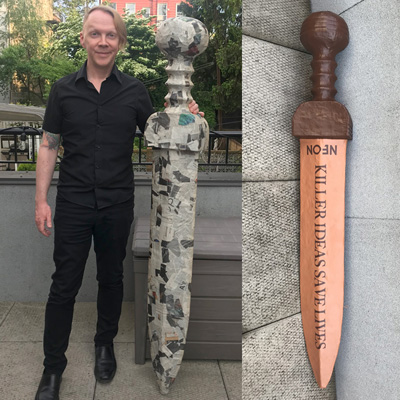
My boss at my day job asked me if I’d be up for making a paper maché sword piñata for our company’s 10th anniversary, and I jumped at the chance! This thing is a giant-sized replica of a wooden sword that periodically changes hands among different teams here as a trophy for amazing creative work. Here’s a pic of the real sword and one of the winning teams, on our company’s Instagram. Anyway, I’d never made a piñata before, but I always wanted to try — it was fun!
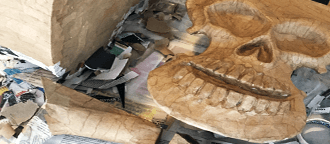
Love 2 make new Friends
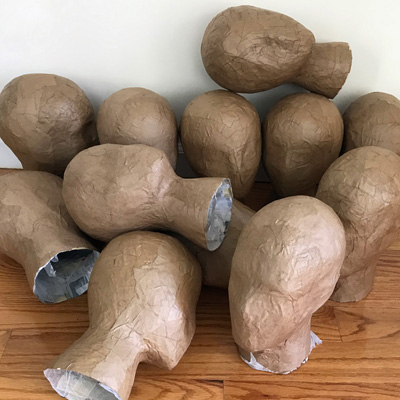
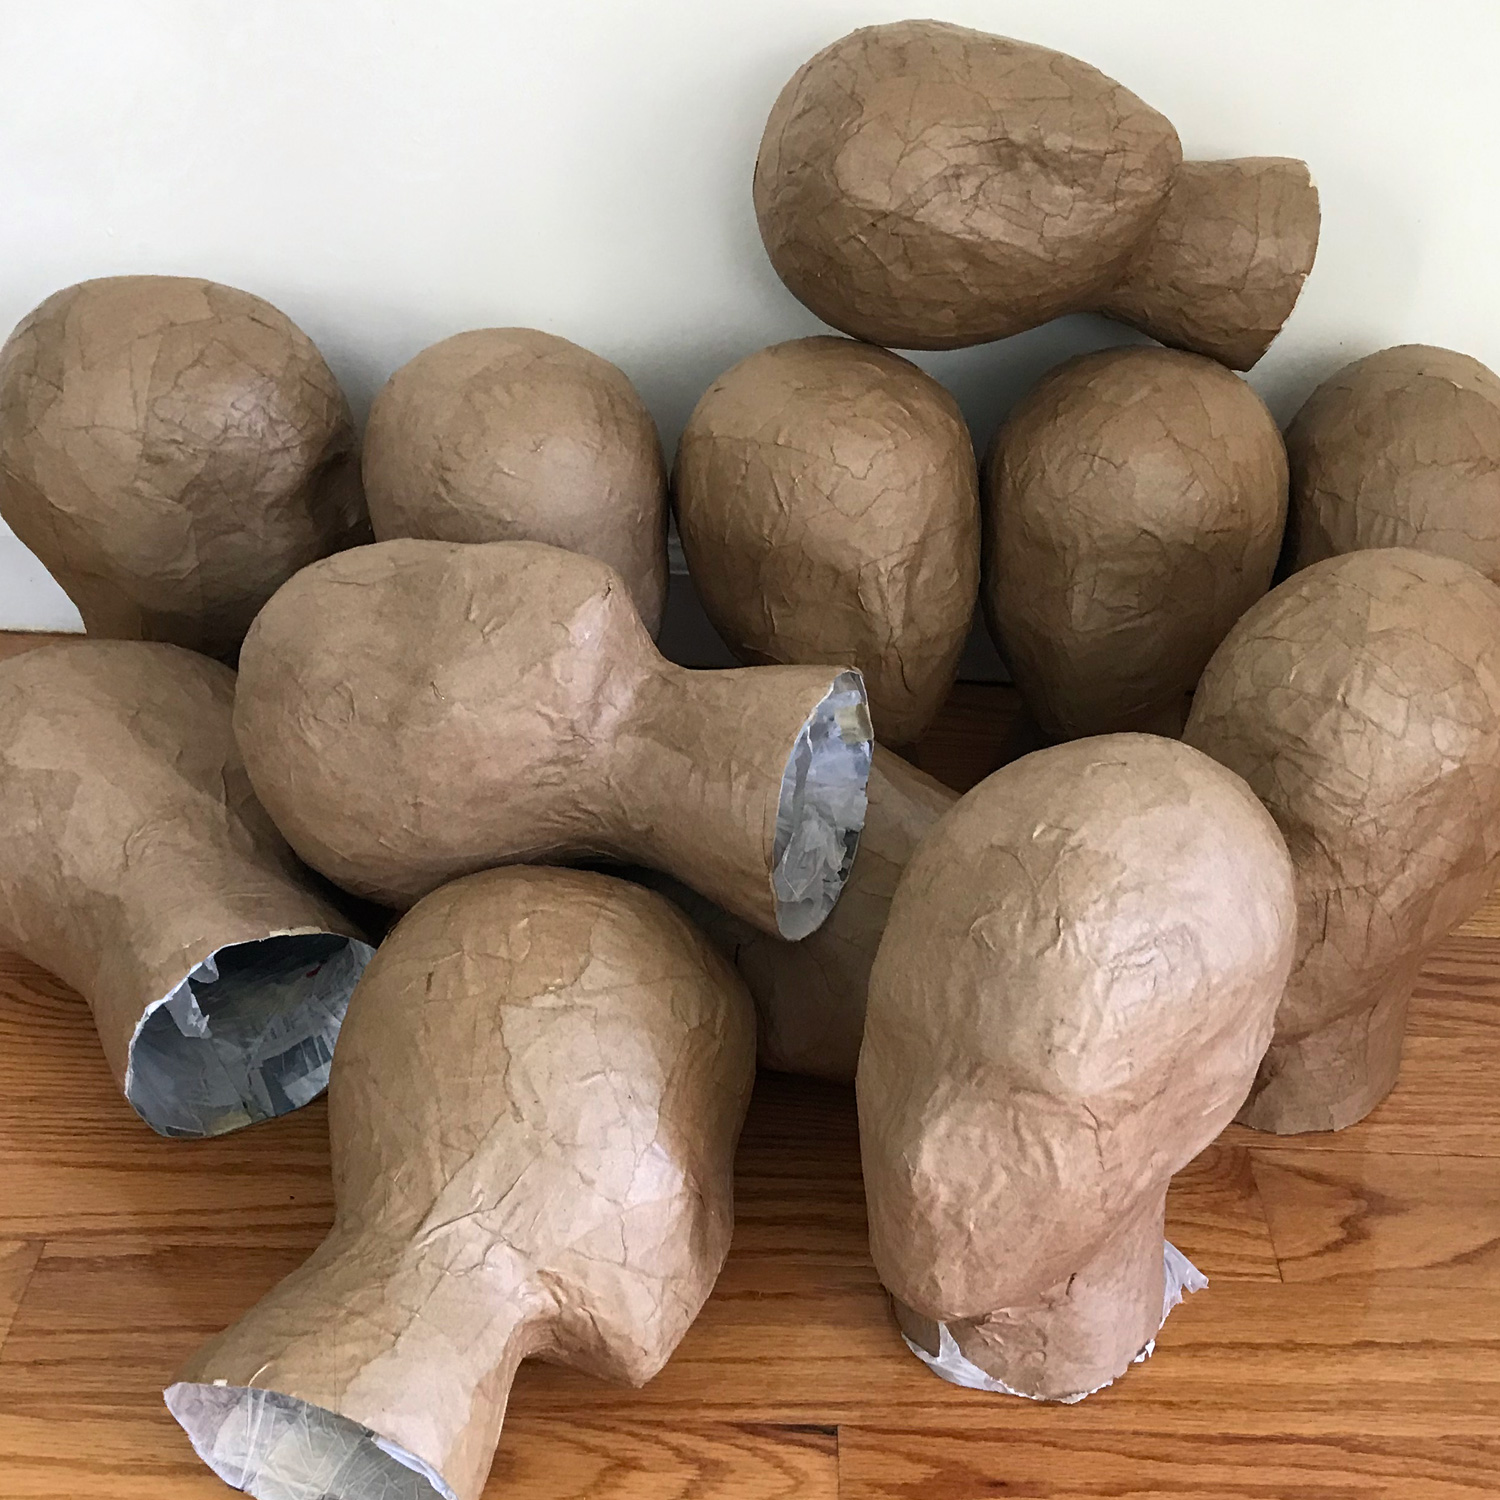
It’s June, and that means Halloween preparation is well underway! This here is the very early stages of making a dozen paper maché severed heads!
I’ll post a few pics of the heads in progress below; full article coming soon!
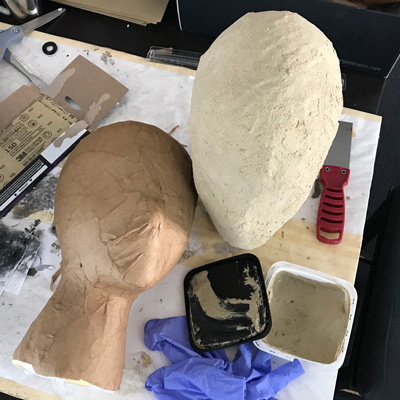
Experiment: using paper maché in place of a hard hat for big masks
I wrote way too many words about this! So I’ll start with a short version, and then you can read the rest for more details if you want:
The short version
I mount most of my big masks on a hard hat. Hard hats are almost perfect for this because they’re stable and comfortable, but they’re also somewhat heavy and very hard to cut. The suspension inside (that’s the rigging/straps/padding) is all I really need, but there’s no easy way to attach just the suspension into a mask without the big plastic shell of the hard hat. I came up with this method to make my own structure to attach the suspension to, using foam board and paper maché.
Skull mask with marching skeletons — pics from Mardi Gras!
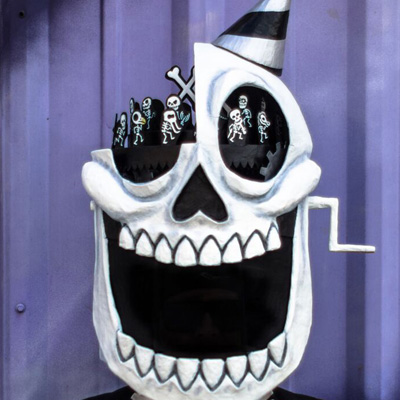
Here are some more pics of my mask in action on Mardi Gras day, and another video as well!
You can check out my posts about making this mask here:
• Part 1 – making the gears and moving parts
• Part 2 – making the little skeletons
• Part 3 – building a skull mask around all this
• Part 4 – painting, hat, finishing touches, etc!
Skull mask with dancing skeletons, part 4

This is part four of my skull mask project with rotating gears and marching skeletons. See parts one, two, and three.
Installing the hard hat
Almost all of my big paper maché masks are mounted on a hard hat. Hard hats are great because they’re cheap and they provide a lot of comfort and stability in a big mask. I usually saw off some parts of the hard hat for each mask depending on its shape, in order to reduce weight and to help the hard hat fit in the mask as well as possible. Read more…
Skull mask with dancing skeletons, part 3
This is part three of my skull mask project with rotating gears and marching skeletons. See parts one and two.
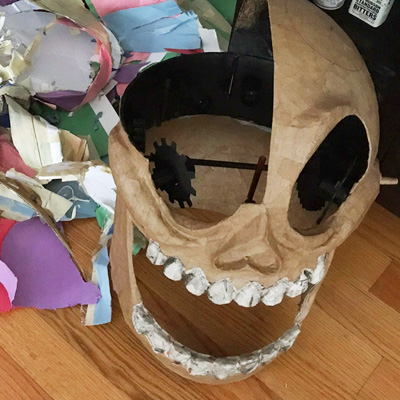
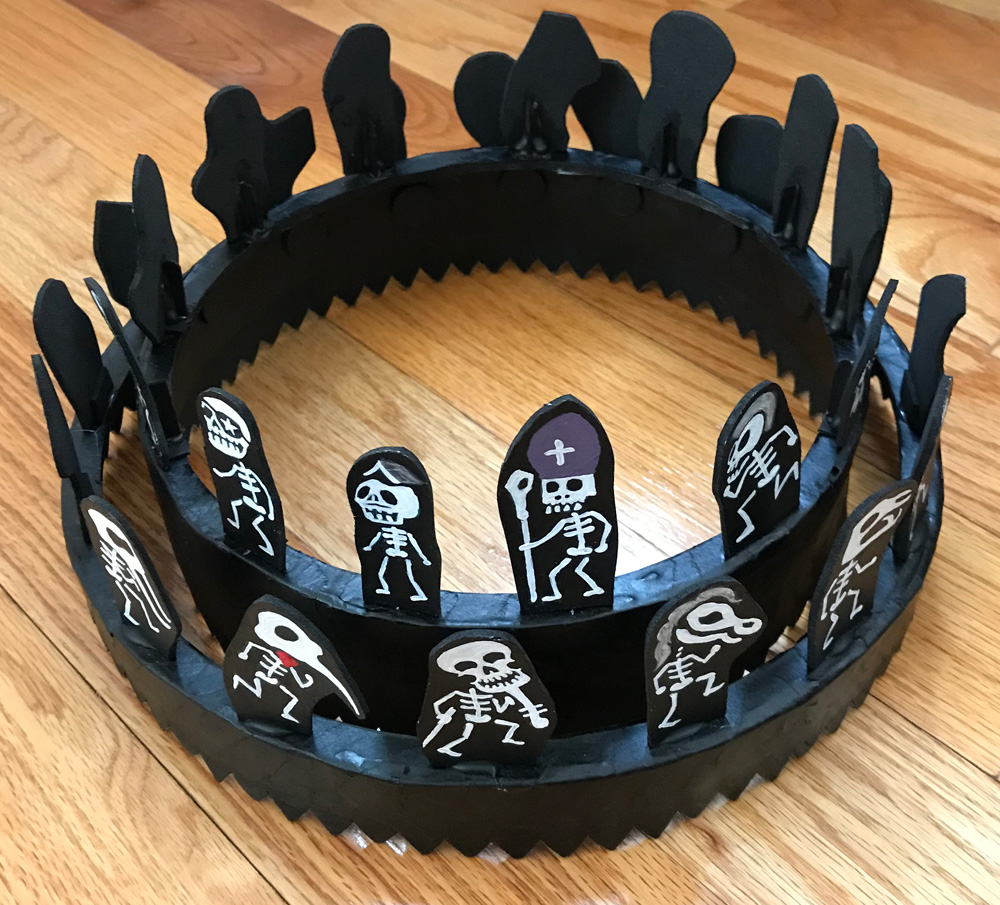
Building the skull shape
In part one I built the whole mechanism with the gears inside of a big circular wall; this would become the outer wall of the skull mask at around ear-level (not my ears, the skull’s ears — uh, wait a minute…). Read more…
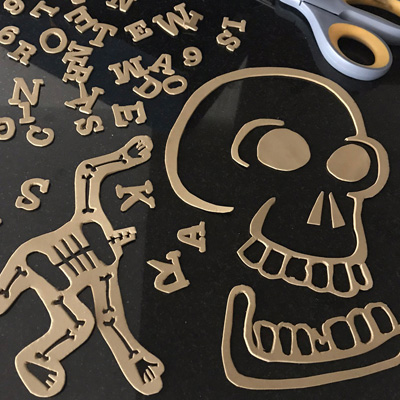
Paper maché skull mask with dancing skeletons, part 2
This is part two of my skull mask project with rotating gears and marching skeletons. See part one here.
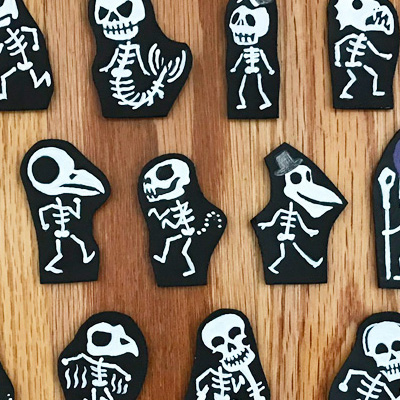
Dancing skeletons
I drew all 29 of the dancing skeletons at a larger size (about 6″ tall) on sketchbook paper, keeping the designs as simple as possible since I’d be re-painting them by hand at a much smaller size. I scanned ’em and cleaned ’em up in Photoshop, reduced them to about 2″ tall, and printed them out. Read more…
Skull mask with dancing skeletons, part 1
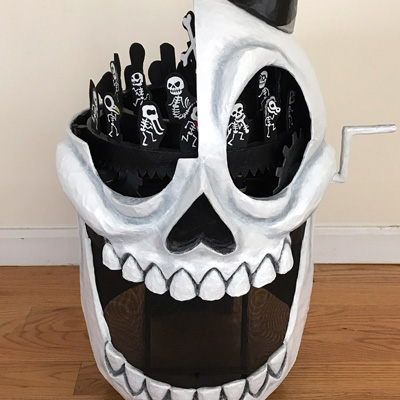
Welcome to the newest installment in my ongoing quest to kill myself with overly complicated art projects! For the 20th anniversary of my skeleton group I decided to make a paper maché skull mask with moving parts! Yikes! The mask has a crank and gears and 29 little skeleton figurines representing my fellow skeletons; a sort of best-of selection of our skull masks and skeleton outfits over the last two decades. Here’s how I made the thing!
Experiment time: paper maché and wood filler
One thing about working with paper maché is that it’s very time consuming, because you’ve gotta do lots of layers and they all take a long time to dry; most of my big masks and sculptures need at least seven layers of paper to be thick and sturdy enough. I’m always looking for any kind of shortcuts that might speed up the process of building up a surface that’s nice and strong, while also keeping the cost of materials in mind.
Experiment time: paper maché versus plaster cloth
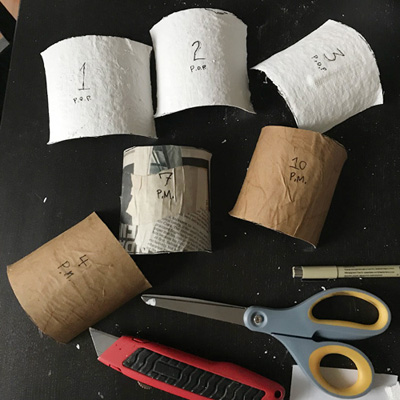
I’ve always used paper maché for my big masks and sculptures, and although I really enjoy the paper maché process it can be very time-consuming. A friend of mine mentioned that she recently tried plaster cloth — aka plaster wrap, plaster of paris strips, craft wrap, etc — and she said it saved her a ton of time. She’d made a couple Halloween masks with the stuff and they definitely looked great; she said she was so happy with the results that she’d never go back to paper maché. Huh! I was skeptical, but intrigued.
Creating 3d relief shapes with craft foam
A few years ago I made up this method for cutting out precise shapes with craft foam, to create 3d relief shapes on a lot of my various sculpture projects.
Craft foam, aka wonder foam, is a soft rubbery material that I often describe as being similar to a yoga mat, but much thinner. You can buy it in any arts and crafts store, and it comes in tons of colors. Read more…
Spray painting tips for paper maché projects
Spray paint is a big part of my process for creating most of my paper maché masks and sculptures, and it can be a huge time-saver when you’re working on any large shape. Here are my tricks and tips for working with spray paint, whether you’re a beginner or a seasoned pro!
I use Montana Golden acrylic spray paint for all my commission projects and any of my more-serious personal projects like my Mardi Gras skull Read more…
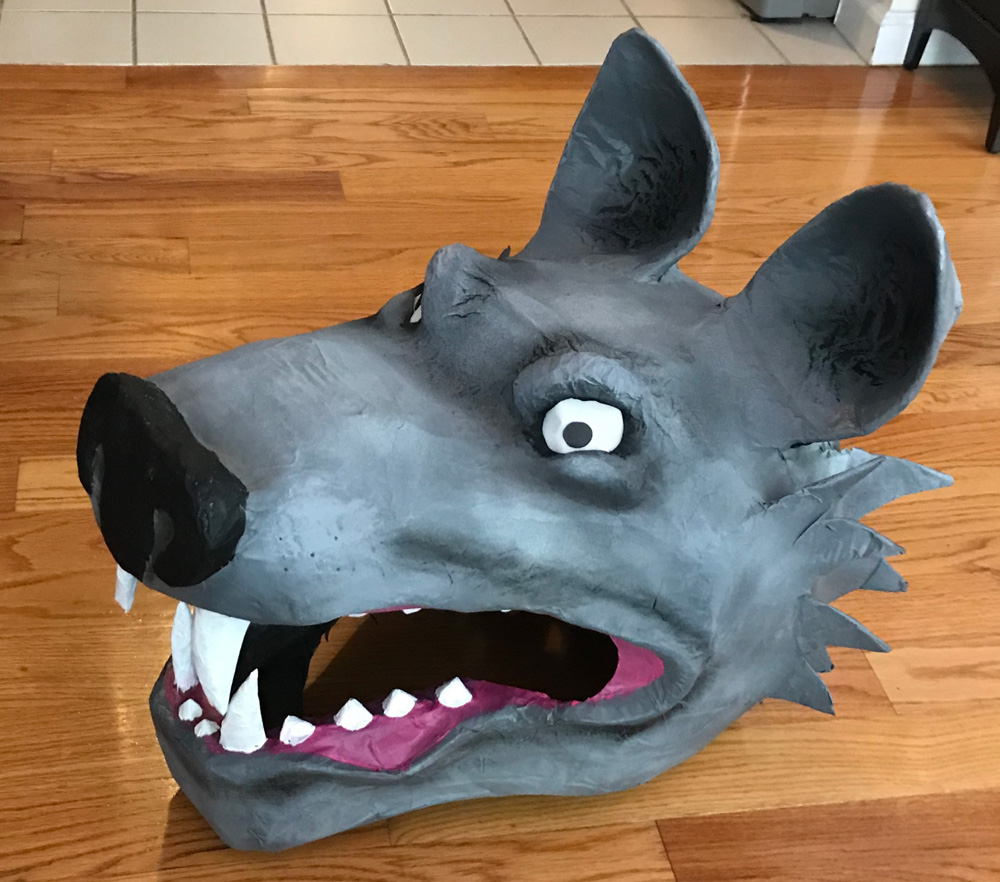
Paper maché wolf mask
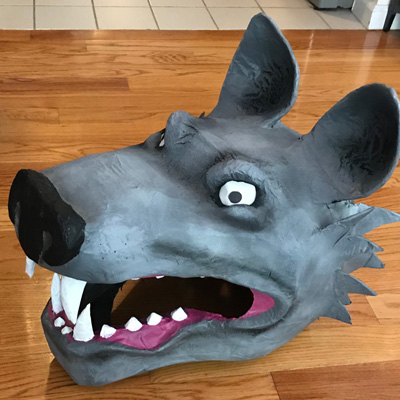
I made this oversized paper maché wolf mask for Halloween 2018! It was a rush project without a lot of planning, and I took a lot of shortcuts, but it still came out pretty cool (but, uh, way bigger than I was thinking)! Here’s how I made the thing…
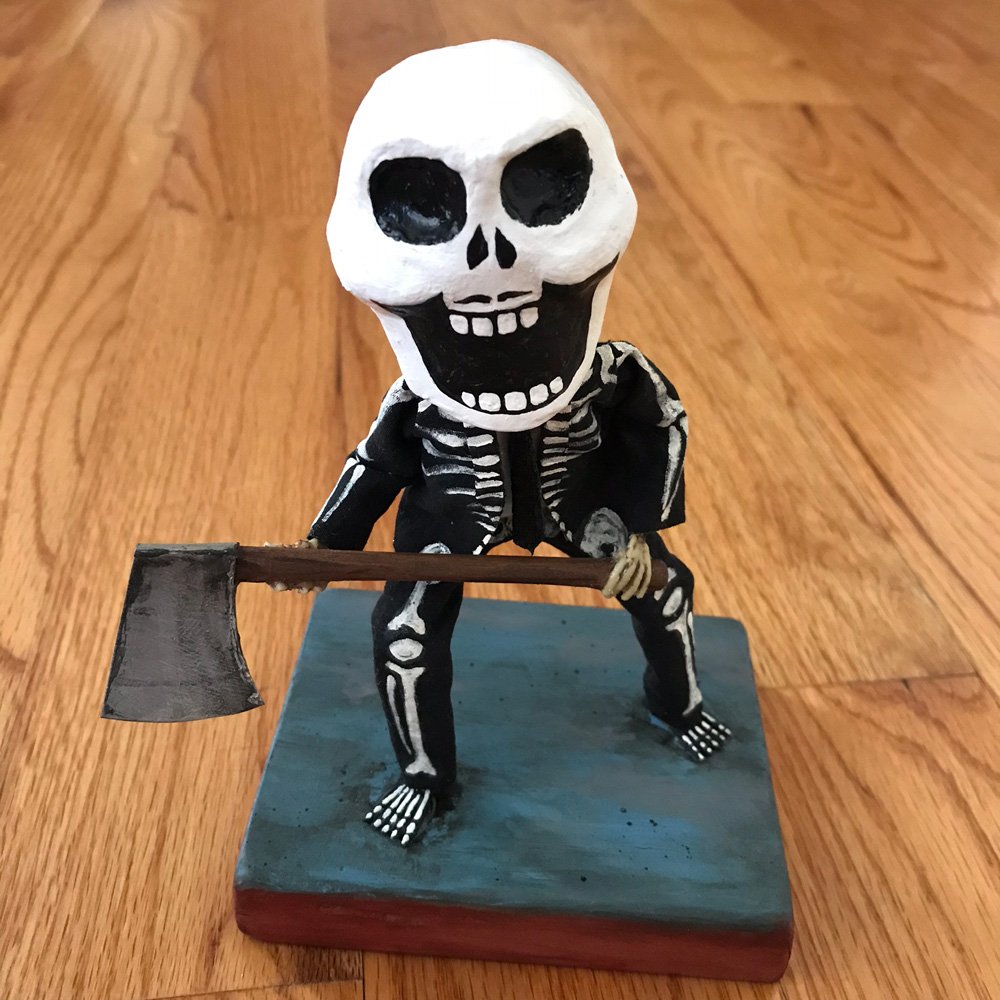
Axe Man sculpture from History Bones!
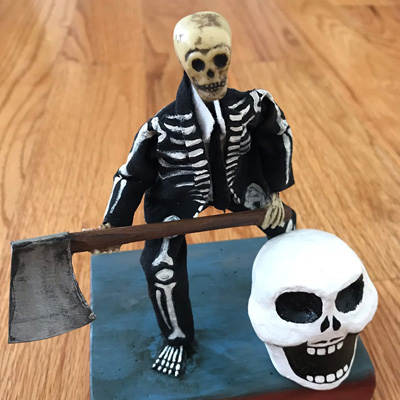
I’m still recovering from Halloween, and this is a thing I’ve been dying to post about for weeks: Lee from History Bones sent me her sculpture of my Axe Man costume! Holy shit! Incredible! The whole thing is not even 7″ tall! The mask comes off! And the likeness underneath is uncanny!
Giant witch statue! — part 2
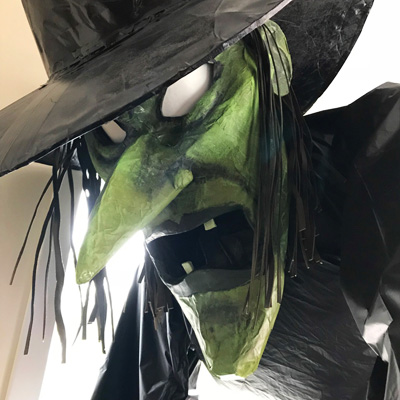
This is part two of two of my giant witch statue for Halloween 2018. See part one here.
Making the witch’s oversized broom
I needed the witch’s broom prop to be much longer than a real broom, so I started with two metal mop handles from the dollar store. I connected these at the ends with a couple layers of shipping tape wrapped around, which felt a little flimsy, and then I rolled a piece of construction paper tightly around the connection point, and then I wrapped some more shipping tape around that. Read more…
 About Manning Krull
 How to make a 4-foot paper maché alligator
 My violin skull mask, Mardi Gras 2015
 Three-headed paper maché dragon sculpture