
Posts tagged "decoration":
Paper maché giant gummi bears!
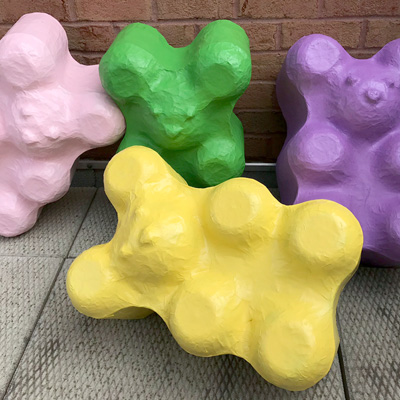
These were so fun! I made these paper maché gummi bears as part of a set of giant candy decorations for my haunted gingerbread house Halloween party!
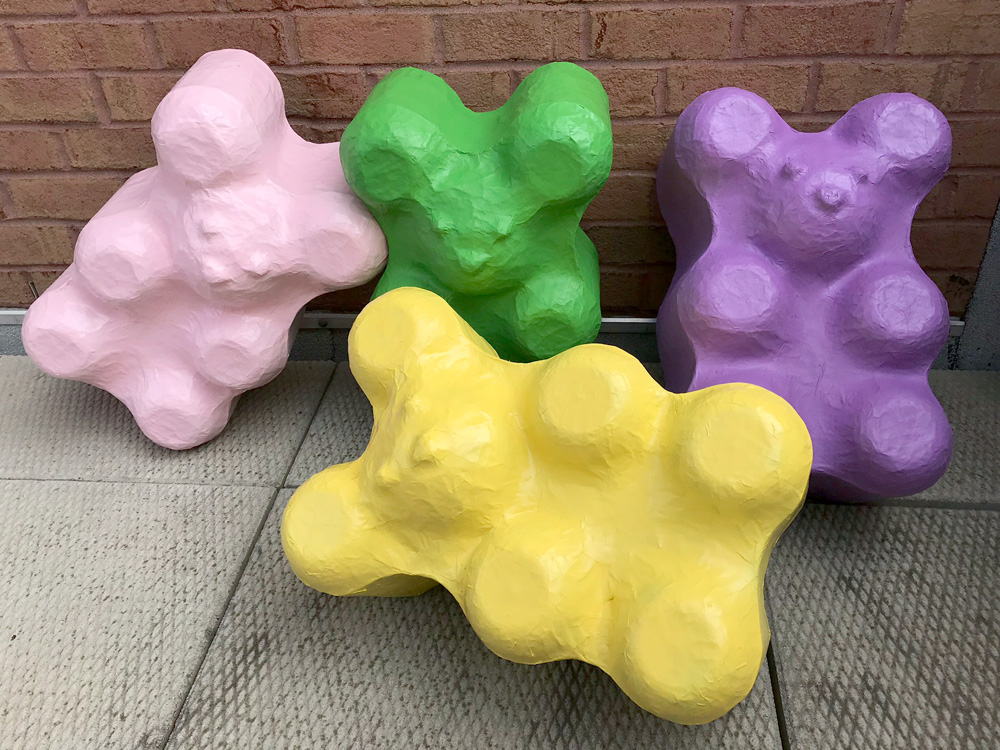
I created a reusable base for the giant gummi bears; I built one nice solid gummi bear shape and then used it to make multiple paper maché copies. (Other projects where I used a reusable base: paper maché baby chicks, twin skull masks)
Paper maché candy corn decorations!
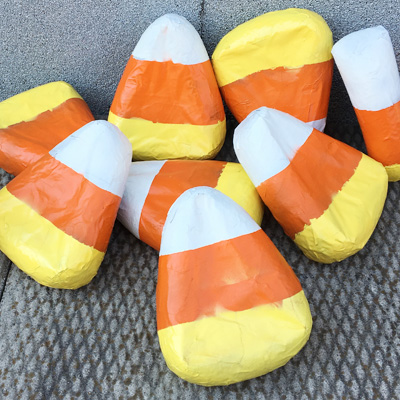
I made these candy corn decorations as part of a set of giant candy decorations for my haunted gingerbread house Halloween party! They were easy and fun! My main goal for the candy corn was to keep them super cheap and super quick, so I could make a ton of them!
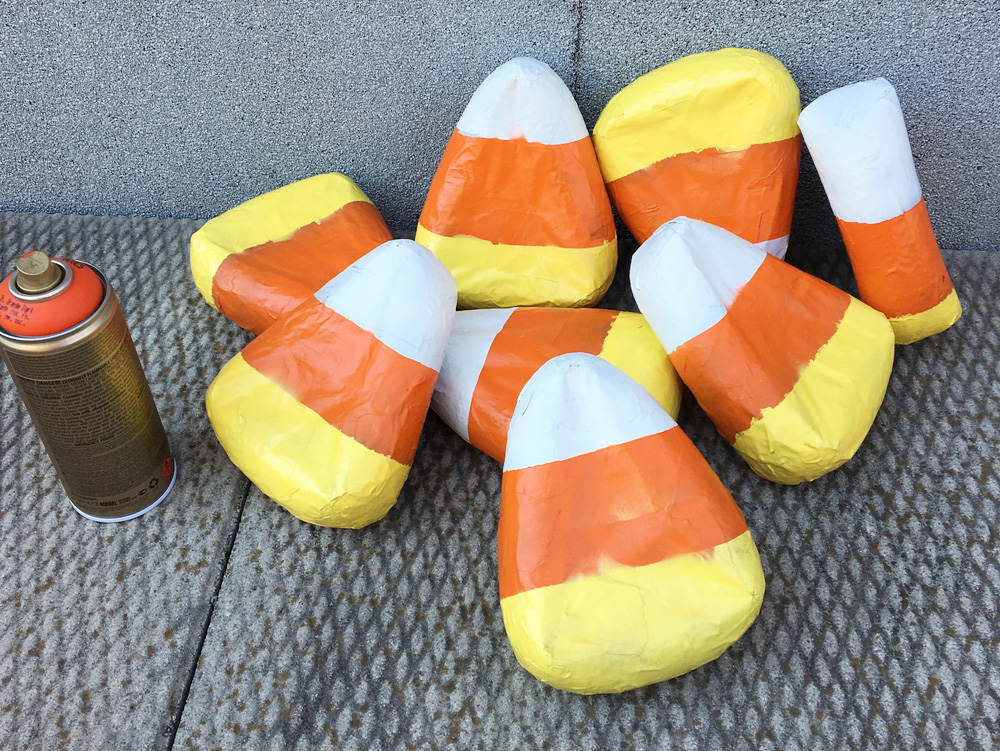
I started with a bunch of foam pipe insulation; I use these things for tons of art projects. I buy them at Home Depot in bags of four 36″ tubes for about three bucks each. Read more…
Giant candy cane decorations!
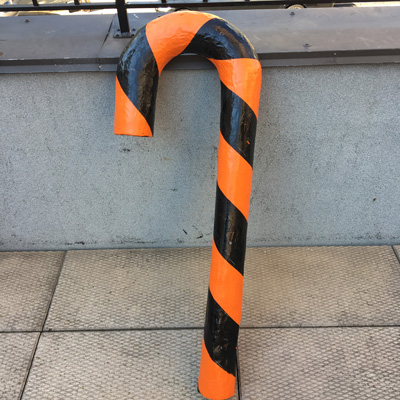
I made these giant 4-foot paper maché candy cane decorations as part of a set of giant candy decorations for my Halloween party — that’s why they’re orange and black rather than red and white! Our theme was basically “haunted gingerbread house” so I made lots of different kinds of giant spooky candies. I did these in Halloween colors but of course you could do them in more traditional colors for Christmas!
Making an oversized medieval key prop
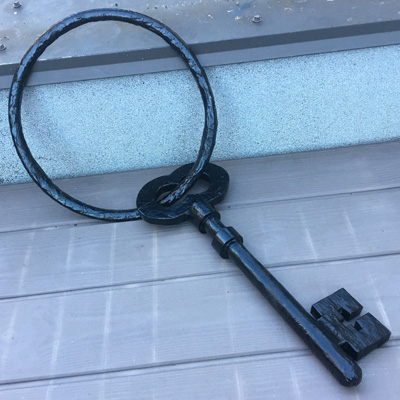
Check out my giant medieval key! I made this for our spooky gingerbread house themed Halloween party, to hang on our bathroom wall across from the bathtub-converted-into-a-cage-full-of-bones. This thing was so easy to make, and it only took one day (besides painting).
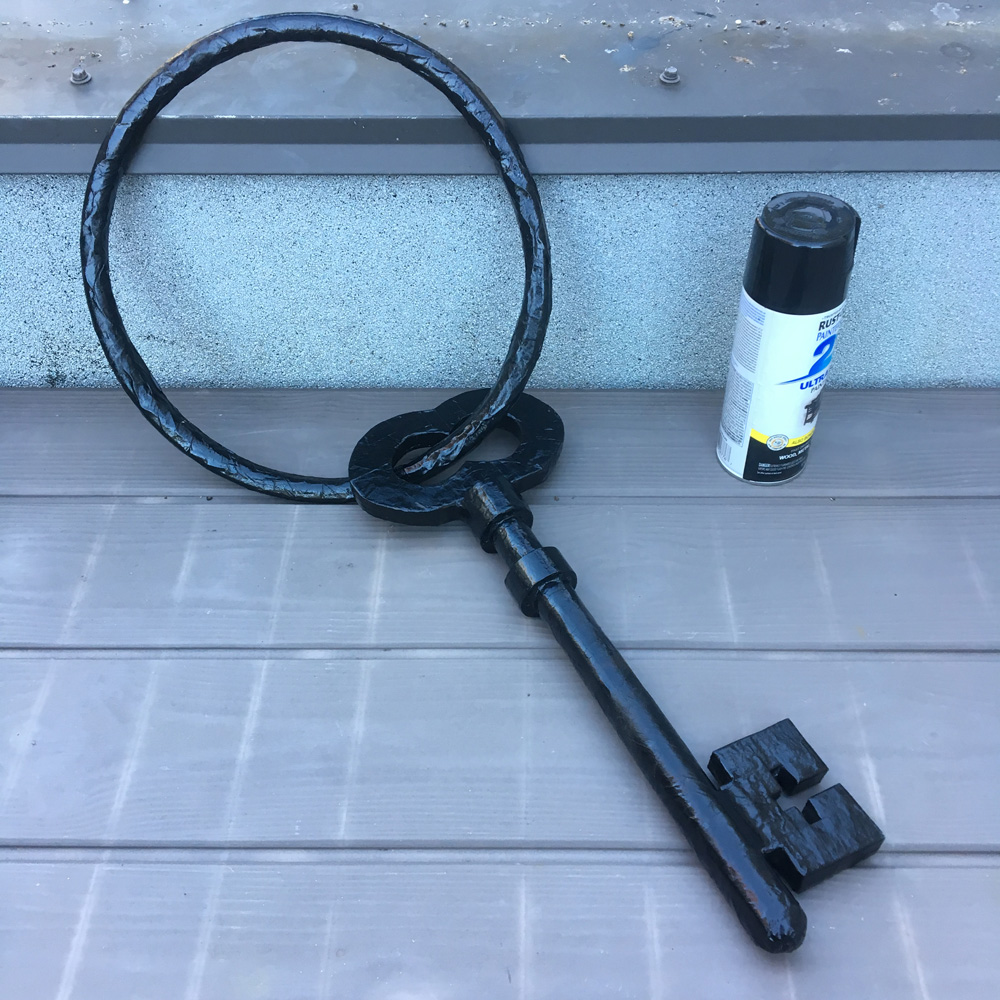
I started out by doing a Google image search for medieval keys. There are so many cool styles to choose from; I sort of mixed and matched some elements from a few keys, with the goal of keeping the design simple and iconic. Read more…
Paper maché globe decorations
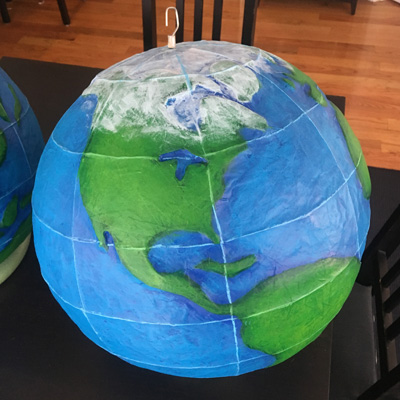
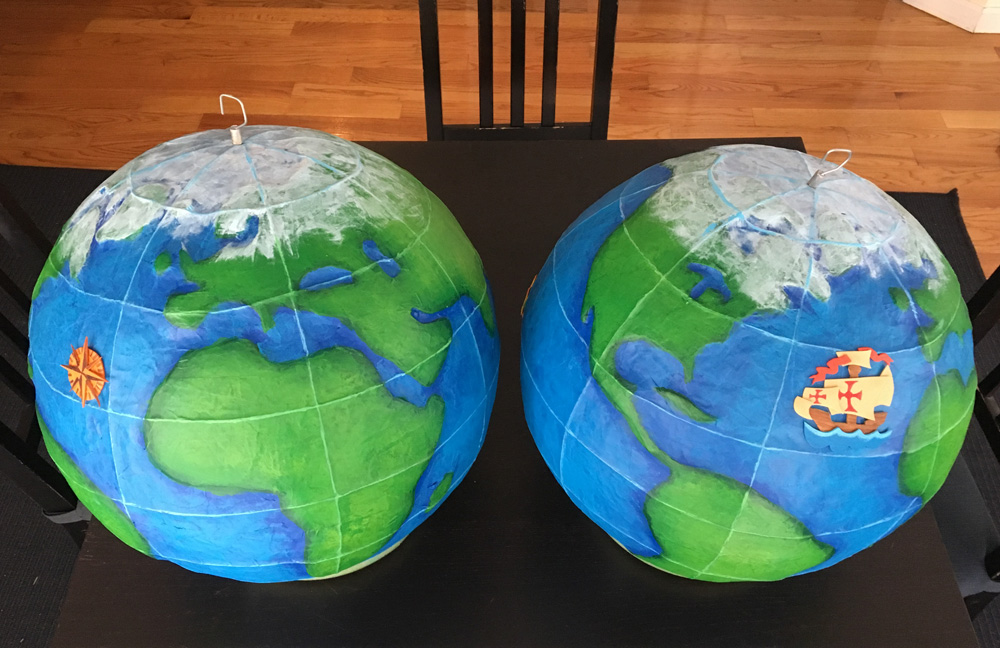
You may remember recently I posted about making a three-headed sea serpent sculpture for the Crewe of Columbus, a Mardi Gras parade group in Mobile, Alabama. The same wonderful client from that project also commissioned this pair of paper maché globes, which go along with the Crewe’s theme of world exploration; they’re going to be hung up as decorations in the same ballroom as Isabella. These were really fun to make!
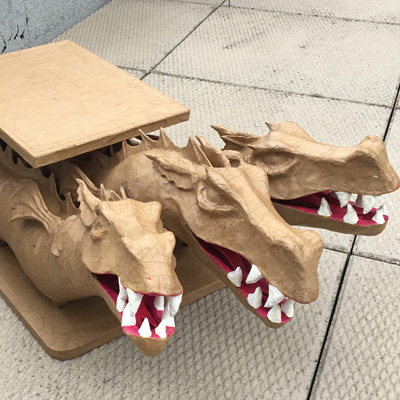
Three-headed paper maché dragon sculpture! — part 2

This is part two of two of Isabella the dragon! See the first part here.
The sea serpent’s bodies and heads and fins and other various parts were done, but I had to do some other steps before assembling them. It made sense to switch gears here and work on the pedestal and tray area, to figure out how they’ll fit with the dragons.
Three-headed paper maché dragon sculpture! — part 1
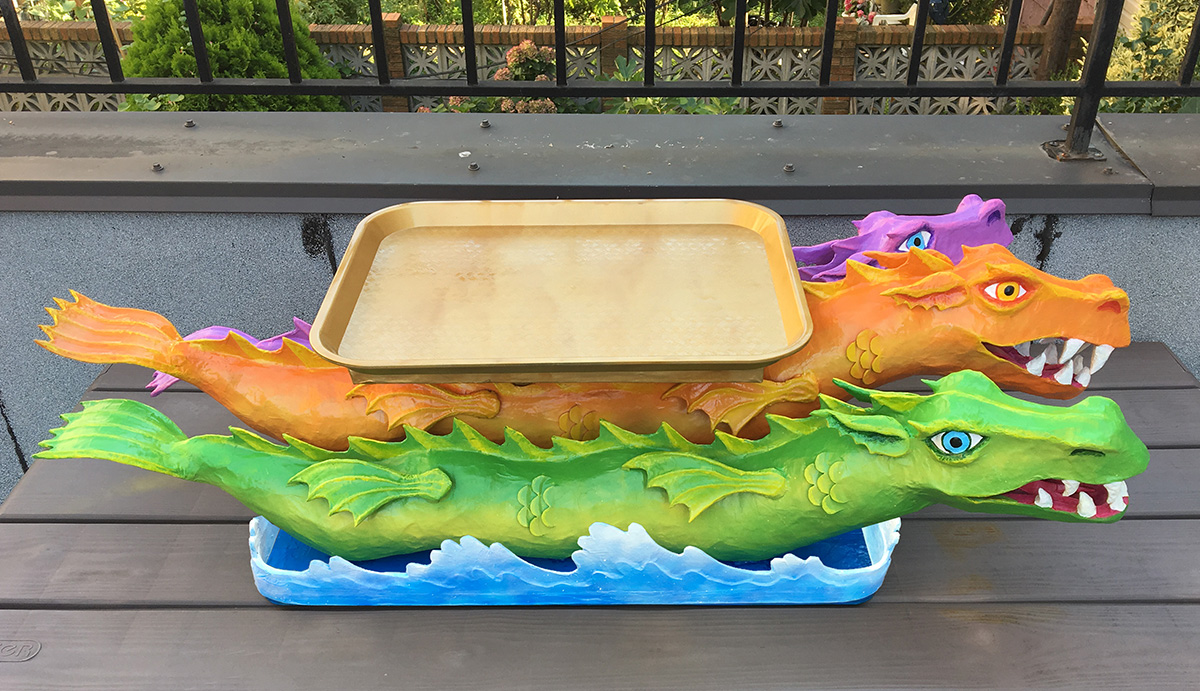
This was an incredibly fun commission piece I got to work on! I was contacted by a member of the Crewe of Columbus, a Mardi Gras crewe in Mobile, Alabama, and asked to make a sculpture of one of their parade floats — a very charming three-headed sea serpent(/dragon) named Isabella. The sculpture would have a serving tray area on top and be the centerpiece on one of the buffet tables at the group’s annual ball. The client sent me tons of photos of the Isabella float and asked for a sculpture that was approximately 40″ long from head(s) to tail(s). I couldn’t wait to get started!
Repainting a dollar store bird skeleton
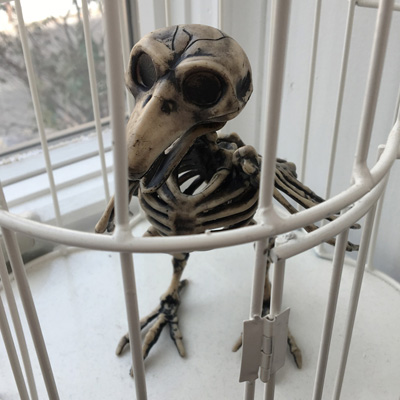
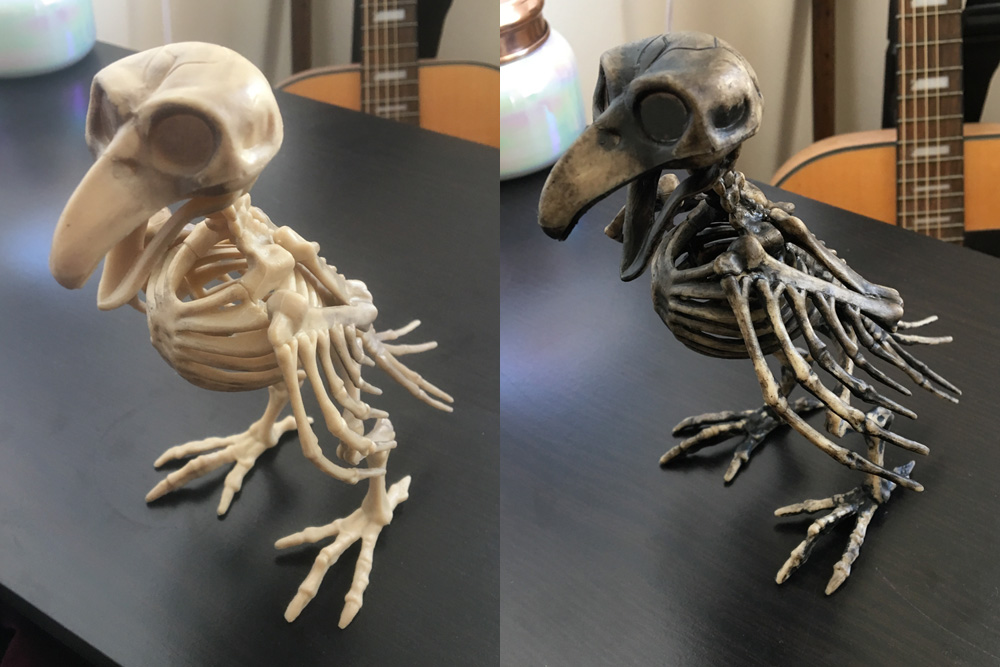
I’m sure it goes without saying that I vastly prefer hand-made Halloween decorations to store-bought ones, but when I saw this really cool spooky bird skeleton for just a buck I couldn’t resist! A few years ago I actually made a tiny bird skeleton for my cuckoo clock skull mask, and it was an insane amount of work for such a simple little skeleton! I’d never use a store-bought piece for one of my Mardi Gras skull masks, for I’m okay with it when I’m decorating for a big Halloween party; the more shortcuts I can take the better! Anyway, I knew this little plastic bird skeleton would look great in this old birdcage we have lying around, so I snatched him up.
Paper maché cupcake sculpture!
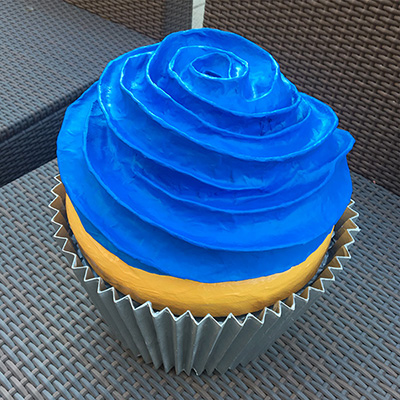
I was commissioned to make this cute paper maché cupcake sculpture, and it was a lot of fun! I’m so used to doing monsters and skeletons and stuff, this was a really neat diversion. The cupcake was to be used as a decoration in a tradeshow booth with a couple signs on it with logos and messaging, and the whole thing is painted in the client’s brand colors. Here’s how I made it!
Now offering custom paper maché masks and sculptures
Interested in a custom papier-mâché mask, sculpture, cosplay armor/accessories, etc made by yours truly? I’ve been getting a lot of requests about paper maché commissions lately so I’ve added a page about custom pieces, with some guidelines about timing and pricing. Drop me a line and let’s talk!
Ouija board wall decoration

For all my Halloween parties, I try to have at least one big decorated area that makes for a good backdrop for photos. This time our main photo area was this big ouija board wall decoration. It was really easy to do and ended up in a ton of our guests’ photos.
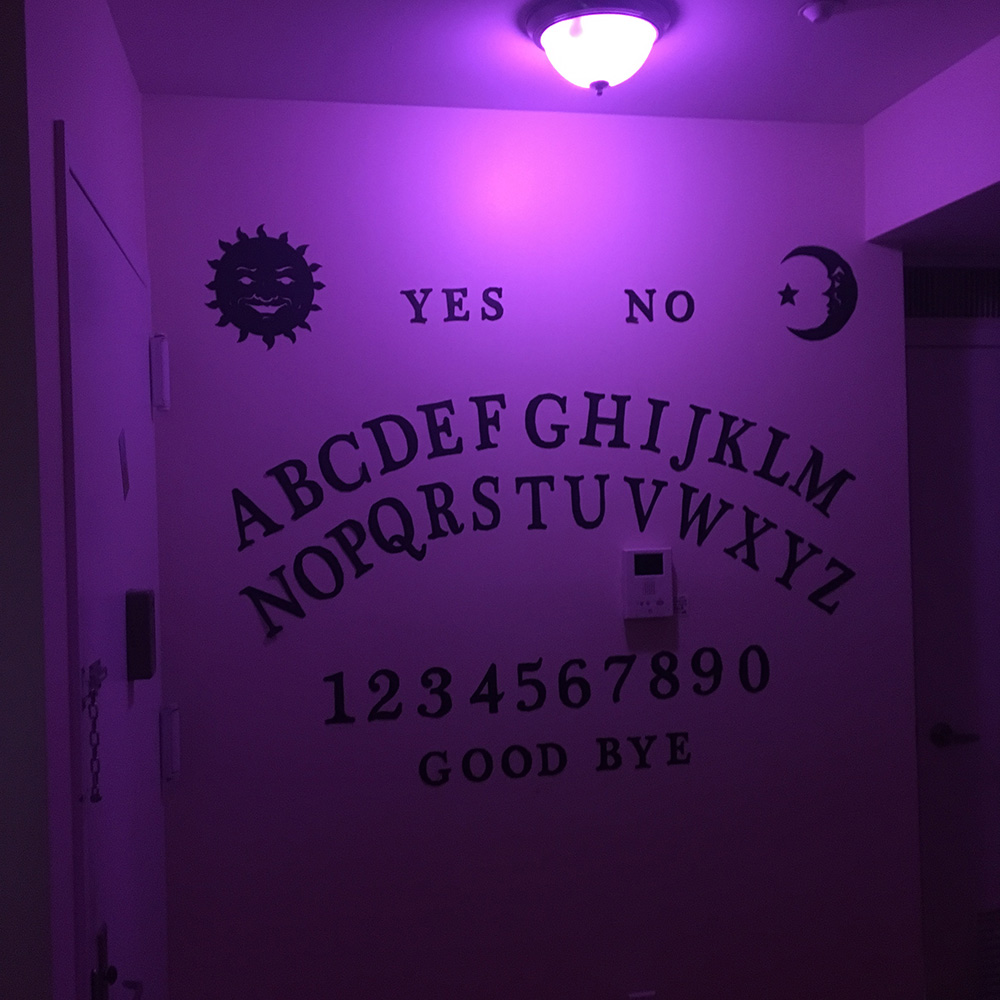
The letters and shapes are all cut out from black poster board. I photographed and measured the wall, and designed the arrangement of the letters in Photoshop to fill up the space nicely. Here’s what that looked like:
Skeleton playing a cello decoration
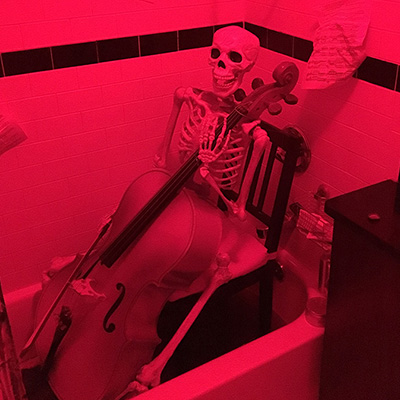
This is just a fun thing I want to share; not much of a “making stuff” project, but a really fun decoration. I recently got my cello out of storage and decided to work it into a Halloween decoration for my seance party: a skeleton playing the cello in a bathtub full of blood!
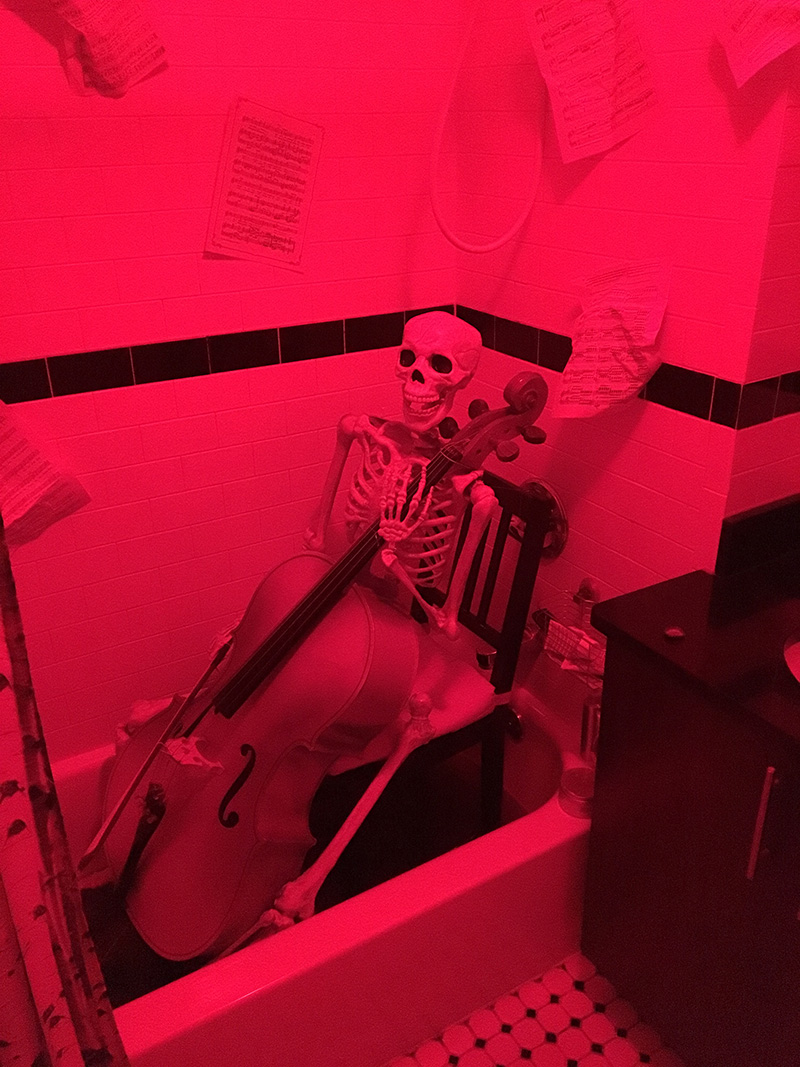
I had a nice store-bought skeleton that I’ve used for several scenes I’ve set up over the years. These skeletons come with very limited mobility, but I’ve modified mine to make them better for posing. Normally their mobility is limited to the following: their arms can only swing forward at the shoulder and bend forward at the elbow, and the legs can swing forward at the hip and bend back at the knee. Read more…
Haunted flying books decoration
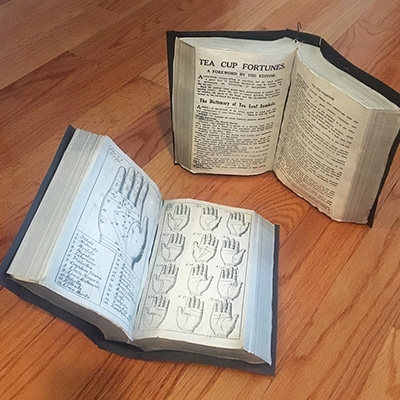
I made these lightweight fake books to hang from the ceiling for my seance Halloween party, to look like they were floating around the room due to spectral activity! These were really cheap and easy and fun to make!
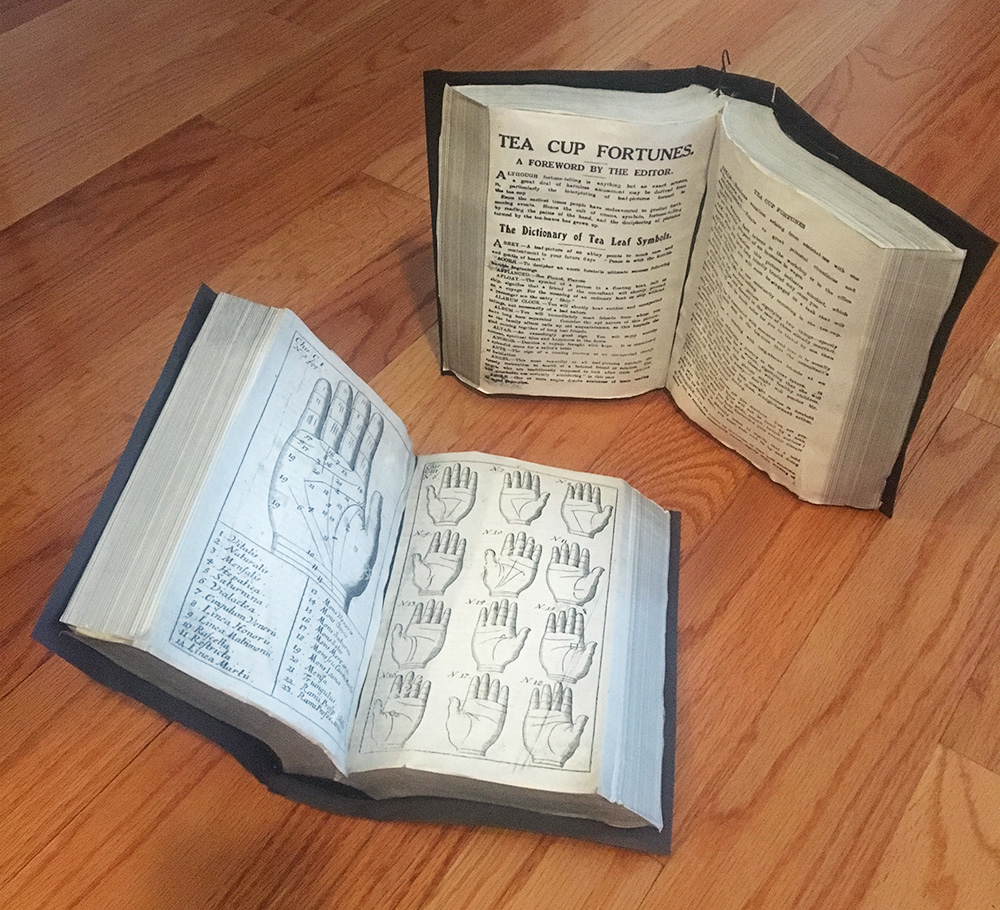
I made graphics in Photoshop for several of the surfaces of the books: the pages, the left and right edges of the pages (those are the long straight pieces pictured below), and the tops and bottom edges of the pages (i.e. the curved pieces). I did some Google image searches of old books to find references for all of this, and then did a lot of tweaking and measuring in Photoshop. Read more…
Cheap and easy DIY knife props
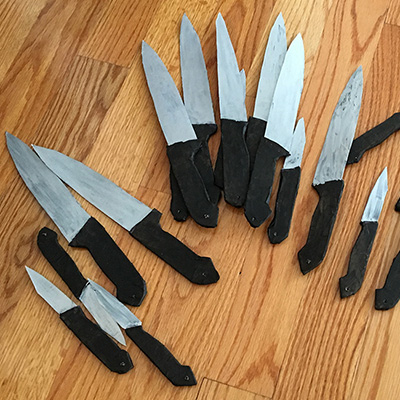
These are so easy! For my séance Halloween party, I wanted a quick and easy method to make dozens of knives and have them floating in our kitchen, held aloft by murderous ghostly hands (i.e. hanging on fishing line). The knives needed to be lightweight, cheap, and relatively quick so I could make a ton of them. (I also wanted them to not actually be dangerous if one of them were to fall on someone; the lightweight part is key there.) I came up with this method that’s really fun and easy and the knives look great. Read more…
Crystal ball decoration for my séance Halloween party
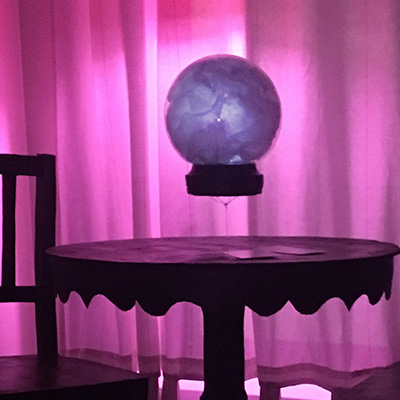
This homemade crystal ball decoration was for my séance Halloween party. The main decorations for the party were lots of pieces of lightweight paper maché furniture hung upside down on the ceiling. This crystal ball was the centerpiece for all of that, hanging upside down from the little paper maché table I made. It was fun and easy to make!
I considered a lot of options for the clear ball part itself; my main criteria were that it had to be lightweight, transparent, and preferably cheap. I ended up buying an 8″ acrylic globe off of Amazon; these are meant to go over a light, like on a light post in front of your house or whatever. They come in a lot of sizes, with options for clear or frosted, and mine ended up being about $11. You can find these at Home Depot too.
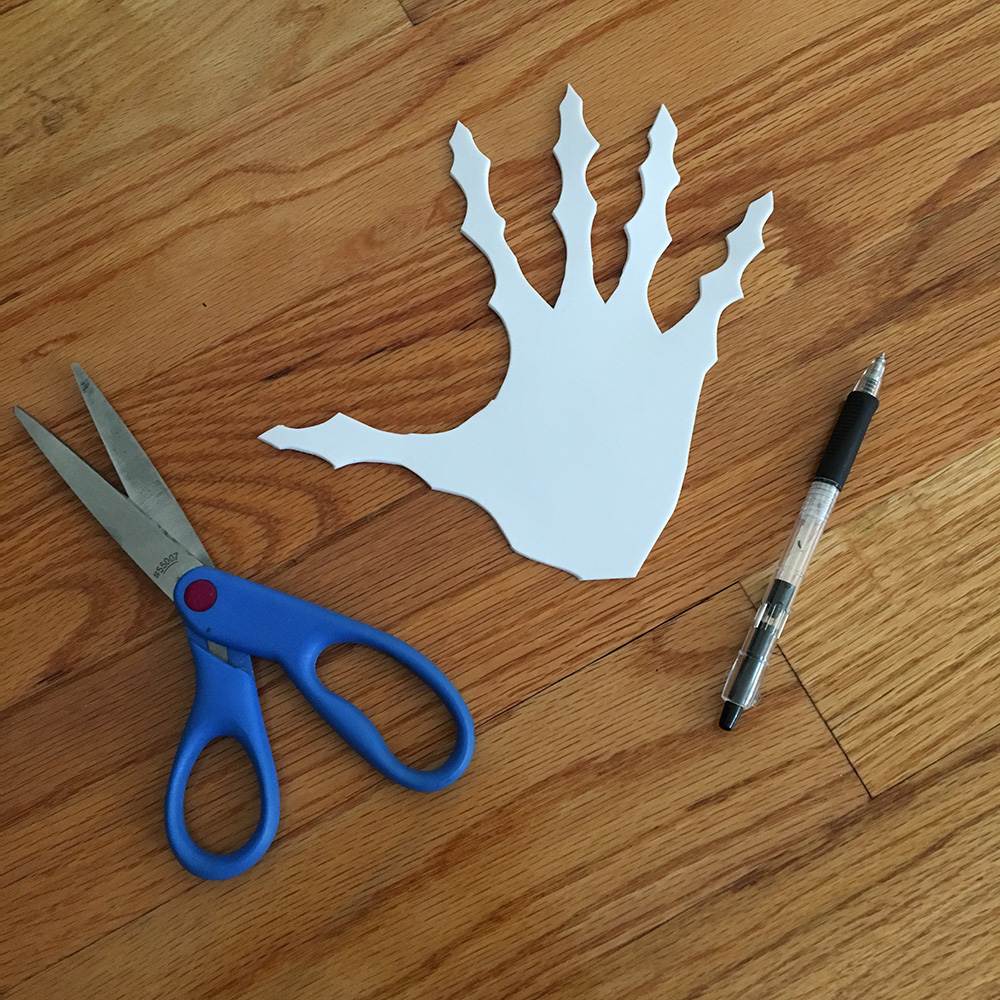
Creepy paper maché hands for my ghost costume

I made these creepy hands for my “guy being strangled by a ghost” costume! (Article about that whole thing coming soon.) You could use this same method for posable, realistic hands for any kind of monster decoration: a witch, a vampire, a zombie, etc!
First, I traced my own hand onto a sheet of craft foam (aka Wonderfoam). I kept my thumb stretched way out since ultimately I wanted these hands to be in a strangling position around my neck.
Paper maché spooky lamp prop
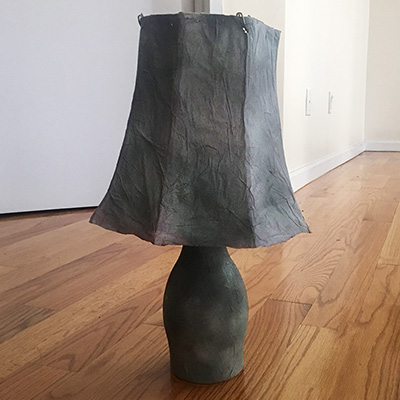
This is part five of my paper maché furniture projects for my séance Halloween party; see part one; chairs, part two; table, part three: mantel, and part four; nightstand.
I got the idea for this lamp when I saw this plastic bottle of almond milk in our fridge; it’s a neat bowling-pin shape that’s perfect for an old-timey lamp. I decided to add this lamp project to the list of lightweight paper maché furniture that we’re hanging from the ceiling for our spooky séance party.
Paper maché Victorian nightstand
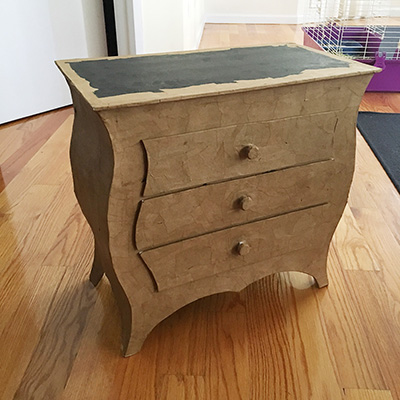
This is part four of my paper maché furniture projects for my séance Halloween party; see part one; chairs, part two; table, and part three: mantel.
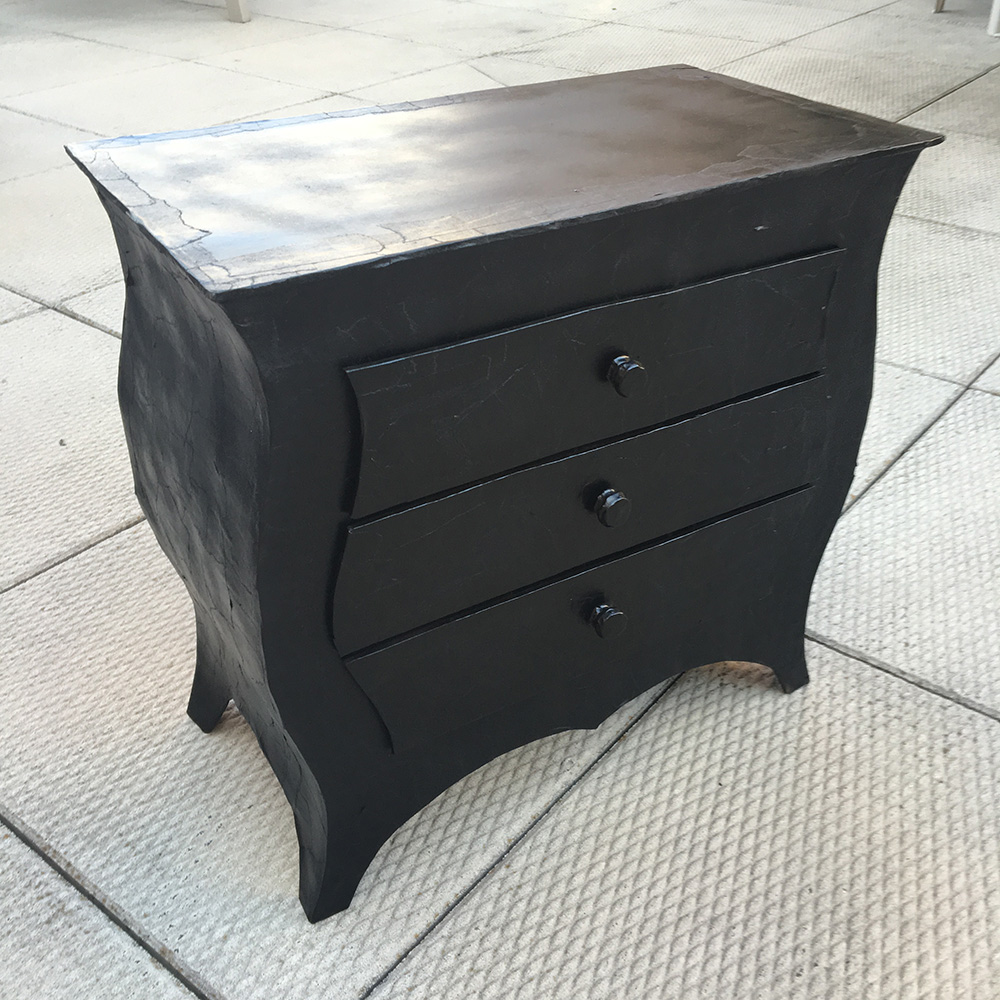
Okay, one last piece of furniture before I lose my mind! This time, a floating haunted nightstand with a floating haunted lamp.
I started the nightstand with three big pieces of foam board — the front, back, and top.
Mantel prop for my séance Halloween party

This is part three of my paper maché furniture projects for my séance Halloween party; see part one; chairs and part two; table.

This mantel is possibly the biggest paper project I’ve ever made! (Well, this or the giant spider.) I don’t have a ton of work-in-progress photos for the construction of the mantel — I did a tremendous amount of sketching and measuring beforehand, and a lot more along the way as the thing came together and I kept adding things. Almost all of the pieces are foam board, with a little bit of poster board, all held together with lots and lots of packing tape and masking tape.
Paper maché table for my séance party
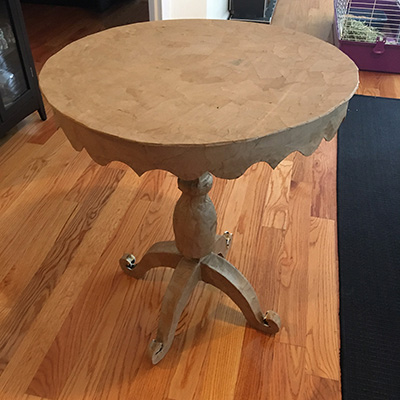
This is part two of my paper maché furniture projects for my séance Halloween party; see part one (chairs!) here.

With the chairs done, I moved on to the table! Unlike the chairs, I didn’t have a real table handy to use as a model for this, so I just made up a table based on some Google image searches for victorian round table.
 About Manning Krull
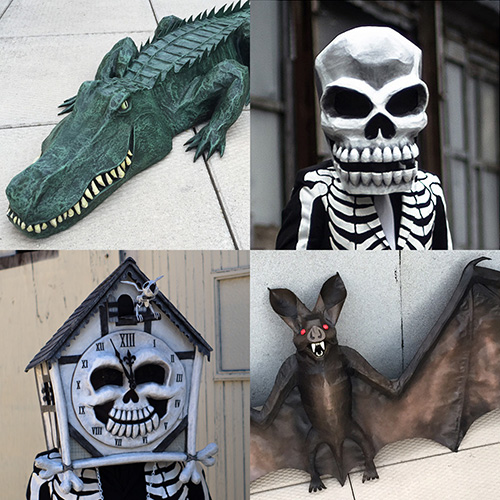
 How to make a 4-foot paper maché alligator
 My violin skull mask, Mardi Gras 2015